Build Your Own Fixer Upper Style Hanging Lanterns
Every time I watch an episode of Fixer Upper, I’m always drawn to the hanging lanterns and wall baskets that Joanna uses throughout the homes that she and Chip remodel. In fact, I’m so enamored with them, that I decided to create a pair for myself!
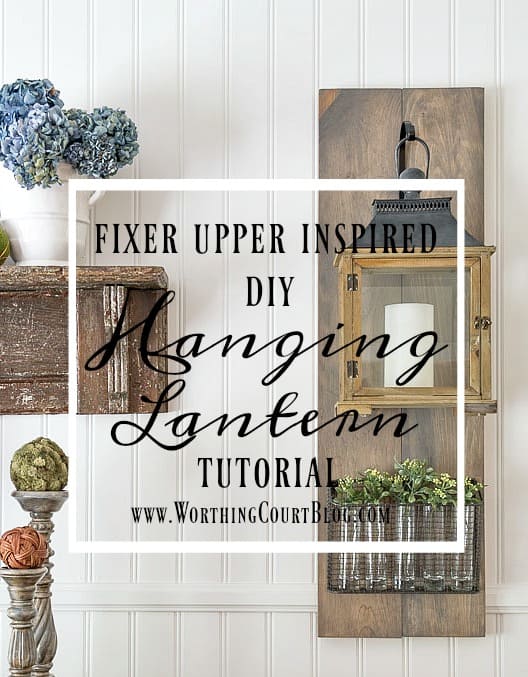
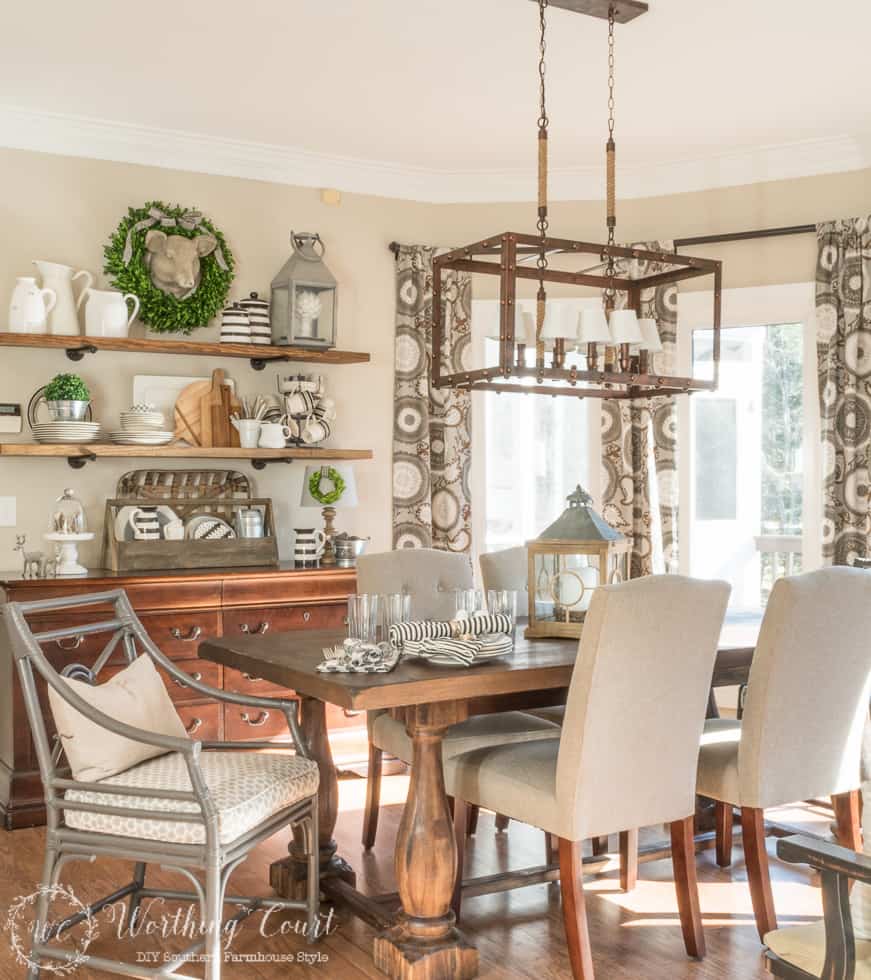
For this week’s edition of The Best Of Worthing Court, let’s take a look back at one of my favorite projects of all time – my Fixer Upper style hanging lanterns! They look wonderful flanking the buffet in my dining room and do a great job of helping to fill a large wall.
They’re super easy to make, even if you only have very basic, beginner level diy skills. All you need is a screwdriver and some stain, as long as you get your wood cut to size at the home improvement store ahead of time.
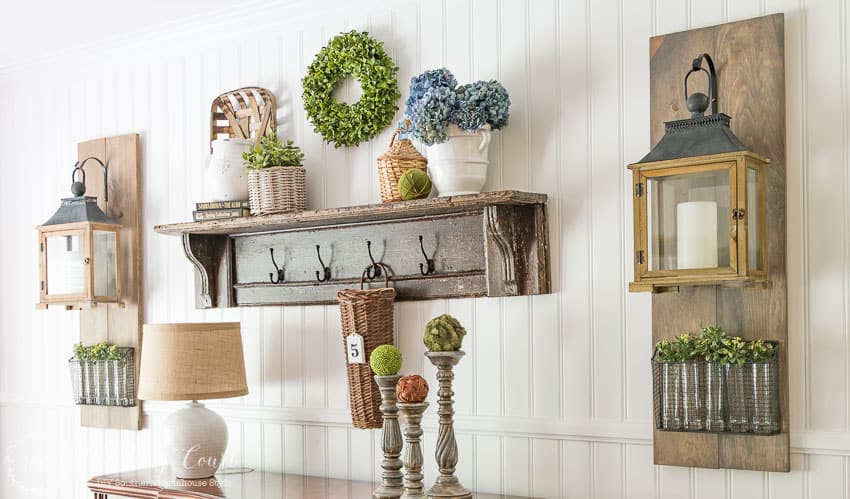
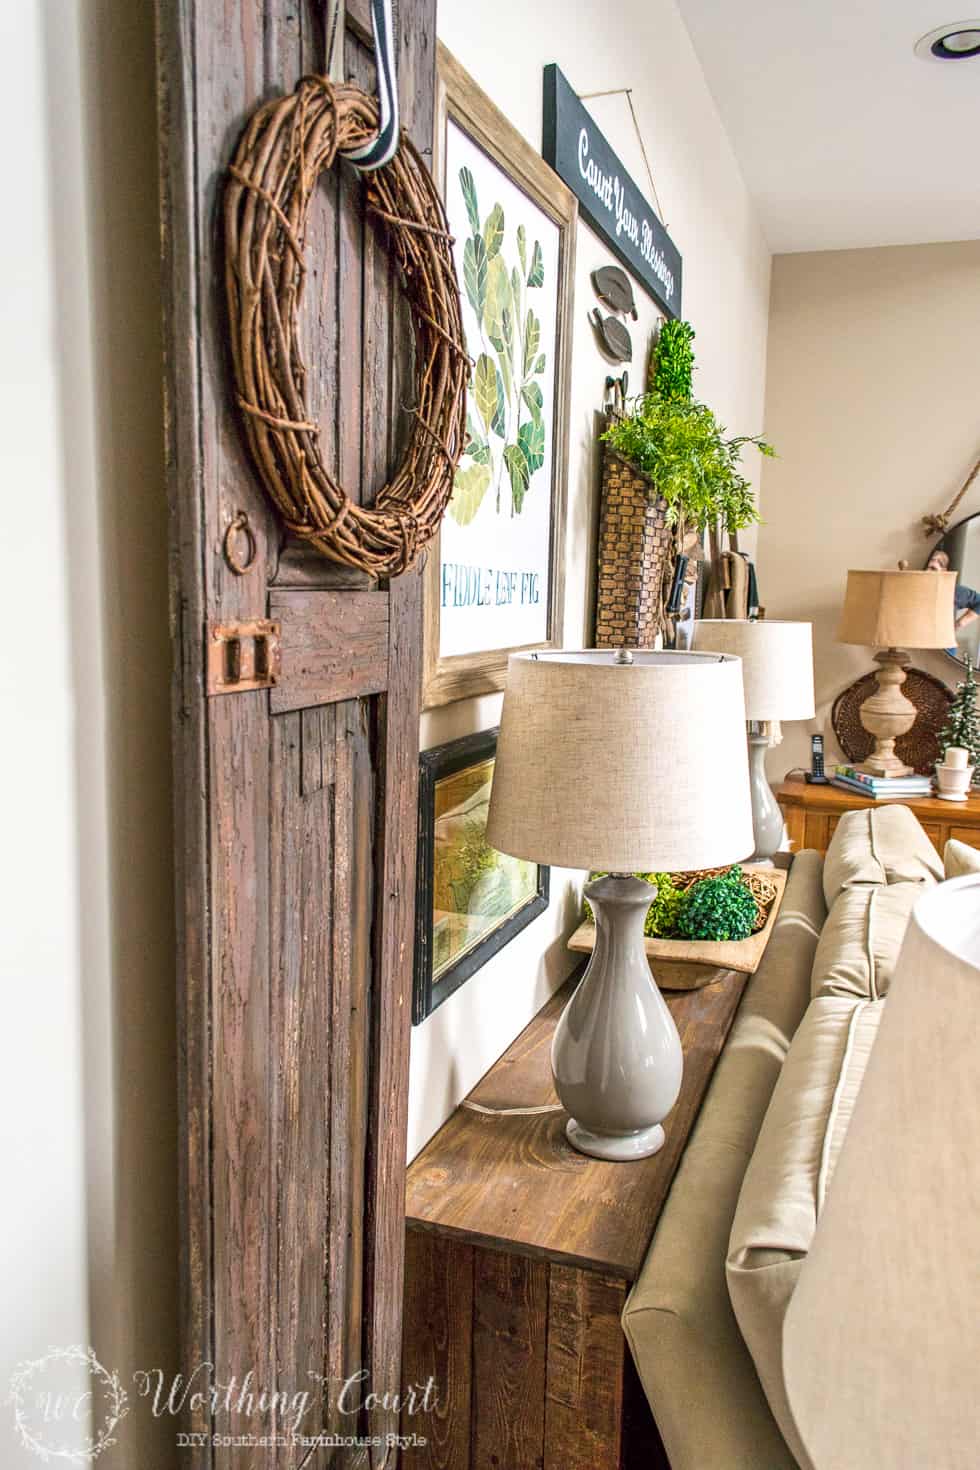
I LOVE these and catch myself walking into my dining room quite often, just to stare at this wall. Ssshhh…don’t tell. I think it’s all of the textures, colors and layers that are so appealing to me.
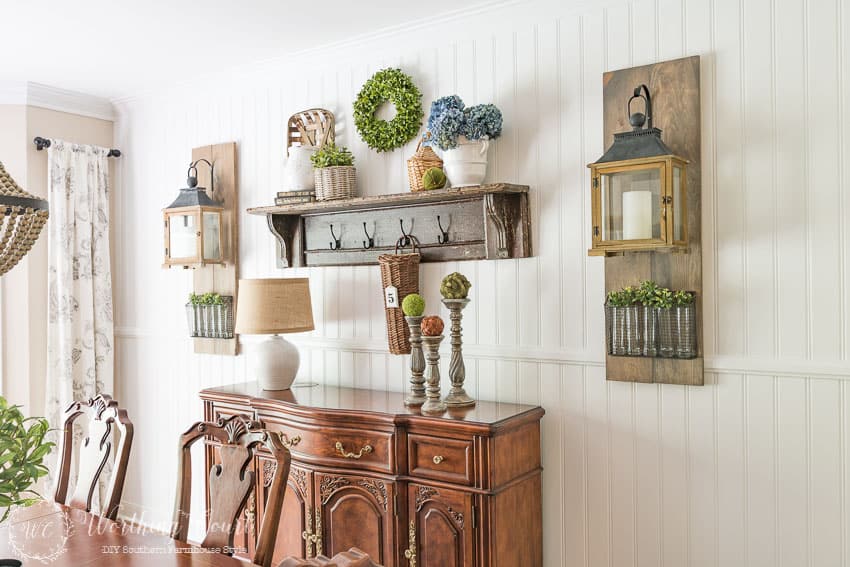
Wow – my chairs and buffet have been painted since I first shared this tutorial with you! Click HERE to see the finished room – before and after. Anyway, these things were soooo easy to make! They have so much more impact than if the lanterns were simply hanging directly from the wall. Let me show you what I did.
SUPPLIES NEEDED TO BUILD FARMHOUSE HANGING LANTERN DISPLAYS:
This supply list is for ONE hanging lantern display.
1″ X 6″ pine boards – not pressure treated for outdoor use
Palm Sander or sandpaper
2 – 12″ Metal Mending Straps – You may need something shorter if your boards are not as wide as mine.
8 – 1/2″ Wood Screws – Adjust the length you need according to the thickness of your boards.
Drill
Drill bit – sized for the size screws you are using
Screw bit
Chop Saw – Or, have the home improvement store cut the board to size for you.
Brown stain of your choice – I used MINWAX SPECIAL WALNUT
Gray stain of your choice – I used MINWAX CLASSIC GRAY
1 pair of “D” RING HANGERS
1 – Lantern of your choice
1 – Hook to hang the lantern from
1 – Wire Wall Basket
Glass Vases to place in the basket
FAUX GREENERY BUSH – With stems snipped off
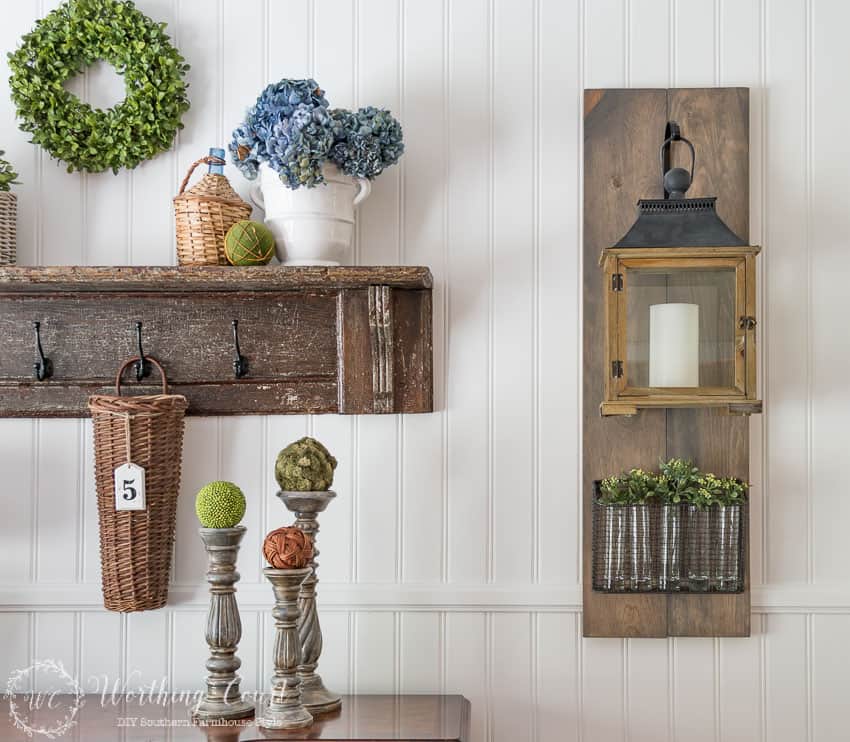
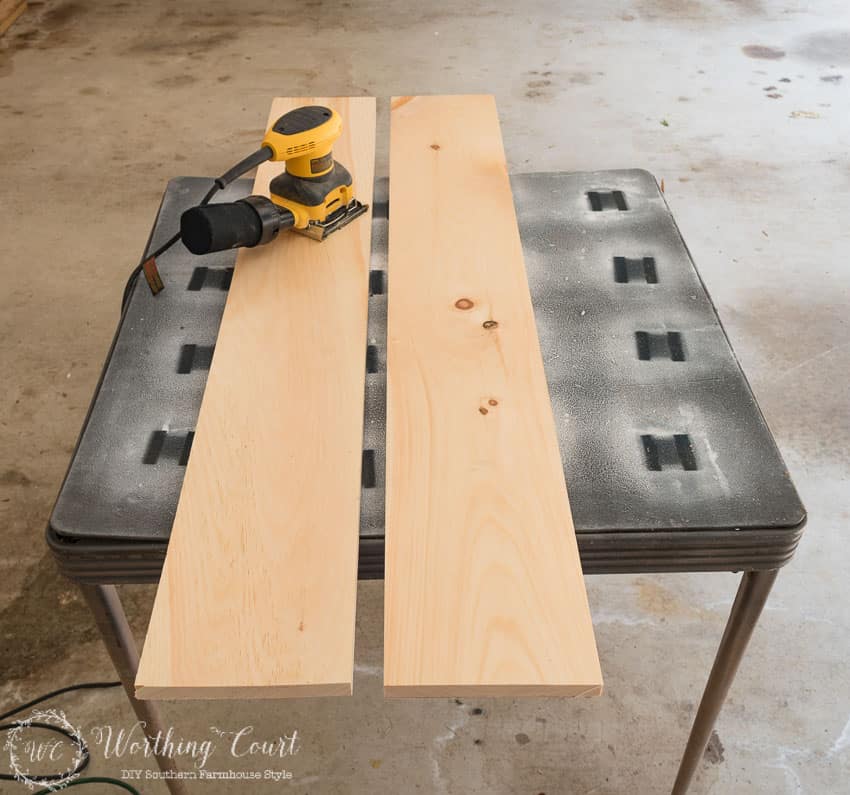
Step 1: Determine the size of the boards you need by laying your lantern and wall basket on the floor in the arrangement that is appealing to you. Once you’ve determined the spacing that you like, measure for the length and width of the board you need. I needed a 1″ x 6″ x 8′ board that was cut into two 48″ long pieces. That gave me a few inches of space above the lantern and below the wire basket and about 1″ of space on each side.
Step 2: Give the boards a light sanding with the palm sander or sand paper on what will be the face side, the edges and the top and bottom of each board. When finished, wipe the boards down with a damp rag to remove all of the wood particles.
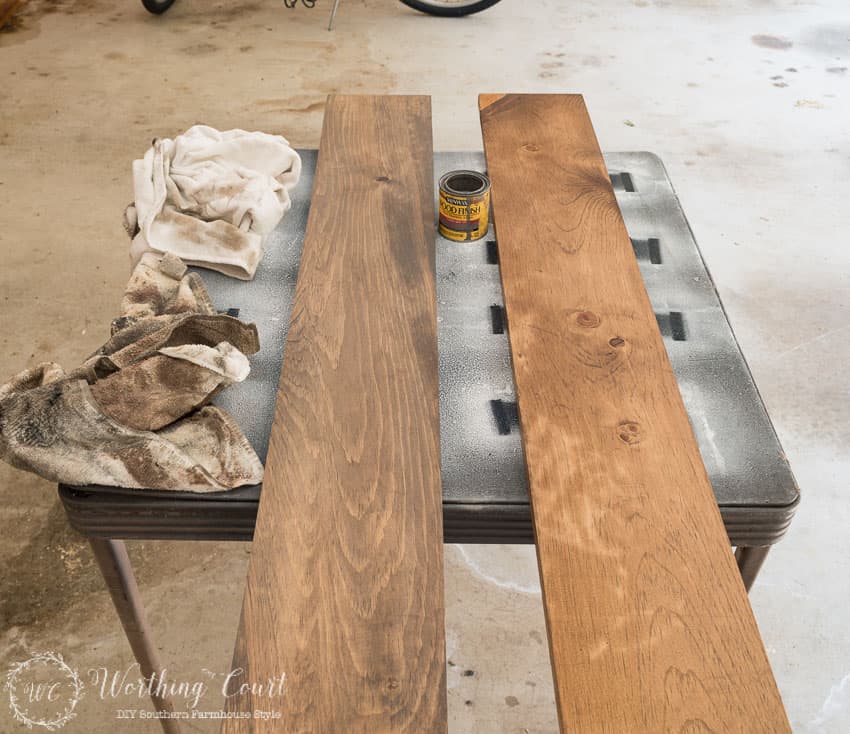
Step 3 – Apply stain to each of the boards before attaching them together. Apply one coat of the Minwax Special Walnut stain to what will be the front side, the edges and the top and bottom of each board. I wanted the brown to be darker, so I allowed the stain the sit for a minute before wiping the excess off. It’s up to you if you want to stain what will be the back side or not. I chose not to. #lazy
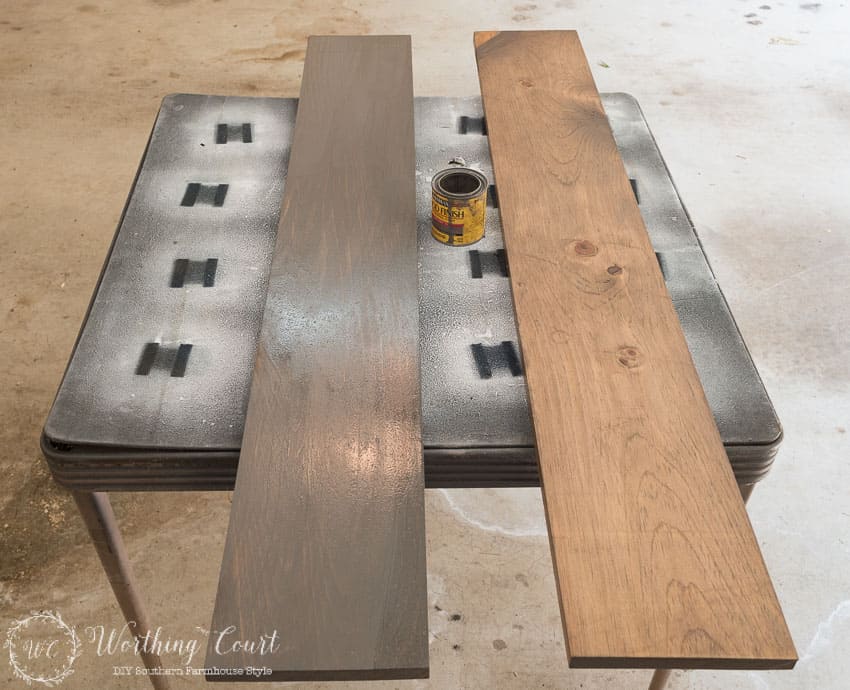
Step 4 – Apply the Minwax Classic Gray stain on top of the Special Walnut stain. Technically, you’re supposed to allow the stain to dry between coats, but I didn’t. I just slapped the gray right on top of the brown while it was still wet. #impatient
In the above photo, the board on the left has one coat of the gray stain and the board on the right doesn’t have any gray. It wasn’t gray enough for me, so I applied a second thick coat of gray stain, allowed it sit for a minute or two and then wiped the excess off. In the below photo, I’ve applied the second coat of gray to the board on the left, but haven’t wiped it down yet. The board on the right has one coat of gray stain.
Step 5 – After the stain has dried, turn the boards over so that they are face down. Butt them up to each other and attach a metal mending plate near the top and one near the bottom to hold them together. Attach the D ring hangers to what will be the top, making sure they are level. You may need to predrill the holes for your screws so that the wood doesn’t split.

Step 6 – I don’t have a photo of this step, but turn the boards back over so that they are right side up and attach the metal hook for the lantern and the metal basket to the wood.
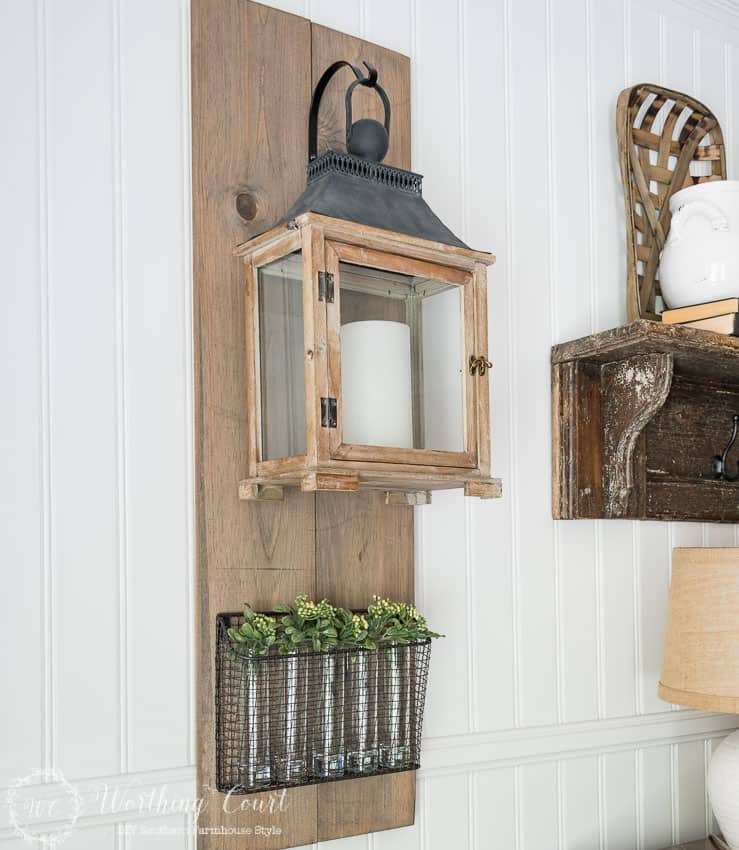
Step 7 – Hang the display on the wall, fill the wire baskets with glass vases and greenery and enjoy!
I admit that I was hesitant about adding these hanging lantern displays to my dining room wall. I was afraid that it would be too much, but I couldn’t have been more wrong – they are just what my farmhouse dining room needed!
YOU MIGHT ALSO LIKE THESE FARMHOUSE STYLE PROJECT TUTORIALS:
SIMPLE DIY PROJECTS FROM MY BREAKFAST AREA MAKEOVER
HOW TO BUILD A RUSTIC SOFA TABLE
great job. looks like and easy project with a lot of wow power.
Love it!! It’s a style that can go with any season!
Love your style. You always inspire me!