How To Hide The Exposed Side Of A Refrigerator
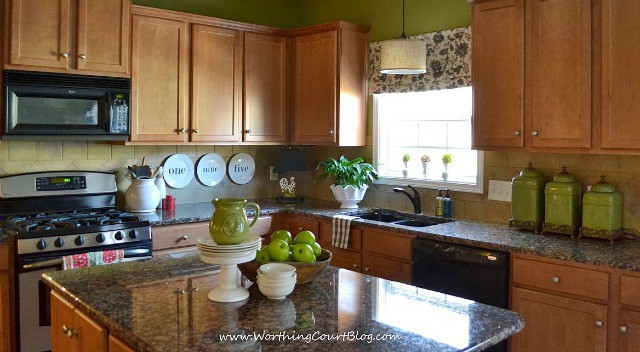
I did this project in the kitchen at our last house. Even though it’s several years old and these colors aren’t in style anymore, it’s still a great solution for the side of a refrigerator!
There’s one item in my kitchen that has always bugged me, but I came up with an easy solution (that’s also functional) to disguise it.

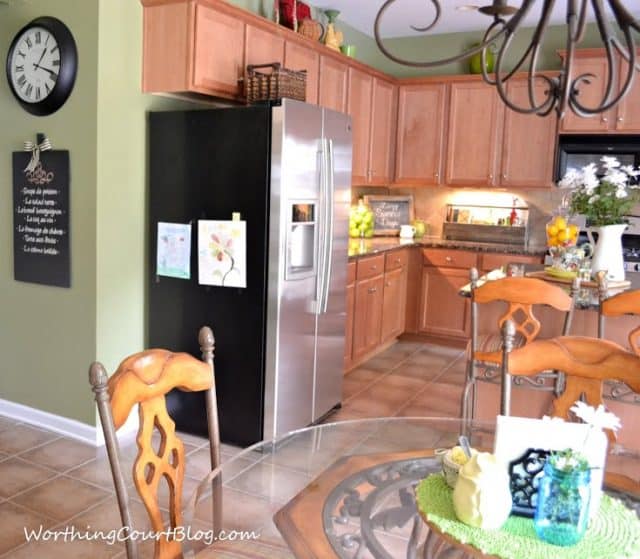
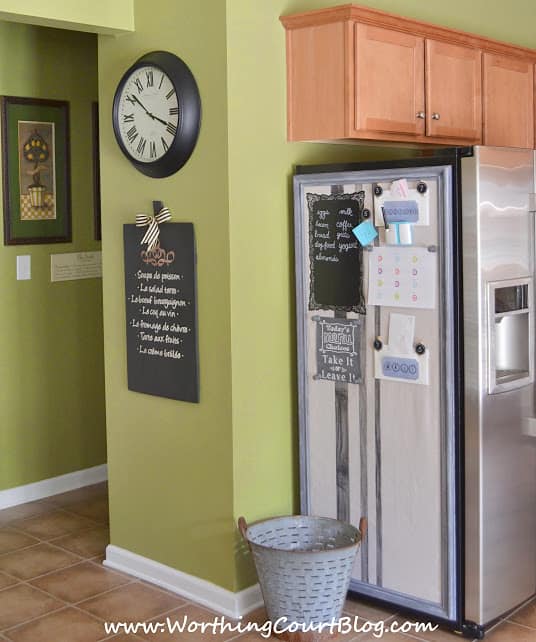
Maybe you already guessed that it’s this big black hole side of my refrigerator that stares me in the face every time that I enter my kitchen from the family room. Watching my granddaughter tape pieces of her artwork to it gave me an idea for a way to disguise the big black eyesore.
I gave a lot of thought to hiring someone to add a stained-to-match piece of wood beside the fridge that would extend from the top of the cabinet down to the floor, but I gave that idea up because I was concerned about how closely we could get it to match the cabinet finish.
I’ve always wanted a bulletin board in my kitchen, but I don’t have much wall space to hang one on. So the side of my fridge seemed like the perfect spot for one. And it could pull double duty by minimizing the black hole side of my refrigerator while also serving as a command center of sorts.
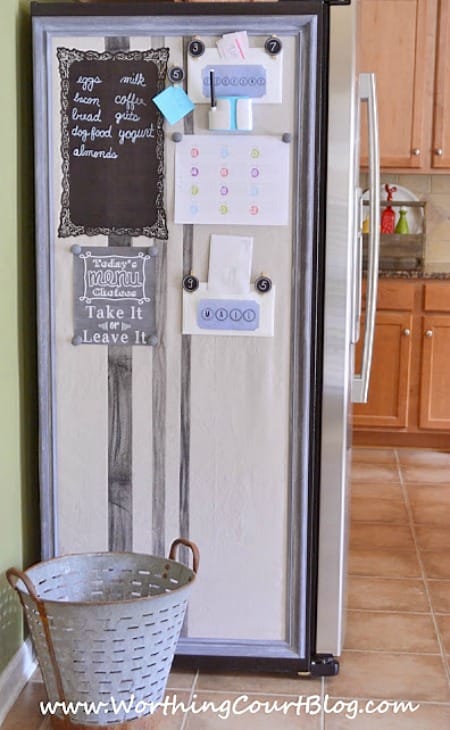
I intended to purchase some wood trim from a big box store to build a frame with, but then I stumbled across a huge frame on the clearance aisle at Hobby Lobby that was marked down to $22 from $240. I couldn’t believe it! The frame measures 60″ x 24″ and was the perfect size to cover most of the side of my refrigerator.
The frame was a yucky color, but a little gray and white craft paint took care of that!
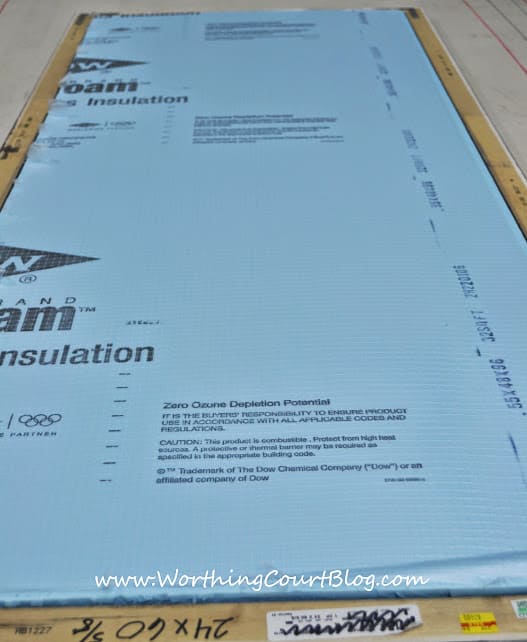
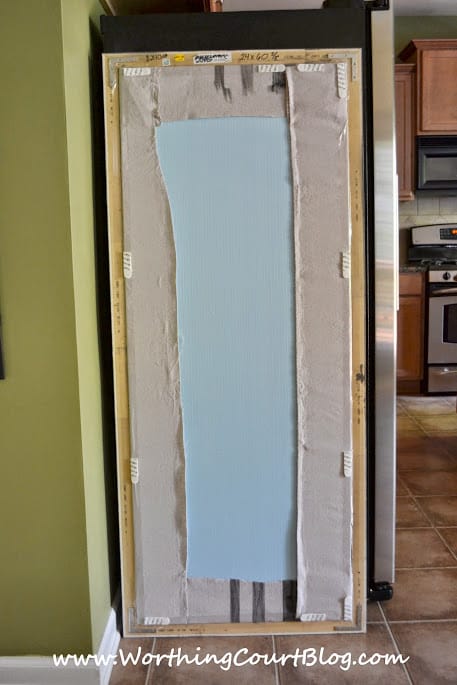
I purchased a large sheet of exterior foam insulation from a home improvement store and easily cut it to fit inside of the frame.
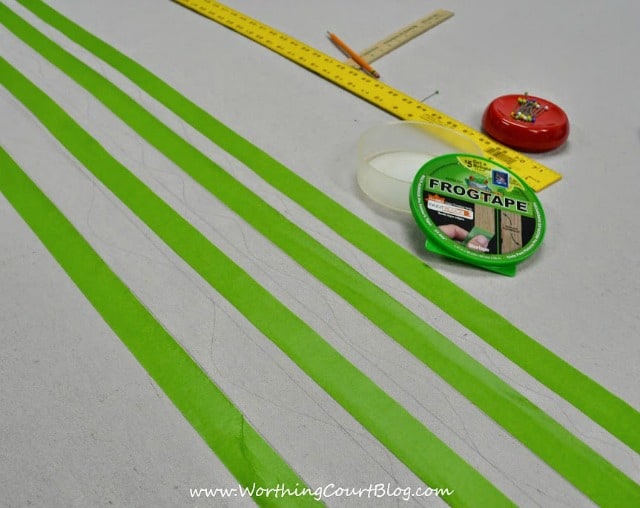
I wanted my bulletin board to mimic the look of a grainsack, so the next step was to tape off and then paint some stripes onto a piece of dropcloth. The dropcloth was cut large enough to completely cover the insulation with several extra inches to wrap around to the back.
I just used plain old black craft paint to paint the stripes and then sanded them for a worn look. If you do this, make sure the paint is completely dry before sanding and don’t remove the tape until you’re finished.
Once those steps were completed, I simply positioned the dropcloth where I wanted the stripes to fall within the frame, wrapped it around the back of the foam insulation and hot glued it into place.
I needed to secure the covered piece of insulation to the frame, but it’s so lightweight that some super sticky packing tape did the trick.
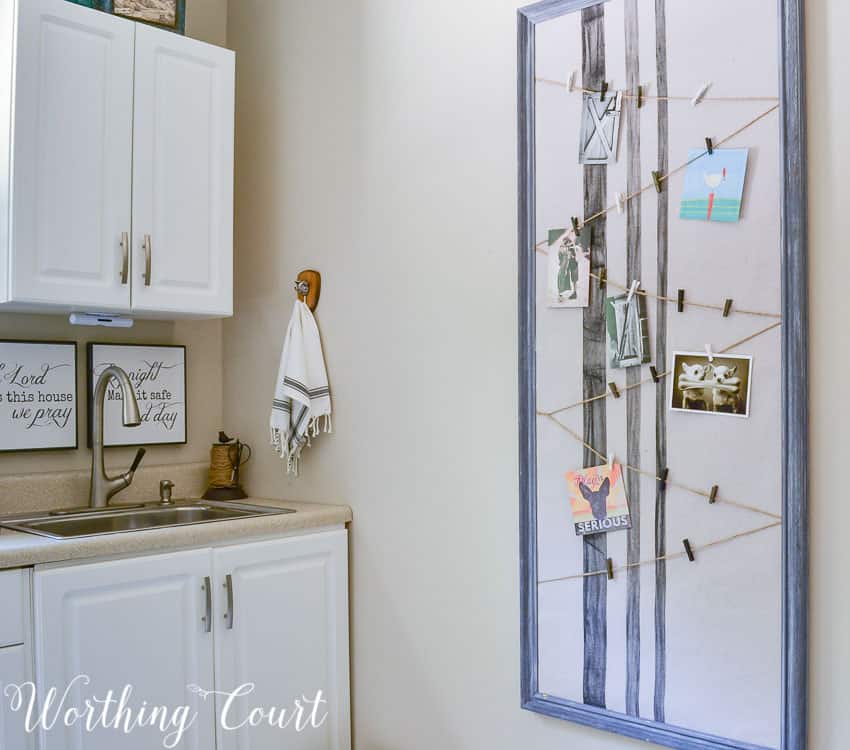
Here’s what the completed bulletin board looks like from the back side. I’ve outfitted the frame with multiple Command Velcro Strips to adhere the bulletin board to the side of the fridge without damaging it.
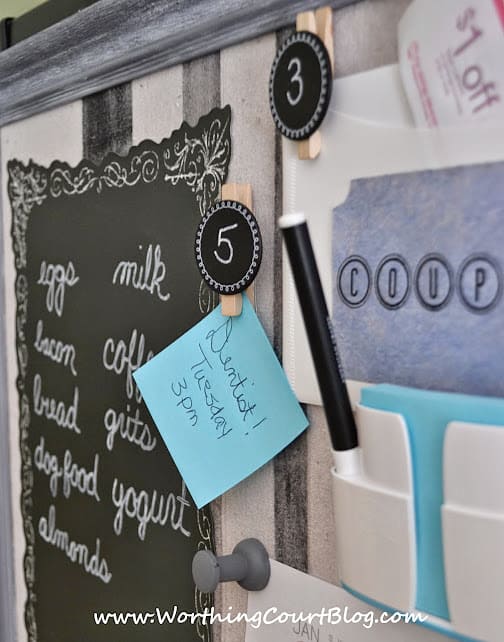
To accessorize the bulletin board and make it more useful, I added a stick-on chalkboard that I found at Target, which is great for jotting down groceries that I need to add to my list. Some pre-made plastic envelopes are perfect for holding coupons and mail. Cute little clothespins with a round chalkboard face (from Target) work great for holding the envelopes and special reminder notes in place. I just glued a thumbtack on the back and now they’re perfect for the bulletin board.
Oh – you might think this would be a logical place for a weekly menu, but if you look closely, down below the grocery list, you’ll see what I have to say about that!
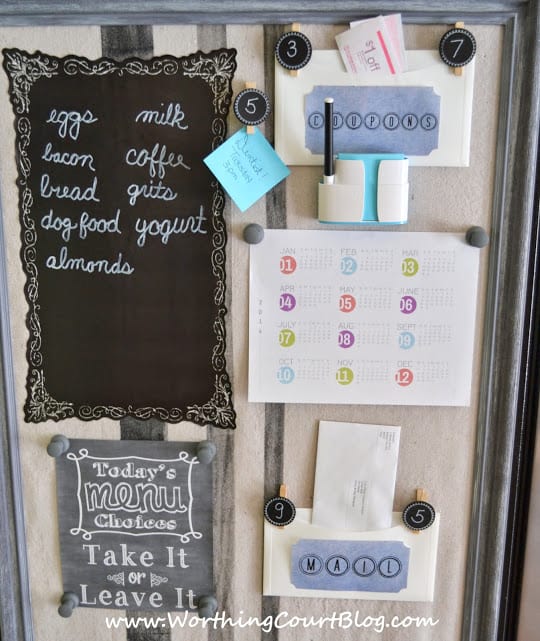
A year-at-a-glance calendar works best for me. I’m not good about keeping up with a daily calendar that I’d have to write on (I use a Google calendar on my pc), but I do need to know what the actual date is every now and then.
The calendar and “menu” are attached with ginormous tack pins that I found at Dollar Tree and spray painted gray.
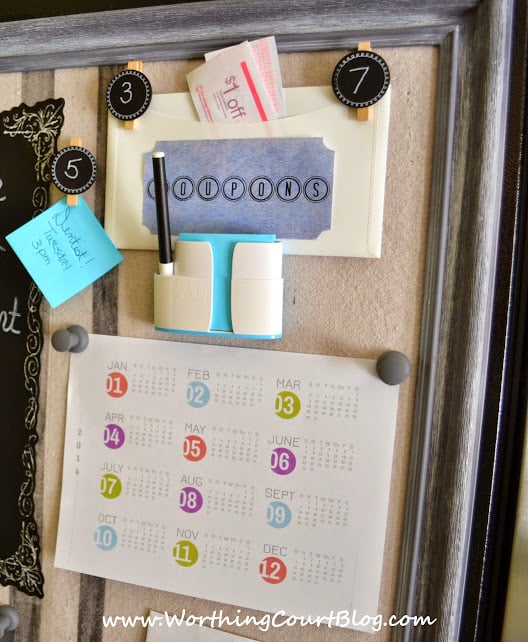
A little cup that holds note paper sticks to the dropcloth surface just fine with Command Strips. The brightly colored papers work well to grab my attention when there’s something that I don’t want to forget.
I’m loving not having to see the big ole black side of my fridge and the bulletin board is already coming in handy!
Now all I need is some new artwork from the grands to display on it.
When we moved from this house eight years ago, the bulletin board came with me and now lives in the laundry room at our new house. The grands aren’t little anymore and no longer provide me with their sweet artwork, but my project still works well as a bulletin board in its new home!
Want to see other easy projects that I’ve done to this kitchen?
How To Change A Can Light To A Pendant Light In 5 Minutes
(Without Hiring An Electrician}
Now that is super cool Suzy!….Great job…love the grain sack idea!…
Thank you, Shirley!
I think that’s a fantastic idea!
Thank you, Stacey. I’m so glad that I finally figured out a way to hide the side of my fridge!
OMGee this is genius. You totally scored with that frame and I love what you did with it. Pinned. Would love if you shared this on the Merry Monday Linky Party.
Thank you, Erlene. I admit that I was pretty pumped when I found the frame for such a good price!
I love it Suzie, pinning for sure! Christine from Little Brags
Thank you, Christine and thanks for the pin too!
I am in love with this idea! It looks great, thanks for sharing at Inspiration Monday!
Debbie
Suzy, I’m so glad I saw this idea! I think we have matching refrigerators! Pinning and sharing your marvelous project! 🙂
Thank you, Jane. I don’t understand why in the world refrigerator manufacturer’s put black sides on stainless steel refrigerators!
What a fantastic idea! I have a very similar black hole i my kitchen. thanks for the inspiration!
Love the message center. Love the green paint. What ìs the name of the color. Thanks.
I found it… Sherwin Williams Lemon Verbena.
I love this idea – I hate stuff all over the frig- always looking for a solution.when I saw the picture I actually thought it was mine from our house in 2009 – exact same green, cabinets, granite down to the clock on the wall – always loved that .