How To Make A No-Sew Fall Table Runner
I am sharing a tutorial for a no sew fall table runner that you can easily make!
Hi, my friends!
You’ve certainly seen me blogging, Facebooking and Instragraming about the new house enough – moving week has finally arrived for us!
I’ve asked a few good friends to help me out over the next couple of weeks as we get settled in a bit so that it won’t be crickets over here.
Today, Barb from The Everyday Home is sharing an easy no sew fall project.
~~~~~~~~~~~~~~~
Hello everyone!
I am so happy to be guest posting here at Worthing Court for
my dear friend, Suzy.
This is a DIY project that I hope you will enjoy reading about and
want to try, also. This fall table runner is so easy to make and will look great on a
side table or a dining table, too!
Thanks so much for letting me share!
xxoo, Barb
…………………………………………………
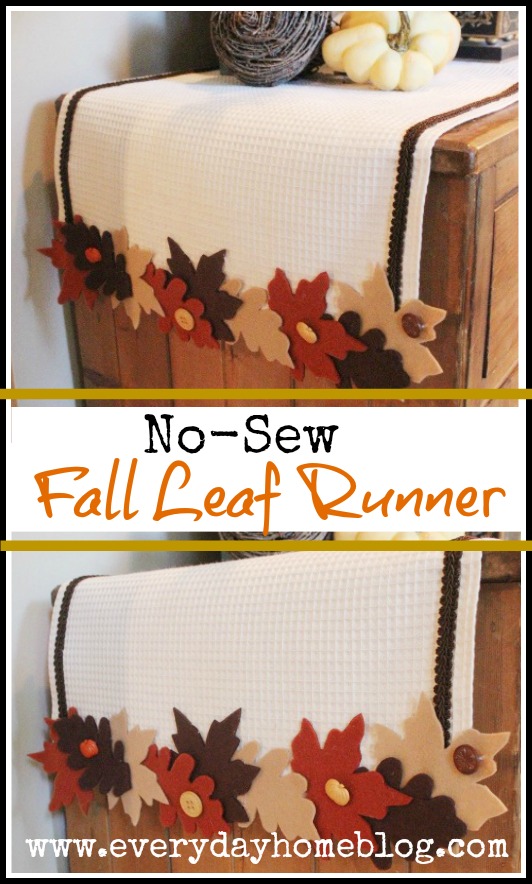
No-Sew Fall Leaf Runner
………………………………………………..
Who says you have to own a sewing machine to
create awesome fabric projects?
If you have some Stitch Witchery and a hot glue gun
– the possibilities are endless.
But, don’t let companies like Singer and Brother know.
It’s not good for the sewing machine indutsry. 🙂
Ok…let’s get started on the No-Sew Fall Leaf Runner.

I only spent about $10 on my supplies. I did have some
of the items on hand already.
1) 1/2 yard waffle-weave fabric
(you could use linen, burlap or even drop cloth)
2) 2.5 yards decorative trim
3) (3-4) colors of felt squares
4) 1/2 Yard Heat ‘n Bond
5) Stitch Witchery
(I already had both on hand)
6) (opt) Package of Decorative Buttons
(I already had on hand)
7) Glue Gun and sticks
8) Iron

1) Decide how wide and how long you want your runner to be.
Cut fabric accordingly, allowing an extra 1″ on each side.
2) Turn fabric under 1/2″, and iron flat. Turn fabric another 1/2″.
Place Stitch Witchery between turned layers.
Apply heat using an iron set on high. It only takes a few
seconds for the Stitch Witchery to “melt” and bond the fabric together
to create a hem.

3) Hem both sides. You can also hem the ends, but I did not since
they will be covered with the felt leaves.
4) Next, apply the decorative trim to each long side with a glue gun.

I used the lines of waffle-weave fabric to guide me and
allow me to create a straight line with the trim.
You may want to lightly mark a line with a pencil before
applying the trim if working with another type of fabric.

5) Now you need to prepare your squares of felt to cut your leaves.
I wanted to add a backing to the felt so it would give the leaves some
body, but you can stick this step.

Place the felt on an iron-able surface, add the Heat ‘n Bond paper side up
on top of the felt. Using a medium-setting on your iron –
iron over the paper backing for about 2-3 seconds all over
until the Heat ‘n Bond adheres.
Then, peel the paper backing off…

Your felt back will look like this once the paper backing is peeled away.

It’s not sticky at all, as it may appear. It just adds a layer on the back
which creates some body to an otherwise “floppy” fabric.
I printed two leaf shapes from online, sized them on the copier to the
size I wanted, and traced the shapes on the back of the felt with a
marker. Then, I cut out the leaves. I cut out 20 leaves total so
I would have extra to play with during the placement.

6) Place the felt leaves along the ends of the runner so that some of the leaves
sticks out beyond the edge of the fabric.
This is why the backing is important.
Once you are happy with the placement, use a few drops of hot glue on
the backs of the leaves to adhere them to the runner.
7) (optional) I had a package of cute Fall buttons leftover from a project
from last year…

I added a few decorative buttons randomly along the leaf border.
You could even use buttons to create a cute monogram above
the leaf border.
And that’s it.
How easy was that?

Honestly, you could whip a table runner up in about an hour.
The timeliest part is cutting out the pretty leaves.

………………………………………….
If you loved this project, I would love for you to follow me at
The Everyday Home Blog
I would also love for you to pin this to your
favorite Pinterest Boards: