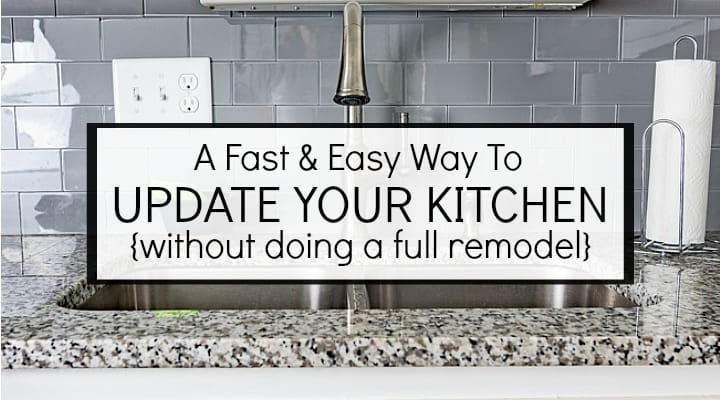
Need A Backsplash? You Have To Try This!
Need to update your kitchen, but not ready for a full blown remodel? Try using peel and stick glass tile for a non-messy, fast and easy update!
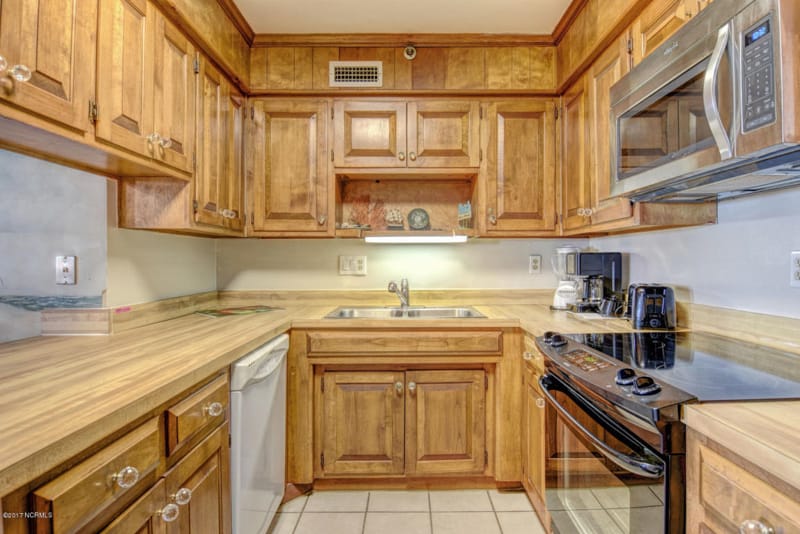
We’re drawing close to being finished to the total makeover that we’re giving to our our teeny-tiny kitchen at our beach condo. If you saw my post about the plans for the kitchen, then you already know that this is what we started with.

Measuring 4′ x 6′, from cabinet front to cabinet front (not counting the refrigerator space), this galley kitchen is tiny. The dark cabinets and fake butcher block counters aren’t our style, so a full blown kitchen makeover was what the space needed. Since we’re working within a tight budget, there thankfully, wasn’t any need to replace the cabinets since they’re structurally sound and I actually am okay with the style of the doors.
This is our to-do list for the makeover that we’ve been tackling. As you can see, we’re sooo close to the finish!
- Paint walls, trim and ceiling √
- Paint cabinets √
- Replace old ceramic tile with laminate flooring √
- Center and replace light fixture The fixture has been centered, but still needs to be replaced.
- Replace counters √
- Add a backsplash √
- Replace faucet √
- Replace cabinet hardware √
- Paint dishwasher We came up with an alternate solution!
- Add a decorative hood above the microwave
- Add a roman shade to the window
- Make it pretty!
This is what the kitchen was looking like after painting the cabinets a creamy white (Sherwin Williams Extra White) and replacing the counters with granite (Luna White granite from Lowes). Obviously, those two things made a HUGE difference! And yes, I know that we have a couple of cabinet doors that are out of alignment – we’ll get to them soon!
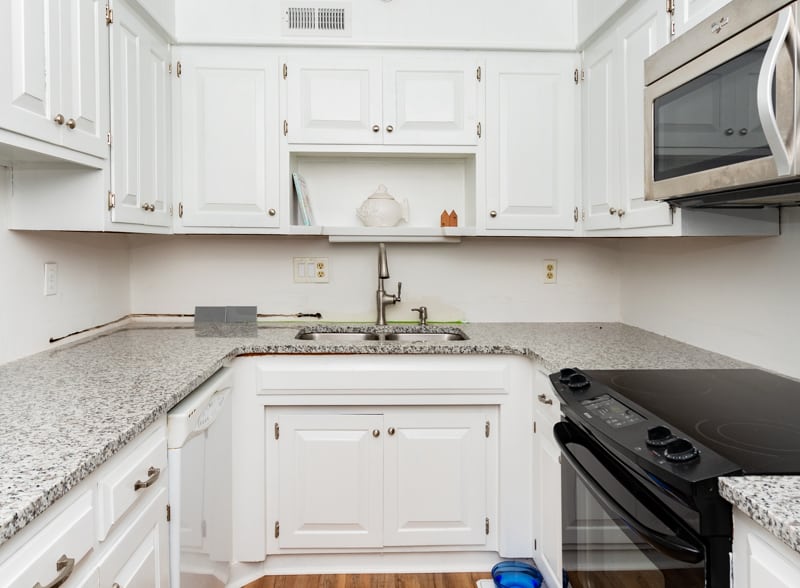
Without a backsplash, the kitchen looks unfinished and all that white was looking terribly sterile, cold, boring and uninviting. So began the hunt for the perfect thing to fix the situation. My requirements for the backsplash were: 1) a neutral color that would go with anything, 2) easy and fast to install so that we could do it ourselves and 3) affordable.
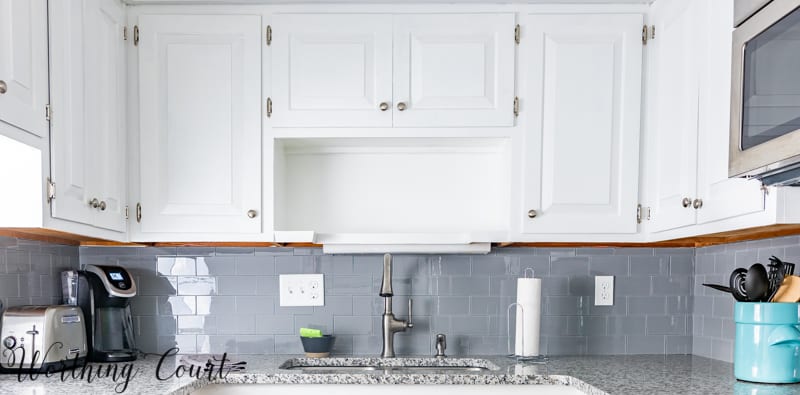
And here’s how the same area looks today!
I was supplied with Aspect Tile for this blog post. The experience and opinions are 100% my own!
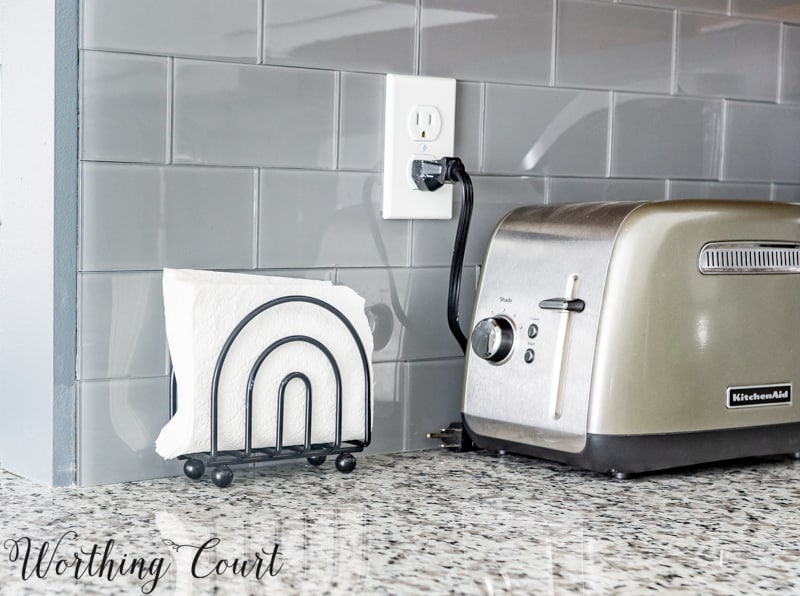
The folks at Aspect Tile were kind enough to supply me with enough gray glass subway tile to do the backsplash in the entire kitchen! What a difference – right? BTW – we obviously chose not to paint the underside of the cabinets since you can’t see them unless you bend over to look. You have to know your diy limitations and that would have literally been a backbreaking job for either Pookie or myself.
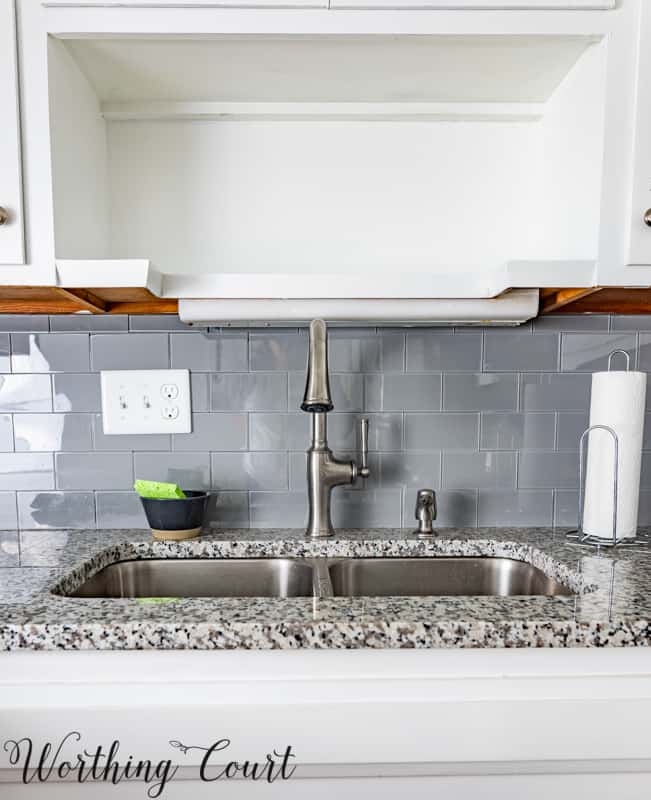
Aspect Tile not only offers glass tile – they also have stone, metal and wood tiles. And the best part? They’re all peel and stick – no mortar or grout required! We used their 3″ x 6″ glass tile in the color Steel and applied it in a brick pattern. You’ll find the full resource and supply list below.
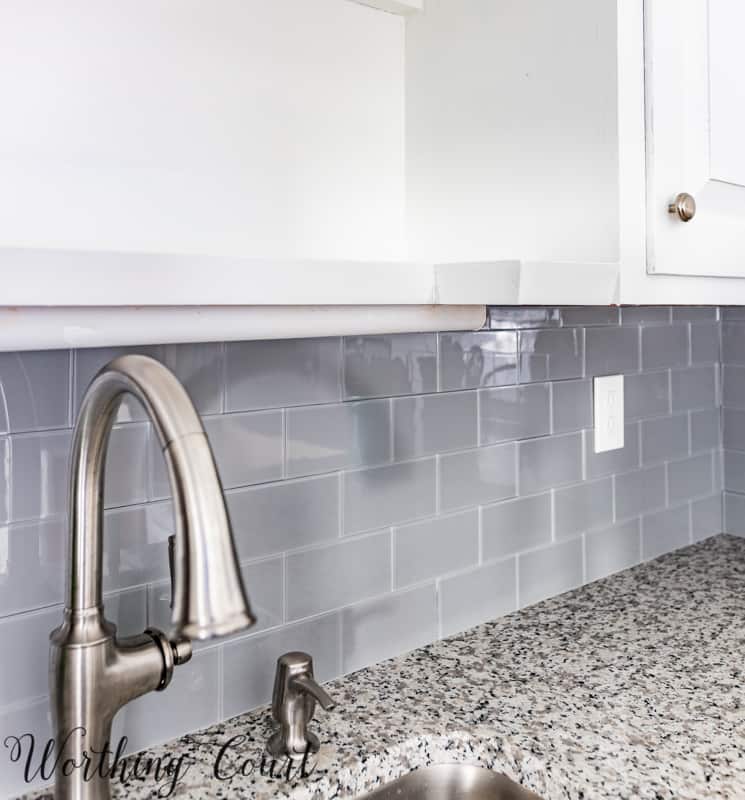
I admit that I was a bit skeptical at first. My biggest concern was whether or not the tile really would stick to the wall and not fall off in a place as high in humidity as right beside the ocean, but we’ve had the tile up for over six months and it’s as perfect as the day that it was installed. The biggest advantage to having grout though, is that it will hide any slight spaces where the tile doesn’t line up perfectly because of the natural settling that occurs in any building. You may notice it in some of these really closeup photos, but truly, I don’t notice it at all when looking at the entire space.

Another concern that I had was what the edges of the tile were going to look like on the sides where it ended. I knew that the full tiles had a finished edged, but I was a little concerned about what any cut edges were going to look like. I assumed that we were going to need to run a vertical line of the tile turned sideways, but there wasn’t any need for the that. The cut tiles looked just fine.
 Since we didn’t have to worry about applying mortar or grout, we only used three tools to install the tile. In addition to these tools, I recommend having a putty knife handy, which easily pops off any tile that might not be positioned correctly on the first try.
SUPPLY LIST:
Affiliate links have been used, which allows me to make a small commission from your purchase, but at no additional cost to you. See my full disclosure HERE.
Aspect Peel And Stick 3″ x 6″ Glass Tile, color Steel
Y’all, we are total novices at installing tile, but this is a project that I believe any diy’er could do! I highly recommend watching the Aspect Tile installation video on their site before beginning.
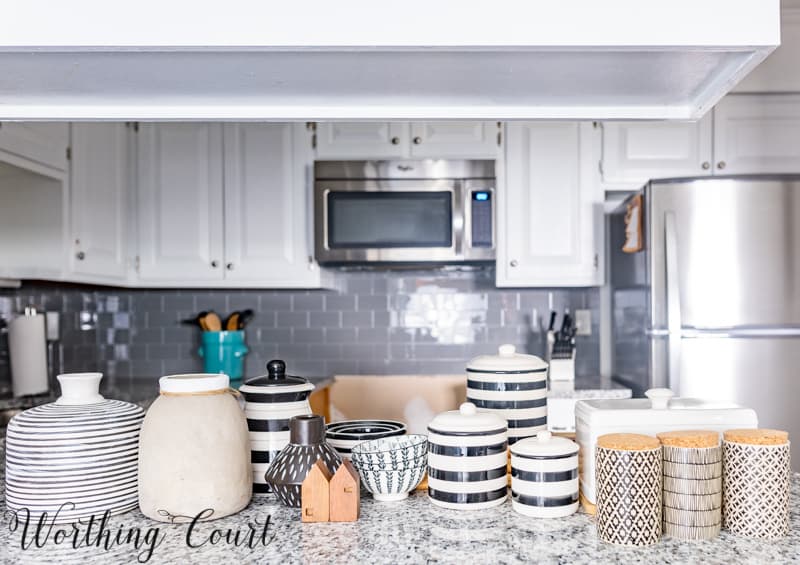
Most of what’s left to do is the fun part – making the space pretty! I’ve been collecting accessories to go along with my modern farmhouse style for a while and these are most of the things that I’ve accumulated.
The next kitchen post will be the full reveal!
Beautiful!
I think it looks beautiful! I wish they had this tile several years ago when I did my kitchen.
I love the backsplash! And I never knew they made tile that was peel and stick for backsplashes. What a great idea! Your kitchen looks amazing! What a transformation!
Looks great. Such a good way to update on a budget, and would probably be a lot easier to change out down the road, unlike regular tile that is practically cemented to the wall.
Wow! I’m so impressed, and I can’t wait to see your final reveal with all of your decorating ideas.