Dining Room Makeover – The Fastest And Easiest Planked Wall In The History Of Ever
UPDATE: Click HERE to see the finished room reveal with before and afters, including my solution for giving my traditional furniture a farmhouse vibe!
Remember last week when I told you all about my dining room makeover plans? Well, I’m excited to share the first DIY project to be completed! If you missed the dining room plans post, you can see it HERE.
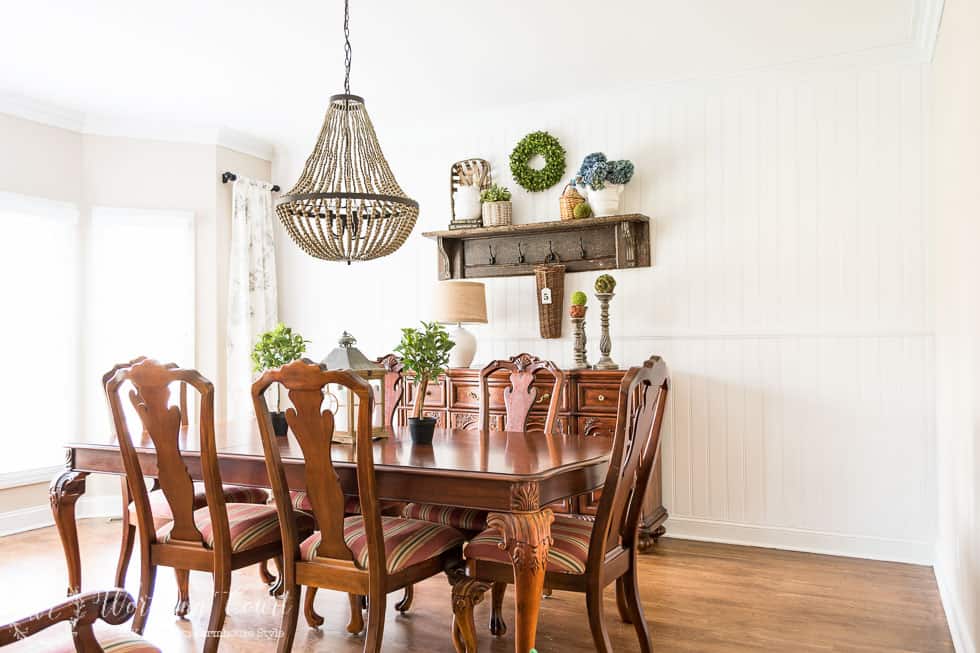
Say hellooo gorgeous to my new planked wall! I’m excited because I love the planked wall, but I’m even more excited because it was so fast and so easy to do that I couldn’t wait to share all about it.
Maybe you dread all of the work that would be involved in cutting sheets of plywood into strips or hanging tongue-in-groove planks one by one. There’s no long drawn out project here – this method is incredibly easy!

Pookie and I completed this wall in roughly two – three hours (not counting shopping or painting). What’s the secret? Paneling. Yep, plain old ordinary, everyday paneling.
To be more specific, this is the product that we used from Lowes.
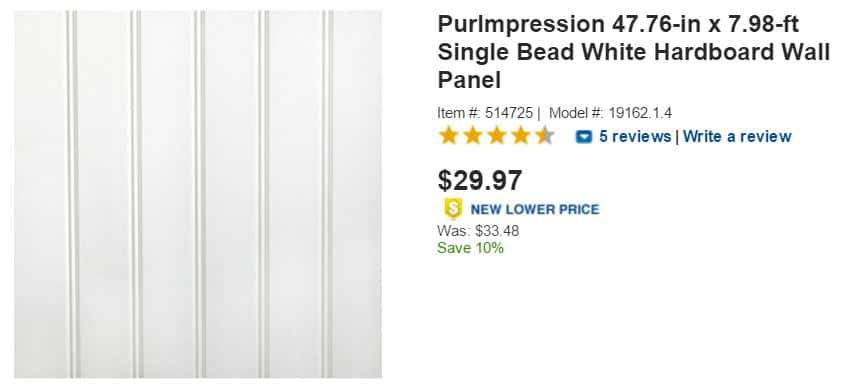
They do have flat paneling too (that looks more like wide boards with groves in between), but I thought that this single bead paneling looked more like individual boards. Plus I really like the texture and dimension of it.
Now, I admit that I was a little scared at the thought of putting any kind of paneling on any wall in my house. I kept having flashbacks to the 70’s, when I had an entire den full of that cheap, awful brown stuff. But, after thinking about it, I decided to take the plunge and see how it would look. I’m so glad that I did!
Things that we had to consider:
- Hang the paneling horizontally or vertically? In the end, I decided that I liked the vertical look for the dining room. In my mind, it seemed that horizontal planking would be a little more rustic looking and I wanted something a little dressier for the dining room.
- How far up the wall to take the paneling – all the way to the top or only about 5′ or 6′? I knew that I wanted to be able hang anything that I wanted to on the wall without some kind of trim getting in the way, so I decided to just mount it at the top of the baseboard and take it all the way up to the bottom of the existing crown moulding.
- How to handle the fact that our wall space was 98″ tall, but the paneling was only 96″ tall. We decided to cut the sheets into two 48″ tall pieces and hang them so that there was a 2″ space about halfway up the wall that we could cover with a piece of trim that resembles a chair rail.
With all of our decisions made and measurements in hand, we made our way to our local Lowes, where we were able to get the paneling cut into the exact sizes that we needed. Our wall measured 177″ wide x 98″ tall (from the top of the baseboard to the bottom of the crown mould), so we had to buy four sheets of paneling that were then cut into a total of eight pieces.
To attach it to the wall, we ran a bead of construction adhesive around all four sides of each piece of paneling, plus a few dabs in the middle. Then used a few brad nails (with a nail gun) to hold it in place until the adhesive dried. If you don’t have a nail gun, they have small nails (that are made especially for paneling) that you can use with a hammer.
When the paneling was in place, every seam and joint was caulked and then the entire wall was painted the same color as the rest of the trim – Sherwin Williams Pure White in semi gloss. I was a little worried about being able to see seams, but they aren’t visible at all.
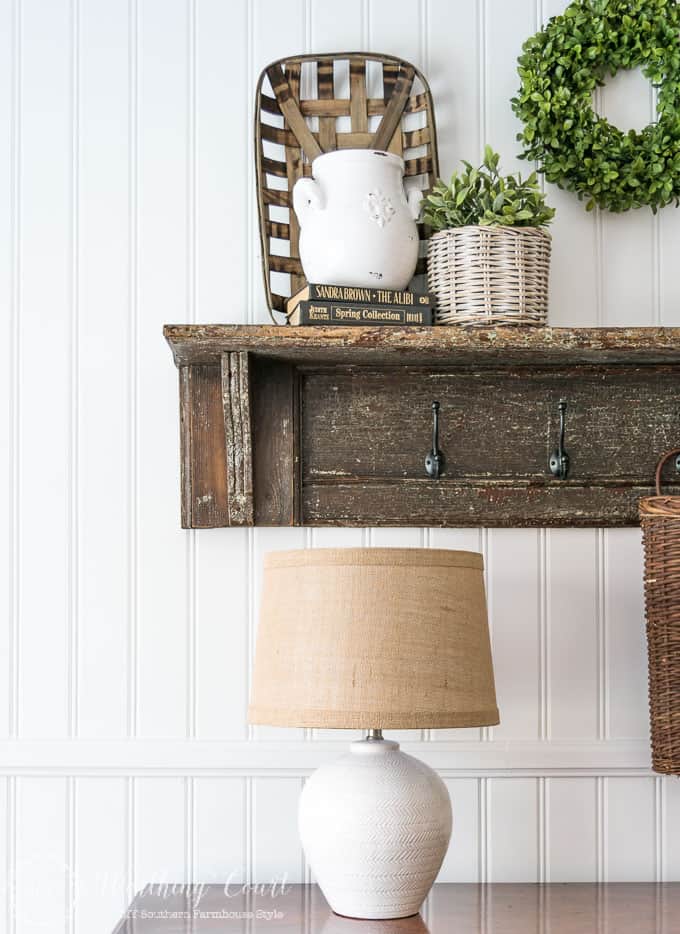
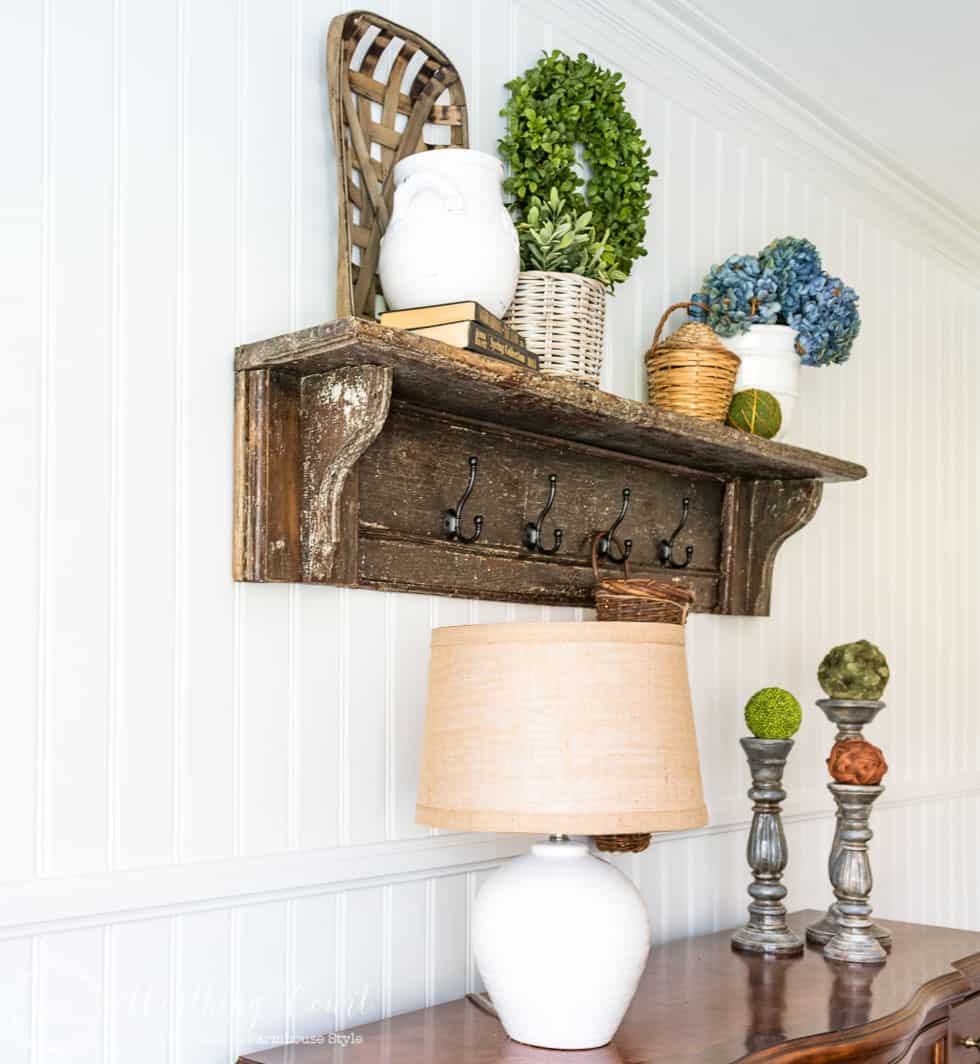
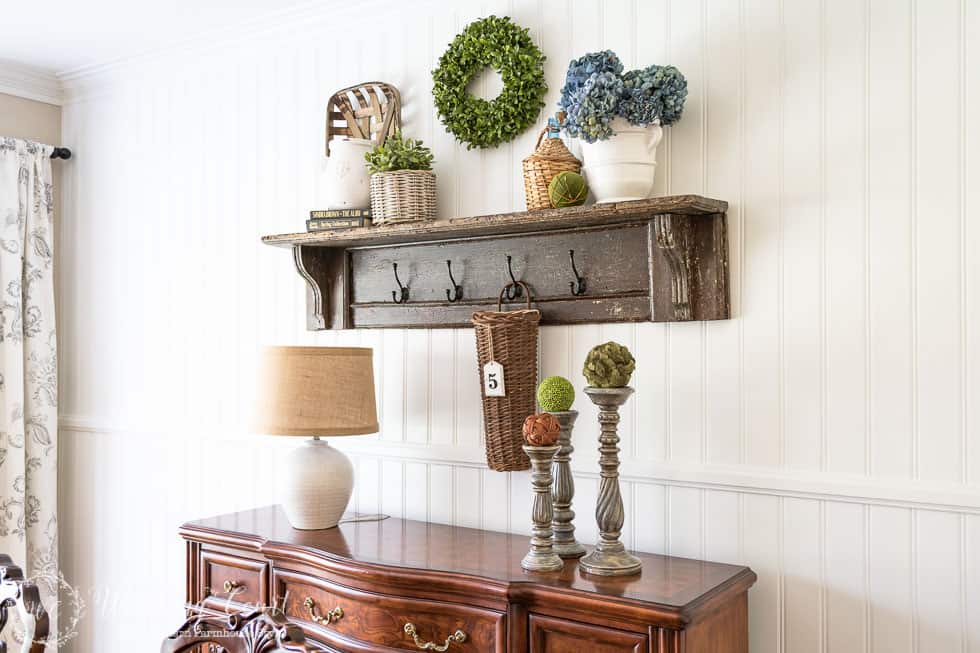
After the paint was dry, I didn’t waste any time getting my vintage mantel hung and decorated! Maybe you remember it from the basement of our former home.
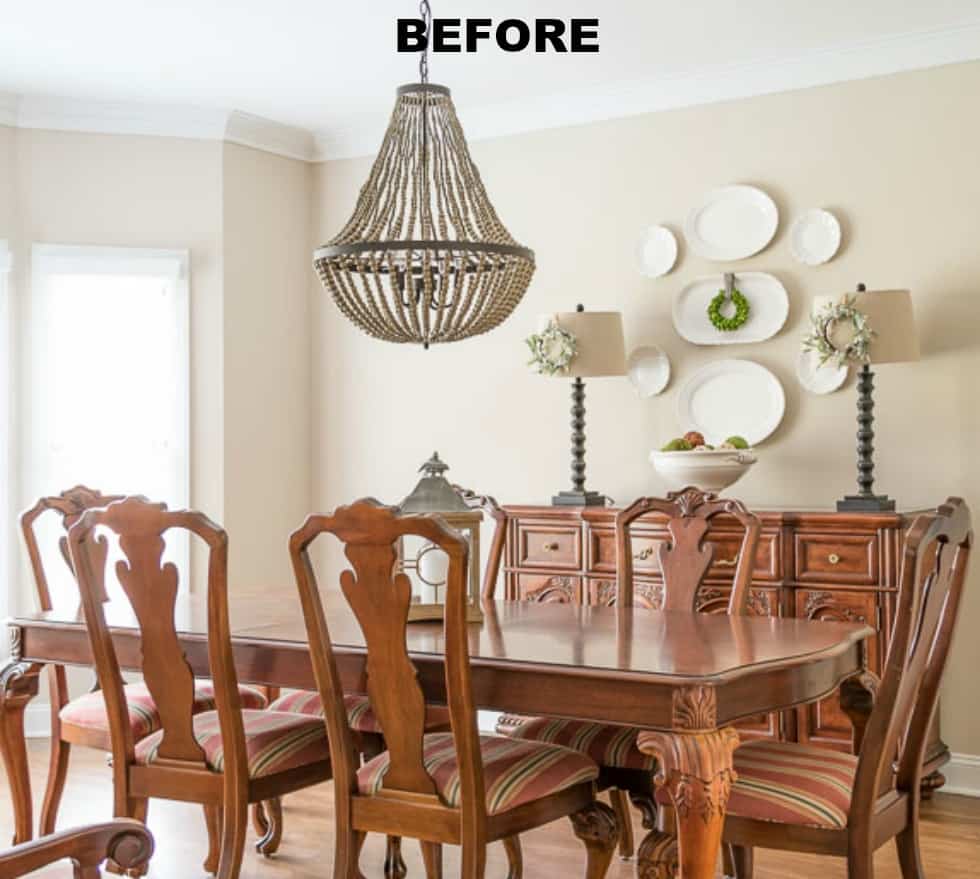
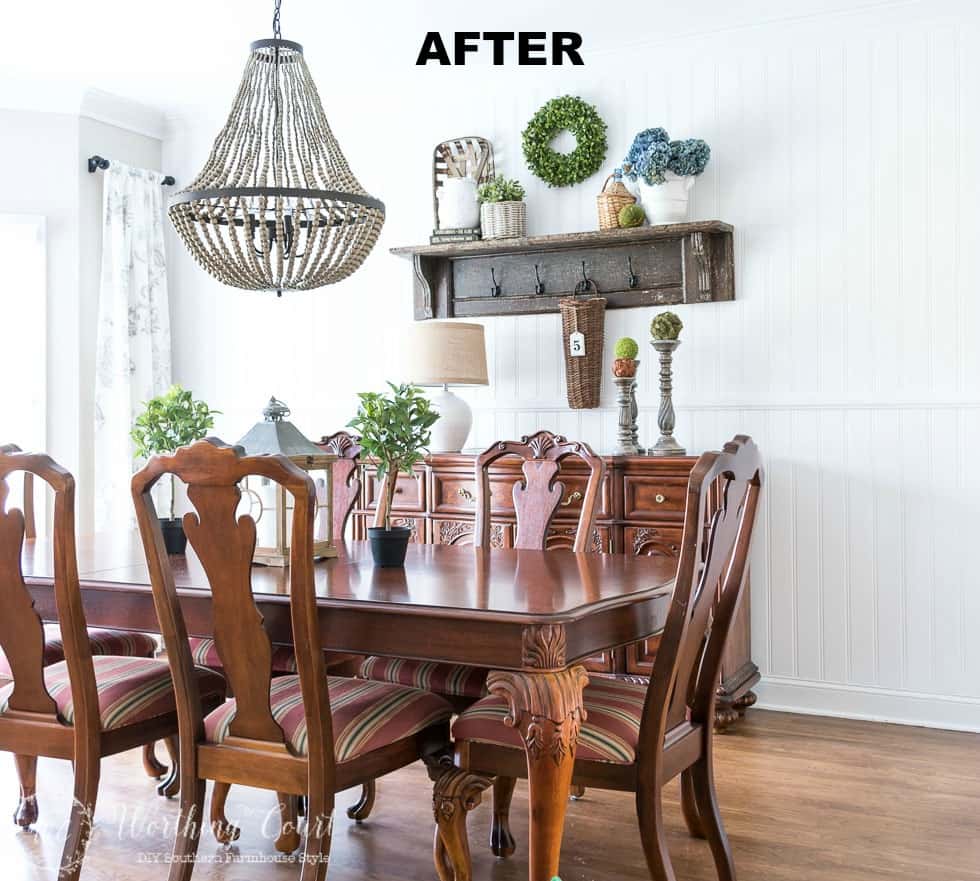
Want to see the before and after?
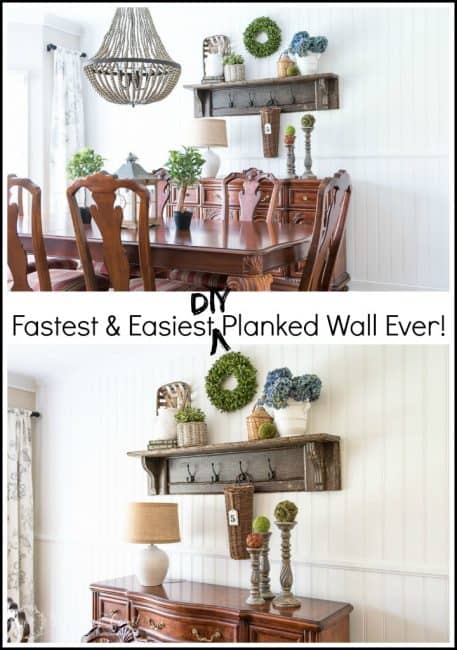
Pin it for later!
I love the modern farmhouse look that this panelled wall has created!
Wow what a transformation, the after is stunning 🙂
Thank you, Dawn!
Great job! Looks terrific!
Thank you so much, Cindy!
It looks great GF!! I love how the mantel looks with the chandelier and the new curtains!
I’m so glad you like it! You weren’t supposed to notice the curtains yet! 😀
Looks really nice! Especially hung vertically, it gives a touch of farmhouse elegance. I would love to hang some in my house. One question please, did you have to remove and reinstall the baseboard and crown trim, is the product thin enough to butt against the trim, or did you have to add extra trim to hide the butt joints? Thanks!
No, we didn’t have to remove the baseboard or crown moulding. The paneling is thin enough to butt against it. We did caulk all along the baseboard and crown moulding though. And no, we didn’t need to add any extra trim to hide any joints. Glad you like the wall!
Wow!! Does that ever look amazing Suzy!!
I will definitely keep this mind…. I like the idea of 5-6′ for my mudroom…. fantastic!!
Have a great day!
Maxine
I am so glad I found this post because I want to put planks on bottom half of my entry wall! This will be so much easier! I also want to put some over a bench in my kitchen! Thank you Suzy for this post and your room is beautiful!
Thank you, Gail. This was super easy and has me wanting to do it everywhere! 😀
Love the look! Great job. Does it just sit on top of the baseboard?
Hi Donna. Yes, it just sits on top of the baseboard. However, we made sure it was level and then we caulked the seam between the top of the baseboard and the bottom of the paneling when we were finished. Glad you like it!
It looks so fantastic Suzy. I may use this at the mountain house. It would be perfect and much cheaper than tiling the kitchen wall.
How funny, I just posted a couple of weeks ago about how I PUT UP PANELING as well! I never thought I’d see the day. But it was so easy! Thanks for sharing your take on it, I love it!
Very beautiful…I love your chandelier as well! I’m thinking about planking a wall, so this was a great tutorial to read about first!
That looks great! Totally easy to do! I’m in the middle of redoing my shed and turning it into mine and my daughter playroom/office. We might do somthing like this for the walls since it’s so easy. Thanks so much for sharing!
I love it! The planked wall makes the room so much warmer and inviting now. Wow! Love it!
It’s absolutely beautiful! We used the same paneling in a powder room makeover a couple of years ago and makes such a statement. I would love for you to share this at the Friday Favorites link party going on now.
~Bonnie
http://www.oursecondhandhouse.com/2016/03/friday-favorites-week-317.html
Oh wow! I absolutely love this transformation. I’ve always loved the look of planked walls.
Thanks for sharing and for linking up to the #SHINEbloghop.
Wishing you a lovely weekend.
xoxo
I’ve put a lot of beadboard in my lake house and love it!! Thanks for bringing this by to Throwback Thursday!!
Mollie
Your before picture was gorgeous as is and the after is stunning! What an amazing job! Thanks for sharing! #HomeMattersParty
This is so beautiful! I love the new wall just brightens everything up and gives the room so much character. That shelf is also really amazing!
How beautiful! Thanks for sharing this with us at 100 Happy Days. I love paneled walls. Yours is simply stunning. 🙂
Amazing idea! Now I’m looking around my house to see where I can copy you! Thanks for sharing!
Suzy,
I love your “after” picture. As usual, you guys did a superior job!!!
Thanks for sharing and inspiring.
Rita