Decorating With Pumpkins – How To Create An Luxurious Fall Centerpiece On A Budget
Take your table to a whole new level this fall season with step by step directions for creating a luxurious fall centerpiece that fools the eye into thinking it’s overflowing with pumpkins.
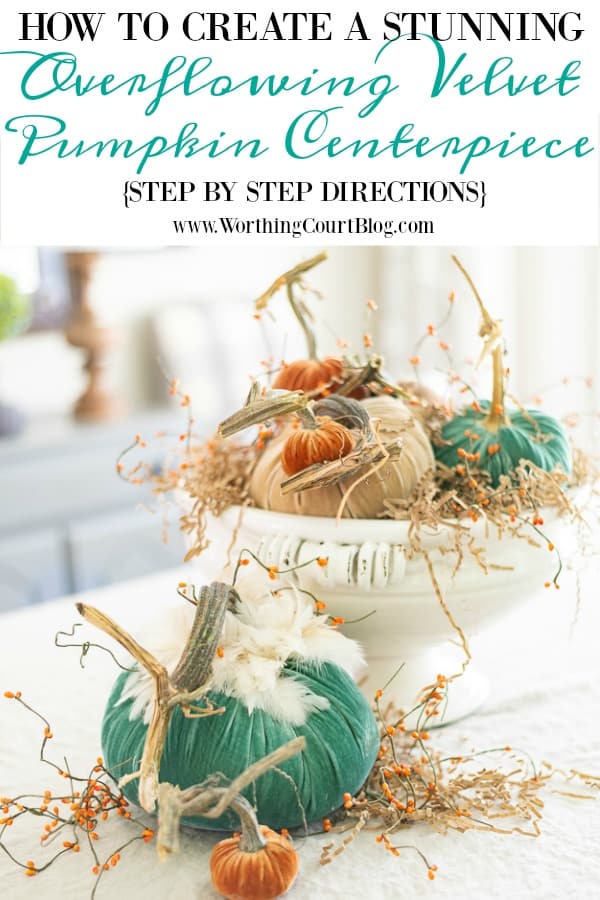
Here’s the trick to creating a pumpkin centerpiece that appears to be filled to the brim and overflowing with pumpkins. Appearances are deceiving though!
I was compensated for this post by LoveFeast. The original project, photos and opinions are 100% my own. See my full disclosure HERE.
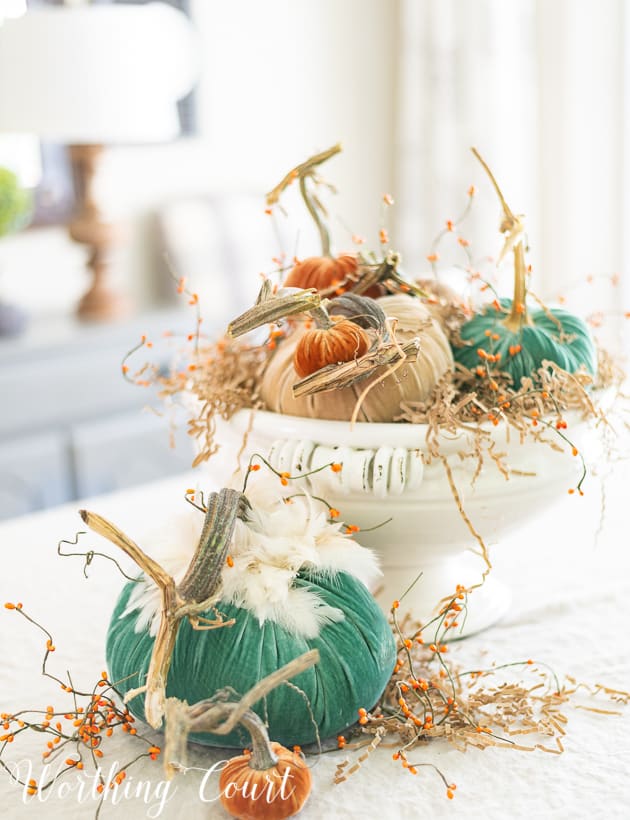
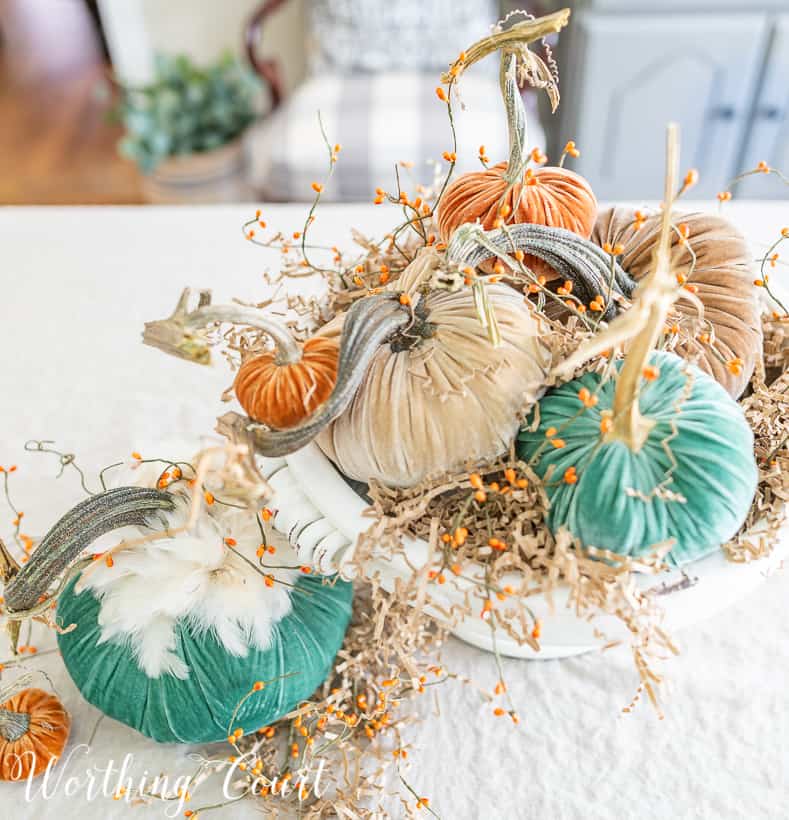
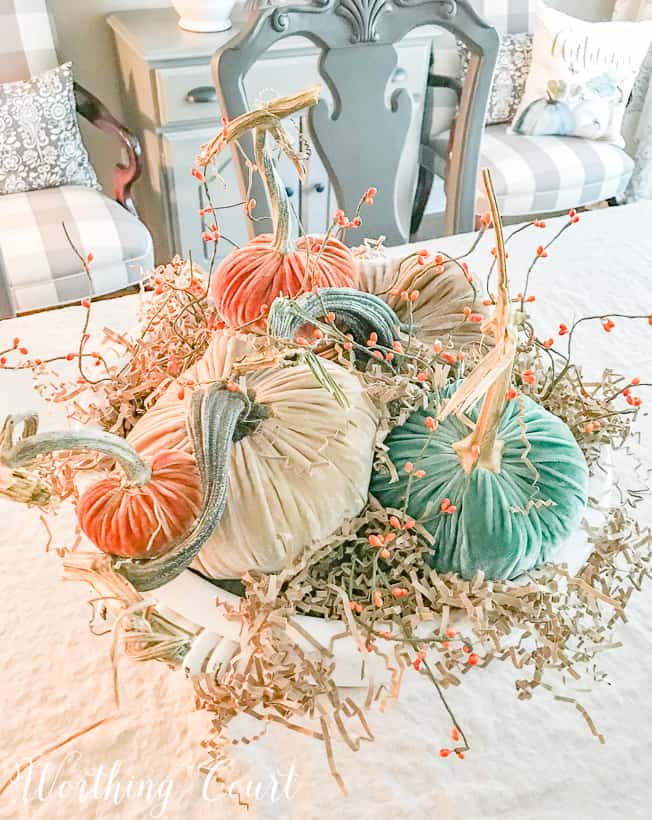
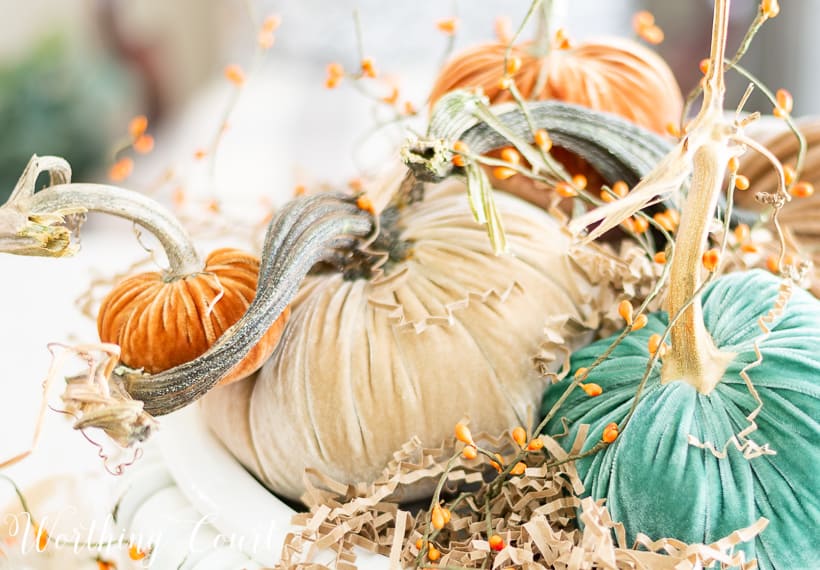
Since I was going for a stylish and luxurious centerpiece for my dining room, I chose to use velvet pumpkins, but you can apply these directions to whatever type of pumpkin you’d like to use.
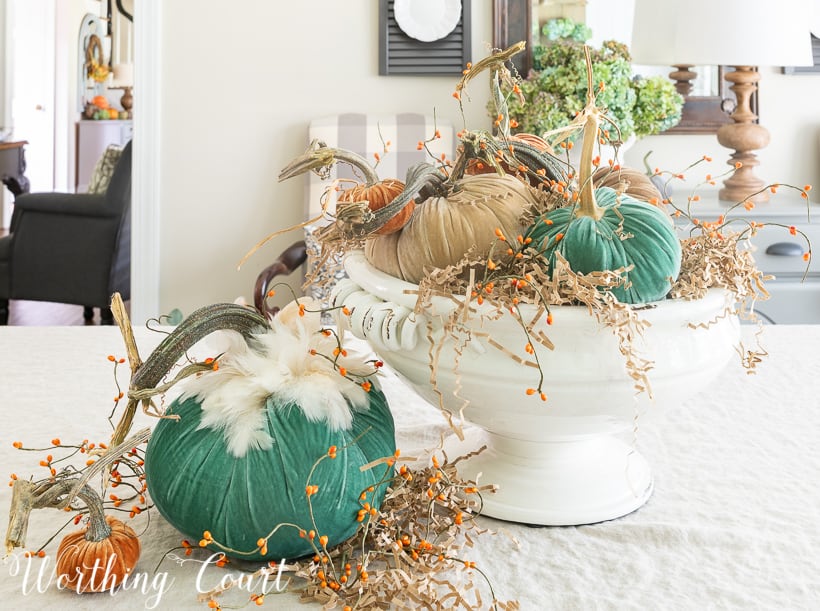
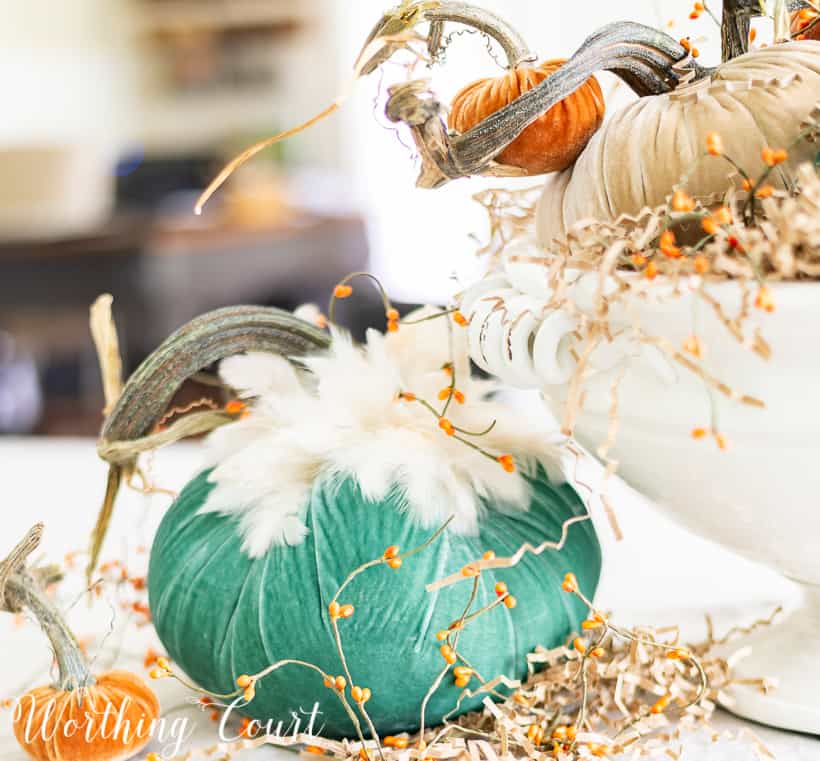
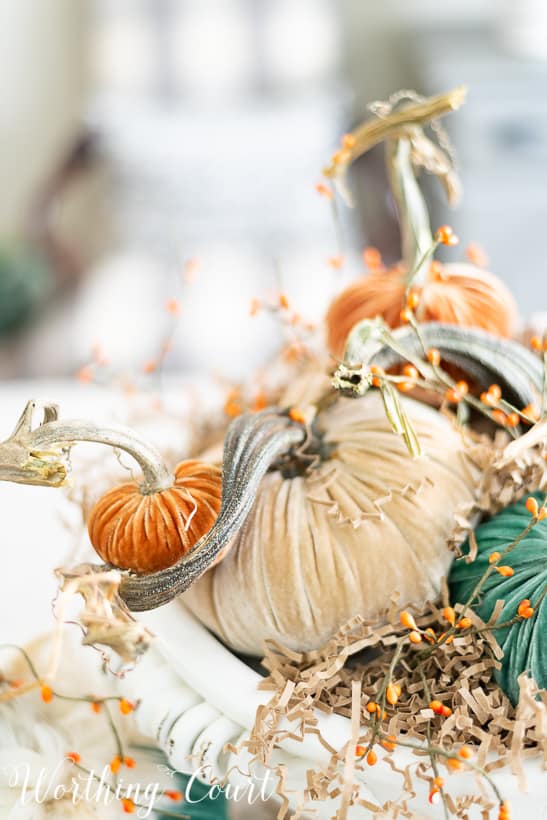
I love the mix of neutral, blue/turquoise and traditional fall russet mixed together, so to really set the colors off, I grouped them in a large, white footed bowl. Then for maximum impact I placed the centerpiece on top of a washed natural linen tablecloth. The colors just POP against the neutral background and are gorgeous!
I’ve said many times that I always think of a bountiful harvest when I think of what fall means to me, and this centerpiece captures that timeless look feeling perfectly.
But – this isn’t what it seems! If you’ve been reading Worthing Court for long at all, then you know I’m all about decorating on a budget. So, I came up with a super simple way for you to create a bountiful fall centerpiece without blowing your budget.
Creating a dramatic arrangement like this is so much easier than you think!
Let me show you exactly how I put my centerpiece together and then you can adapt what I did to fit your own home, the type of pumpkins and the container that you’re going to use.
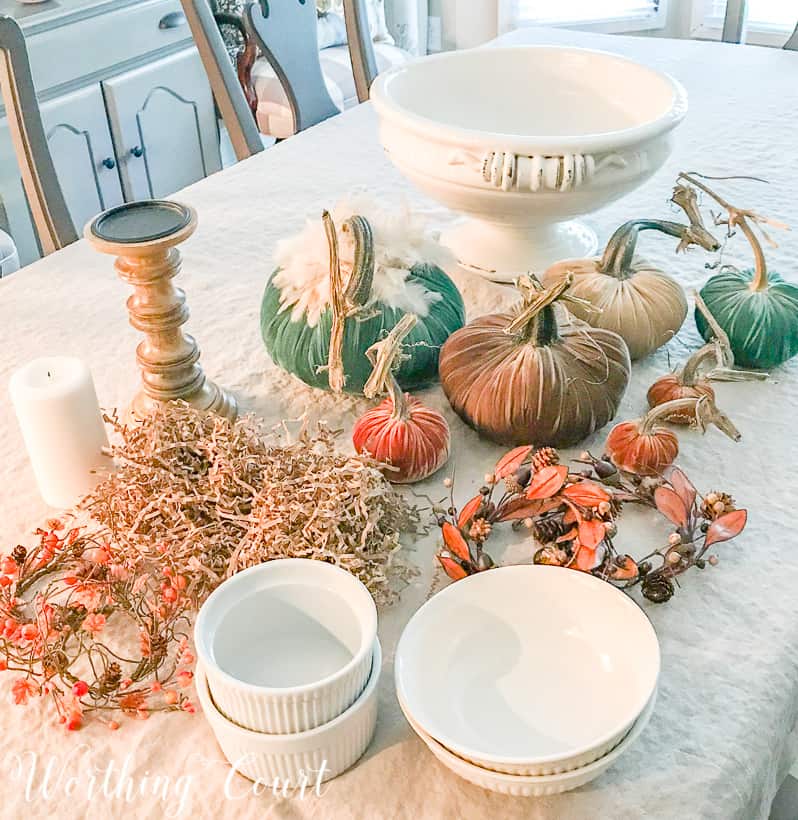
SUPPLIES:
- pumpkins of various various sizes and colors
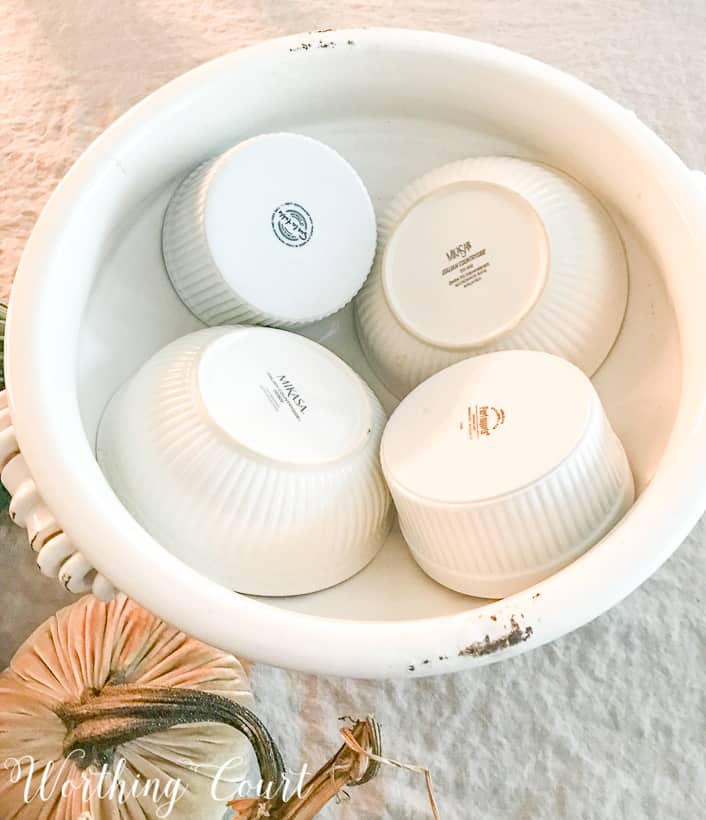
- a large container or footed bowl (the opening of mine is 14″ across and the bowl is 9″ tall)
- enough smaller bowls to fill the bottom of the container
- shredded paper crinkles
- berries.
You can ignore the candle and candlestick in the photo – I wound up not using them.
Let’s fool the eye!
DIRECTIONS:
To make it appear that the container is overflowing with pumpkins, fill the bottom with assorted bowls. I used a variety of bowls from my cabinets, turned upside down.
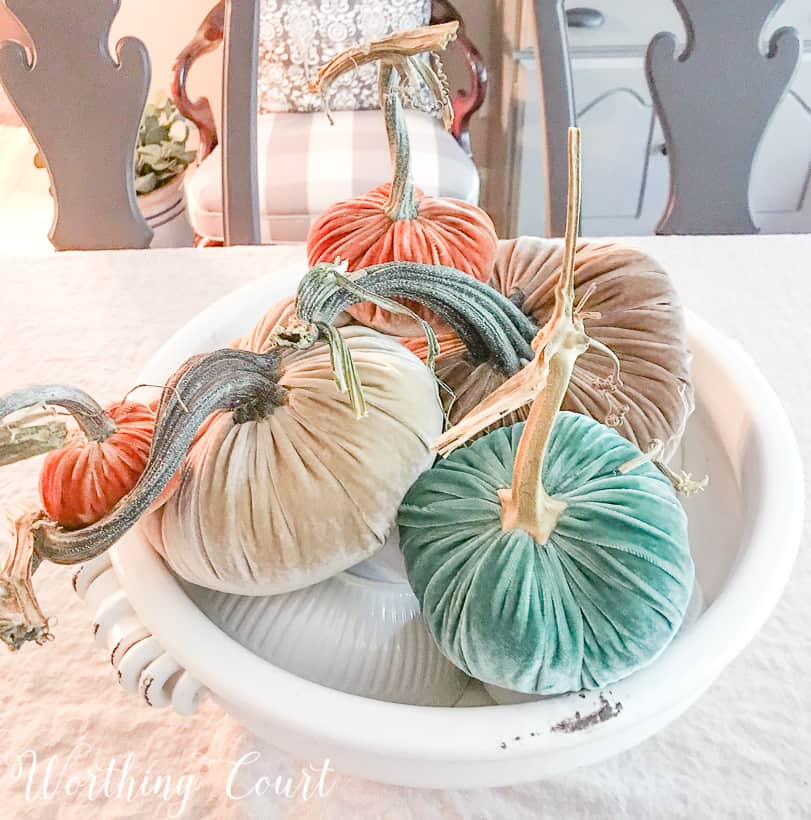
Place the pumpkins on top of the bowls that are turned over. Be sure to turn and tilt them at different angles instead of positioning them with all of the stems pointing straight up.
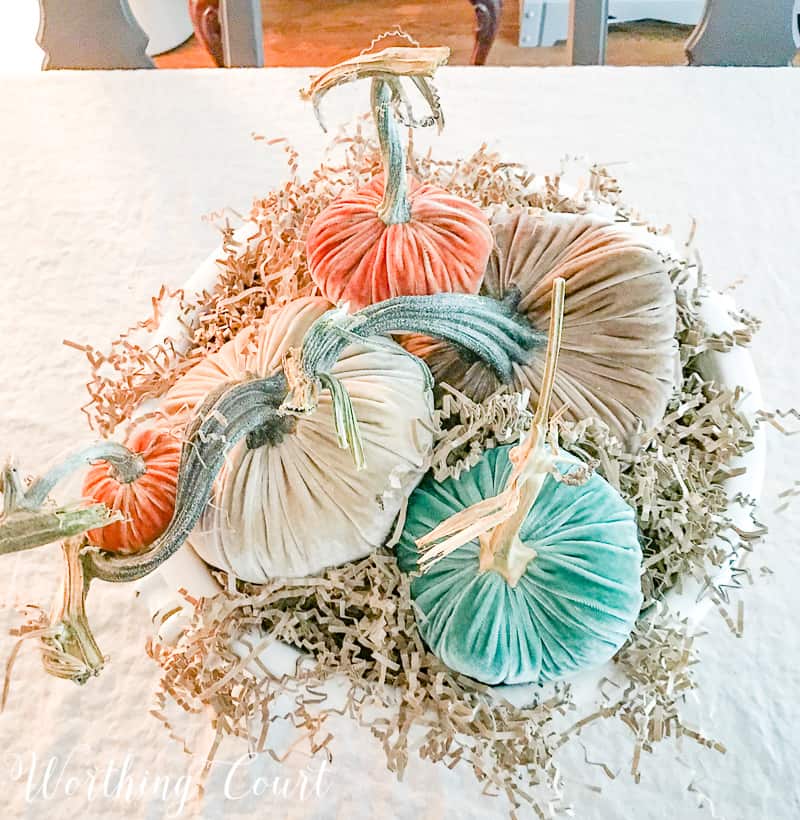
Fill in the empty spots with shredded paper, making sure to completely cover the filler bowls beneath the pumpkins.
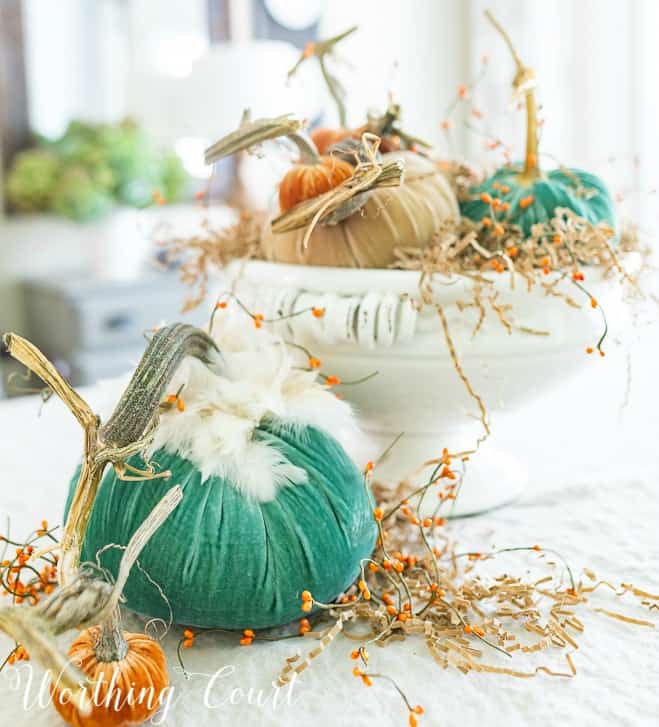
Tuck in pretty fall berries.
Give your centerpiece extra presence by adding a pumpkin or two off to the side, along with more of the paper crinkles and the same berries that you used in the container.
And voila – you have yourself a beautiful and bountiful fall pumpkin centerpiece. So easy and it looks like you’ve spent a fortune on pumpkins!

The light bulb came on – thank you. Have a huge wine colored soup tureen that would be wonderful for an arrangement but never came up with a solution to raise the items I wanted to show off. Am grabbing some bowls today. Thank you for the sharing your secret.
Glad you found some inspiration, Carol!
Beautiful arrangement! You are so clever and talented. I enjoy your blog and your Instagram photos. Thank you.
Thank you for being so sweet and encouraging!
So so pretty!
The use of crinkled paper as a filler is genius! I’ve used it for the inside bottoms of lanterns to create a soft looking base for whatever is displayed in them but never would have thought to use it as a filler.
I love crinkled paper too. One of my favorite things about it is the way you can make it look like it’s kind of dripping over the edges of a container.
I love the Hello Doormat. I need a new one and these look like good quality.
Looks AMAZING! I have a similar soup tureen so you have just give me another great way to display the gorgeous pumpkins. Nice work!
Mary Ann
Glad you found some inspiration, Mary Ann!
I love, love , love the feather touch on your velvet pumpkin!
I wish you could reach into the screen and feel them – they’re soooo soft!
You did an AMAZING job on your centerpiece, Suzy!!! Love the colors and the additional fall elements! Sigh!!!!
Thank you, Julie!
It’s so great to see a new take on the typical “ole” pumpkins. These are beautiful!
They truly are a work of art!
This is beautiful! Love the velvet pumpkins, they’re gorgeous!!
Thank you, Lindsay. Those pumpkins are to die for!
Suzy, you’ve outdone yourself! I love the idea of putting these adorable pumpkins in a soup tureen!
Thank you!
They’re so pretty!
Beautiful and easy! Love the pumpkins.
Love the pumpkins. This would be a great win. I love everything in the shop. Thanks for the chance. Happy Fall.
Love the pumpkin display on your dining room table. I have loved al of the bloggers using these amazing pumpkins. Each blogger has their own style shining through in the displays.
Looking forward to seeing your whole “fall home” this year.
I LOVE velvet pumpkins! They are my Fall weakness (and Fall is my favorite season)! Thank you for the great inspiration! I plan to do something like this now.:-)
I have to tell you I was at Goodwill yesterday and came across one of these velvet pumpkins! Are you sitting down ? A $1.99 yes I grabbed it as quick as I could and purchased it ! Along with a wonderful fall table cloth for 4.99 ! I couldn’t believe someone had donated that velvet pumpkin! It is going to grace my coffee table this week!
WOW! Thanks for telling me about your terrific score!
Suzy, this is gorgeous! And I love how your shared your tips on filling that bowl, genius!
Hugs, Jamie
I have never thought about using bowls in that way! What a great idea. I love your budget-friendly projects and this one is gorgeous!
Did you buy or make your velvet pumpkins? I’m new to your blog, so I may have missed the pumpkin making process. I love everything. Thank you.
I purchased my velvet pumpkins. 😀
Very cleverly done! The results are beautiful! I liked the addition of the crinkle paper especially.