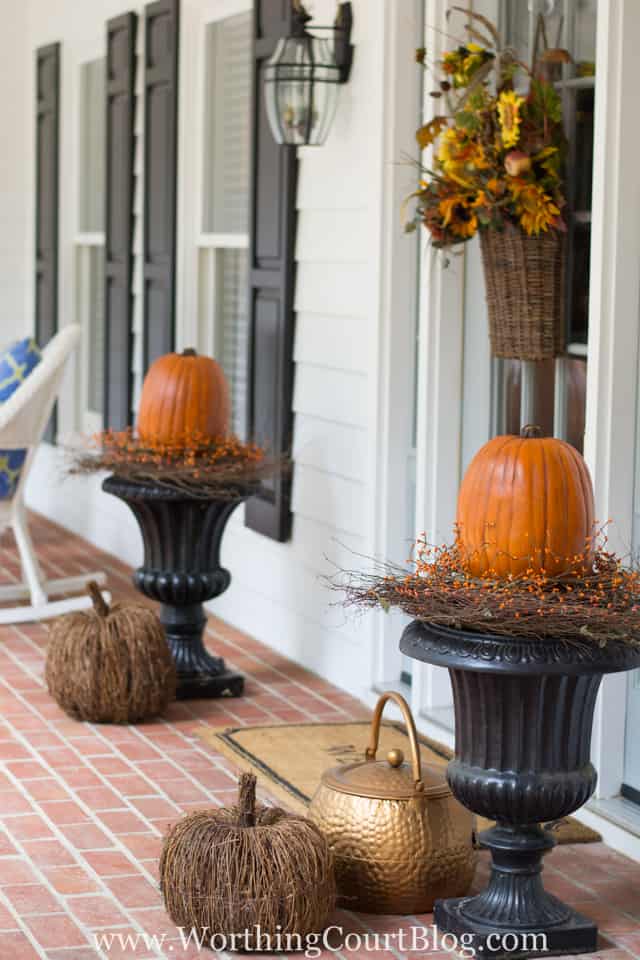
How To Create A Beautiful Fall Planter The Fast And Easy Way
Create a beautiful fall planter that will bring a splash of seasonal color to your entryway! This fall urn arrangement is the perfect solution for people who are short on time!
I love traditional mums for fall as much as the next person, but sometimes I just don’t have the time or the inclination to play in the dirt.
An added bonus to this planter is that I won’t have to replace mums that fade and die before the season is over. These planters will last right up until the last pumpkin-pie-eating-guest has exited the door after Thanksgiving! Let me show you how incredibly easy this DIY fall planter is!
Supplies needed for each planter:
13″ Tall faux or real pumpkin – Mine are faux
Dark finishing wax
Throwaway brush and rag
28″ Sunburst grapevine wreath
15″ Regular grapevine wreath
Pip Berry Garland
Wire cutters
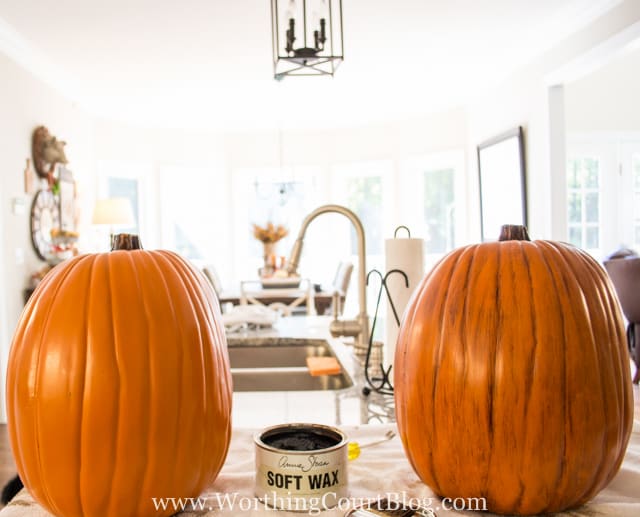
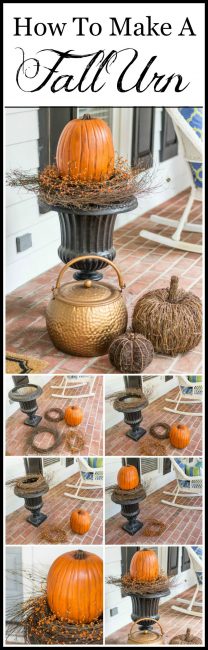
Step 1 – Get rid of the bright orange color of the pumpkins by brushing them with the dark wax and then wiping the excess wax off until your desired pumpkin color is achieved. After waxing and wiping them down, allow them to dry overnight (very important) so that the wax won’t rub off when they are handled. The pumpkin on the left hasn’t had any wax applied to it yet. The pumpkin on the right has been waxed and wiped down to the final look that I was after.
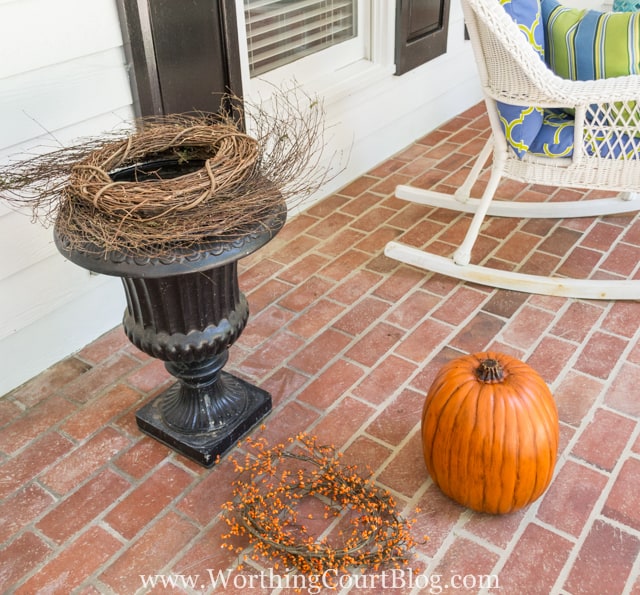
Step 2 – Place the 28″ sunburst grapevine wreath on top of the rim of the planter. If your urn is smaller than mine, you may need a smaller wreath so that it won’t fall down into the container.
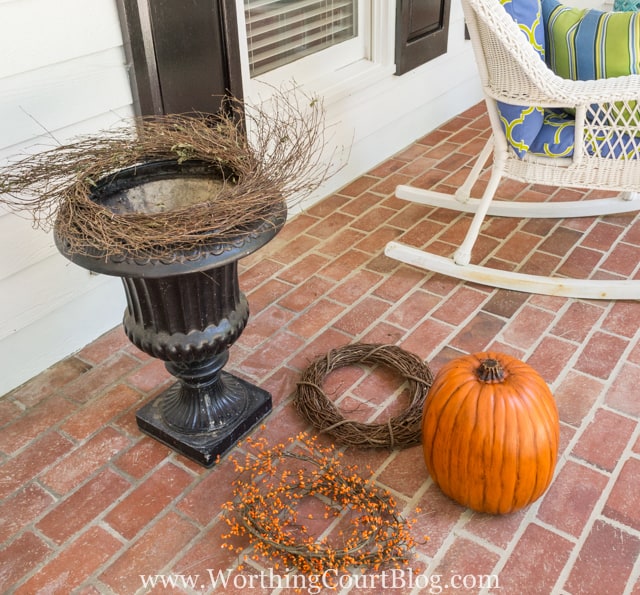
Step 3 – Place the 15″ grapevine wreath on top of the sunburst one. Again, if your urn is smaller, you may need a smaller wreath.
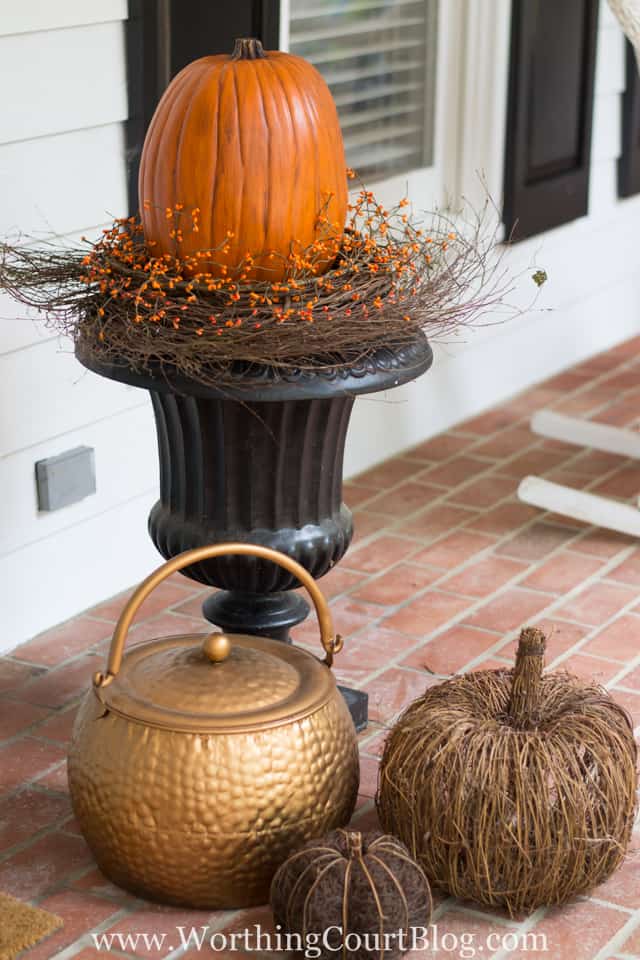
Step 4 – Place the waxed pumpkin on top of both of the grapevine wreaths, over the opening of the wreaths. Just a note – I had to clip away some of the twigs from the inside of my wreath so that the pumpkin would sit properly.
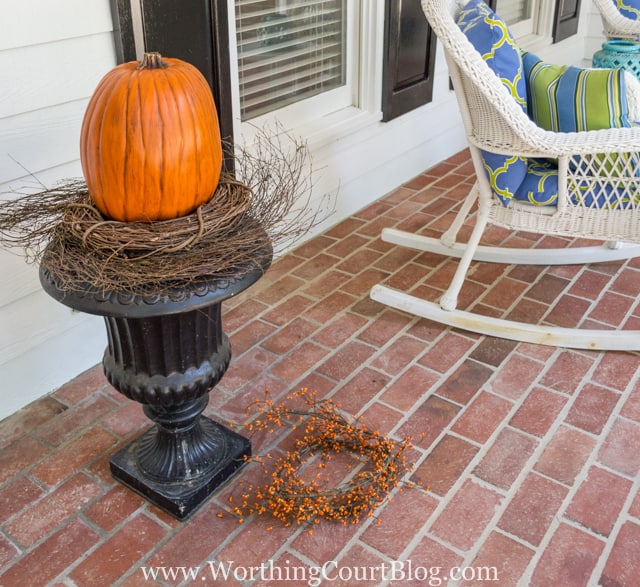
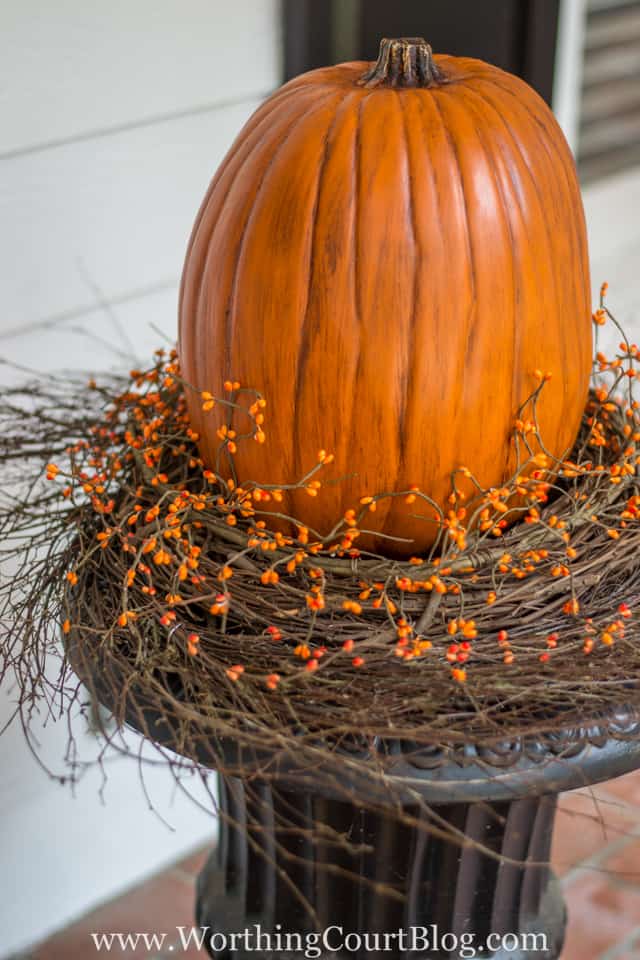
Step 5 – Wrap the pretty pip berry garland around the grapevine wreath and pumpkin, fluffing, bending and twisting it as necessary. Clip the excess garland off with wire cutters.
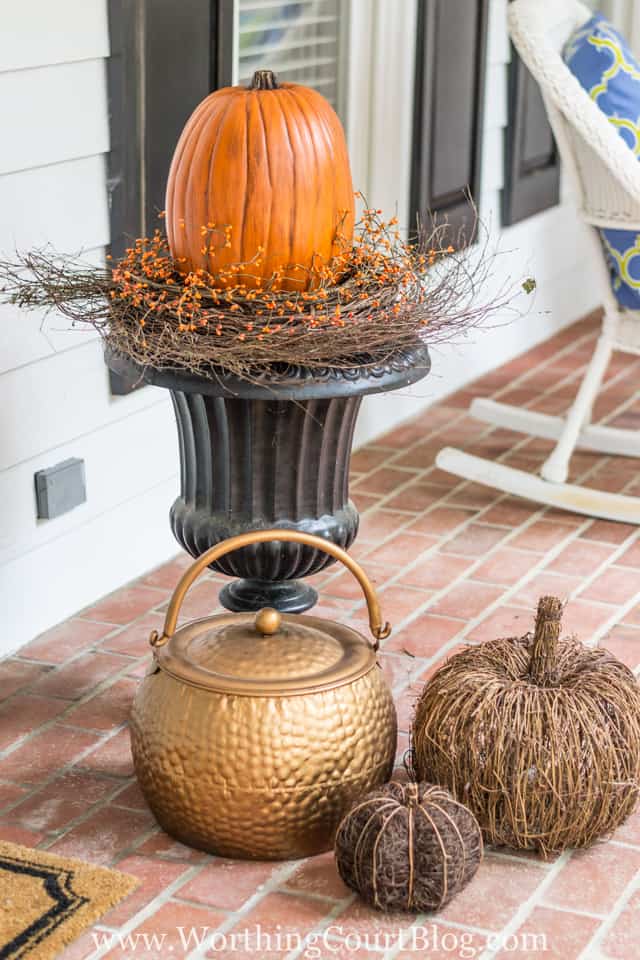
Your beautiful DIY fall planter is finished! Enjoy!
Don’t forget to Pin It for reference!
Yep, that’s a classic!
Suzy – I love your fall urns and the wonderful look of the front porch and your new door. Thank you for sharing this wonderful project at the Thursday Favorite Things Blog Hop! You are one of my features on Tuesday Treasures. Hope to see you again this week!
Thanks for making it easy!
I love this idea!! So easy and looks great!
Love it! Thanks for sharing. Enjoy your day.
Hi Suzy,
thanks for the inspiration! I have two urns by the front door, i never seem to do anything with. Heading over to Hobby Lobby, I think they have their fall decor on sale! Anyway to upload any photos to show you what we’ve done with your ideas? You’ve made decorating seem so easy!
Hi Mary. Unfortunately, there isn’t a way to upload photos to my blog, but I’d love to see what you’ve done! Could you email them to me?
Everything always looks beautiful and inviting. I was looking for the transformation of the outside of the house and can’t find them. Can you repost? I am looking for some inspiration!
Happy fall!
Hi Andrea. I haven’t done a full post about the exterior of our home, but you can see the before and after of the front in a photo in this post: http://www.worthingcourtblog.com/purchase-a-fixer-upper/
Love the urns! Thank you for these great tips and ideas! God bless and please keep Texas in your prayers
I love decorating with pumpkins of all sizes both outside and inside my home. Thanks for another great idea.
Thanks for the reminder…I love this idea! 😉
Your urn decor is very similar to what I do, but I never used finishing wax. As always, you’ve provided even more inspiration! Love that these will transition from September through Thanksgiving with no dead mums to deal with!
Thanks for the idea, have all i need to do this!So cool looking!
I love this. I’ll be copying thus planter idea – and maybe I can keep them alive!!
Hi Susie,
This is exactly what I need. I also love fall mums but feel the way you do. I just don’t have time to deal with the mums not lasting and having to re-do my planters, boxes etc. halfway through October. Love this planter idea. The wax also makes the pumpkin looked “aged”. Thanks for all the tips.
Even though my planters are planted with evergreen cast iron plant, I can still adapt the vine and berry wreath at the base of the plants/top of the planter. The pumpkins will sit at its base! Love the wax idea to give them a more realistic look! Thanks Suzy for the wonderful inspiration!
Great idea! I learned of the waxing or staining technique from a fall craft fair. The gentleman created the most beautiful arrangements using faux fruit that started life looking very bright in color and quite frankly, cheap and fake. Just by applying stain and wiping it off, the pieces became very elegant looking! Love your fall planter creation! Thanks for sharing!
Had not thought of using the dark wax…Thanks!
What a great idea! I really love doing the dark wax on the pumpkins. I will definitely try that one?
So SIMPLE but elegant……will be working this idea into my fall decor. Love the wax idea…..never thought of doing to my pumpkins.
So SIMPLE but elegant………will be working this into my fall decor.