How To Make A Rustic Blanket Ladder For Under $20
A rustic ladder is a great way to display and store pretty throw blankets. This tutorial will show you how easy it is to build one yourself for under $20!
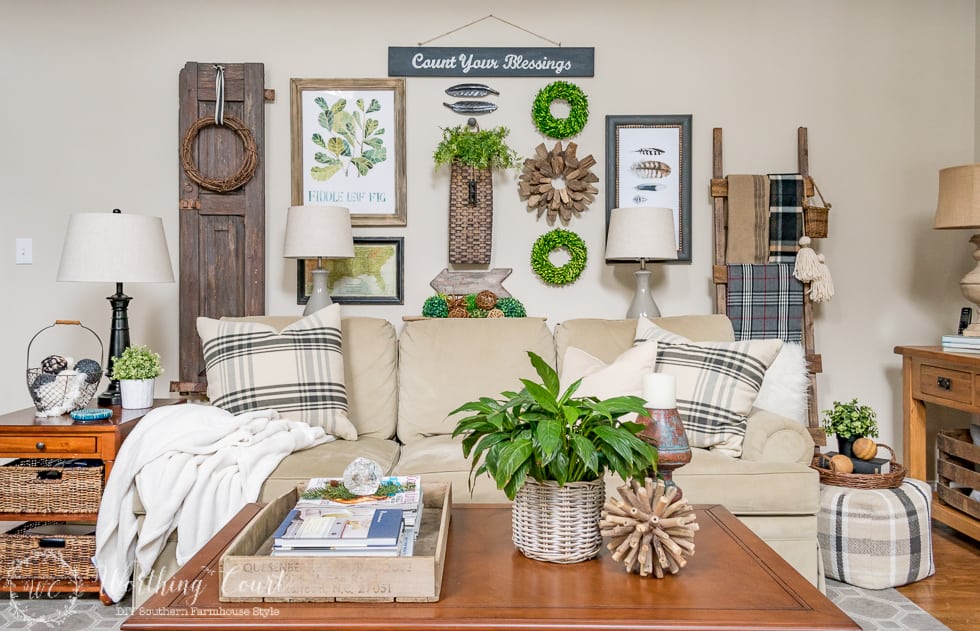
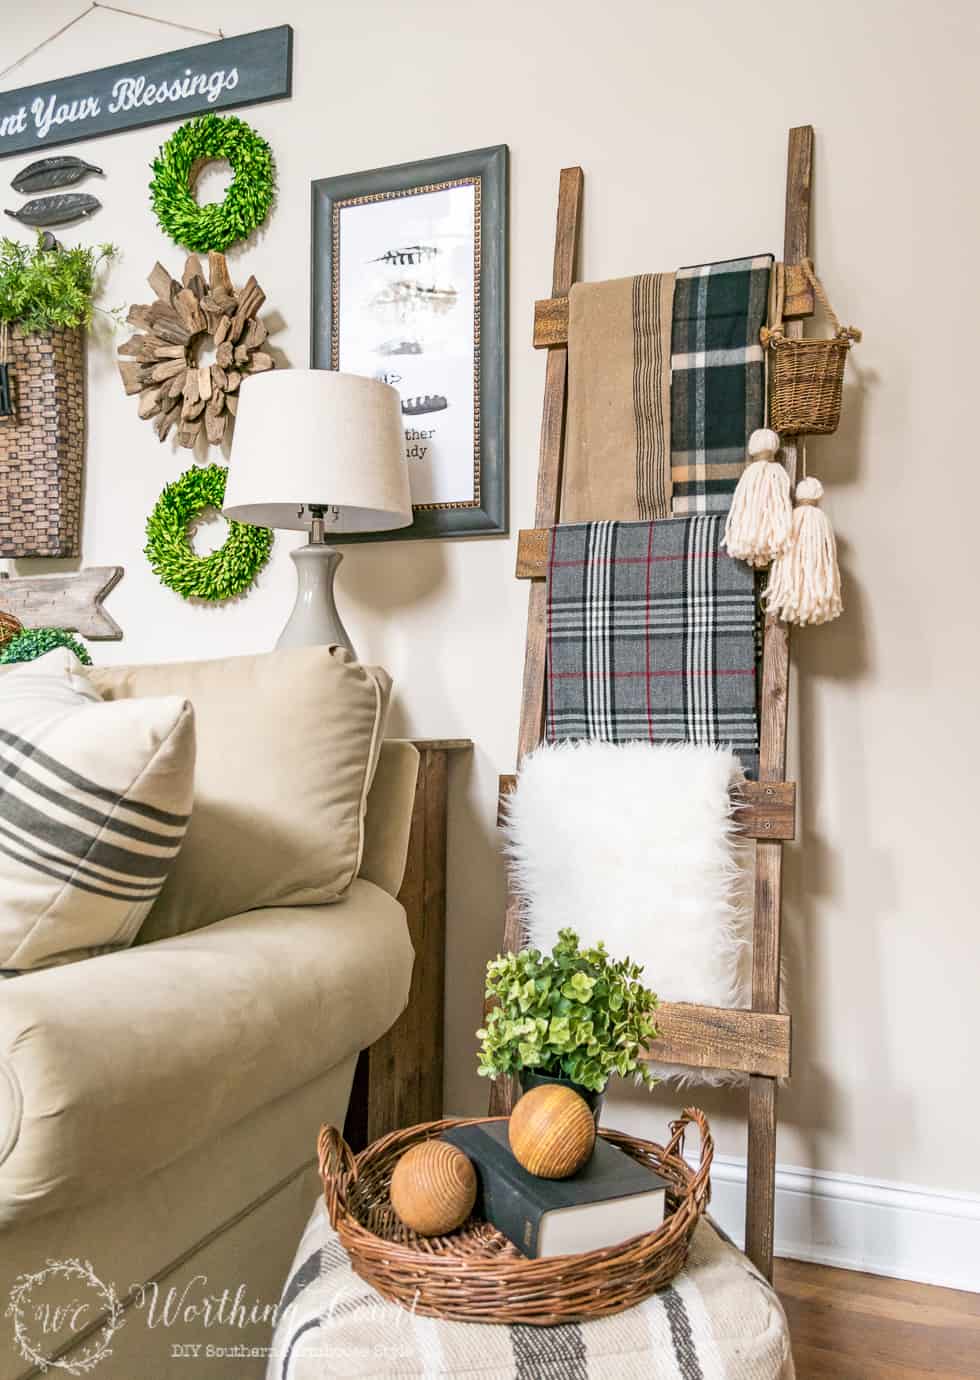
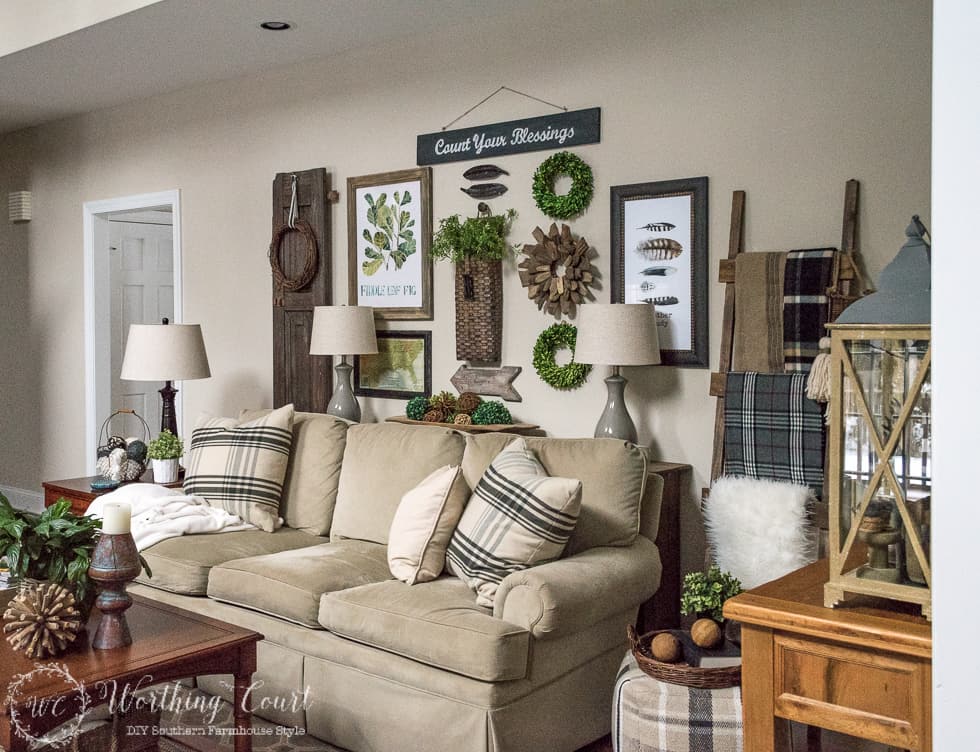
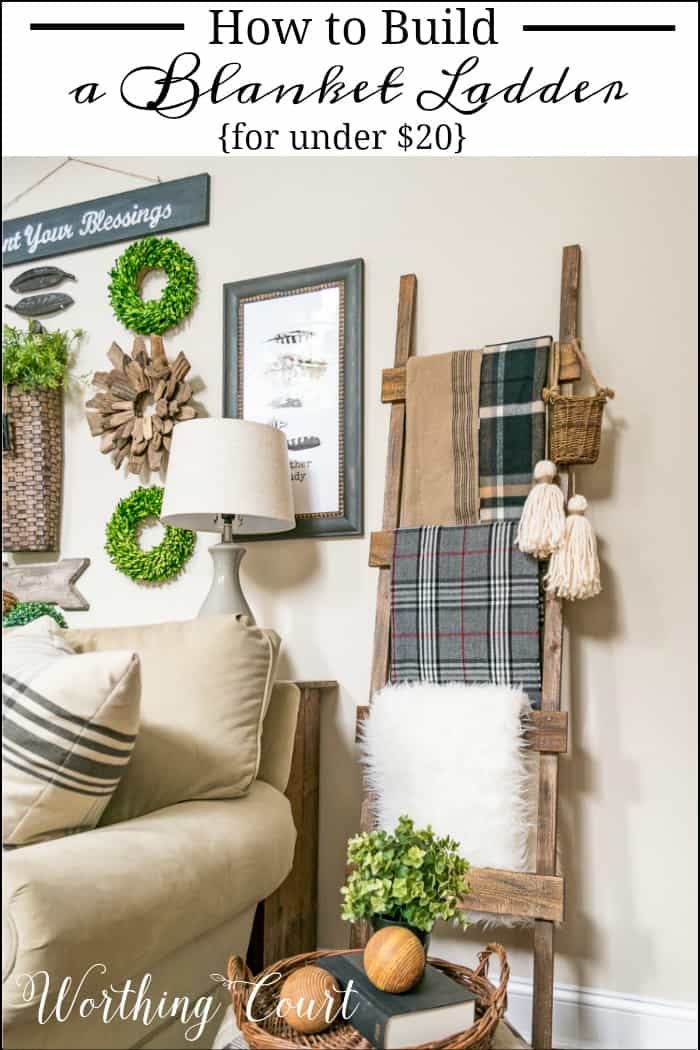
Hi everyone. Thank you so much for all of your sweet comments about my New & Improved Gallery Wall in our family room! As I mentioned in the reveal post, my first attempt at the gallery wall always felt too sparse to me. After some brainstorming and experimenting, I decided to leave most of the bones of the original gallery and add a few key pieces to it. And one of those statement pieces that I added is the rustic blanket ladder shelf that you see to the right of the sofa.
I’ve wanted a ladder for a loooong time, but those bad boys cost way more than I was willing to pay. The price of authentic wood ladders has skyrocketed – there’s no way am I going to pay $250 for something that I could easily knockoff myself. I made mine for under $20, not including the cost of paint and stain because I already had those on hand.
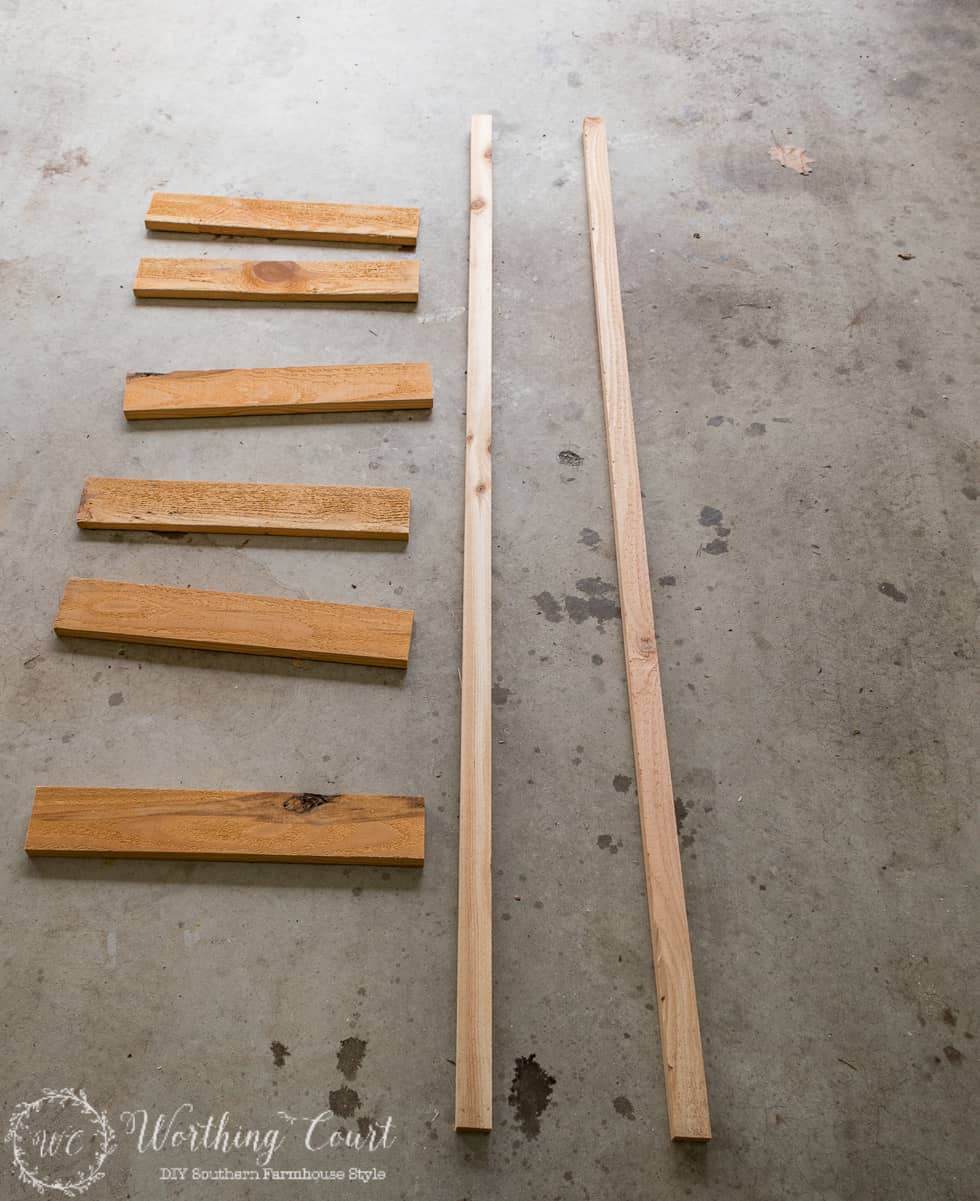
I think you’ll find this is a super easy DIY project that you could make in an afternoon (depending upon drying time for the paint & stain). Below are the supplies that you’ll need to make a 6′ tall, 18″ wide ladder with four rungs. Of course, you can adjust the amount of lumber you need based on the size ladder that you want to make.
Supply List
2 – 1x2x8 boards – I used cedar instead of pine boards. The cedar boards are rough on one side, which contributes to the rustic look.
1 – 1x4x8 board – Again, I used cedar.
20 – wood screws
Drill
Saw
Black paint (any type will do), gray stain, wood colored stain
3 cheap paint brushes
Step 1: Cut the lumber to size
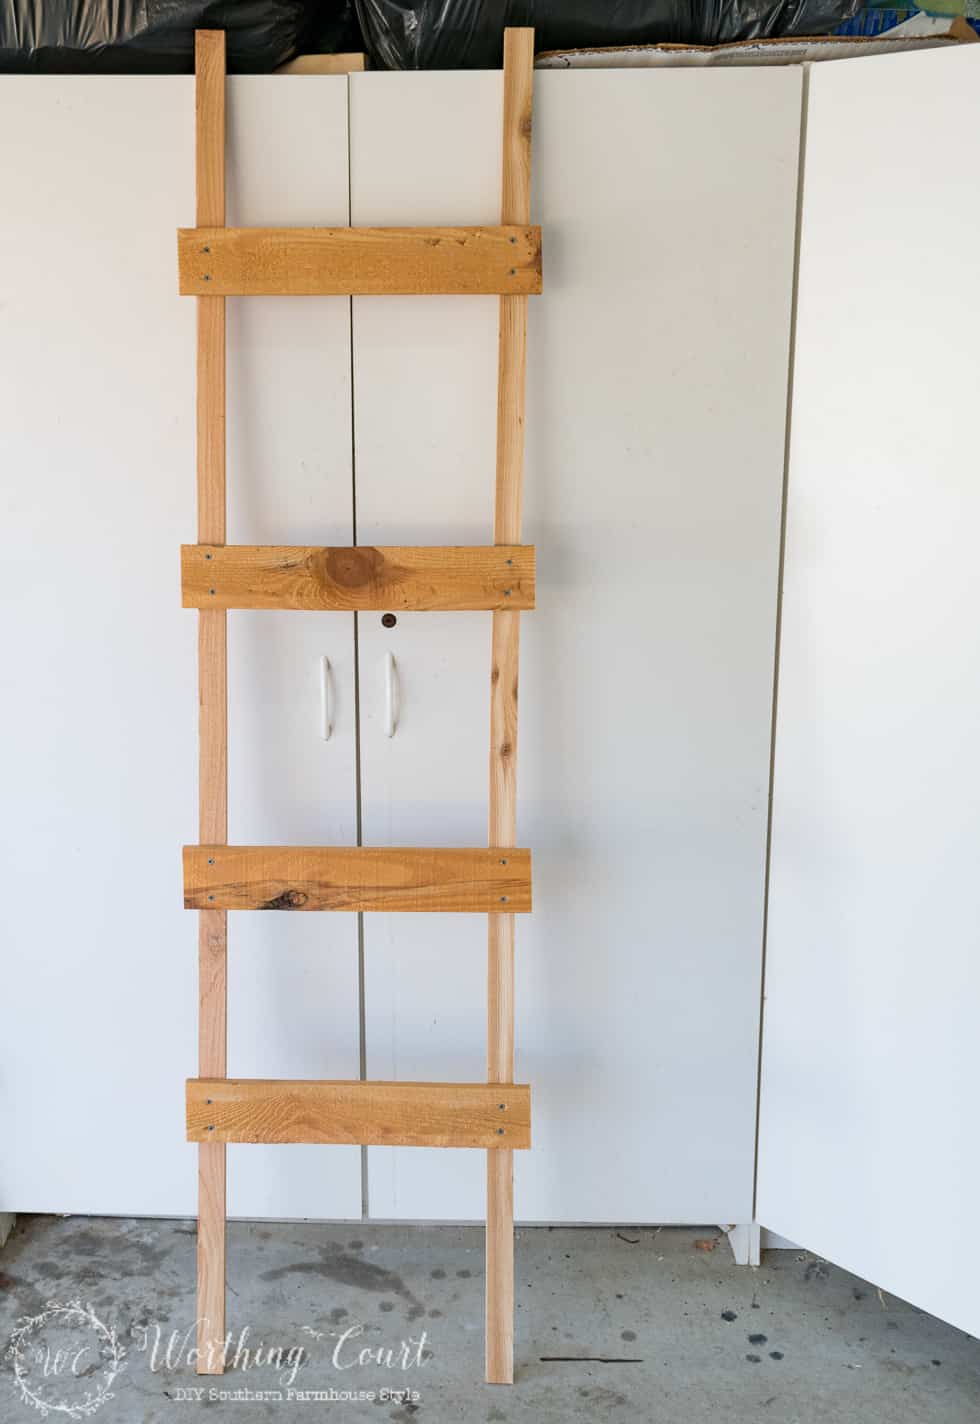
I cut each of the 1x2x8 boards to 72″ long (these will be the sides) and the 1x4x8 board into 18″ long pieces (these will become the rungs). There are six pieces of 1x4x8 in the below photo, but I wound up only using four of them on the ladder.
Step 2: Assemble the pieces
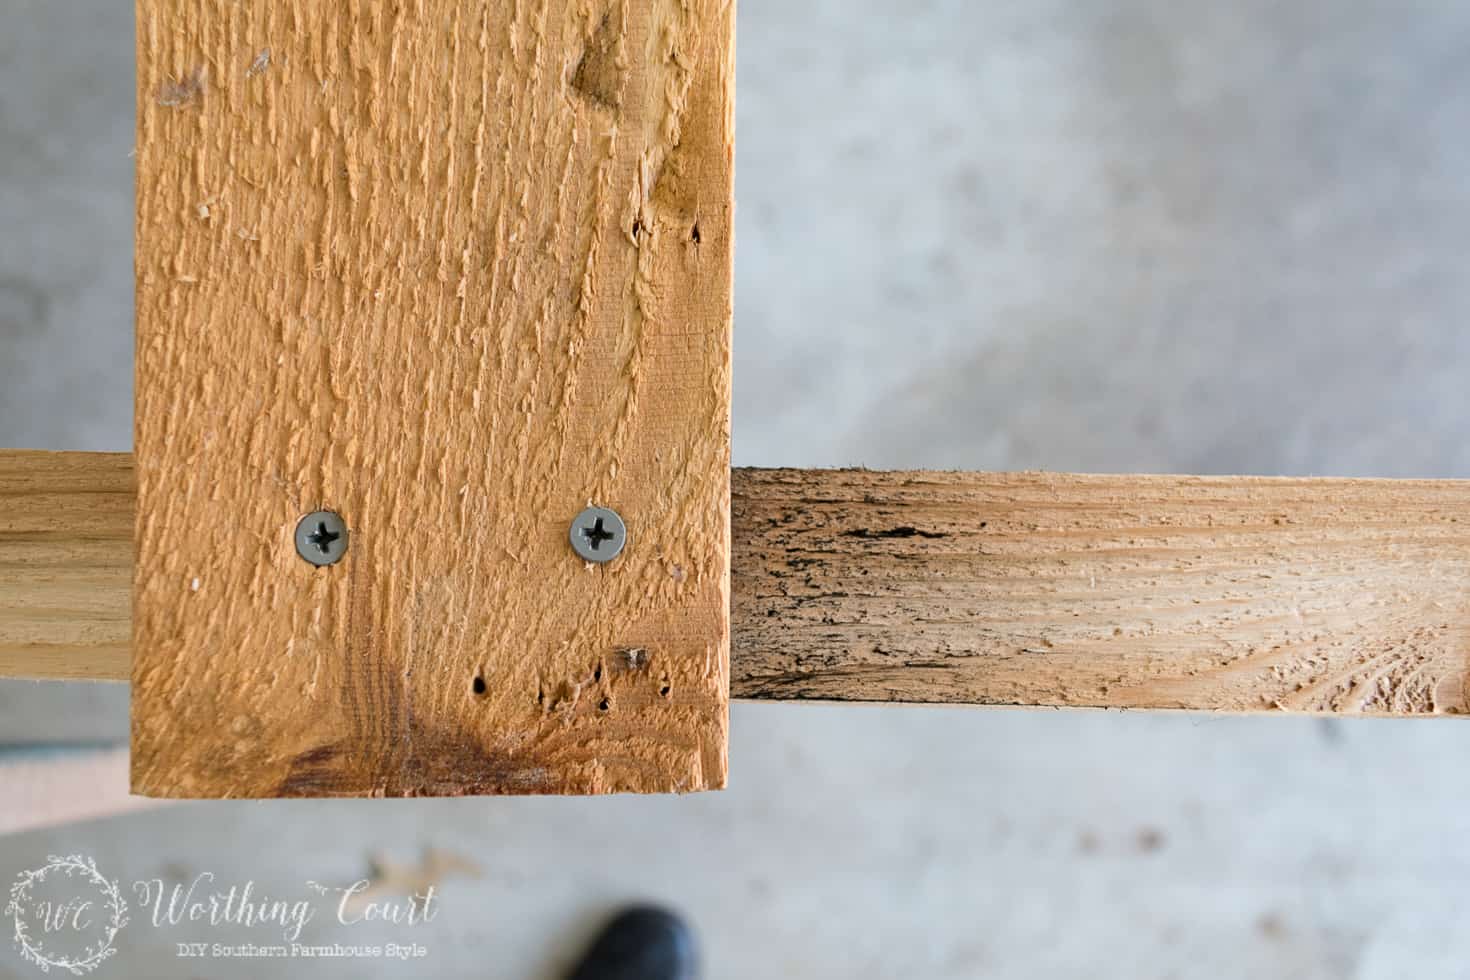
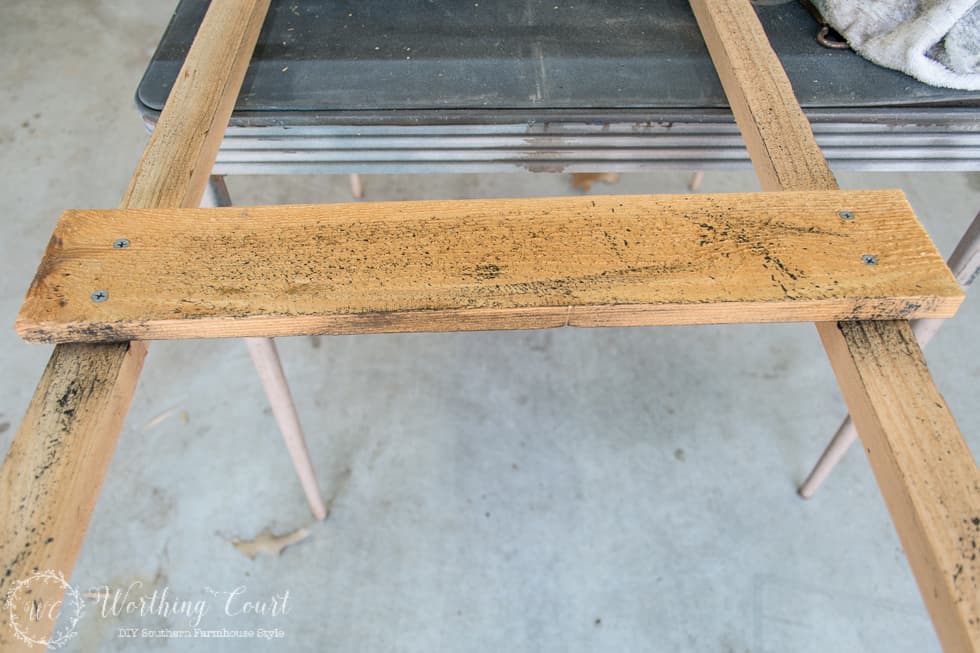
Lay the 1x2x8 boards side by side, at 16″ apart, making sure that the top and bottom of the boards lines up. If you’re using cedar boards, turn them rough side up before assembly. Determine the location of each rung and attach the rung to each side board using two wood screws. When attaching the rungs, allow them to hang over the side boards by 1″ on each size. This will give you an 18″ wide ladder. Make sure they’re level from side to side or your ladder will wind up being wonky.
All assembled and ready for finishing. You can see that I didn’t get my rungs spaced evenly apart. That’s ok – this is rustic farmhouse ladder, remember?
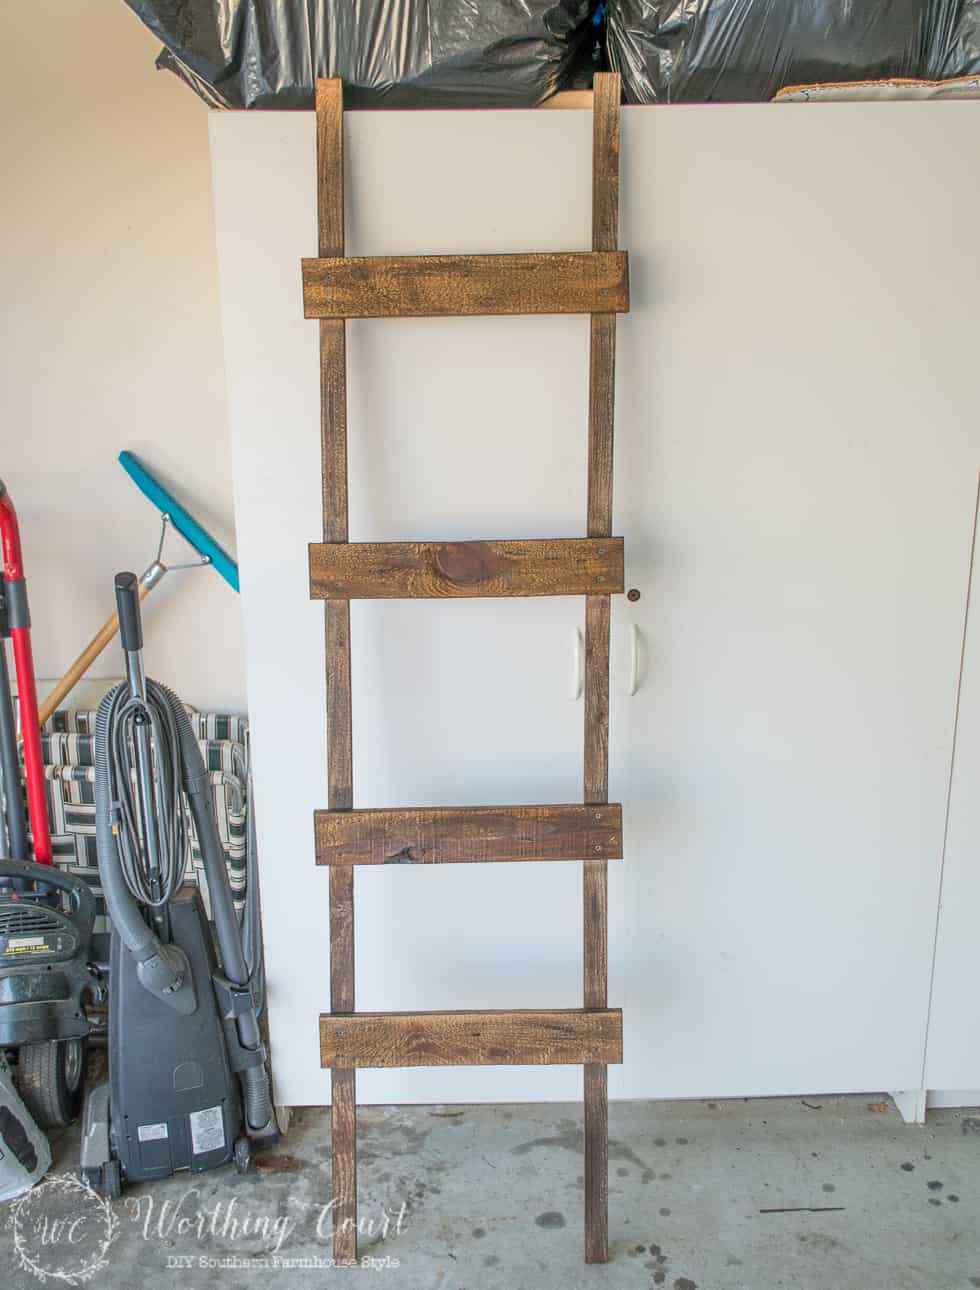
Step 3: Paint and stain
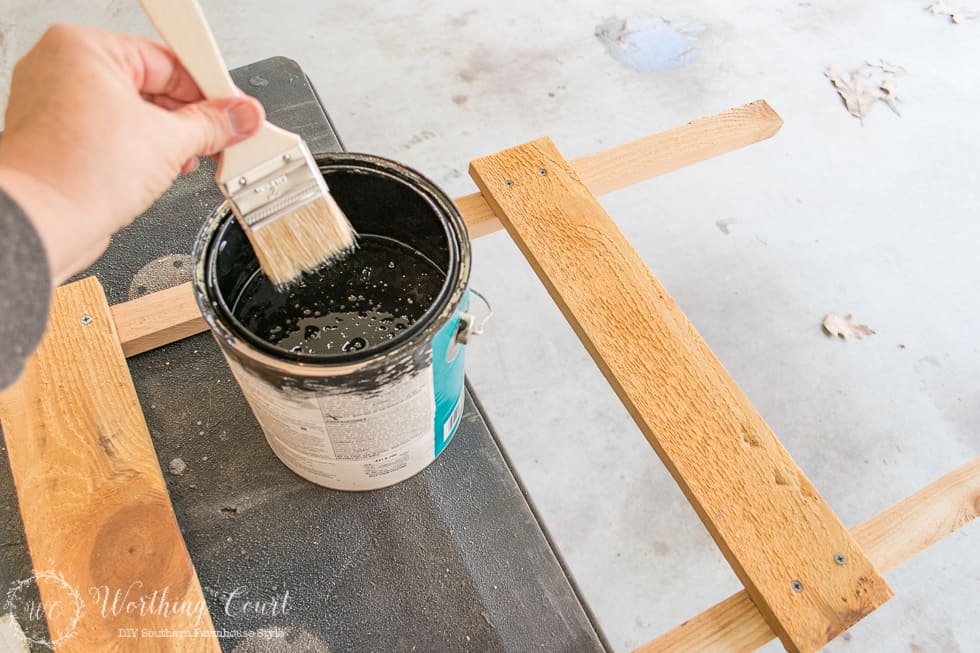
To finish the ladder, I used black latex paint (that was leftover from painting the handrails in my foyer), Rust-Oleum Weathered Gray Wood stain and Minwax Wood Finish stain in Special Walnut (leftover from refinishing our floors).
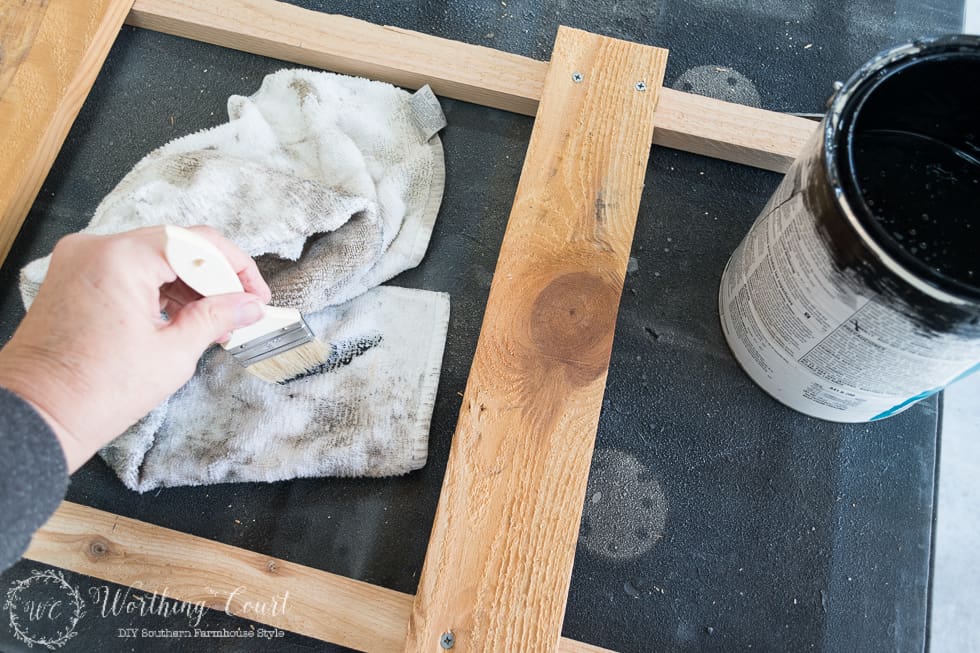
Strategically apply the black paint using a dry-brush method. To dry-brush, dip the tip of the brush into paint…
…then wipe most of the paint off on a rag. Start out with less paint that you think you’ll need because you can always add more.
What do I mean by strategic painting? Well, I knew that I wanted my DIY ladder to look old, vintage – kind of like it had been sitting in someone’s barn accumulating dirt and grime for years. I thought about where an old ladder like that would have accumulated the most gunk and look the dirtiest. I decided that it would be at the top of each rung, where they are attached to the sides, and along the edges of every board. So, I started off lightly dry-brushing black across the surface of each board. Then I brushed it along the edges of each board, using slightly firmer pressure.
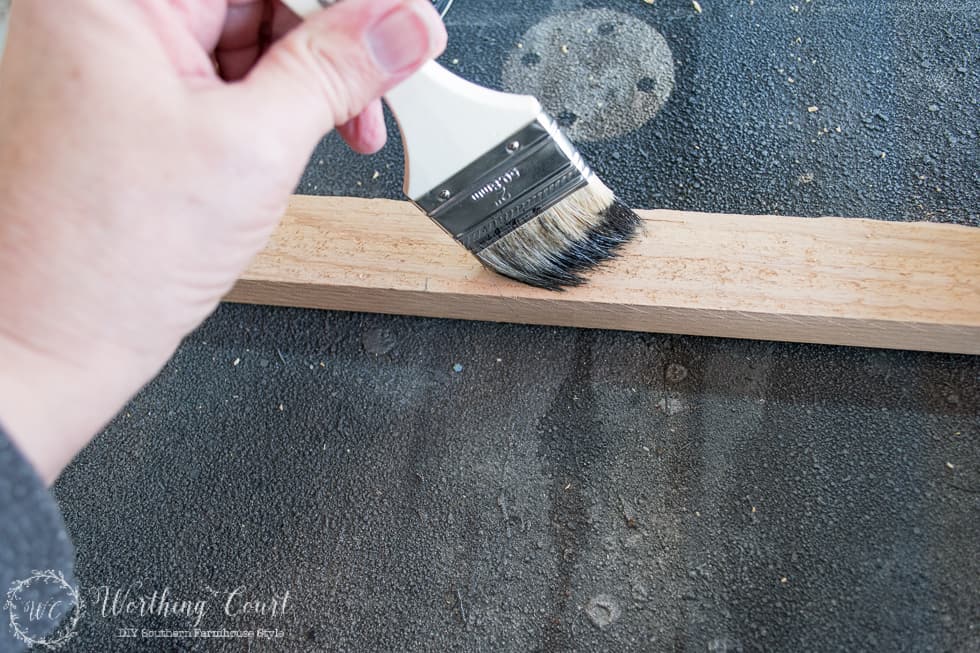
After dry-brushing, I added a little more paint to my brush and used my finger to flick some black spots onto the boards. Think about those dark spots (mildew, I guess?) that you see on old, old boards. Lastly, I started working some of the black paint into the areas where each rung was attached to the sides. Remember, I want the ladder to look like it has been accumulating gunk for a long time.
Allow the black paint to dry and then apply the gray stain, using the same dry-brush method. Once the gray stain has dried, apply the wood colored stain. Make sure you apply the paint and stain to every surface – the front, the sides and the back of the ladder. Sorry, no pics of these steps! Here she is all finished.
See the difference? What do you think – does it look old now?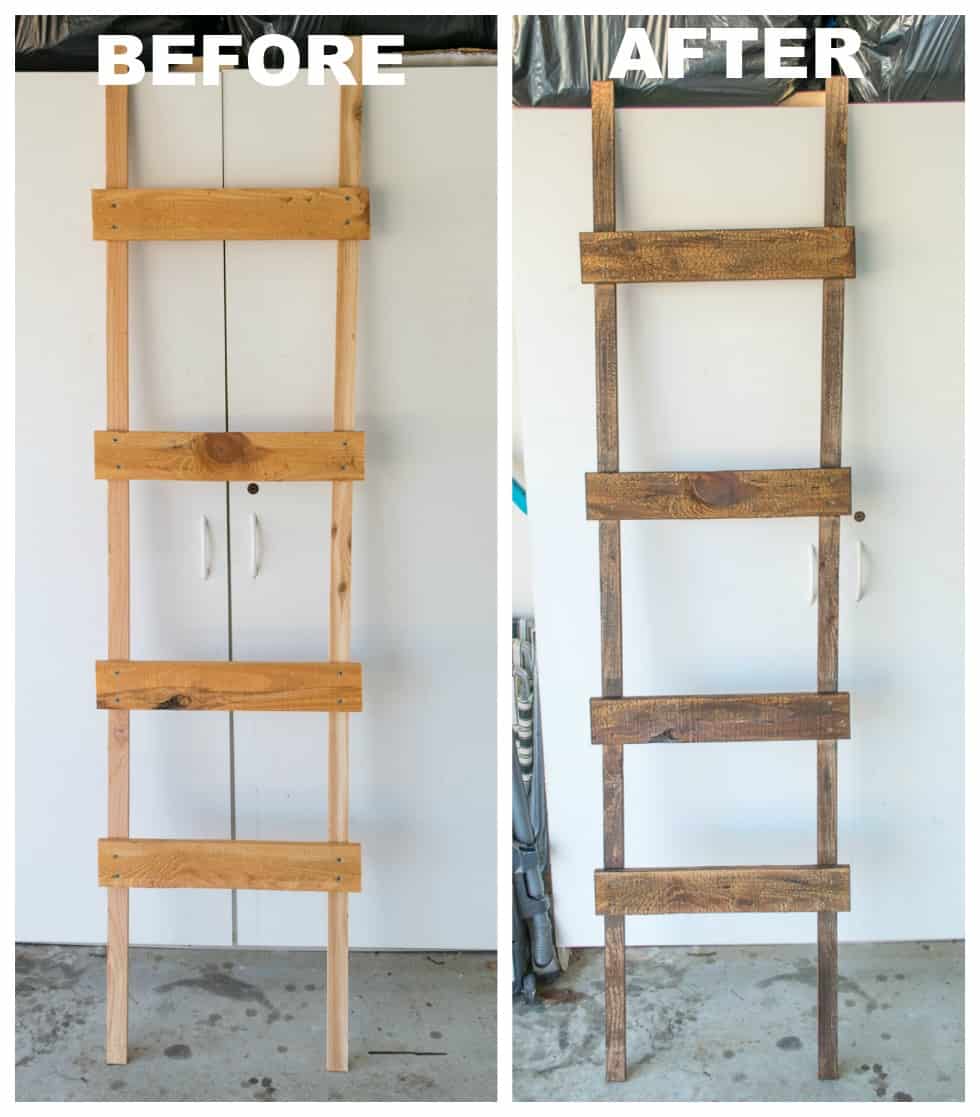 After leaving the ladder out in my workshop (aka the garage) for a few days to get rid of the stain odor, she was ready to come inside the house to be dressed!
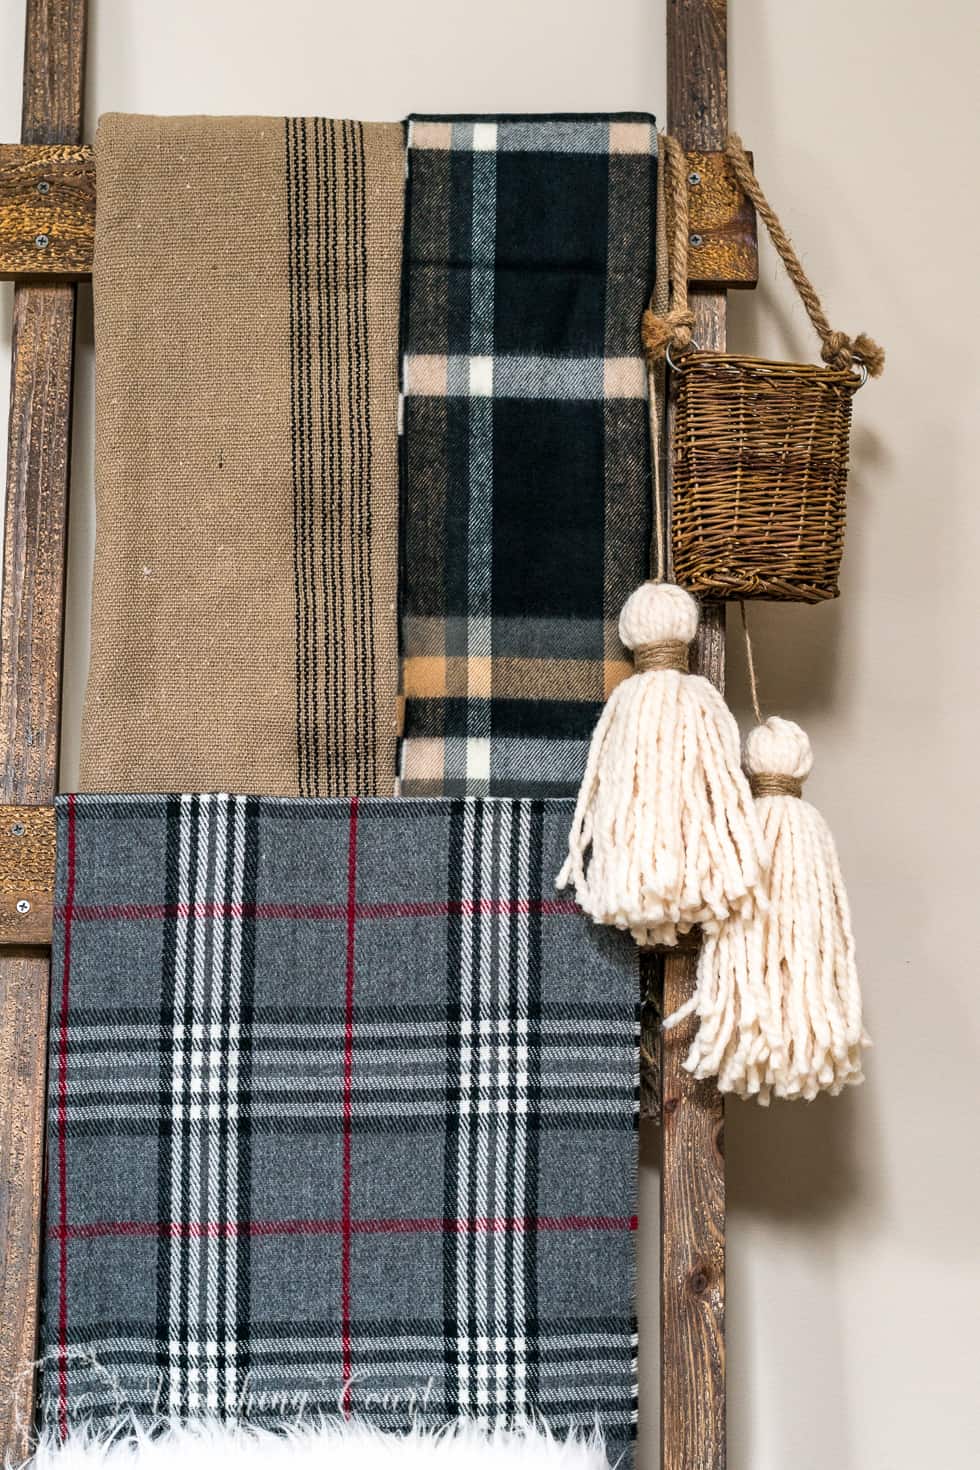
I filled her up with texture and warmth, aka throws and a couple of scarves! Plus I draped a couple of diy chunky tassels over the top rung to add some instant personality. The addition of this little hanging basket was just for good measure.
Several of you asked how I made my rustic wooden ladder, so I hope this tutorial helps. As always, let me know if you have any questions!

You ladder project looks awesome! The whole room look amazing. Those pictures are stunning!
We are bowled over by this! I love anything rustic and have been meaning to do a ladder for the longest time..I can imagine a couple of spring themed cushions, couple of books..some tealights on them and the ladder against my garden wall. Dreams!
We love that you party with us and bring us such deliciousness. We have FEATURED you this week at #SaucySaturday! Thanks for joining us.. Xo
Thank you for this tutorial! I saved it knowing there would come a day when I was ready to make it. Today is the day. Yay! Off to get the 1x2s now 🙂
I realize that I am in the minority here, but I think the wall could use some editing. Just sensory overload for me. The individual pieces are great, but with everything on the wall, plus the patterns and the other objects in the room, etc. it overwhelms.. and becomes a blur.
I’m so going to make one of these ladders. Thanks for the step by step instructions
This rustic ladder is now on my ever growing to do DIY projects. Thank you for a
ALL you wonderful ideas.
Beautiful room! I love the blanket ladder. My husband has some weathered boards laying around I could make it with.
Love the blanket ladder! I’ve noticed it in several of your posts and I love the way you change the things hanging on it seasonally. It really is the perfect rustic, and practical, touch! I think I might try to replicate this and I really appreciate your tutorial! Thanx!
Thank you for sharing the tutorial & your beautiful wall! Great inspiration for my family room in our new home that I can’t seem to decorate!