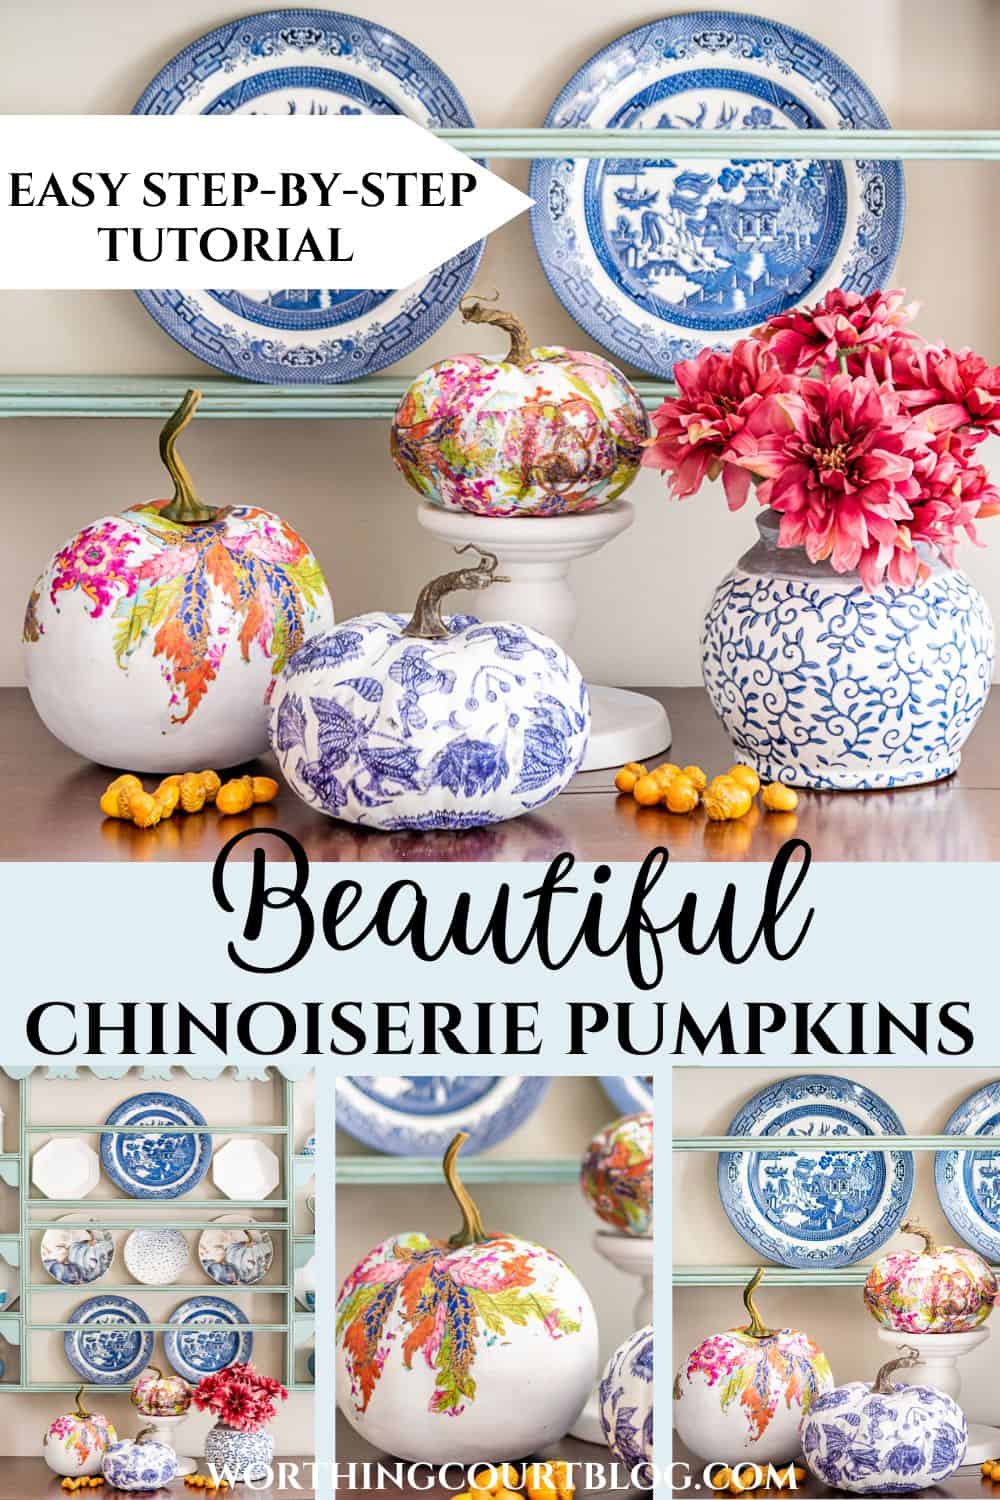
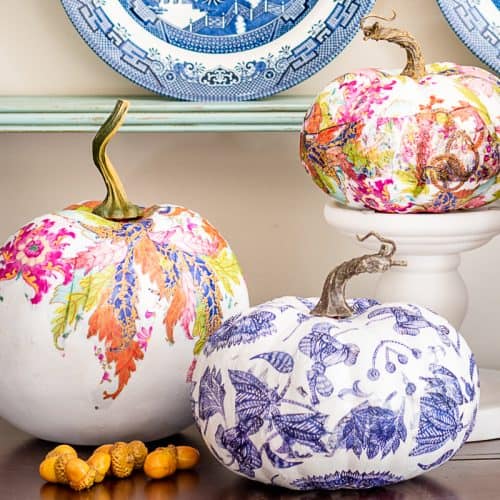
How To Make Chinoiserie Pumpkins
Inside: Step by step directions and the best tips for how to make chinoiserie pumpkins. Add this to your fall crafts bag by learning how easy it is to create these beautiful additions for your fall decor or to give away as gifts.
LOOK FOR THE FREE PRINTABLE PROJECT SHEET BELOW!
This post and photos may contain Amazon or other affiliate links. As an Amazon Associate I earn from qualifying purchases. If you purchase something through any link, I may receive a small commission, at no extra charge to you. Where possible, the exact product has been linked. If that product isn’t available to link, I’ve linked something similar. All opinions are my own. See my full disclosure HERE.
Is it possible to miss your old home decor? You know – the decor that you thought was like your mother’s? I never thought I’d say it, but it has happened to me.
It turns out that those ladies knew a thing or two about timeless, classic decor.
I miss my 90’s house. No – not the house itself, but the way it was decorated. It was a lot like my mother’s.
I miss the classic colors, the Jacobean print fabrics and wallpapers, the chinoiserie style accessories. And chintz – I miss chintz.
But – what goes around comes around – right? This time, it has happened in a good way and this fun pumpkin craft is a way to bring back just a little bit of that look.
If chinoiserie isn’t your thing, you can customize your pumpkins by simply choosing different napkins!
Look for pro tips as you go through the tutorial and a list of FAQ’s at the end. And be sure to read all the way to end to find out how I almost cost us thousands of dollars!
This is such an easy diy project and you only need a few supplies:
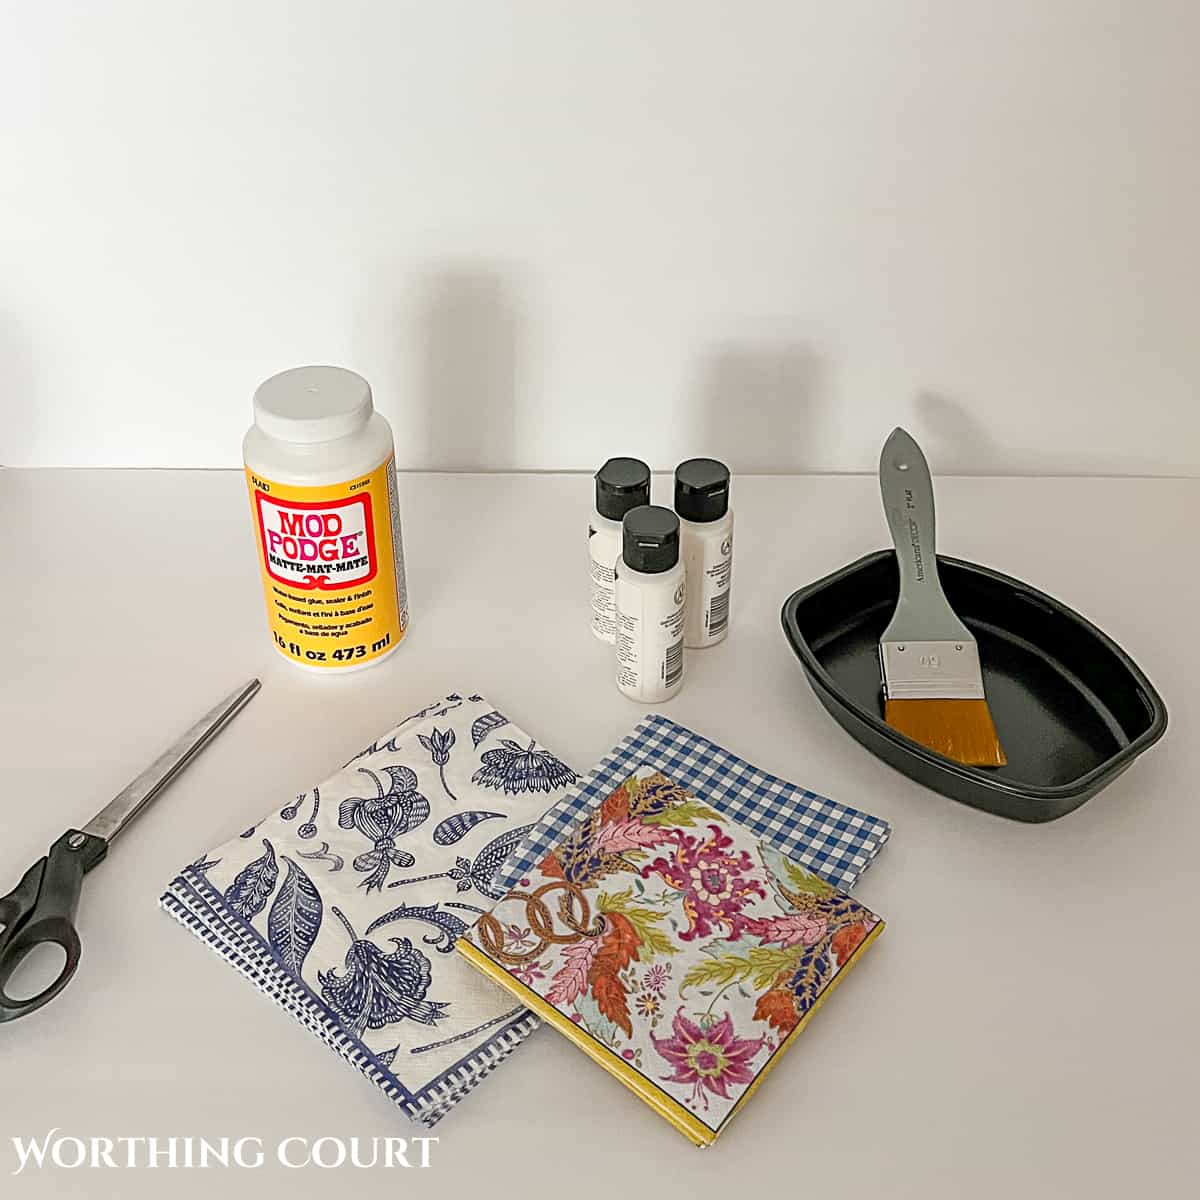
Faux pumpkins – THESE PUMPKINS are a good budget-friendly option. You get 30 pumpkins in multiple sizes for a great price.
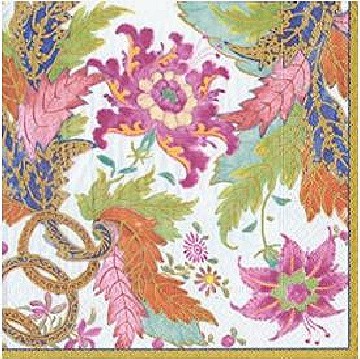
Paper napkins – I used THESE BLUE AND WHITE NAPKINS and THESE TOBACCO LEAF GUEST TOWEL NAPKINS.
TIP: Don’t use cocktail sized napkins on pumpkins larger than about 4″ tall. Dinner size or guest towel size gives a better result on larger pumpkins.
Inexpensive paint brushes or foam brushes
TIP: I don’t recommend using chip brushes for this project because they lose so many bristles.
Scissors – I personally own and love THESE.
White craft paint or white spray paint
A container to hold the Mod Podge
A container to hold the paint (unless using spray paint)
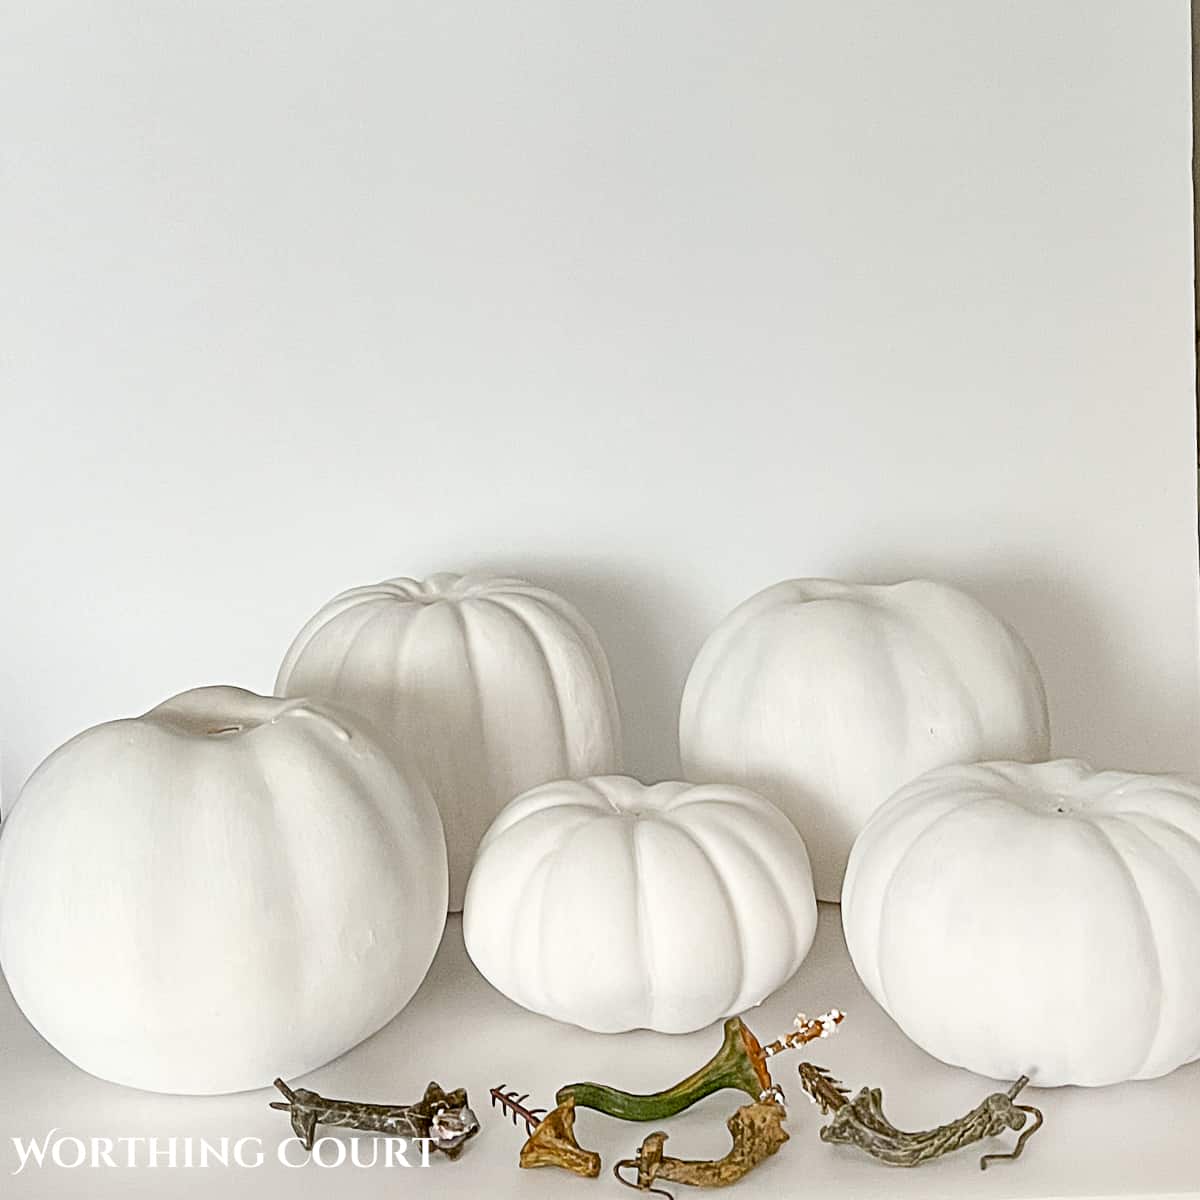
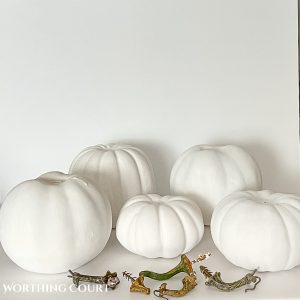
STEP 1: PREP THE PUMPKINS
Once you’ve chosen the pumpkins that you want to use for this project, pull the stems out and set them aside. Remove any excess glue from around the stem hole.
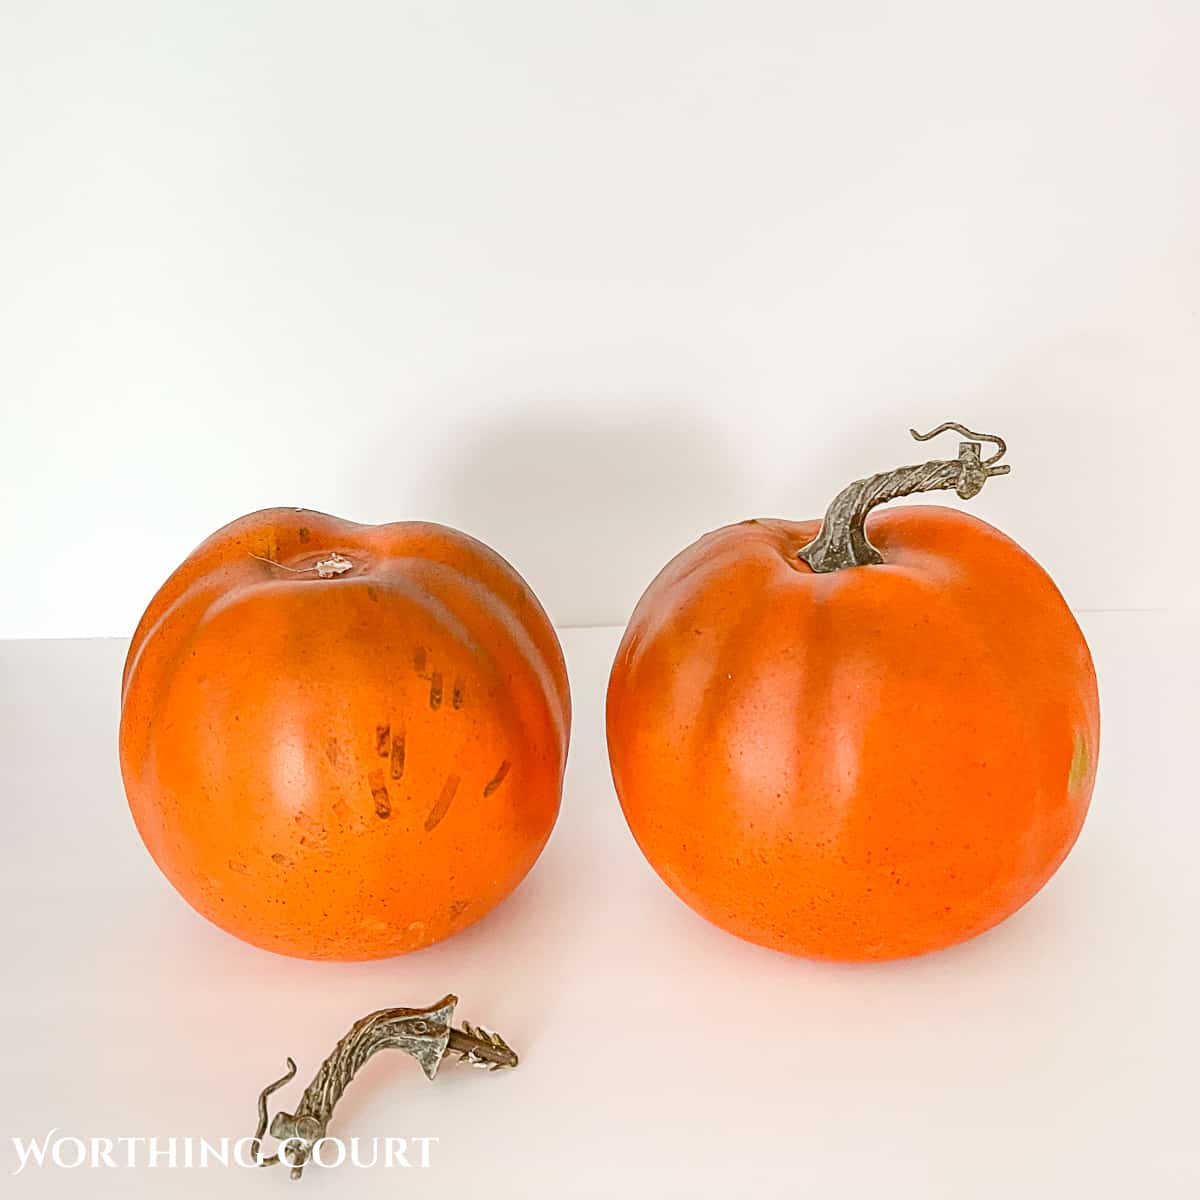
You may have to twist and tug on the stems a little, but they will come out.
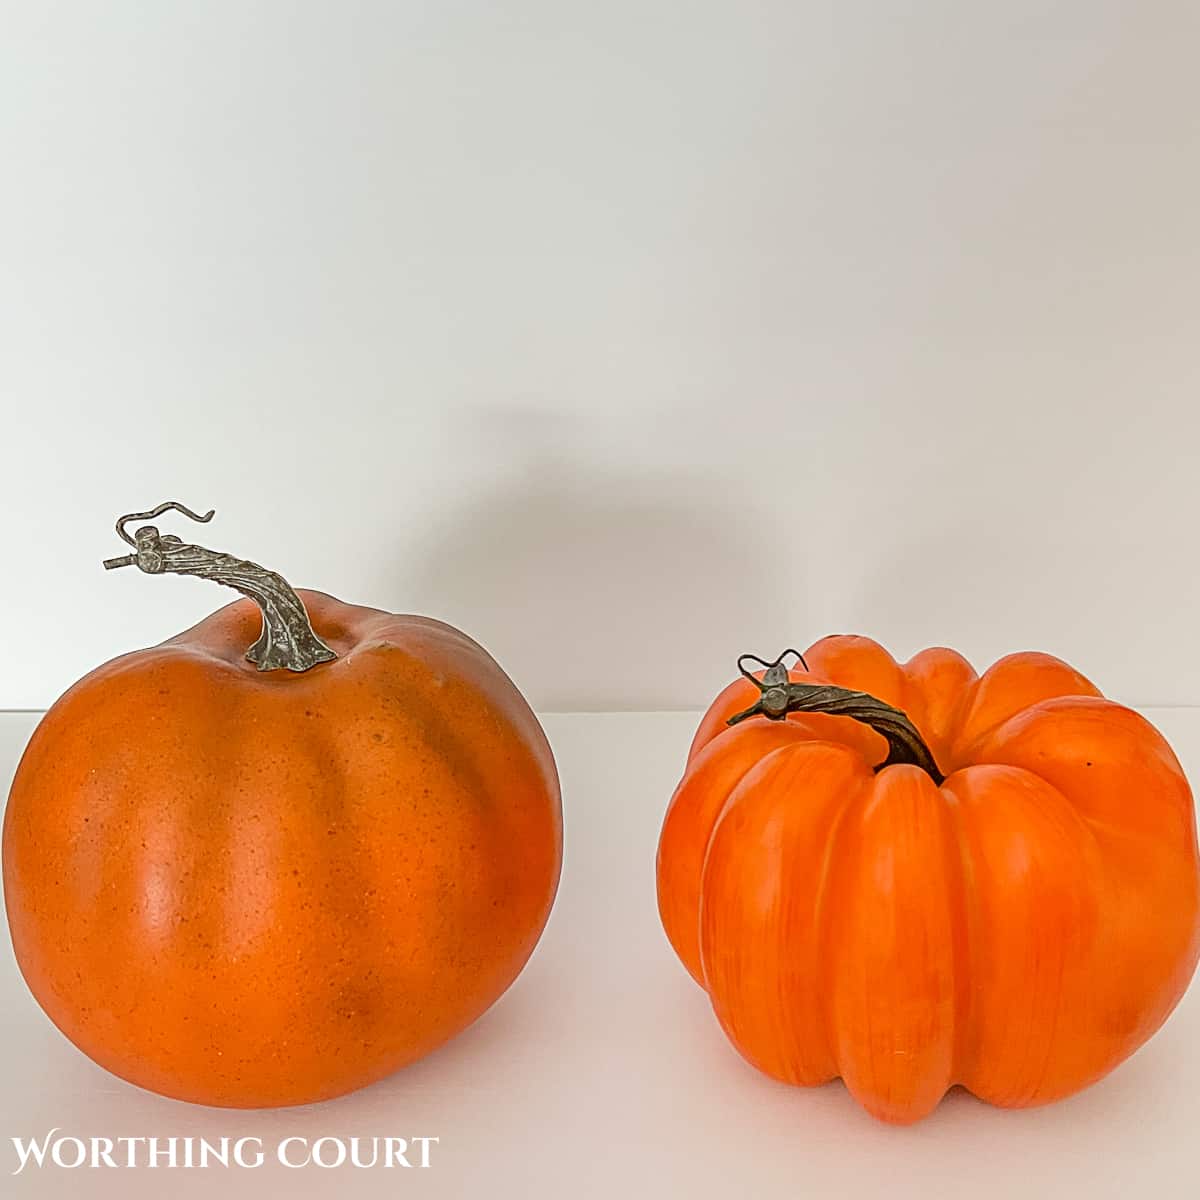
TIP: When choosing pumpkins for this project, I look for pumpkins that do not have deep grooves (like the one on the right) to make it easier to adhere the napkins without tearing.
If the pumpkins aren’t already white, paint them and allow the paint to completely dry.
It took three coats of paint to sufficiently cover the bright orange color of my pumpkins.
TIP: You can use craft paint or spray paint, but for better adhesion, I recommend using a paint with a flat finish as opposed to gloss or semi gloss.
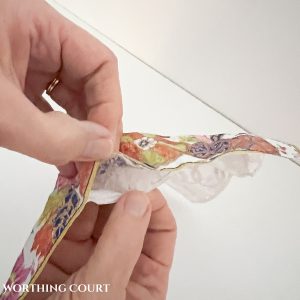
STEP 2: PREP THE NAPKINS
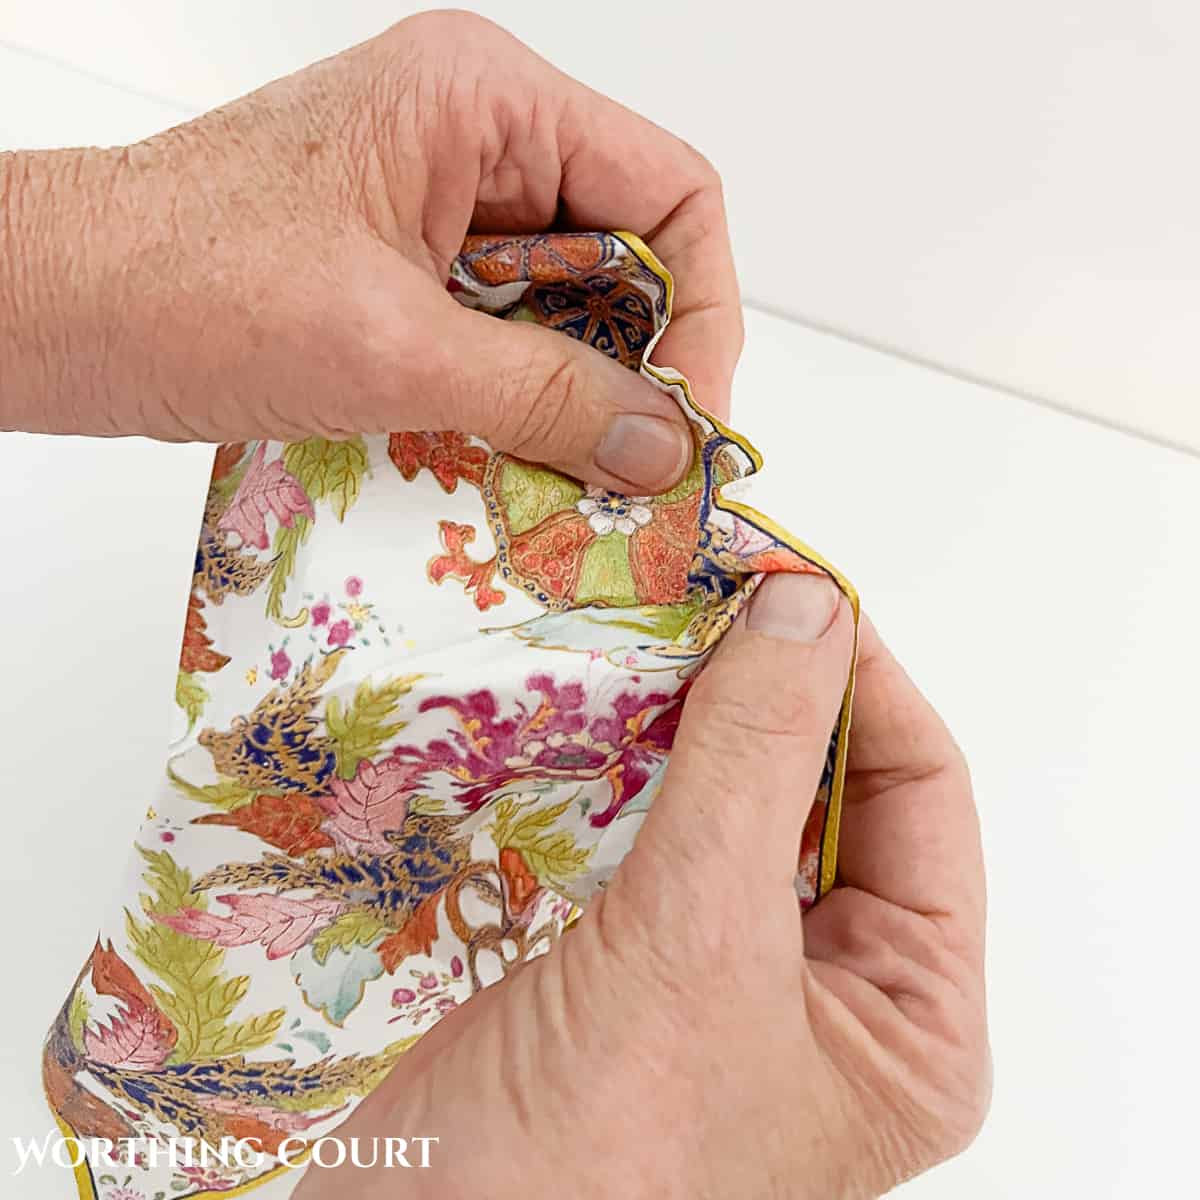
Paper napkins have multiple layers that need to be separated. For decoupage to be successful, you need to work with a very thin layer that is similar to tissue paper.
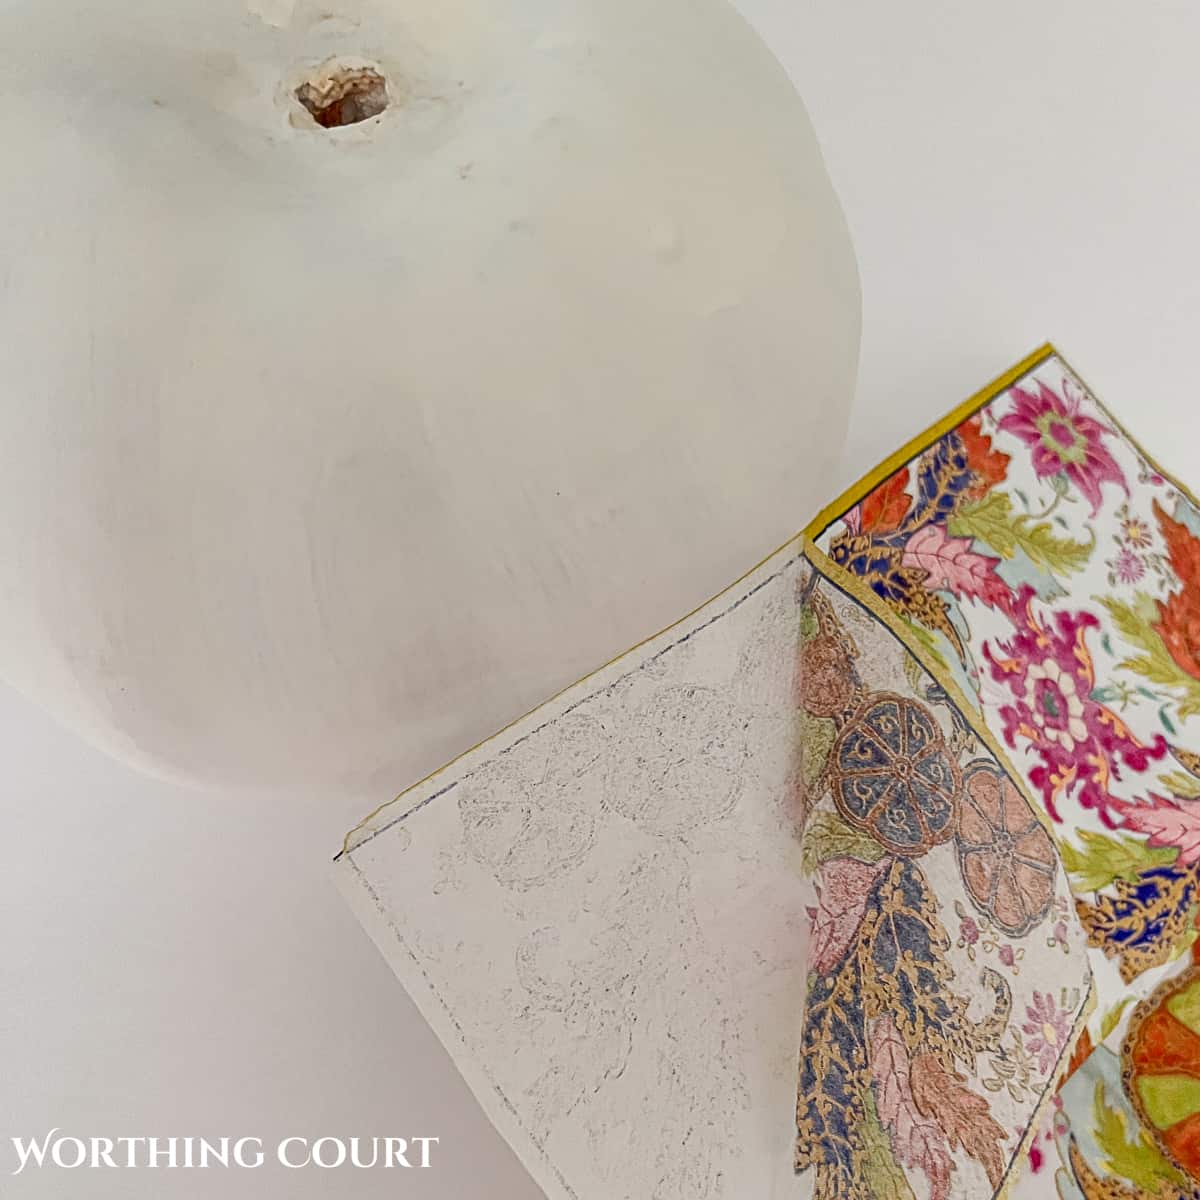
Most paper napkins are three ply thick, so be sure that you don’t assume there are only two layers. The number of ply should be marked on the package somewhere.
TIP: The easiest way that I found to separate the layers is hold one side edge of a napkin with two hands and gently rub the napkin together. You should start to see some separation when you use this method.

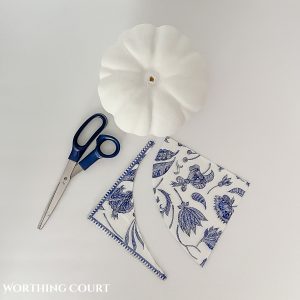
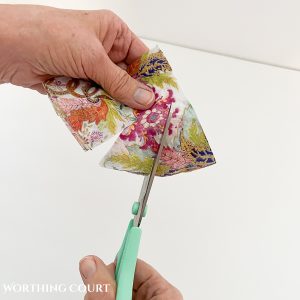
Once you have the napkin down to one ply, fold it back into a square and cut around the edge to create an arch. This doesn’t have to be precise – just cut it into a rounded shape.

To make it easier to apply the napkin to the pumpkin, cut slits going from the edge toward the center.
STEP 3: THIS IS WHERE THE MAGIC HAPPENS
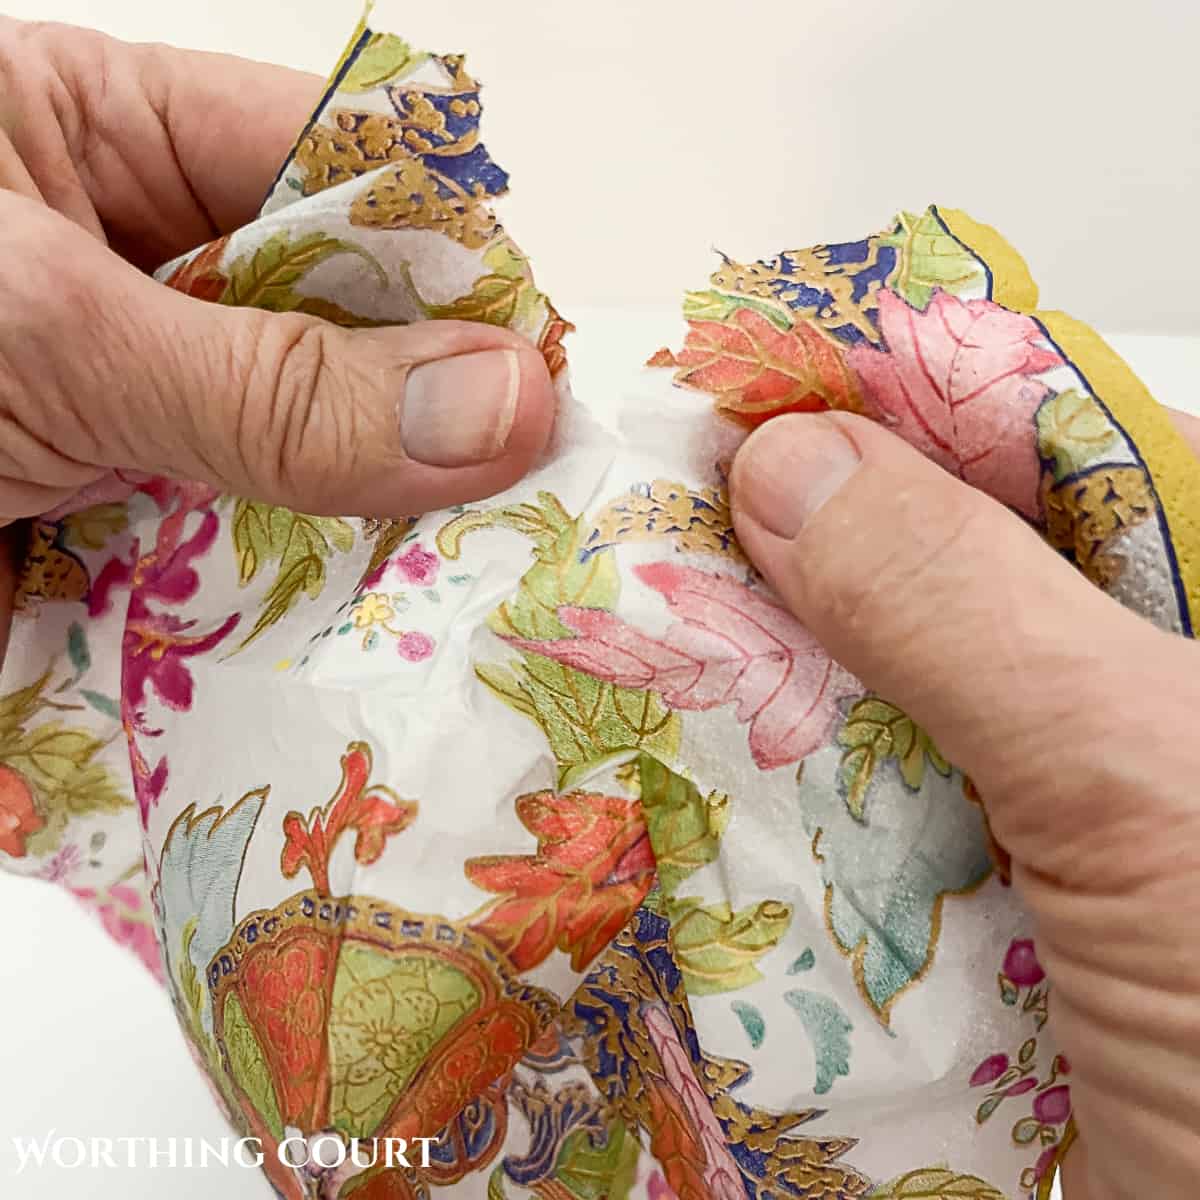
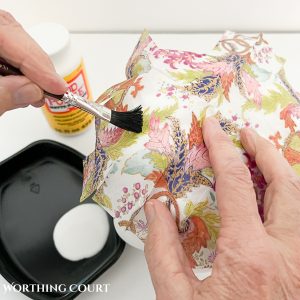
Starting on the bottom of the pumpkin, position the napkin over the pumpkin and apply a thin, even layer of Mod Podge onto the napkin.
Some tutorials will say to apply Mod Podge to the pumpkin before adding the napkin, but I’ve found that step isn’t necessary because the napkin layer is so thin, the Mod Podge goes right through it.

Gently smooth and tamp the napkin into place with the brush you used to apply the Mod Podge.
TIP: If you will not be completing the use of Mod Podge all at one time, be sure to thoroughly rinse the brush out or the bristles will stiffen and become glued together.
Gently smooth out as many wrinkles as you can and be sure to brush out any bubbles and that there are no loose edges.
TIP: Use a piece of wax paper or a plastic baggie over your hand to handle the wet pumpkin to avoid your fingers sticking and creating a tear.
This is a very thin piece of paper that you’re working with, so tears may happen no matter how careful you are. But don’t fret – you can simply cut or tear out a small piece from another napkin and apply it as a patch. The patches will likely be hidden in the pattern and won’t show.
The same goes for wrinkles. Since you’re working with a curved, rounded surface, wrinkles will happen. But again – their appearance will be minimized by the pattern of the napkin.
TIP: One method for removing wrinkles is to tightly stretch a piece of plastic food wrap over the napkin, and use your finger to smooth more of the wrinkles out. Do this while the Mod Podge is wet. Another method is to very gently rub a finger dipped in Mod Podge over the wrinkles once it has dried very slightly.
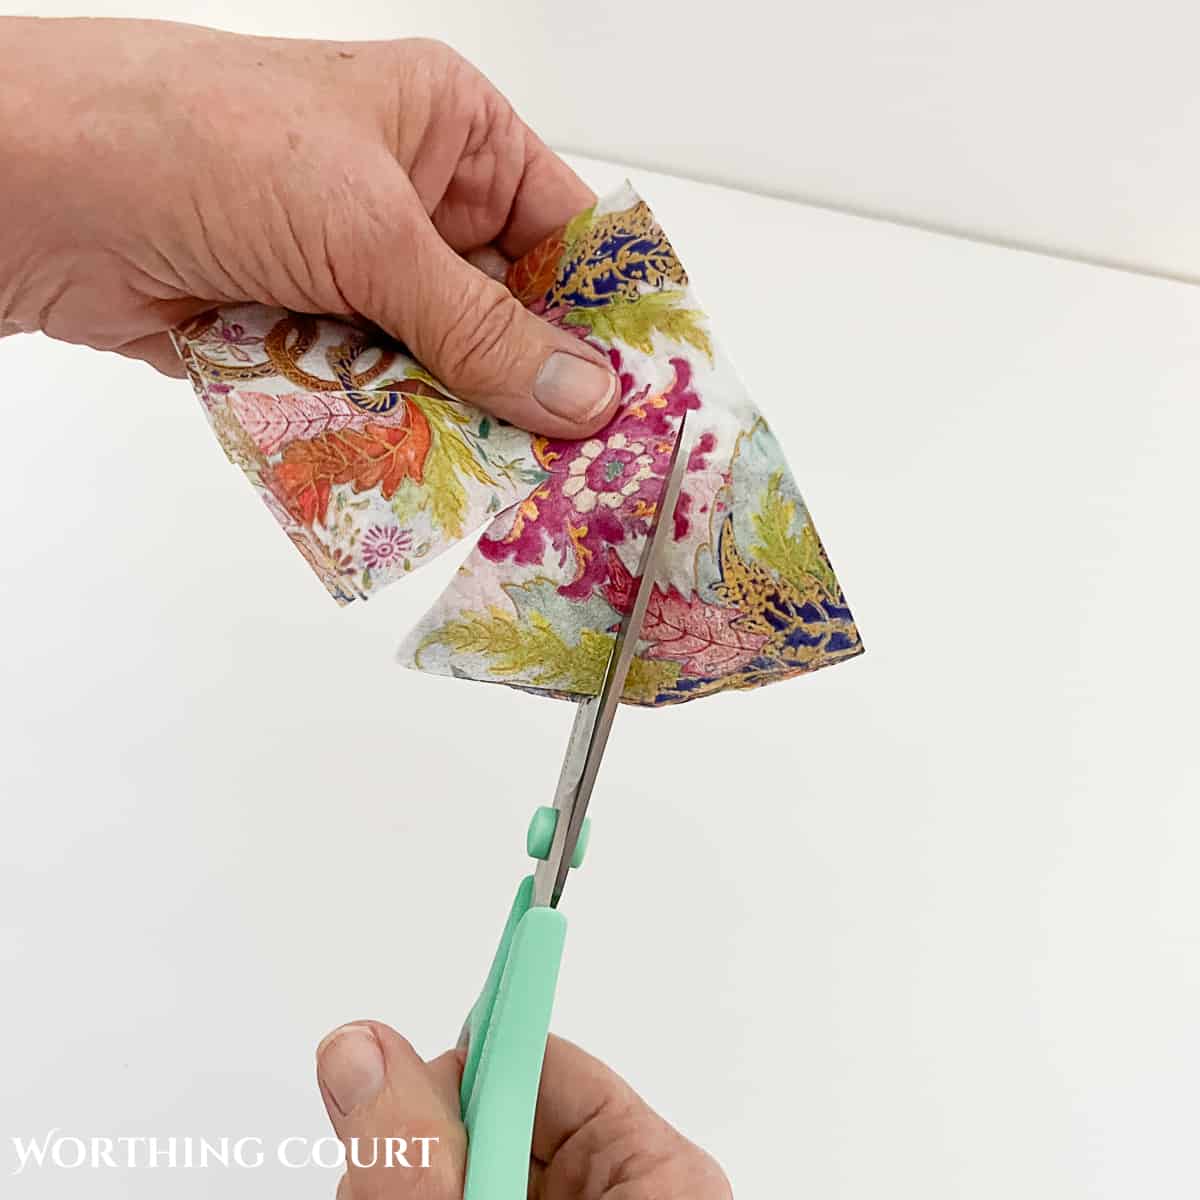
If you find that you are going to have too much overlap, use your scissors to cut any excess away.
Once the bottom half has dried, turn the pumpkin over and repeat the same process for the top half.
TIP: Poke a hole through the napkin where the stem will go while it is still wet from the Mod Podge.
Allow the pumpkin to completely dry.
TIP: Lay the wet pumpkin on wax paper to dry so that it will not stick to the surface.
STEP 4: REPLACE THE STEM
The stem is very easy to replace by simply pushing it back into the hole it came out of.
TIP: If you don’t care for the color of your stems, they are easy to paint. Consider painting them white to match the painted pumpkins or painting them gold for a glam look.
Apply a bit of hot glue down in the hole if you find that the stem won’t stay in place.
VARIATION:
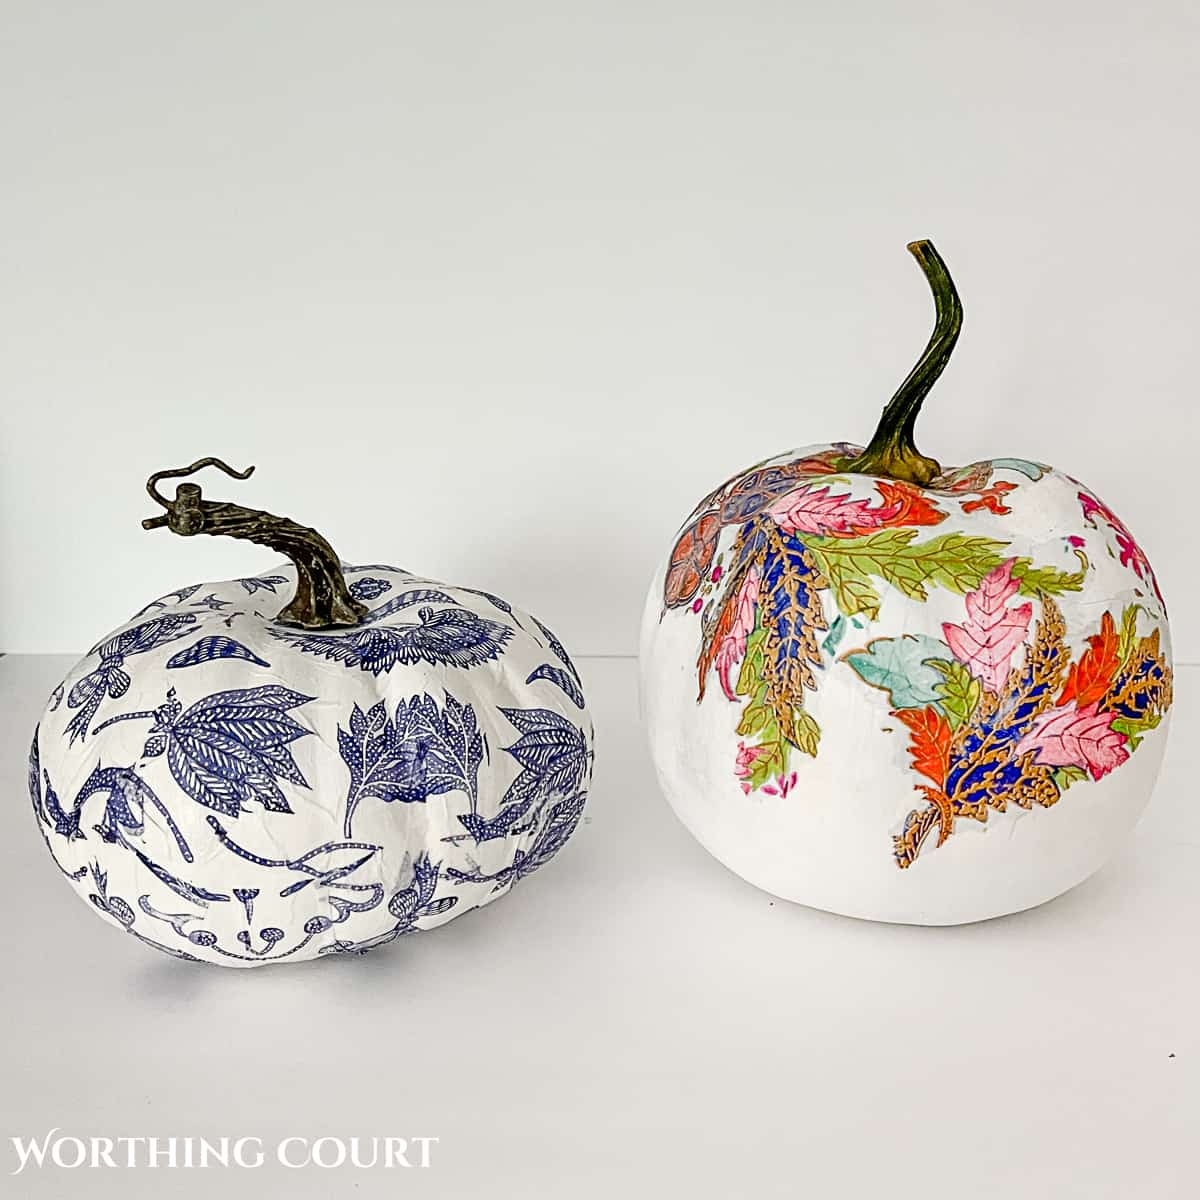
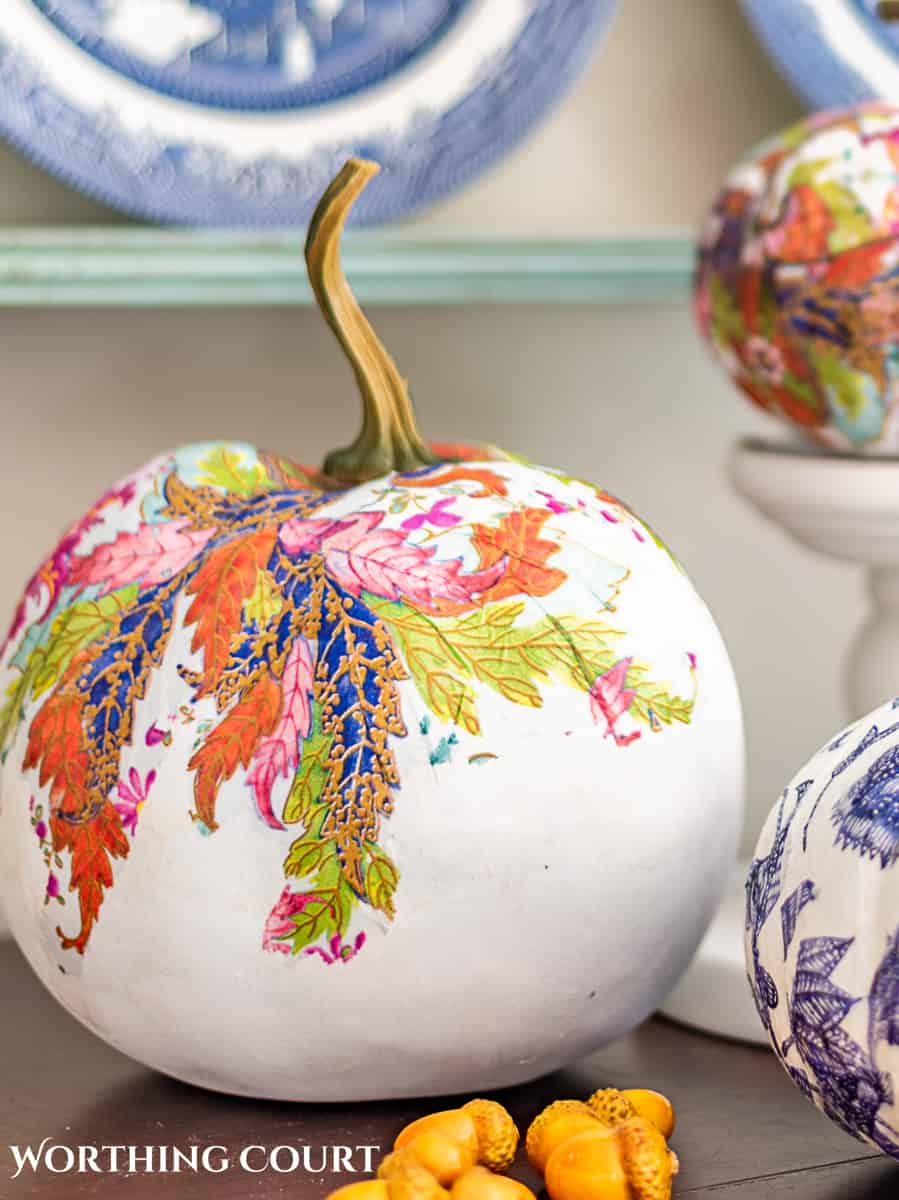
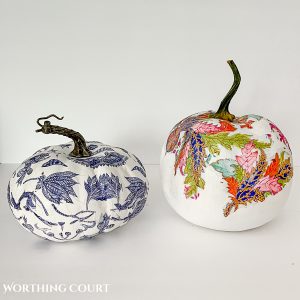
One of the napkins that I chose to work with is this beautiful tobacco leaf pattern. It has so many wonderful colors in it that are perfect for fall.
I covered the smaller pumpkin completely with the napkin, but to get a more elegant look on one of the larger pumpkins, I wanted the look of the pattern draping or cascading down the sides.
To accomplish this, after separating the layers, I tore (not cut) around the part of the napkin pattern that I wanted to use.
I then positioned the torn napkin where I wanted the pattern to be and applied Mod Podge over the top of the napkin.
You can use this same method for randomly applying parts of the pattern all over the pumpkin, instead of covering the entire thing.
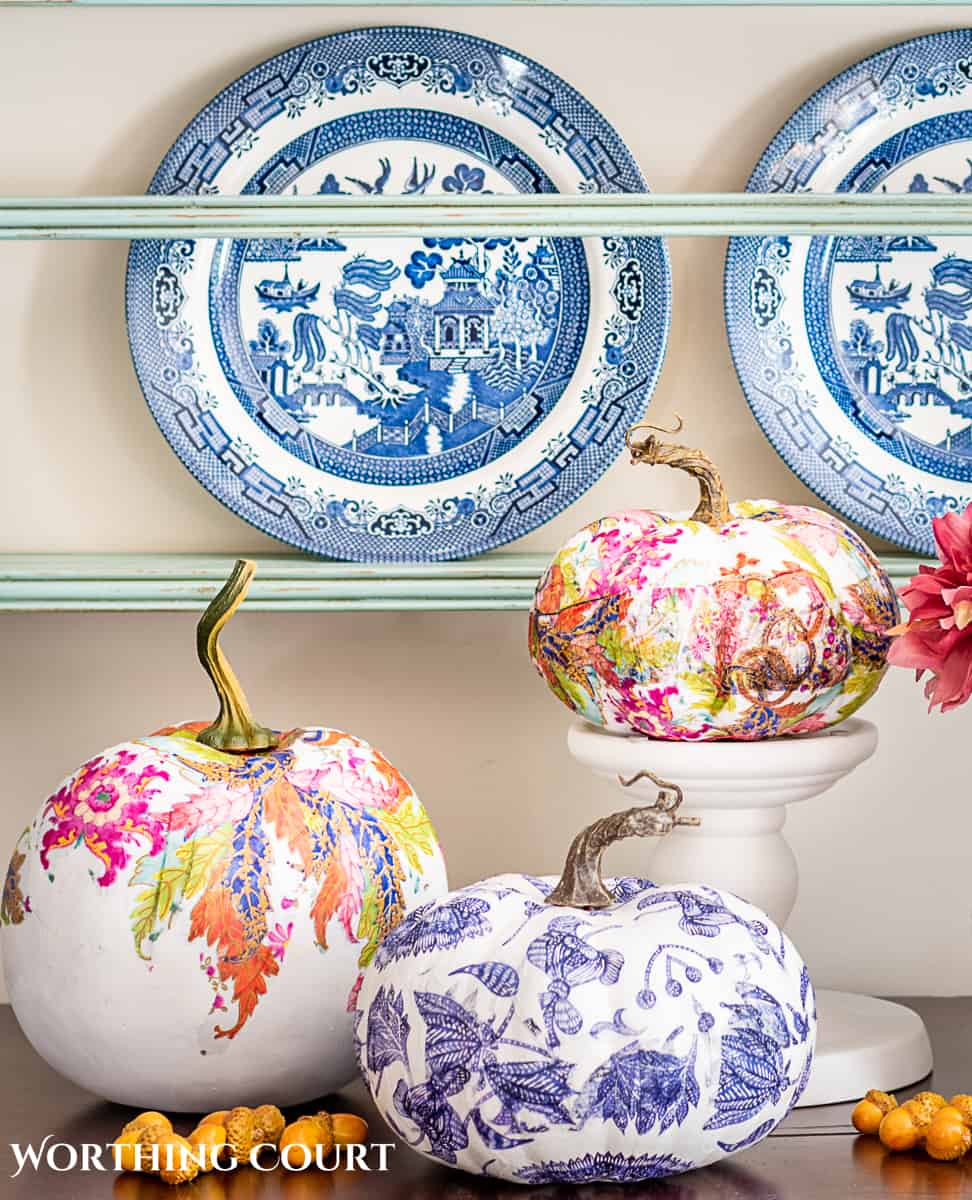
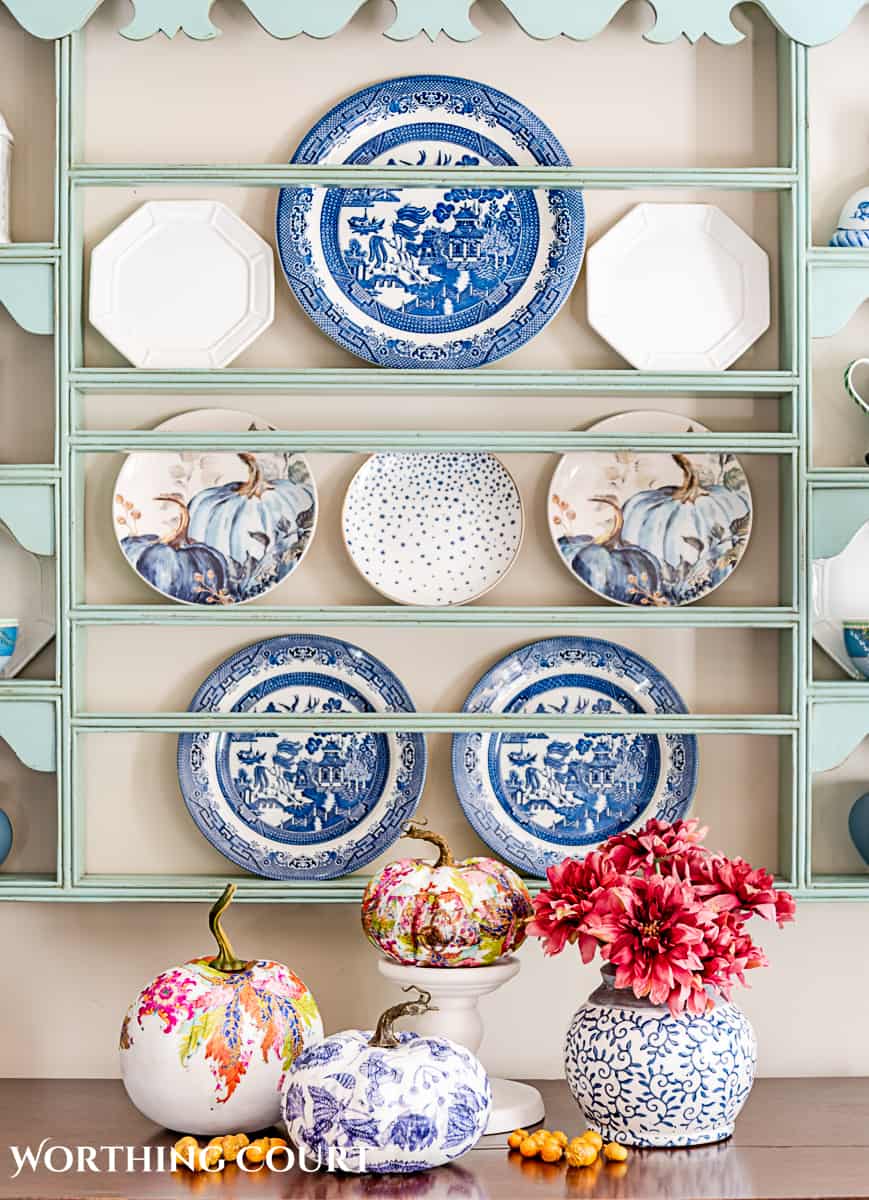
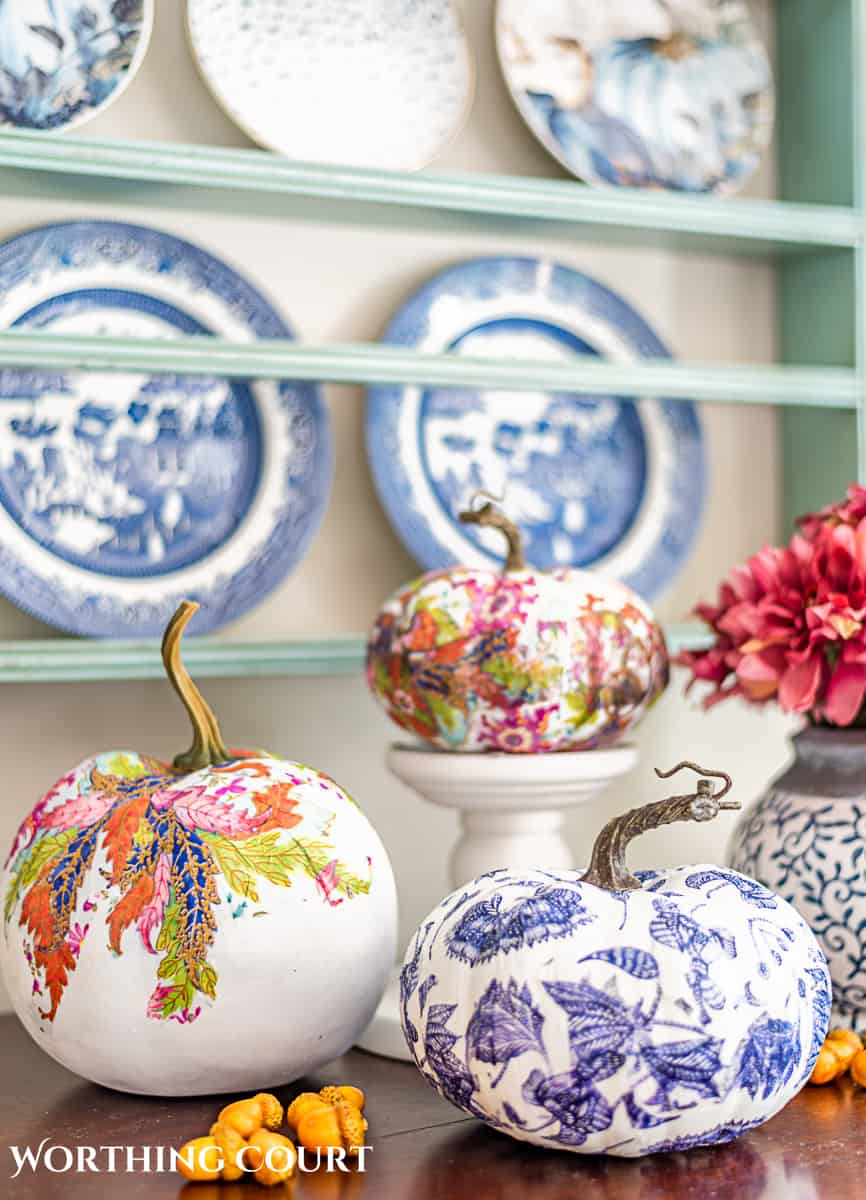
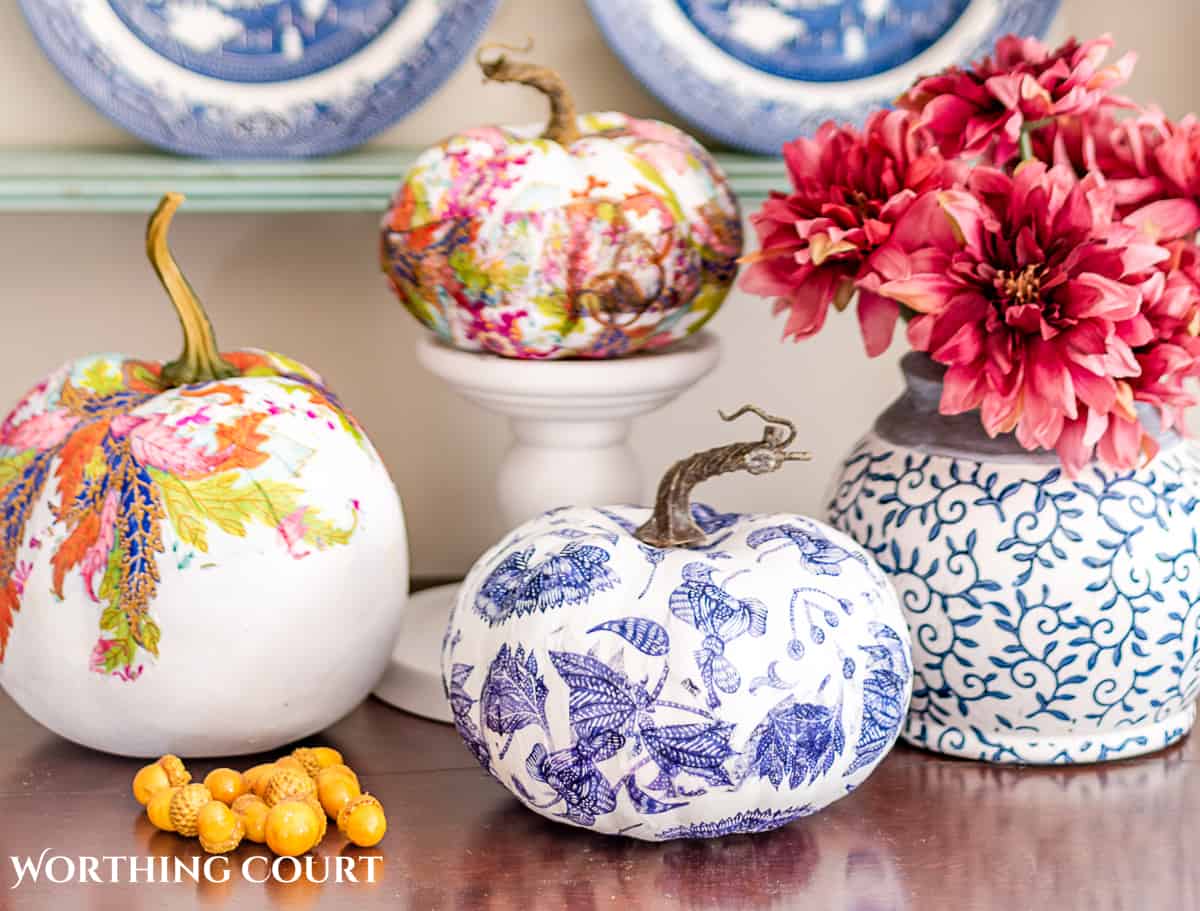
And voila! You’ve just created beautiful chinoiserie pumpkins to add to your fall decor.
How to display your beautiful creation:
- as part of a centerpiece
- in a fall vignette on a coffee table
- as easy diy fall shelf decor
- as giveaway favors at place settings
- on top of a candlestick
- grouped in a bowl with other pumpkins
- as part of a vignette on a sideboard
- displayed in a bowl with a snip of ribbon tied to the stem
- give them away as an inexpensive hand-crafted gift
I think they look best displayed in multiples, so make several. The possibilities are endless!
FAQ’S:
1. Can you Mod Podge a real pumpkin?
Yes, you absolutely can, but you will only be able to use the pumpkin for this one season. Make sure to wash and disinfect the pumpkin before painting to help it last longer.
2. Can I use my Cricut to cut vinyl designs instead of decoupaging a napkin onto the pumpkin?
Yes – that’s a wonderful idea and there’s no need for Mod Podge.
3. Can I use tissue paper instead of napkins to create my chinoiserie pumpkin.
Absolutely. Just make sure that the tissue paper is only one ply thick. Tissue paper is usually slightly thicker than one ply of a napkin, so if you opt to go this route, I would brush Mod Podge onto the pumpkin itself before applying the tissue. Brush another coat of Mod Podge onto the top of the tissue paper.
4. How do I store my decoupaged pumpkins?
Store them in a place that is climate controlled. If stored in an attic or other hot location, the heat may activate the Mod Podge and cause it to become sticky.
5. What if I totally mess my pumpkin up?
Try to remove the napkin while the Mod Podge is wet. I was completely unsuccessful removing a napkin from one one of mine after it dried.
I found that dried Mod Podge will not release after soaking it in water, even if it’s hot water and you flooded your laundry room when you forgot that you were filling the sink. 😬

DIY Chinoiserie Pumpkins
Equipment
- Hot glue gun and glue sticks if needed
Instructions
- Remove stems from pumpkins by pulling and twisting

- Paint pumpkins white with matte finish paint. Allow to completely dry.
- Separate layers of napkin until you have only 1 ply to work with.
- Cut a semi circle out of the folded napkin.
- Cut slits into the napkin in the rounded part.
- Working on one half of the pumpkin at a time, position napkin where desired and coat with Mod Podge, smoothing out wrinkles and bubbles. Allow to dry and repeat process on other half. Allow to dry.
- Replace stems, using hot glue if necessary to hold in place.

So creative and fun!!! You’ve got me in the mood to craft, so now I’m on the lookout for fun napkins! I can’t wait to give this a try!
The best instructions I’ve read on decoupaging pumpkins! I also love the patterns you chose…..I miss chintz too. Thanks for sharing, Suzy!
I’ve been wanting to do this craft for years. I have all the products, just need to make myself sit down and do it.
Do you have the source for the beautiful blue pumpkin plates on your plate rack with the blue and white dishes? I want them!
Happy Fall!
It took me years to get around to doing this too! I’m sorry that I waited so long because it was really a fun craft. I’ve already seen some other napkins that I’d like to use the next time. LOL The plates that you’re asking about came from Hobby Lobby. You’ll have to see if they’re available in your local store because they’re sold out online. Here’s the link to them though: https://www.hobbylobby.com/Fall-Thanksgiving/Kitchen-Dining/Dinnerware/Blue-Pumpkins-Plate/p/81109788
so good!!! I love the guest towel, fall one it’s my colors for sure!! sink overflow done that b4 I know I can never walk away, I’ve had a few close calls also.
thanks so much pumpkins are soo pretty
Pretty! I love the blue and white!
I especially love the tobacco leaf pumpkin. Thanks for sharing this tutorial.
I especially love the blue and white pumpkin! Thank you for the detailed instructions and inspiration!!!
Love that cascading tobacco leaf pumpkin! It is so eye-catching!