Lighter and Brighter Powder Room Reveal
Well…after teasing you with my little lamp update and the new cornice, I’m finally ready to reveal the lighter and brighter powder room!

I started off with three requirements:
I didn’t want to repaint the walls.
I didn’t want to spend the $$$ to replace the vanity.
I wanted to bring some blue in the room.
The whole project was kick-started when I found these plaques at Target.

And the little Ikat patterned bowls at World Market.
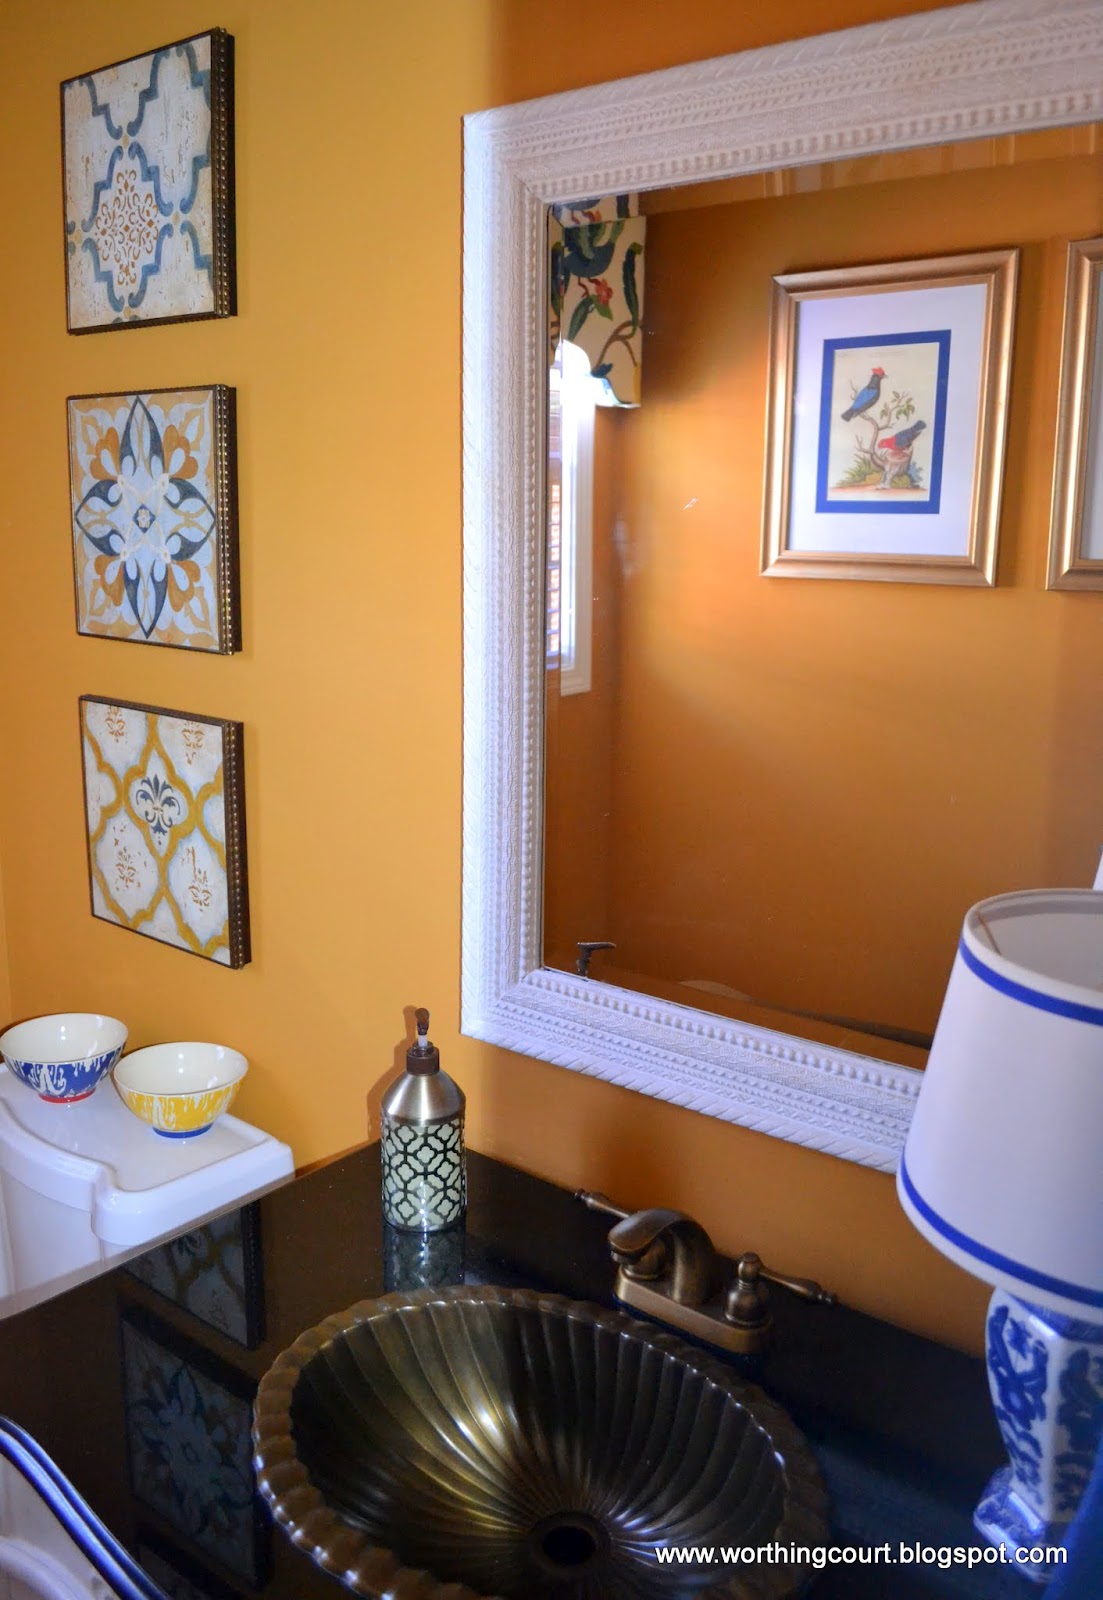
Both the bowls and the plaques contained all of the colors that I wanted to incorporate into this room. Plus, I love the interest that is added to a room when patterns are mixed together.
From there, things just seemed to come together.
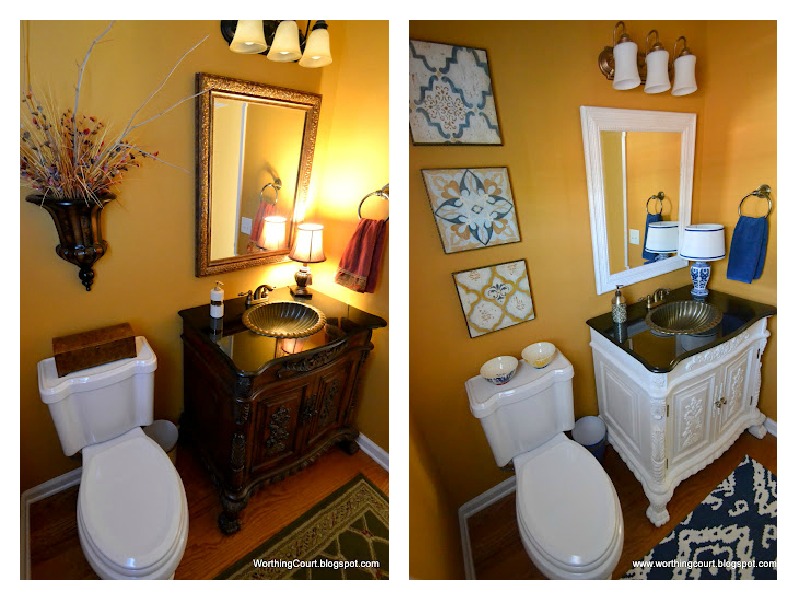
I stole a little blue and white lamp from another room and gave it a quick update by changing the shade to a more modern shape and adding ribbon to it.
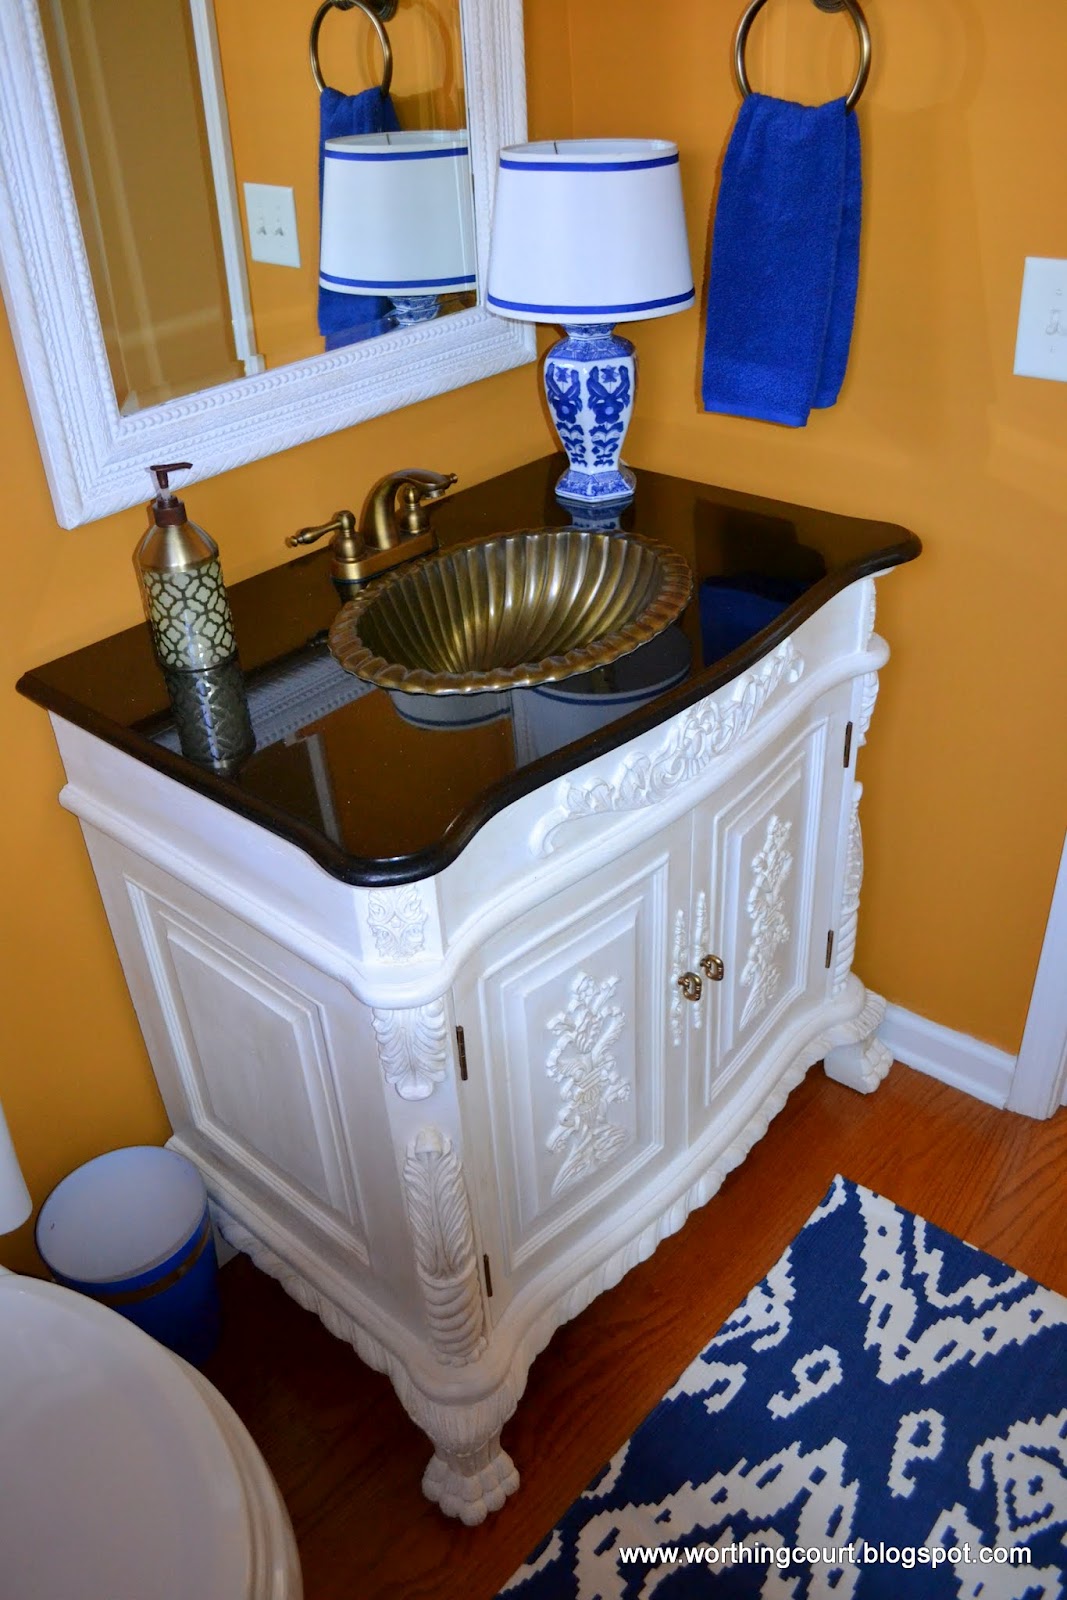
The vanity was painted with Annie Sloan Chalkpaint in Pure White. After giving it a coat of clear wax, I added just a teeny-tiny bit of dark wax.
A tip for you – if you are painting a piece with chalkpaint that has received a lot of handling, wipe it down with mineral spirits prior to painting. This step will remove any oils left on the piece from skin contact that could create a problem with paint adhesion.

I’m a big fan of using calendars for inexpensive wall art! I found this gorgeous one at Calendars.com. It was a few dollars more than the others, but it is printed on heavier paper and every single image is beautiful.

I purchased a couple of very affordable 16×20 frames at Christmas Tree Shops ($9.99 each) and pre-cut navy and white mats. The frames were dark brown, but after giving them a couple of coats of gold spray paint and some Antique Brass Rub n Buff, this is how they turned out.
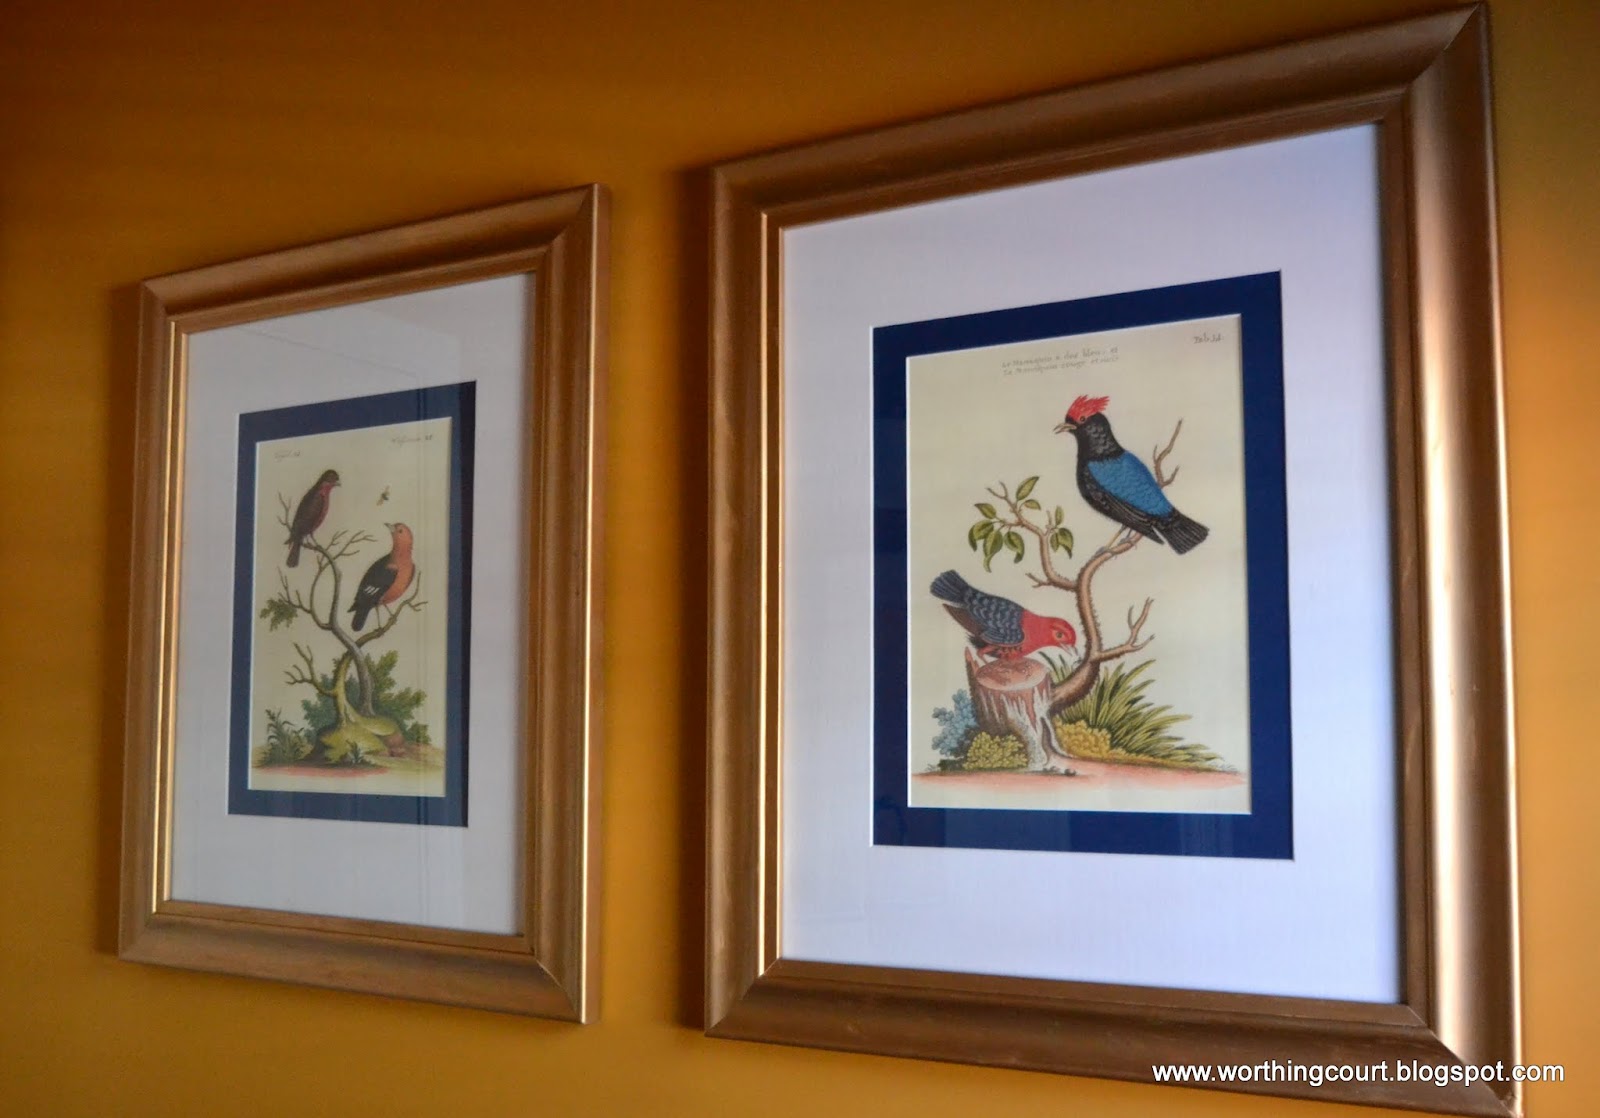
I think they fit right in with the fabric that I used on the new cornice.

A friend found the navy and white flat weave rug at TJ Maxx/HomeGoods. I love the mix of all the patterns in this room.
Okay – how about some before and afters?
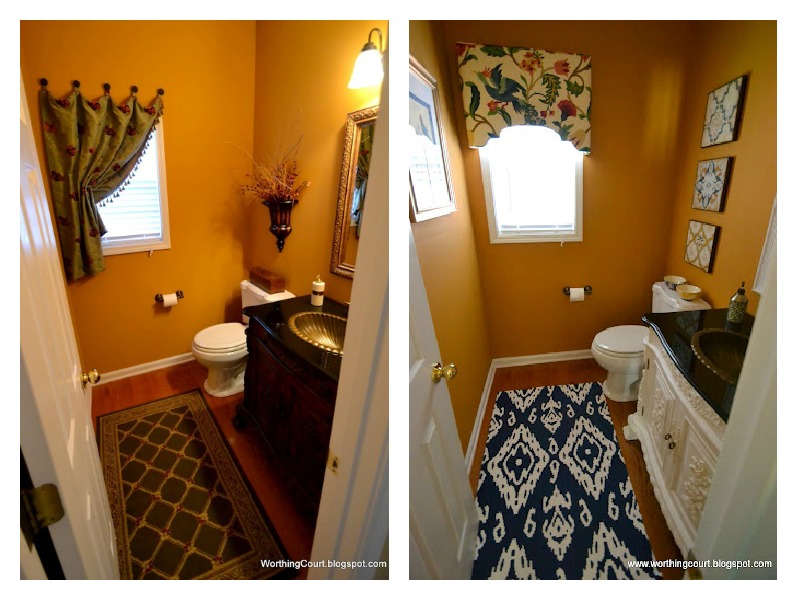
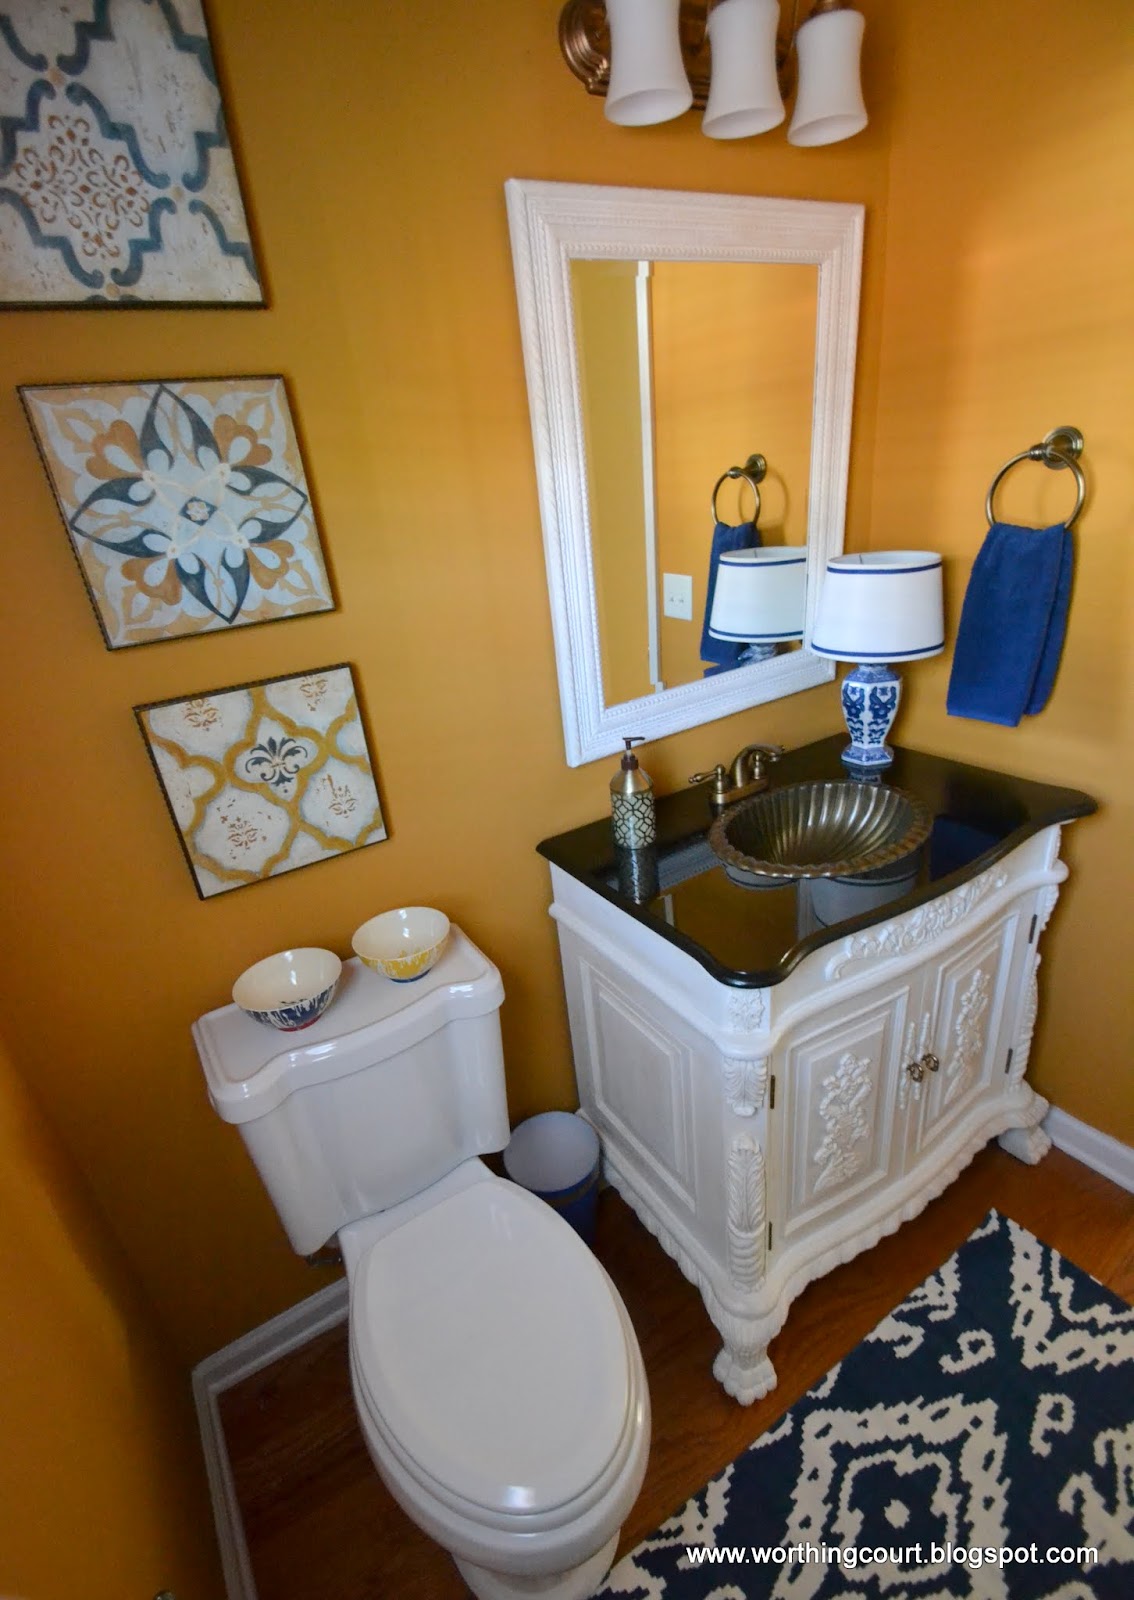
I kept the same light fixture (above the sink), but gave it an update by “refinishing” it with Antique Gold Rub n Buff and by replacing the shades with more modern shaped ones in pure white.

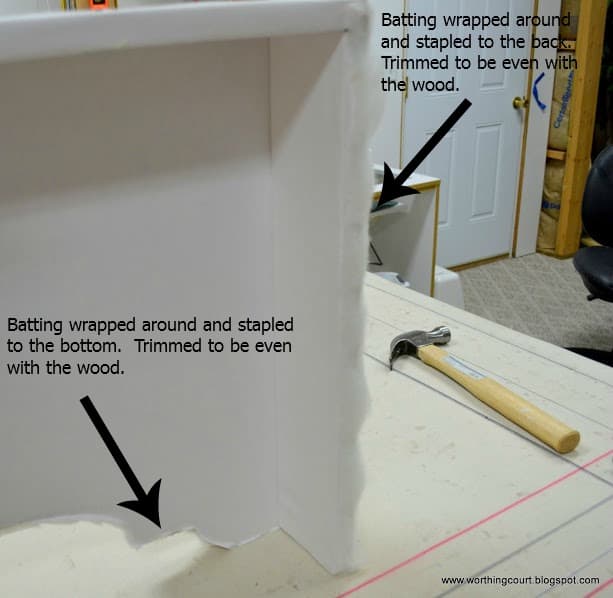
It will walk you through all of the steps necessary to make your own upholstered cornice. You’ll get professional results that your family and friends will think you paid hundreds for.
Beautiful transformation! Love the painted vanity! Thank you for sharing. Visiting from DIY by Design. Would love it if you would share this at my Make it Pretty Monday party at The Dedicated House. http://thededicatedhouse.blogspot.com/2012/10/make-it-pretty-monday-week-17.html Hope to see you at the bash! Toodles, Kathryn @TheDedicatedHouse
I love orange pumpkins and blue and white china. I love your orange walls and blue accents. The tiles tie it all together!
I am loving the color of your bathroom! It is so fabulous!!!! Come link up to my party and share this .
Karin
Looks great! I love the vanity and all the detail it has!
What a fantastic improvement! The bird/calendar idea is fantastic. I wonder if calendars go on super-cheap clearance at some point during the year?
The vanity looks fab in a lighter color – it really brings the detail to the forefront, and brightens the whole room. As a matter of fact, I’m impressed at how much brighter the room is, especially without even painting the walls. You must be thrilled! 🙂
I am constantly amazed by little changes that make the biggest difference. Love those birds & want that calendar now! Thanks so much for the joining “The After Party”!
René
Very nice article, exactly what I wanted to find.
Also visit my homepage: learn more