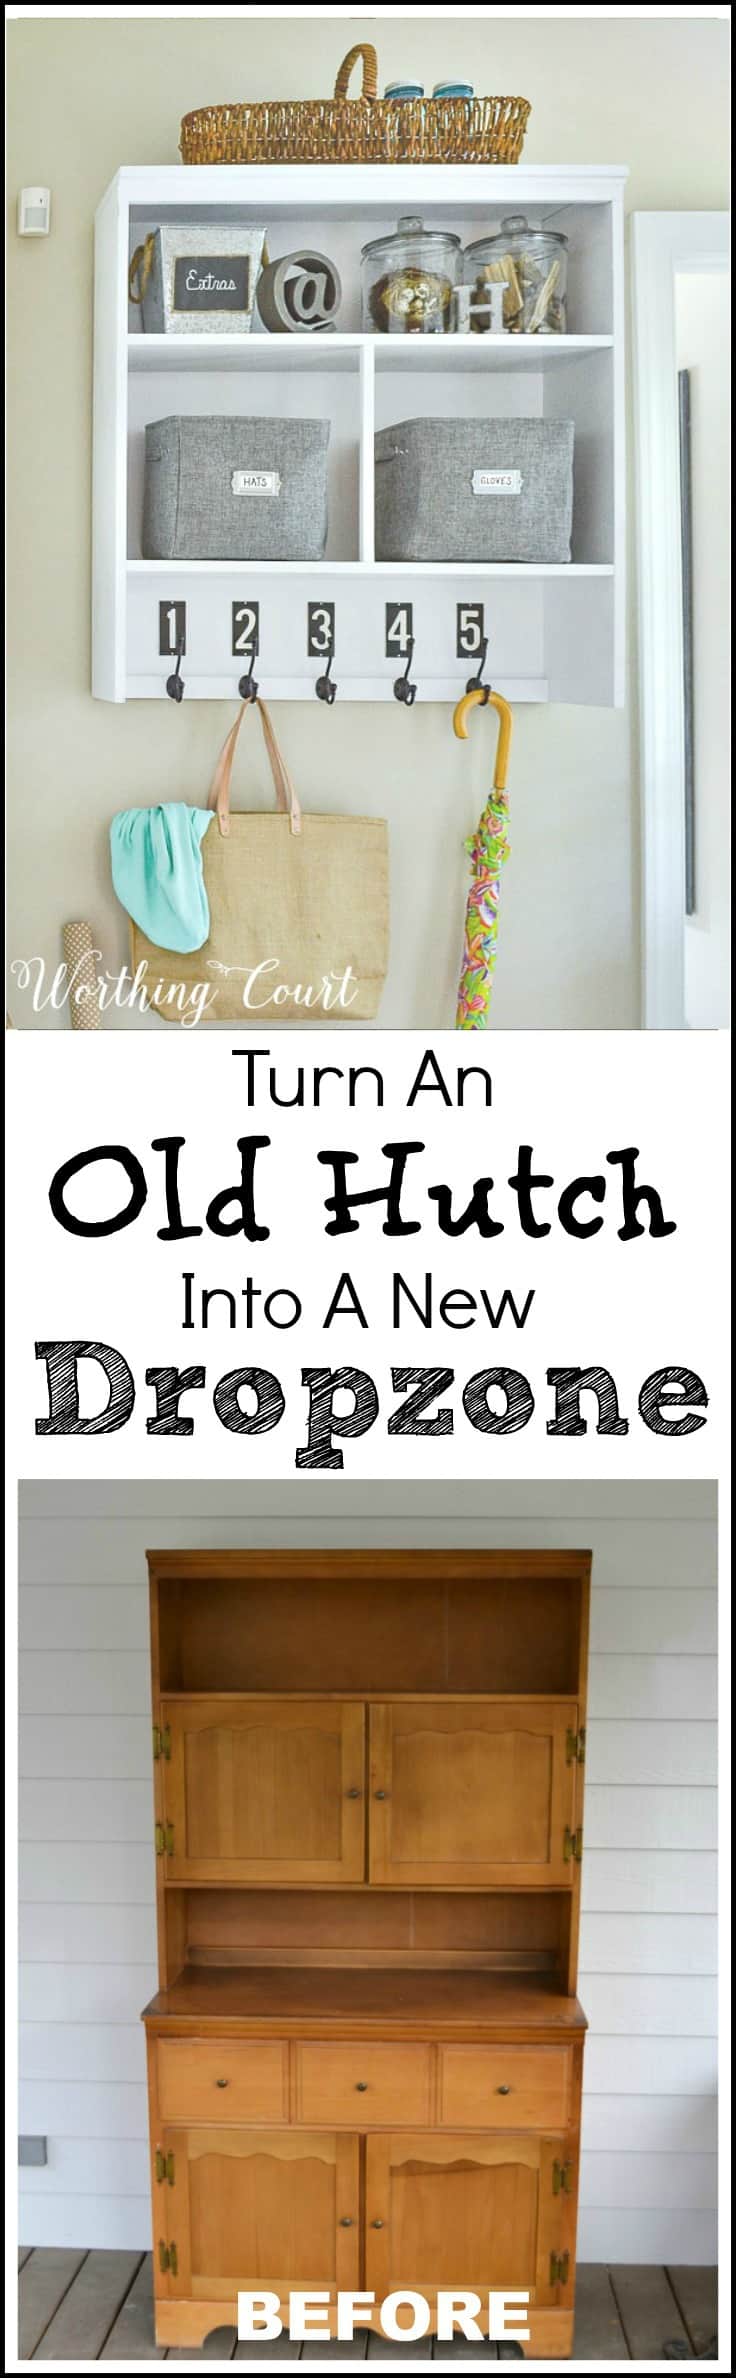
DIY Dropzone
When we bought this house, I always assumed that I would use part of the laundry room as a mudroom. But once the cabinets, sink, washer and dryer were in place, it became evident that it just wasn’t going to work out that way. Enter sad face. A really sad one.

Inspiration struck though, in the form of an old hutch that belonged to my mother-in-law and was used in her home during her entire 60+ year marriage. I can just imagine how proud she must have been when she was able to purchase dining room furniture!
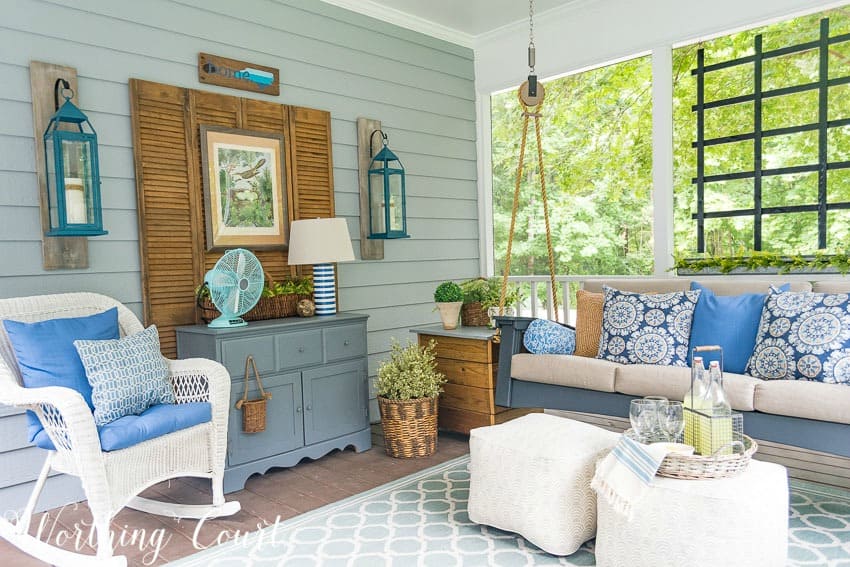
Before I tell you about the transformation of the hutch, take a look at how it started out. Here she is sitting on our screen porch, before the porch makeover. I see these things in thrift stores and on Craigslist all the time, so you should be able to find something similar without too much difficulty.
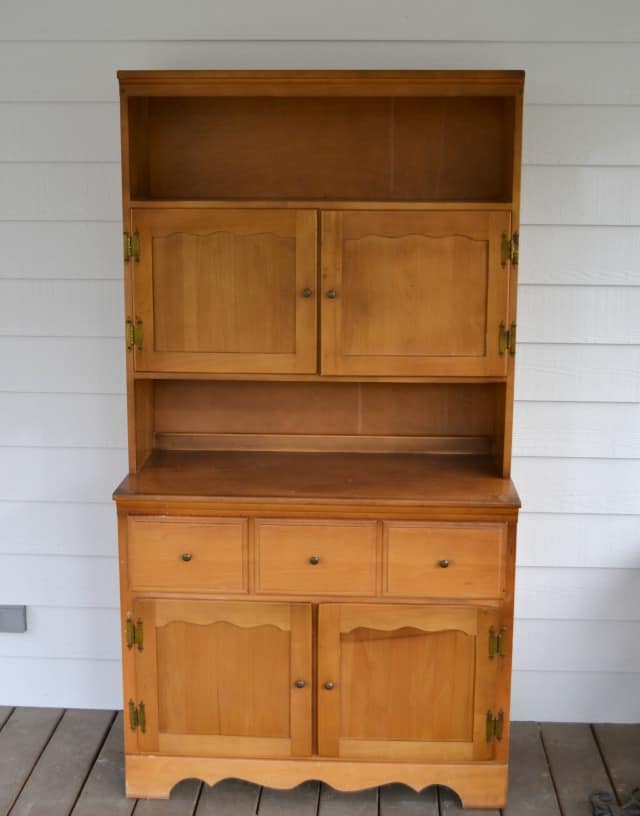
The hutch is in two pieces and the top half is what became my dropzone. The only thing holding the top half to bottom half were two pieces of metal attached to the back. All I had to do was to remove the screws from the metal to get the two pieces apart. The doors were removed, the holes from the hinges were filled in with wood putty and the entire piece was sanded and spray painted. After reinforcing the back with a couple of 1×4 boards, I attached two D rings to hang it from the wall with.
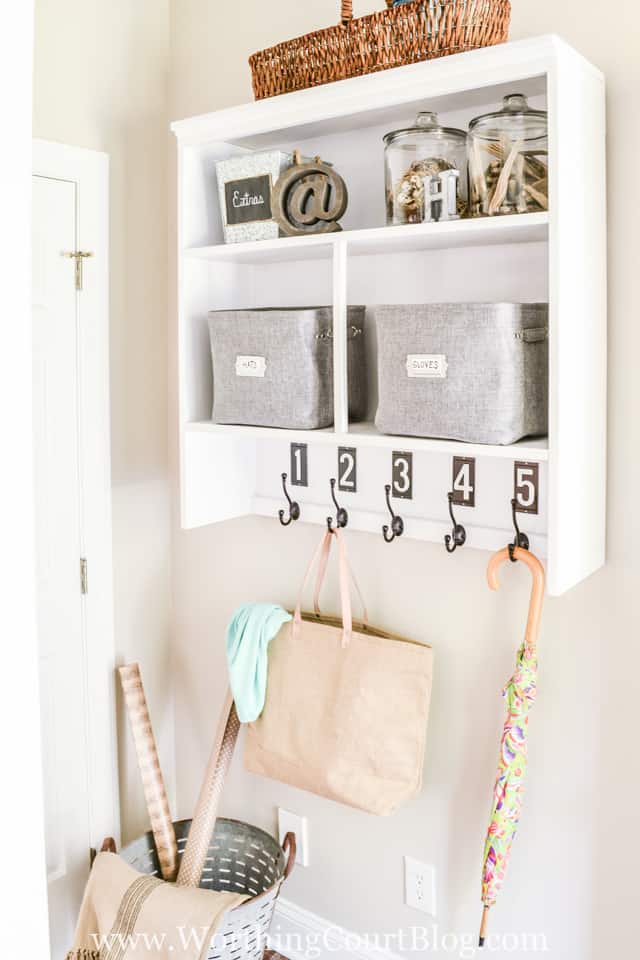
The dropzone is located in one of THE most difficult places to photograph in my home – the little hallway that’s to the left of my breakfast nook. You can see it in this picture of my breakfast nook when it was decorated for Christmas last year.
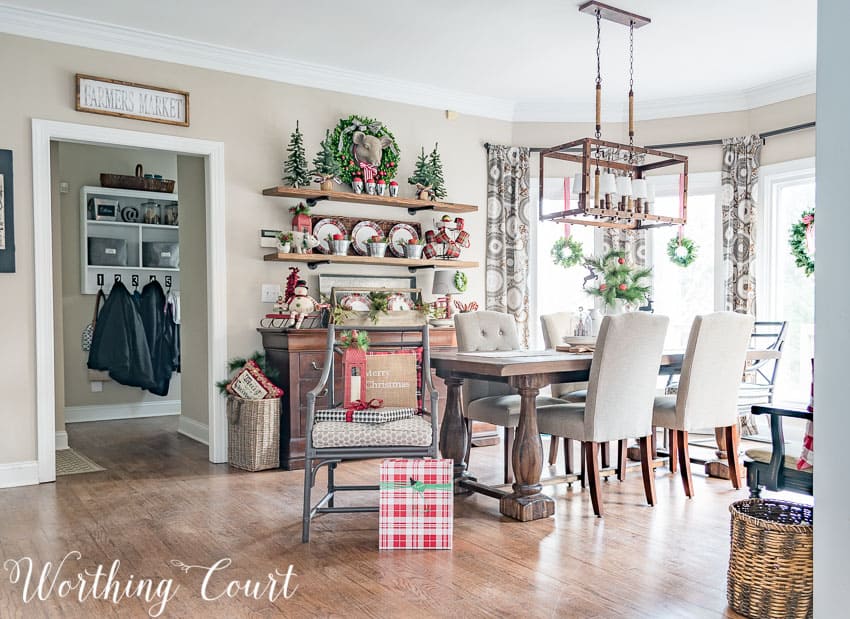
That hallway includes four different doorways and a double closet, plus it’s L shaped, so it’s an especially tight spot for taking pictures. You rarely see it in any of my blog posts because I usually crop it out of photos since it stays filled with coats, pocketbooks and anything else that winds up there. #reallife
This shot, taken from the kitchen, gives you an idea of just what an awkward area it is. Because of the lighting coming in from the breakfast area windows, the walls in the two spaces appear to be different colors, but they aren’t. It’s funny – the wall above my sideboard looks so bare since this photo was taken before I replaced the gallery wall with open shelves.
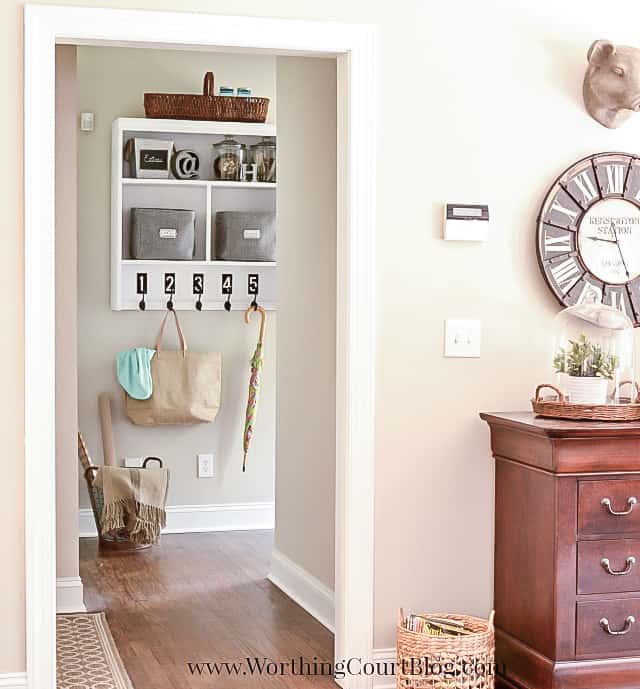
With a little photo editing magic, I was able to get a full frontal shot for you.
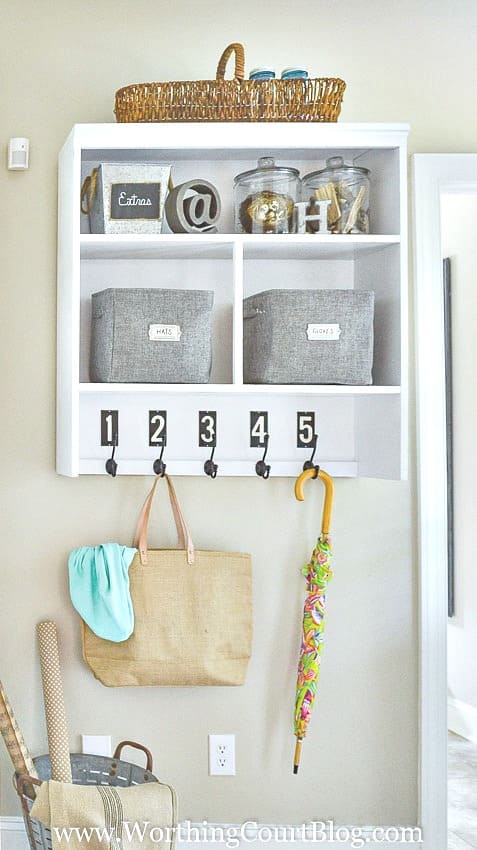
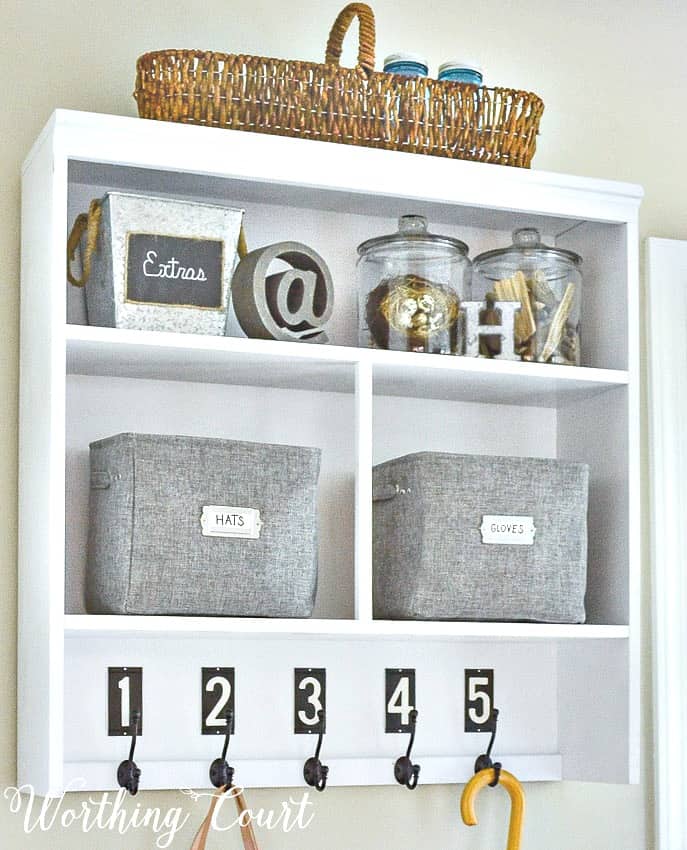
This thing will get yanked on a lot as it is where my granddaughters hang their coats and backpacks along with Pookie and I using it for our coats, my pocketbook and the dog leashes, so it has to be sturdy! I made sure to insert the screws for the D rings, that it hangs from, into wall studs. It is further reinforced by using long screws to attach the hooks that are running across the bottom. The screws go all the way through the bottom of the hutch, into the wall. Not every one of them hit a stud, but some of them did. You can find the hooks HERE.
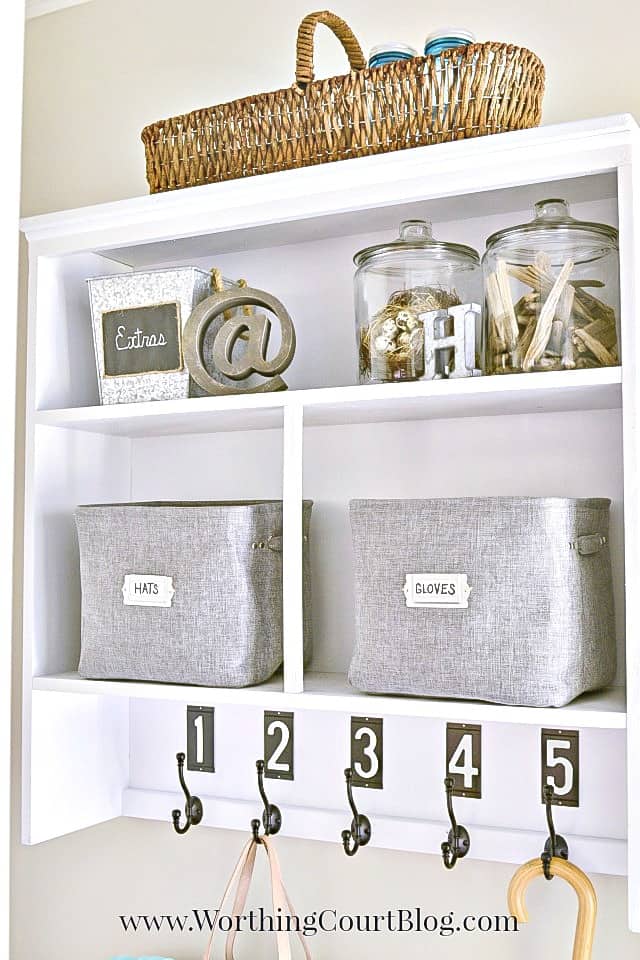
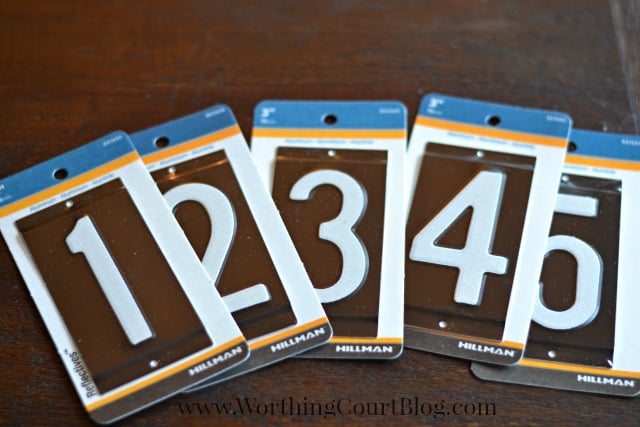
I looked everywhere for some affordable enamel numbers, but none were to be found. I finally ran across these outdoor house numbers at Lowes. At $1.48 each, they are the perfect finishing touch!
Fabric bins and a galvanized bucket work well to hold gloves and hats and other little items. All of the other decorations are from my stash. As a nod to summer, I filled one of the glass canisters with driftwood pieces and placed a faux bird’s nest in the other.

Oh – would you like to see where I used the other half of the buffet? Why, it got painted and lives on the back porch now!
PIN IT FOR LATER!
So how about you – do you have any pieces of furniture that you’ve re-purposed?
Sharing at THESE great parties.
What a great transformation – love it!
I love your creativity!! This is great use of the hutch, love it!!
What a great repurpose!
Love it!….talk about making a great use out of the entire piece!….Beautiful recycling!
I have an old dry sink that is two pieces. I never thought of separating them, but now you have me thinking. . . Great use for your mother in law’s hutch.
What a great way to repurpose a family heirloom. It looks fantastic. I hear ya on tight spaces. Our back entry is TINY, and also has 3 doors.
I love what you’ve done!! Such an awesome idea!!!
That is one of the most genius ideas for repurposing a hutch I’ve ever seen! Love how it turned out and love the bottom half on the back porch!
Such a great idea! Just been looking at a large–and pricey–piece at a furniture store and deemed it too bulky for my space. Now I’m considering the possibilities of my 1920’s TWO-PART china cabinet!
I love this! I would’ve never thought of taking the top of a hutch and making this, but because of what you did, I am looking at things in a different way! Great job!
What a great idea! I would never have guessed that those two pieces were once a whole hutch.
Looks awesome! Very creative!
That is so nice, Suzy! Perfect for your home! I’m hoping to make a tiny little wall space in My Wee Abode do triple-duty as a craft desk/mudroom/utility space. On the wall, I plan on installing a fold-out convertible desk (for my crafts/sewing/etc). Underneath that, a white IKEA storage bench, large enough to sit on and take off shoes, etc. (mudroom), with enough storage inside to house my HomeRight Steam Machine (utility storage). Whew…. gotta think how to use every bit of area in a small place, but still make it look ‘pretty’ and not cluttered. You inspire me to think out of the box. Thank you!
That’s brilliant! Great way to upcycle! 😉
I did something similar in my hubbys office! Great minds…….?
Great use of the old hutch! Thanks for the good ideas 🙂
Have to look for a w piece hutch!
That should be “2 piece hutch”!
I love this use of the hutch. Now, the only part not listed is those doors!! Can’t wait to see what you do with those!!
I love what you did with the old hutch. Your mom would be amazed,