A New Kind Of Fall Wreath And How To Make One
DIY embroidery hoop wreaths are all the rage! Let me show you how easy it is to make one of your very own fall wreath for the front door.
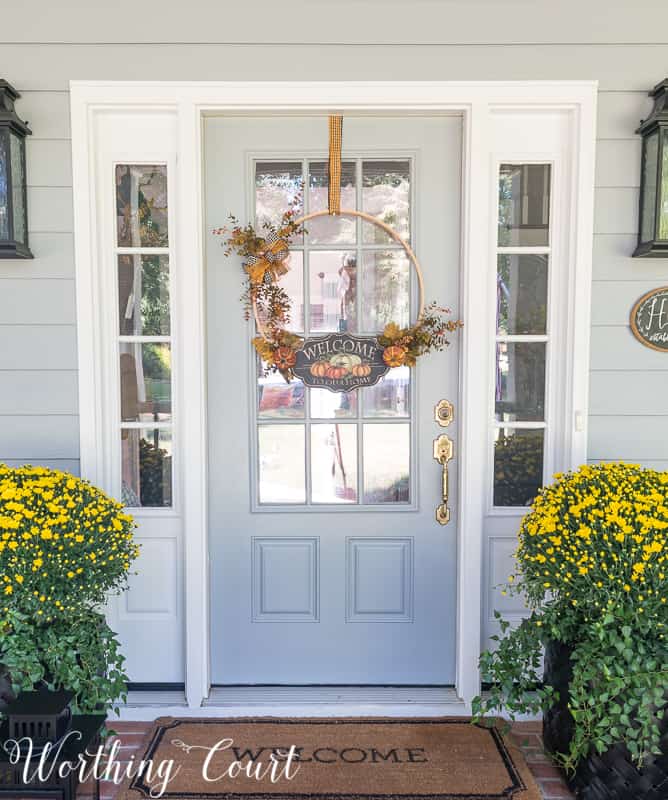
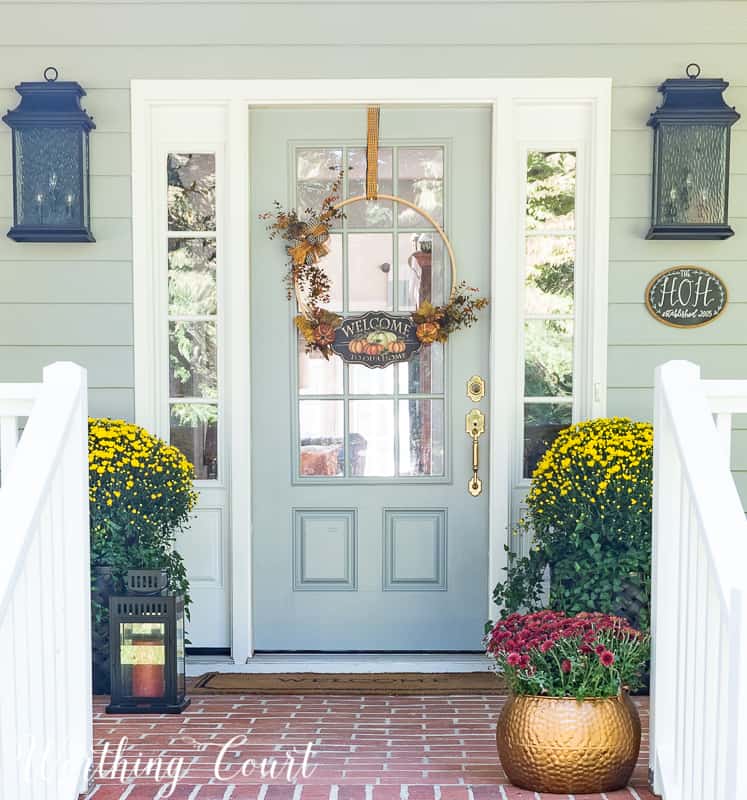
I decided that I wanted something a little different for my front door this fall. Something a little leaner and cleaner than an overly fussy fall wreath. I’ve had my eye on lots of different types of embroidery hoop wreaths for quite a while and when I ran across a cute fall plaque, I knew just what I wanted to create!
Let me show you the step-by-step directions for how to make a DIY fall wreath for your front door.
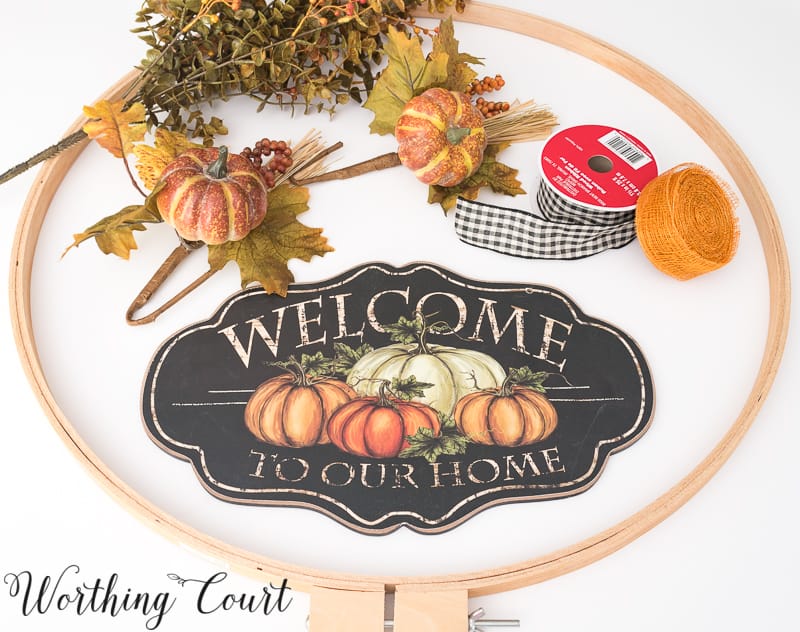
SUPPLIES NEEDED:
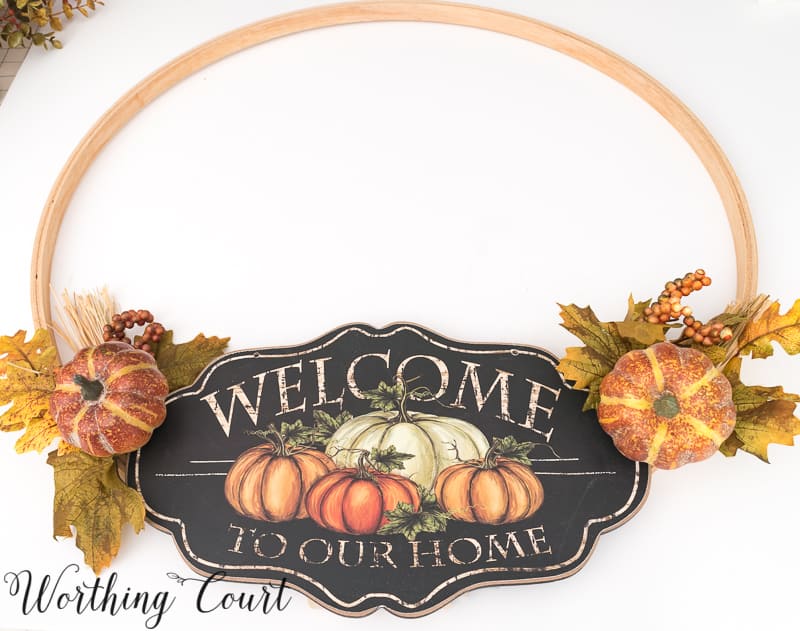
Embroidery hoop – My wreath is 23″ in diameter.
Decorative plaque – I found mine at Hobby Lobby.
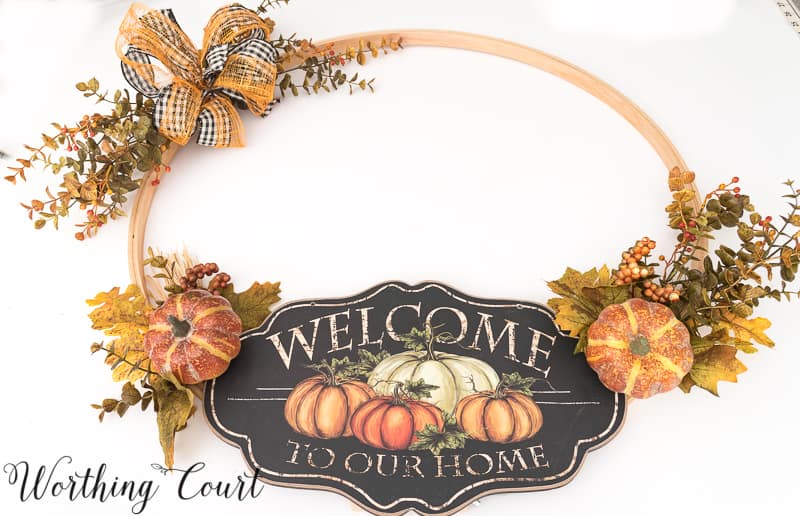
1 – Faux Foliage Bush in Fall Colors
2 – Fall Picks
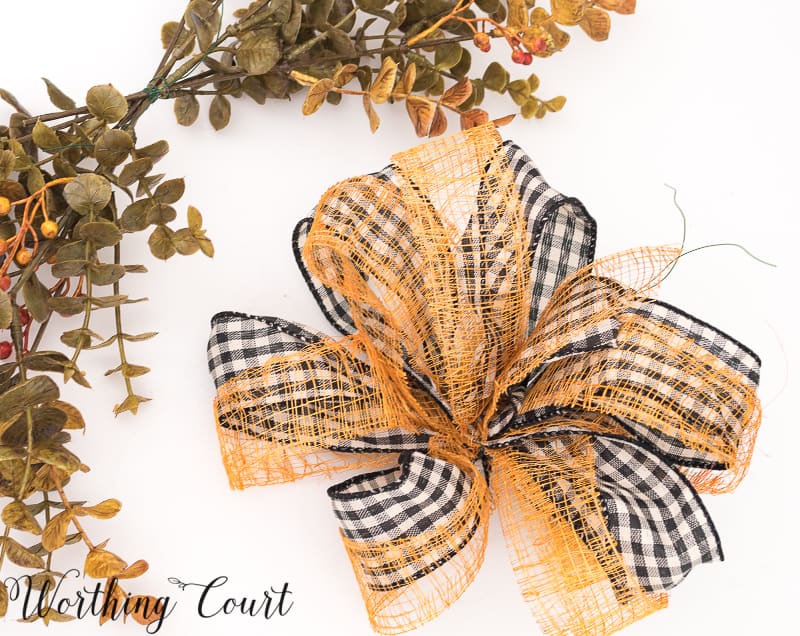
Ribbon
Glue Gun and Glue Sticks (not shown)
Florist Wire (not shown)
STEP 1:
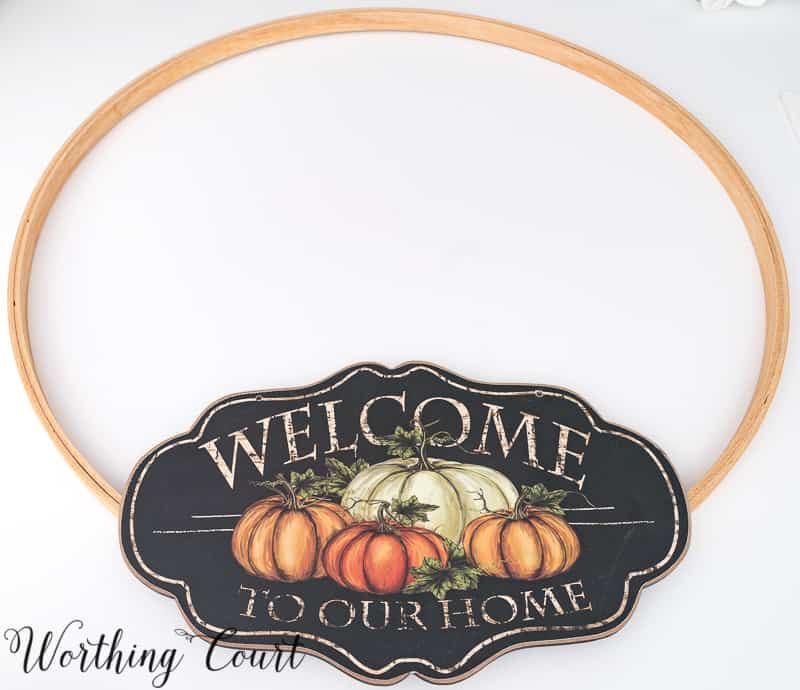
Hot glue the decorative plaque to the clamp part of the embroidery hoop. Be sure to be generous with the amount of glue that you apply. Allow the glue to dry before proceeding to the next step.
STEP 2:
Hot glue a fall pick to the back of each side of the plaque. I had to bend the stems on my picks to get them in the proper position. Hold the picks in place until the glue is dry.
STEP3:
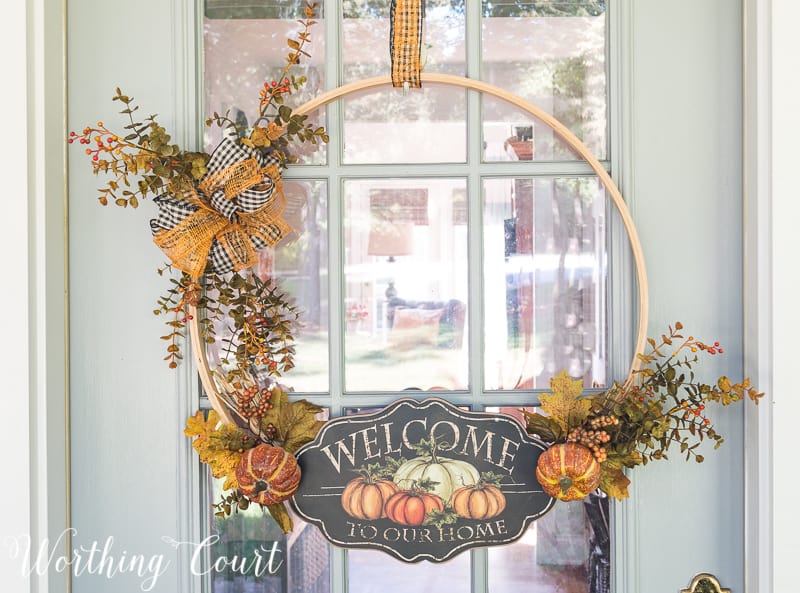
Snip pieces from the pretty floral bush, turn the stems so that some of the ends are facing one way and other ends are facing the opposite way. Wire the stems together with green florists wire. Look closely and you can see where my stems are wired together in the middle.

STEP4:
Make a cute bow using two different colors of ribbon that coordinate with the other decorations on your wreath. Click HERE for an easy to follow tutorial for bow making. When tying the bow together, be sure to leave the ends of floral wire long enough to secure the bow to the pieces of the floral bush that you wired together.
STEP5:
Secure the bunch of faux foliage and the bow to the hoop with floral wire.
Hang the embroidery hoop wreath on your door and enjoy! My DIY fall wreath is actually hanging from a suction cup hook. I layered two lengths of ribbon together and looped it around the hoop to make it appear that the wreath is hanging from ribbon and to help cover the suction cup.
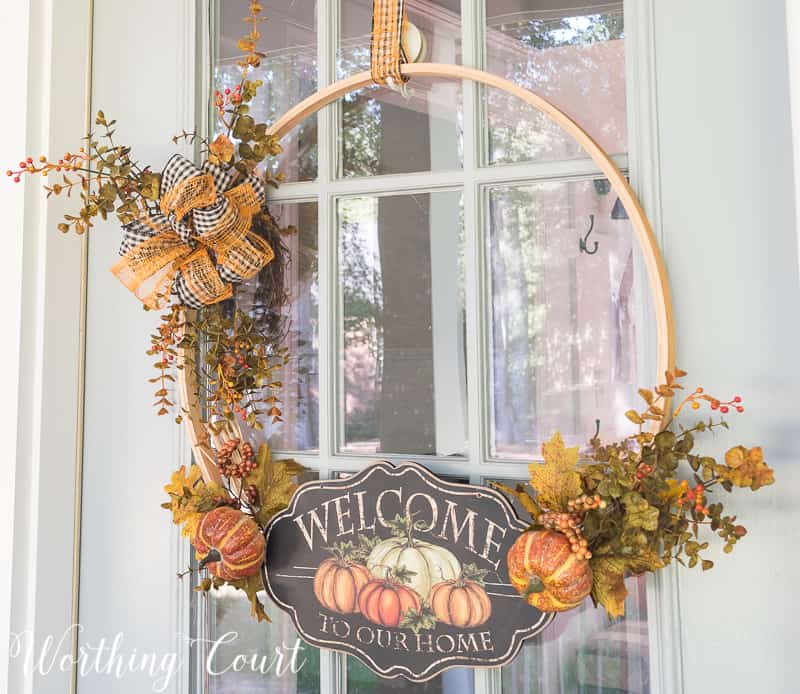
I adore this fall wreath and love how it blends with the rest of the seasonal decor on my front porch this fall! Click HERE to take a closer look at my porch.
I’ve teamed up with several of my talented blogger friends to bring you lots of DIY ideas for fall decorating! Click on the name of each blog below to see their projects.
Hunt & Host | Thistledown Domestic Creations | Christina’s Adventures | The Honeycomb Home | Worthing Court | My Creative Days | Sincerely, Marie Designs | Wife In Progress | Seeking Lavender Lane | The Everyday Home
This is beautiful, Suzy! I just adore the ribbon you chose. I haven’t made any wreaths yet with an embroidery hoop but I think I need too after seeing how lovely this one is!
Your wreath came out beautiful, I really love how you used the ribbon to hang it!
Love this wreath – off to hobby lobby!
This is so so beautiful! I absolutely love this! Great job!
This is so pretty Suzy! I love how you added the sign to your embroidery hoop (super clever). I am also obsessed over your front entrance…HOW GORGEOUS!!!!
I agree, I am going to Hobby Lobby after work! It is time to change the wreath on my front door, thank you for sharing!!!
The idea is great! I think it is clean and simple looking, just the right touch to compliment the rest of your fall porch decor!!
This is such a fun idea and so easy!!! Can’t wait to make on. Thank you for sharing your idea!
LOve this !! Going to have to make one. Thank you fir the inspiration!
I love this wreath , so simple yet elegant!
The temperatures are actually dropping a bit here and I’ve bought a can of copper spray paint! Love your front porch…great inspiration!
This wreath is so cute! I like that it’s different from the other traditional wreaths.
Great wreath…you have the perfect place for it…a covered porch! 😉
1Your wreath is very pretty! But I wanted to let you know that I get an error (404) when I try to follow the Thistledown link. Thanks!
Great idea! So easy to make too.
Suzy, your wreath is just wonderful! I love the simple, clean look and your whole entryway is beautiful!
Love it, love it, love it!!!
Beautiful! I’ve been wanting to make a wreath using an embroidery hoop now I’m even more motivated. Thanks for sharing!
VERY inspirational! I’m going to be doing something different, too… using a galvanized horizontal piece!, with purple, orange and green foliage. 🙂
Love it. The small plaque is what makes this wreath. I have an older hoop and now I know what to do with it. 🙂 Love your porch as always.