How To Decorate A Christmas Tree Like A Designer
The ultimate step-by-step guide for how to decorate your Christmas tree like a professional designer.
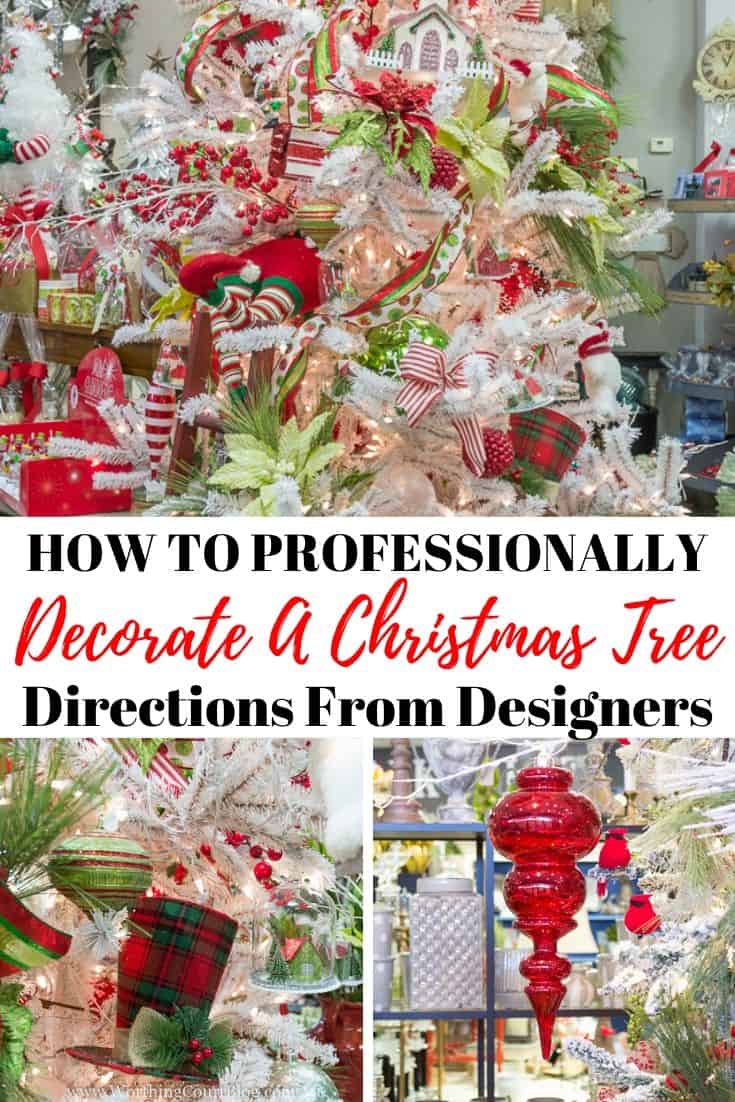
My friends, this is one blog post that you’re going to want to pin to your Christmas Decorating Boards so that you can refer to it year after year. This is THAT GOOD and there’s a great pinnable image below!
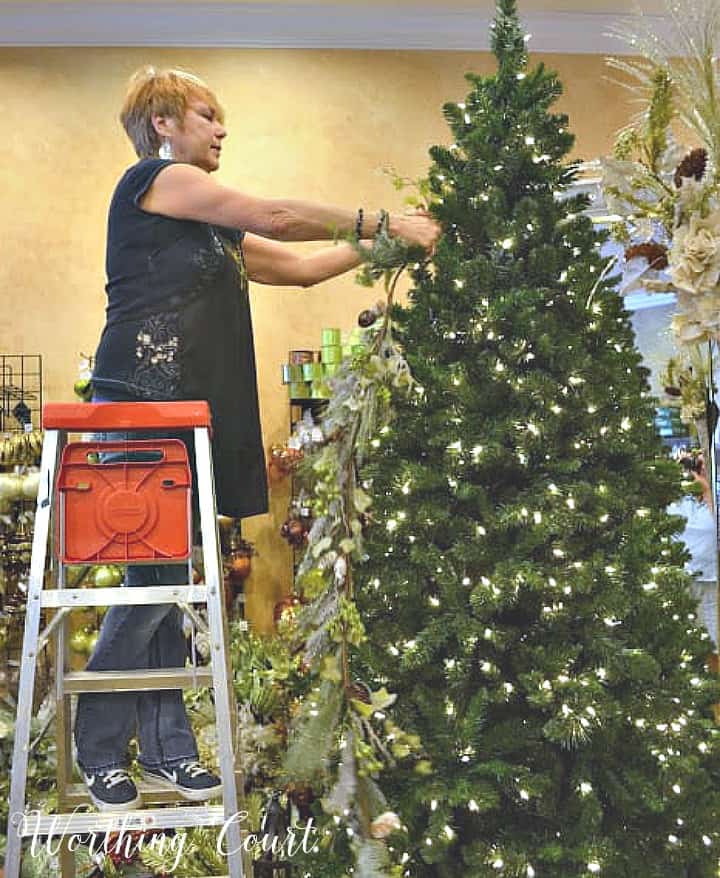
I’ve had the privilege to get special access to several local home decor stores over the last few years, while their stores were closed and their designers reset the entire place for Christmas. It was a truly magical experience for me and boy did I ever learn a lot!
All of the store designers are amazingly talented and were kind enough to share all of their step-by-step Christmas tree decoration ideas. I was also told some designer Christmas tree decorating secrets so of course I’m going to share them with you!
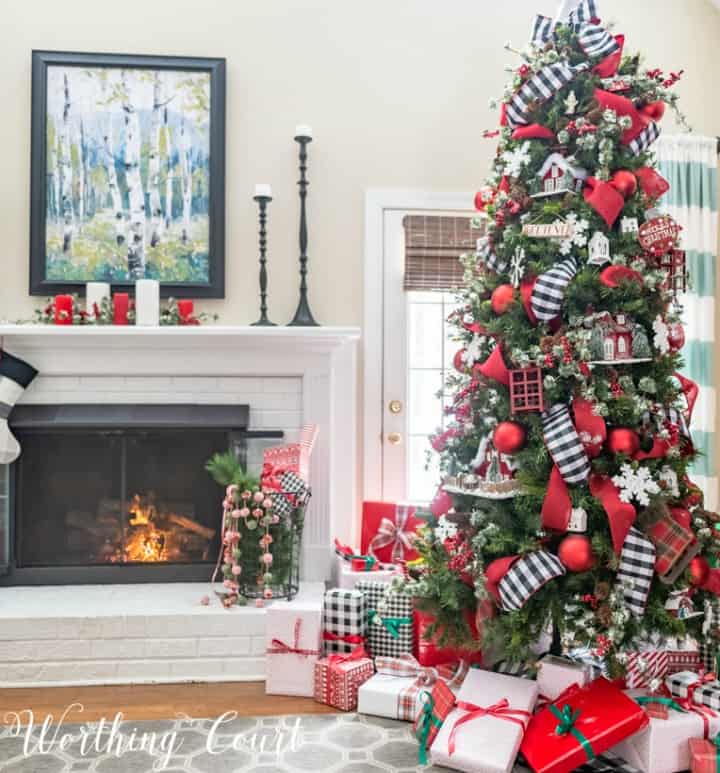
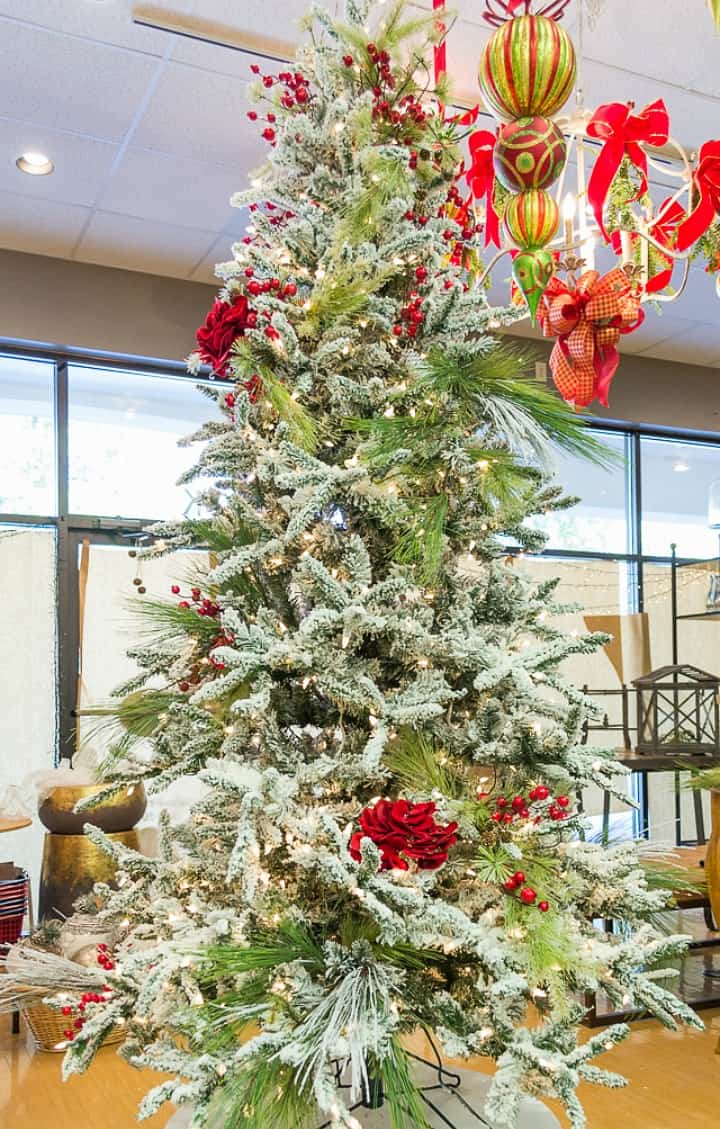
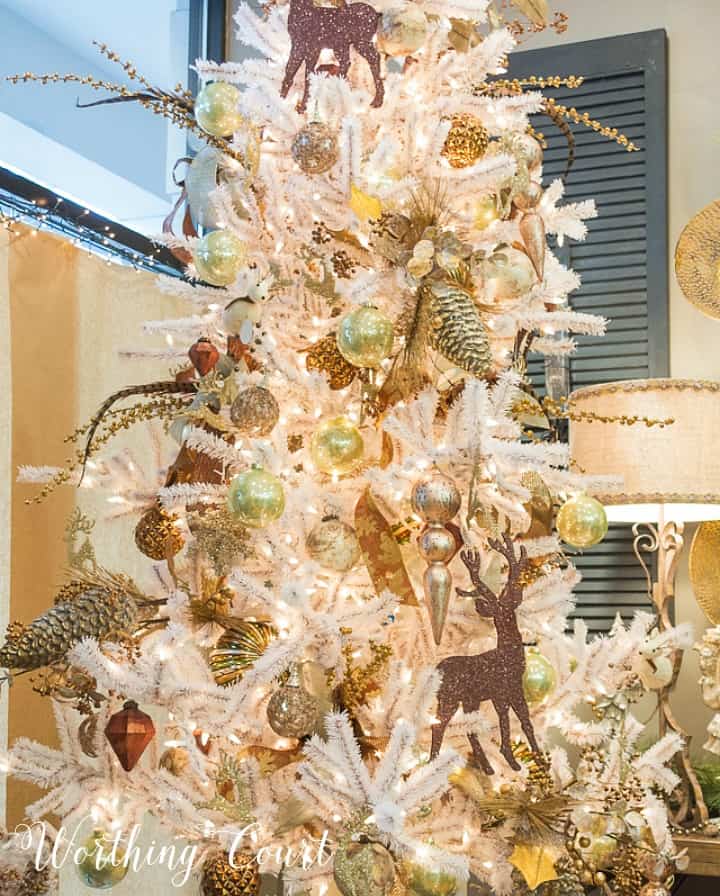
You’ll see images from several different Christmas trees, as there were multiple Christmas trees being decorated at the same time. The important thing to remember is that these steps can be followed no matter what style or color of Christmas decor you want to use on your tree!
STEP 1: READY THE TREE & GATHER SUPPLIES
- Maybe this goes without saying, but fluff all of the branches on the tree and make sure that the tree is standing straight from top to bottom. I’ve completely decorated a tree more than once, only to realize that the top half of the tree is leaning.
- Make sure that all of the lights are working. It’s much easier to fix any problems before the decorations are on the tree.
- The designers recommend that you have the tree lights on while decorating.
- Supplies that you’ll likely use while decorating your tree are: ornament hooks, floral wire, pipe cleaners, zip ties (for heavy or bulky items), wire snips and scissors
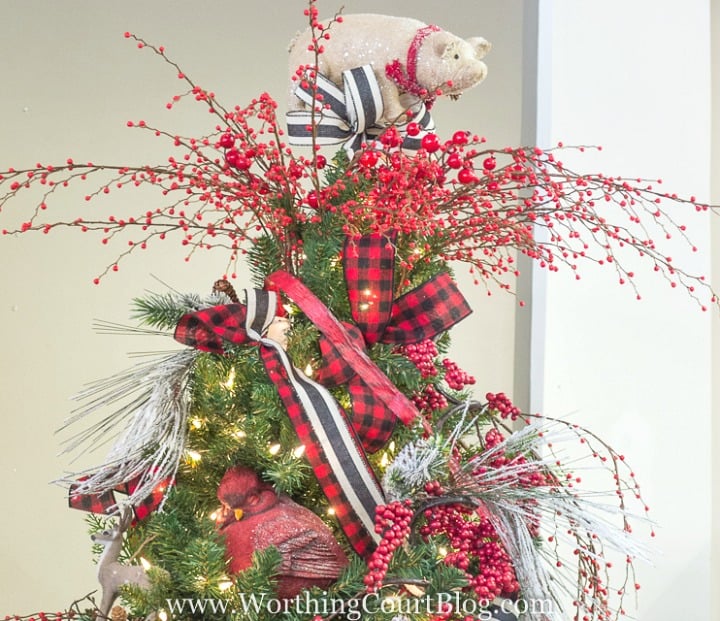
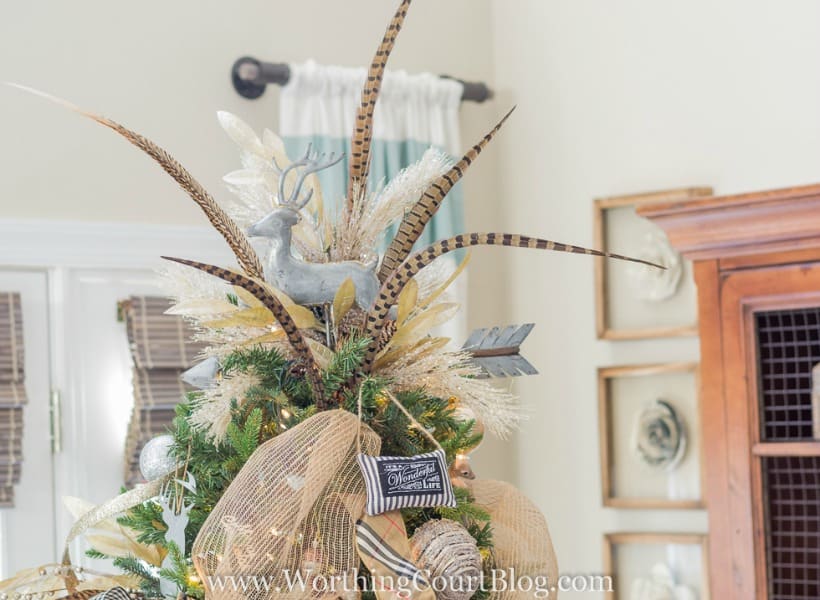
STEP 2: START AT THE TOP
- The Christmas tree topper is considered the crowning glory, is usually a bit elaborate and helps to set the look for the entire tree.
- If you will be adding a star, angel, etc. to your tree, it’s best not to place it right on the tip-top of the tree. Depending upon what you’re using, it can be very appealing to place it about a hand’s width down from the tip-top. It can be attached with floral wire or zip ties. If you attach it slightly down from the top, it should be buried into the branches a little instead of looking like it’s floating on the ends of the branches.
- Most items, such as a star or angel, look the best (and draw more attention) when they are combined with something else, such as picks and/or ribbon. And good grief – these days picks are available in all varieties and colors!
- If you’re using a star, angel, etc. for the top of your tree, start the first layer of topper picks a little below it by adding 3 long spikey picks.
- If you aren’t using anything else on top of your tree, start the first layer of topper picks slightly down from the top.
- For the second layer of topper picks, choose 3 – 4 slightly shorter and more full picks. Place these a few inches closer to the top than the original 3 spikey picks.
- Add a third layer of picks using shorter and more full picks.
- Don’t think you have to point them going straight up. Picks pointing straight up (or at a slight angle) combined with picks pointing downward add a lot of interest. Depending upon what type of pick you’re using, you may actually want to turn the pick upside down, so that the top of the pick is facing whomever is looking up at the tree topper, especially if your tree is taller than normal head height.
STEP 3: ADD THE GARLAND
A lush, full garland can make a huge impact on a tree! These tips are referring to the type of garland that you might also use on a mantel, not the lightweight kind that drapes along the edges of the branches.
- Start about 1/5th of the way down from the top of the tree.
- Use floral wire to attach the garland or twist the branches together, if the tree is artificial.
- Run the garland at around the tree at an angle: 2 – 3 times around a 6′ tree and 3 – 4 times around a 9′ tree.
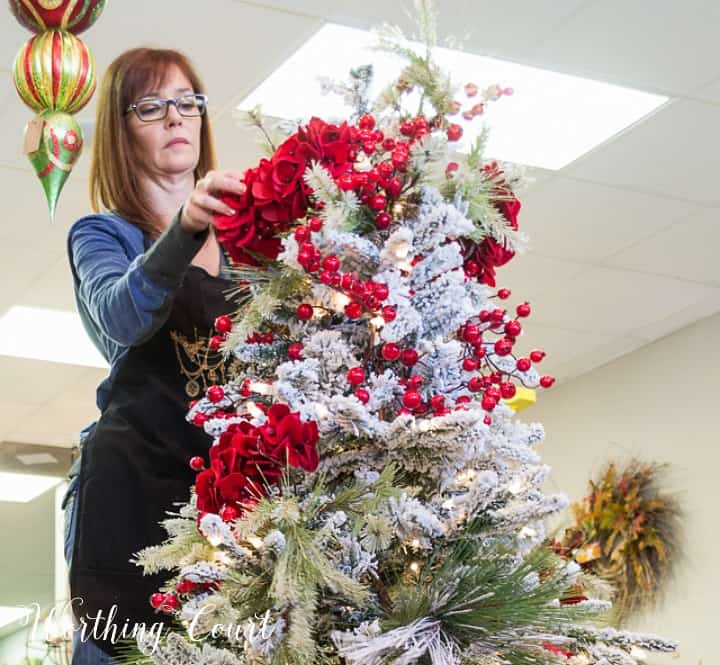
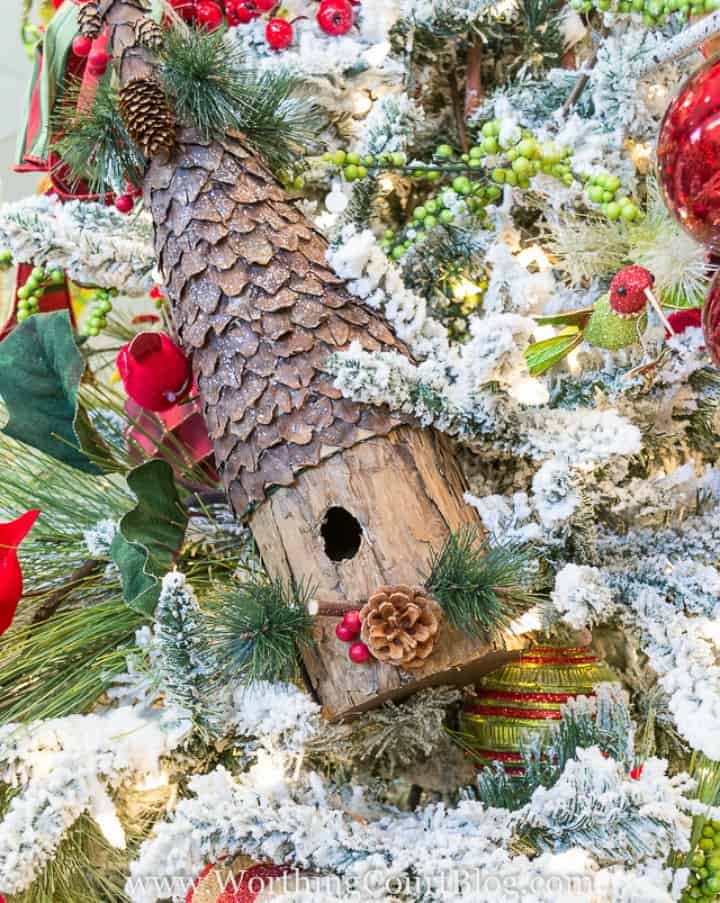
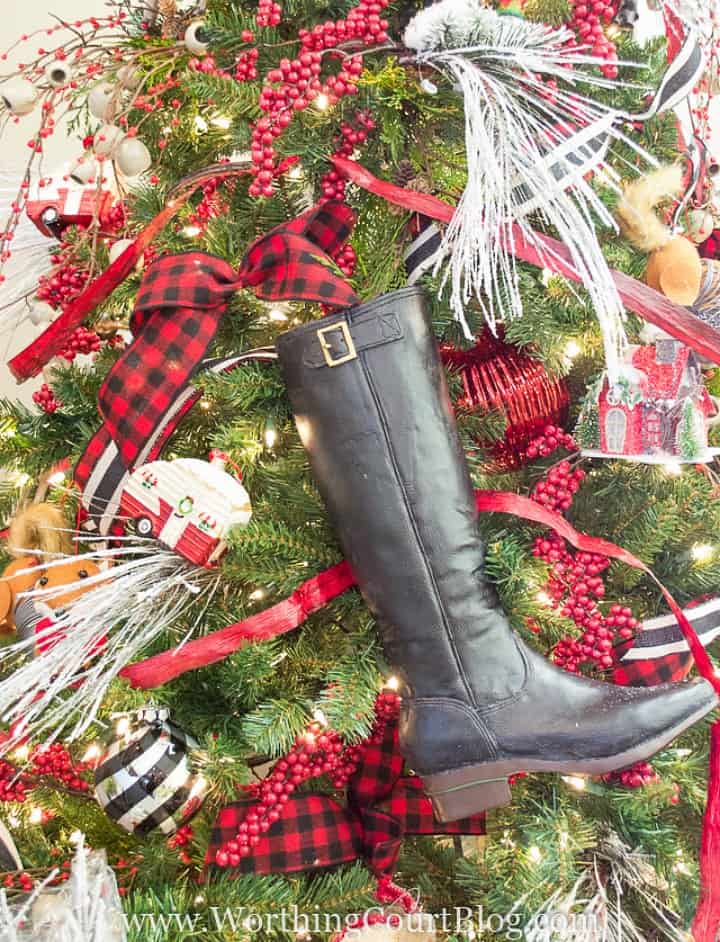
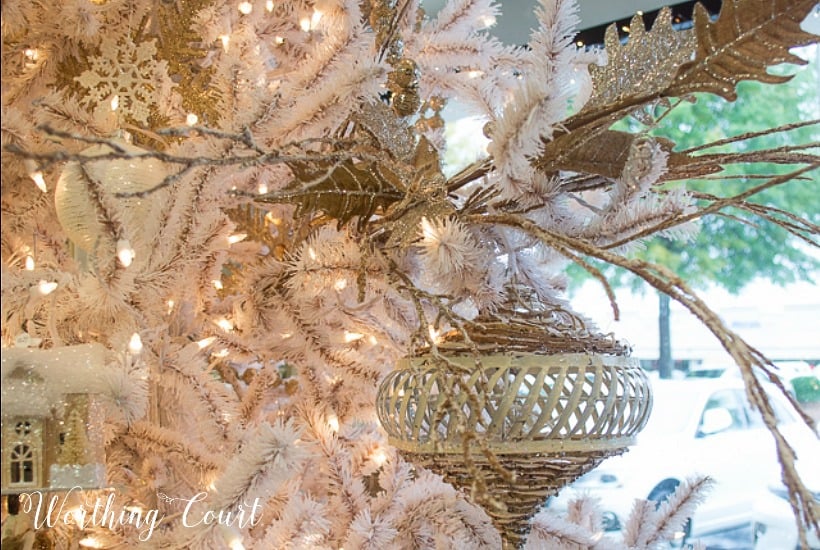
STEP 4: ADD OVERSIZED DECORATIONS
- To make a real statement and really give your tree a designer look add oversized exaggerated decorations to the tree! What you add is only limited by your imagination!
- Add 2 – 3 oversized items to a 6′ tree and 3 – 4 items to a 9′ tree.
- Be sure to stagger them around the tree and not placed directly above or directly beside one another.
- Place the largest Christmas decorations toward the bottom of the tree.
- Mix them up – all of the items don’t need to match.
- A tip from the professional tree designers is to drill a hole into whatever you’re hanging if you need a spot to run a hanger through.
- Use cable ties, floral wire or pipe cleaners to attach large items to the tree. The boot, on the tree, below was purchased at a thrift store with the express purpose of using it on the tree, so it was fine to drill a hole into the backside. Think outside of the box!
STEP 5: ADD FILLER
- Add less expensive Christmas ornaments, such as plain round ones, deep inside of the tree. You’ll only get a glimpse of them, but it they will help to reflect the lights and will make the tree look more full and will fill up any empty spots inside the tree.
- It’s easier to hang these filler ornaments now as opposed to when the “outside” of the tree is filled with other, larger ornaments.
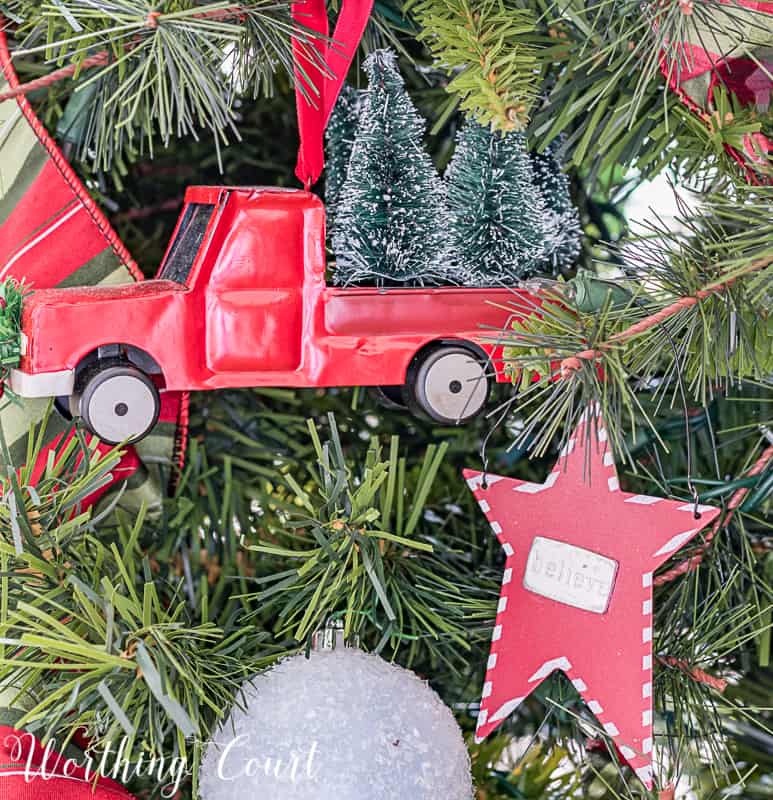
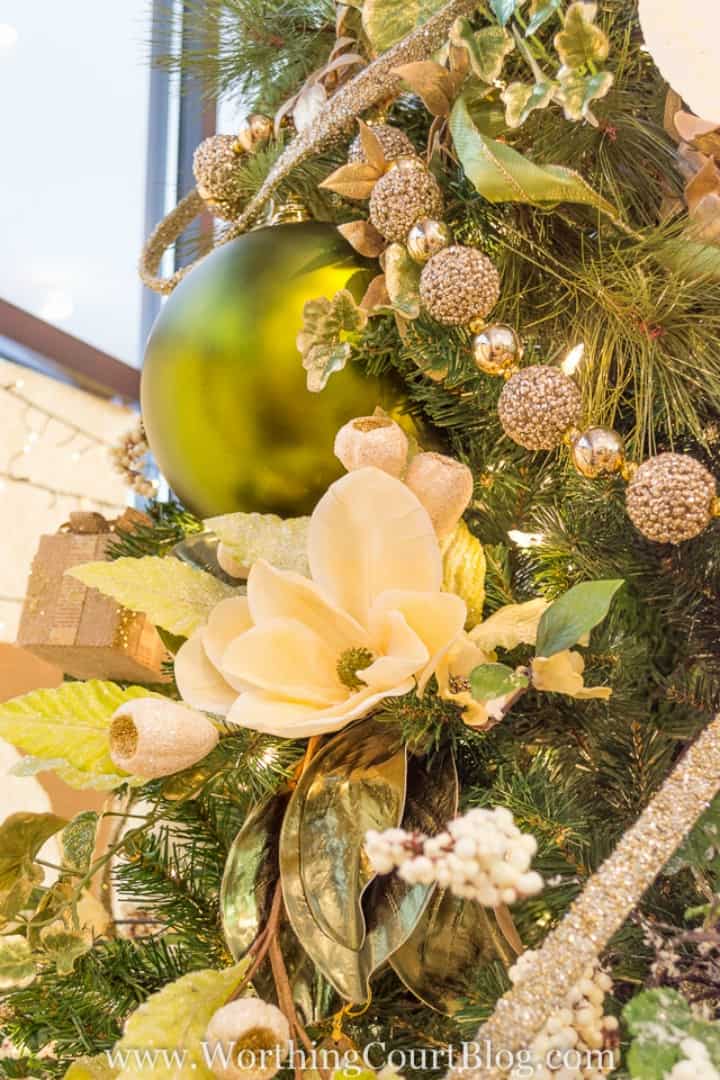
STEP 6: ADD ORNAMENTS
- Now that you’ve filled the inside of the tree with inexpensive ornaments, add the more special ones to the outer part of the tree. Use a mix of both large and small ornaments, but hang the largest ornaments first and then follow up with the medium sized ones and then the smaller ornaments.
- Try nestling large tree ornaments slightly into the tree instead of just hanging them on the tips of the branches.
- Pipe cleaners or floral wire works best to hang ornaments with rather than traditional ornament hangers. Bonus – you can reuse them next year!
- Snug the ornament up against the tree branch when attaching it to the tree instead of letting it dangle.
-
Use long ornaments to help fill empty spaces.
STEP 7: ADD DIMENSION WITH PICKS
- Give your Christmas tree more dimension, fill in holes and make the tree appear larger by adding picks throughout the body of it. The picks should extend beyond the ends of the branches and should be angled in various directions – some downward, some upward and some sideways, if appropriate for the pick.
-
The picks closest to the top of the tree may need to be turned upside down so that you aren’t looking at the underside of it.
- Stagger various types of picks all over the tree. Don’t put the same type of picks too close to one another.
- Multiple picks combined together in a cluster typically look better than just one lonely pick. Try combining three different types of picks together. For example – combine something with greenery with something long and stick looking (with or without leaves) and with something full (like a flower).
- Lay the longest pick on the bottom, the second shortest one on top of that and the shortest pick on top of those two. Then spend a minute fluffing all of the parts of the picks, twisting and mixing the parts of each pick together. You’ll get a much more natural and professional look that way. No flat picks allowed!
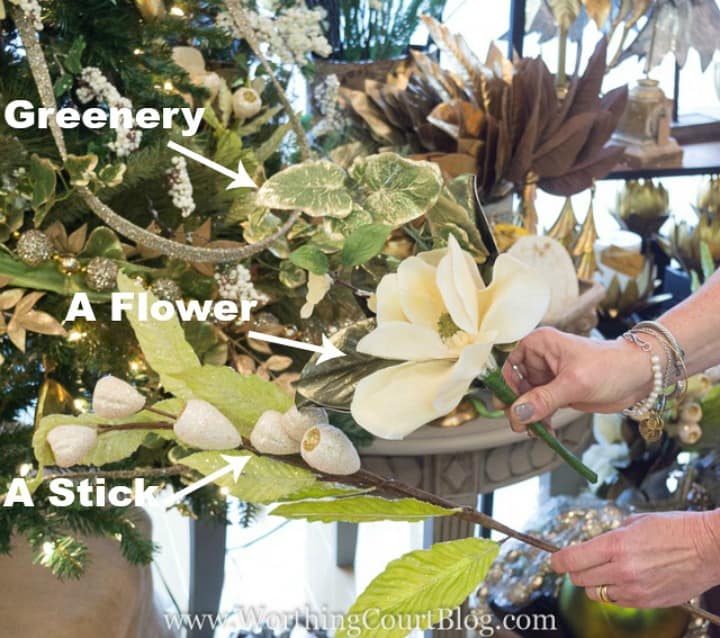
- Poke the pick into the tree and attach it to the branch with a cable tie or with floral wire, if necessary. Fluff the tree branches into and around the pick to help it look like it’s a part of the tree.
- A long pick makes a great place to hang a special Christmas ornament too.
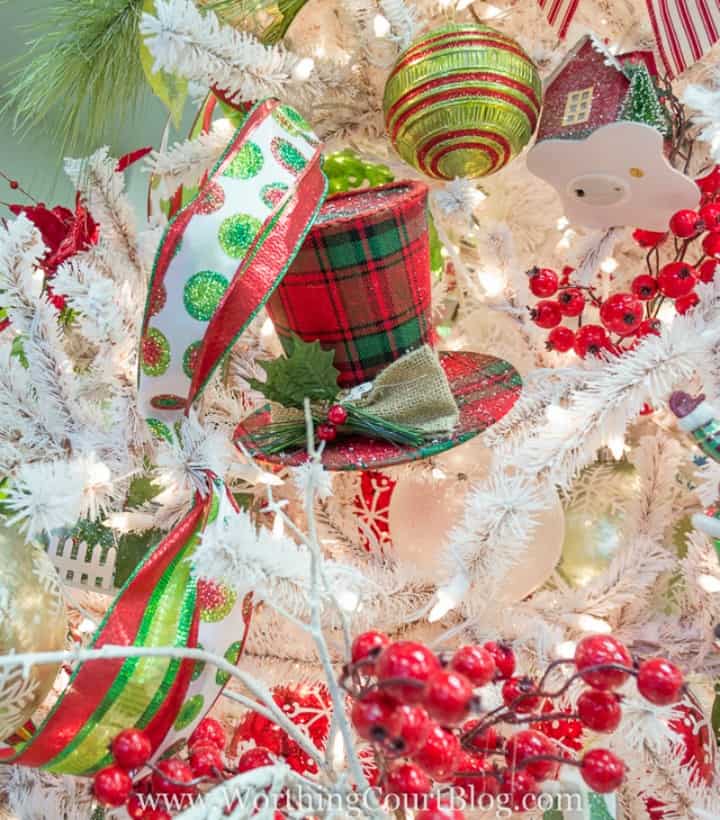
STEP 8: EMBELLISH THE TREE WITH EXTRAS
- Add decor embellishments such as ribbon, lightweight garland and glitter tape once all of the picks, ornaments and oversized pieces have been added to the tree
- To add glitter tape, start attaching it near the top, but below the topper. Wind it around the tree similar to how you applied the garland in Step 3.
- Glitter tape has a mind of its own, so allow it to twist and turn as you go. That’s what makes it look so great!
- You’ll use less ribbon if you cut short pieces and stuff the ends of them into the tree as opposed to using one long continuous piece of ribbon. Using this method also makes the ribbon look more natural.
- Twist a tree branch around the ribbon if it won’t stay in place.
- When adding ribbon to the tree, start at eye level and work up and out from there. I can’t tell you why this works better, but it does!
- Place the ribbon going in different directions so that it doesn’t appear as if it’s just wrapped around the tree.
You’re finished! Now get ready to enjoy the oohs and aahs of your family and friends and answer all those questions about who you hired to decorate your tree!

Hi!
Hope you had a nice Thanksgiving.
Yesterday my husband put up the holiday lights outside BEAUTIFUL🎄
I have put away the fall decorations and will start on the Christmas decorations in the next few days.
Love your post on decorating a beautiful Christmas tree.
I use a faux tree. It looks fresh longer.
We are empty nesters. But remember our daughters putting small trees in their bedrooms.
They also had a full size tree to decorate in
their rec room. All fun memories.
The family tree I decorated. And we enjoyed all of the trees.
Thank you for all of your helpful suggestions.
Always enjoy reading your post.
Love very much that you use color throughout your home. So refreshing and welcoming.
I honestly do not understand very neutral/white homes. Not at all welcoming.
I have commented in quite while Please accept my comment.
Such great tips which are easy to understand! Thank you!
loved your article. very helpful. my problem is my ornaments look dark on the outside of tree. my lights are bright. you can see the ornaments
Thank you for doing such a beautiful job in explaining how to professionally decorate like a pro. I learned so much, even at 70 years of age.
I’ve been decorating trees professionally for over 30 years and I picked up some great tips here. Very detailed instructions. Thanks, I guess old dogs can learn new tricks!
Enjoying your blog especially about Christmas tree decorating top to bottom. I will revisit when I am actually decorating but where are you located???
Love the tips! I enjoy decorating.
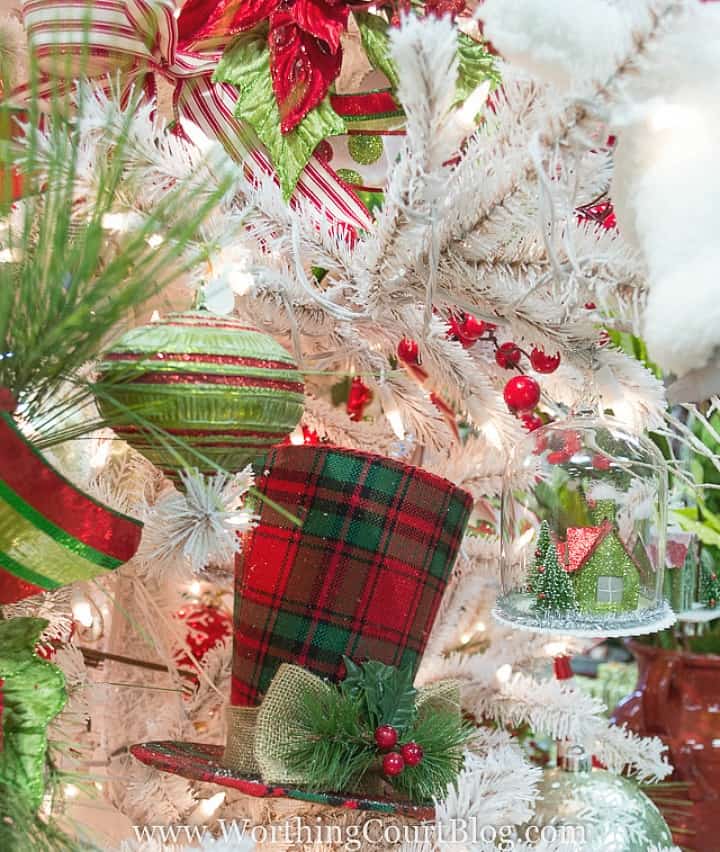
Love the red plaid top hat ornament. Any link to find those?
Isn’t is cute? Unfortunately, I don’t have a link for it. It was in a local home decor store.
Love, love, love all the trees absolutely all of them beautiful. Love how they are decorated. Yo are an inspiration. Thank you.
Thank you, thank you, thank you for telling those of us who aren’t tree decorators how to attach the picks to the tree!!!! I’ve been going nuts trying to figure out what I’m doing wrong. I thought you just stuck them in because they were “picks”! It’s so simple, I’m embarrassed I didn’t figure it out on my own, but I’ve never done anything other than HANG ornaments on a tree! I’ve read so many articles and no one explains this. So, thank you!!!
You’re so welcome, Hollie. (Your name is the perfect Christmas name!) Sometimes it’s the little things that trip us up – right? Merry Christmas!
Thank you for sharing these wonderful ideas. I really learned a lot.
Thank you for letting me know, Debbie! I’m so glad you found it helpful. Merry Christmas!