Christmas Tree Basics – How To Choose, Set Up And Fluff An Artificial Christmas Tree
In this post I’ll show you how to choose, set up and fluff an artificial Christmas tree, whether flocked or unflocked. You just might have an aha moment when you see the genius way that I’ve discovered for fluffing!
If you’re like me, your Christmas tree is the star of the show when it comes to decorating your home this time of year.

This post and photos may contain Amazon or other affiliate links. As an Amazon Associate I earn from qualifying purchases. If you purchase something through any link, I may receive a small commission, at no extra charge to you. All opinions are my own. See my full disclosure HERE.
We all put so much effort into making our trees as beautiful as possible with decorations, but you may be setting yourself for disappointment if you don’t start with the basics.
After you’ve selected the proper tree for your setting and fluffed it properly, you’re ready to decorate! Click on THIS LINK to see my post: How To Professionally Decorate A Christmas Tree – Designer’s Step-By-Step Directions.

CONSIDER THIS BEFORE YOU BUY
There are quite a few things to consider when purchasing a new artificial tree! I’ve learned the hard (and expensive) way by not taking a few things into consideration before I buy.
These considerations are in no particular order, but if you want to wind up with a tree that you’re happy with, don’t just run out and buy one off of the shelf.
- Where will the tree be displayed?
- What is the height of the ceiling where it will be displayed?
- How much space/width do you have to properly accommodate a tree?
- What color are the lights on the tree?
- How full is the tree? How many tips does it have?
- Will you need to move furniture to make room for the tree?
- What is the overall shape of the tree?
- Do you prefer pre-lit versus unlit?
- If you’re buying pre-lit, how many lights does the tree have?
- How easy/difficult is the tree to assemble?
- What is your budget?
If you’re in the market for a new tree this year, I’ve also included a list of 12 beautiful trees with great reviews that are available to ship quickly. There are multiple price points, all are pre-lit and many are available in multiple sizes.

THE EASIEST WAY TO FLUFF A TREE
Now that you’ve selected and purchased your tree, it’s time to prepare it for decorating. When it comes to fluffing a tree, the thing that I dread the most are the scratches on my hands and arms that I’m left with. Using in this method totally prevents that – no need for wearing long sleeves and gloves anymore!
Please forgive the horrible quality of these photos. My originals are nowhere to be found, so I had to grab screenshots from videos.
STEP 1:
Place the lowest section of the tree into the base and lower the first layer of branches. Leave the remaining branches in their upright position.
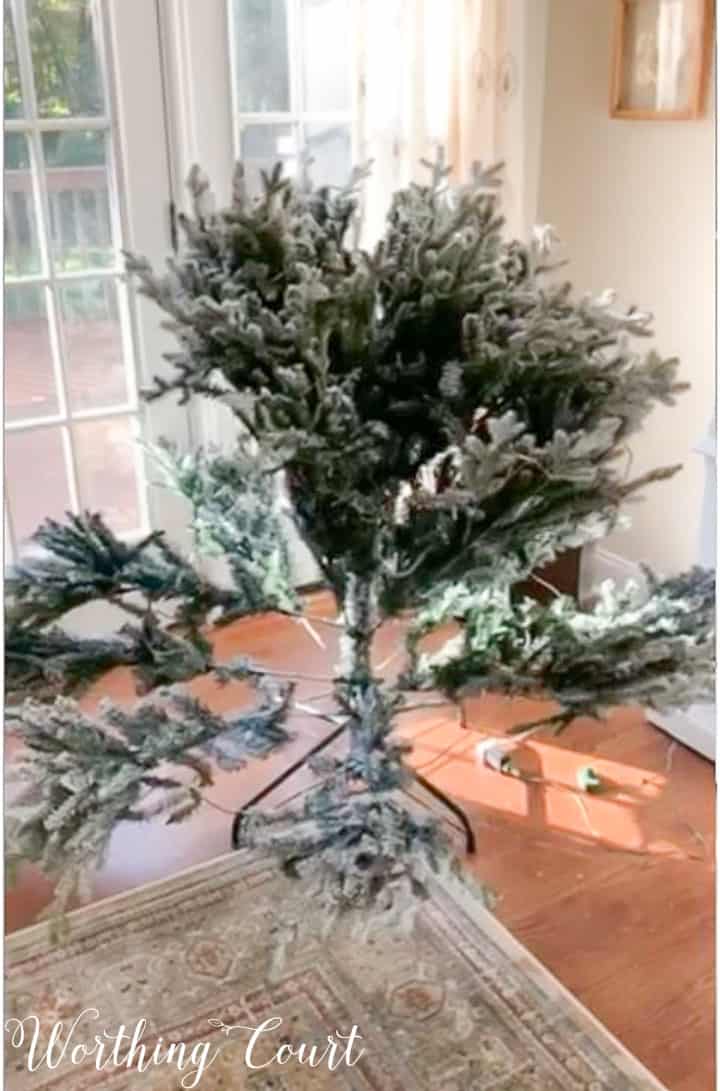
STEP 2:
Working from the trunk of the tree out to the tip of each limb, pull apart all of the small branches. Arrange some of the branches in a downward position, some straight out and some in an upright position.
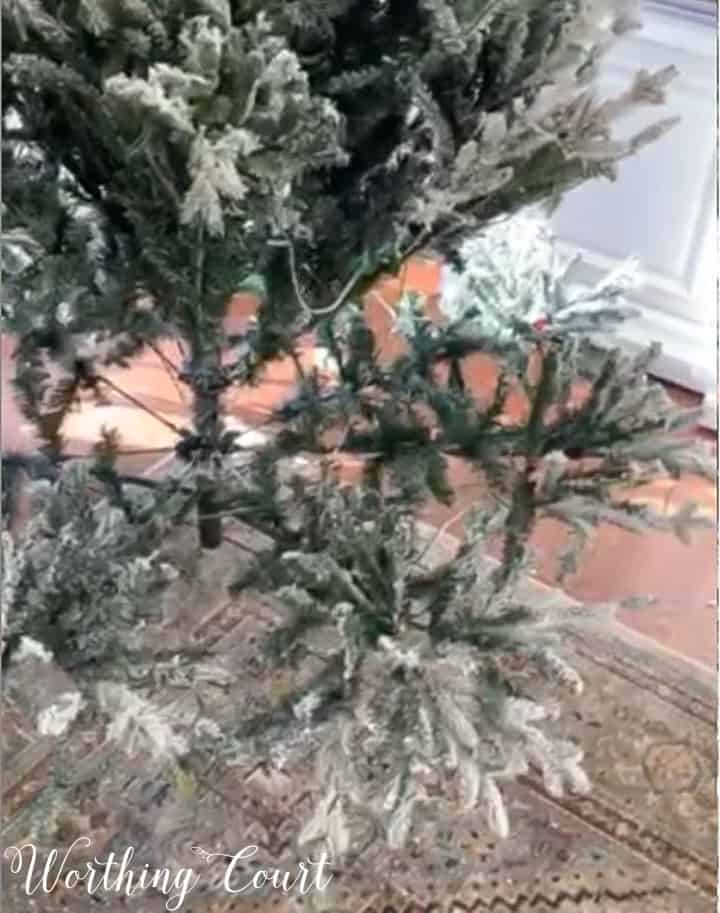
STEP 3:
Continue to lower one layer of branches at a time. When the bottom tree section is complete, add the next tree section and repeat the process.
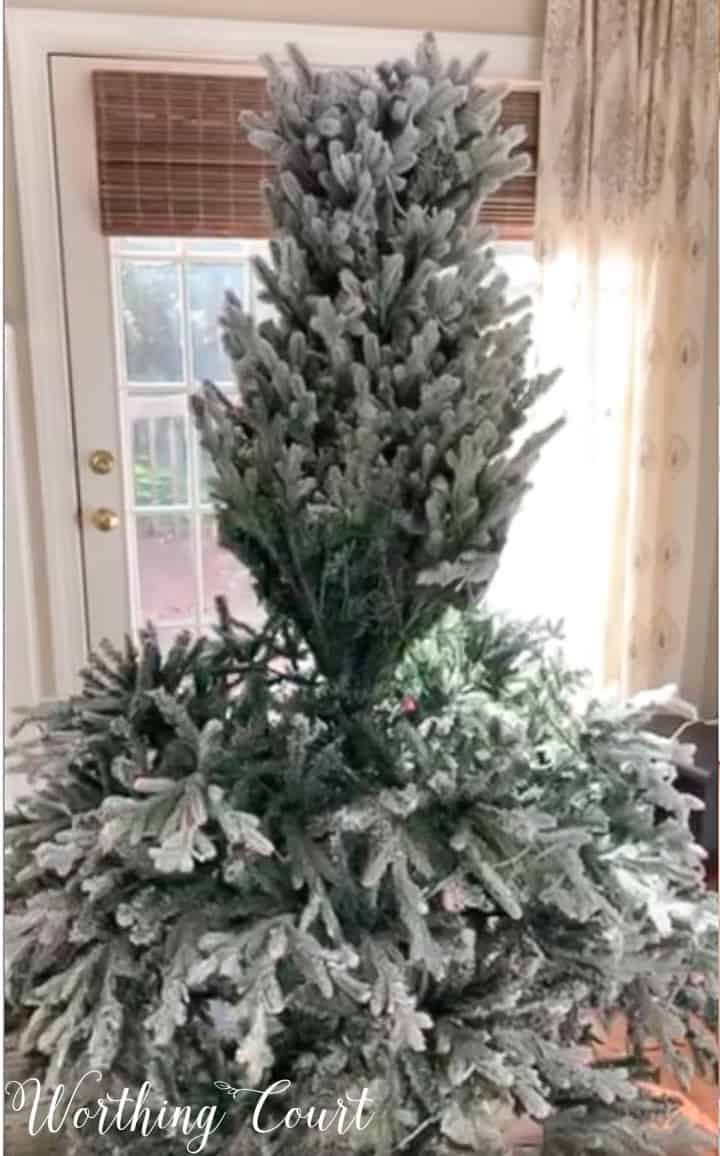
STEP 4:
I find it easiest to fluff the very top section in my lap and place it on the tree after I’ve fluffed it.
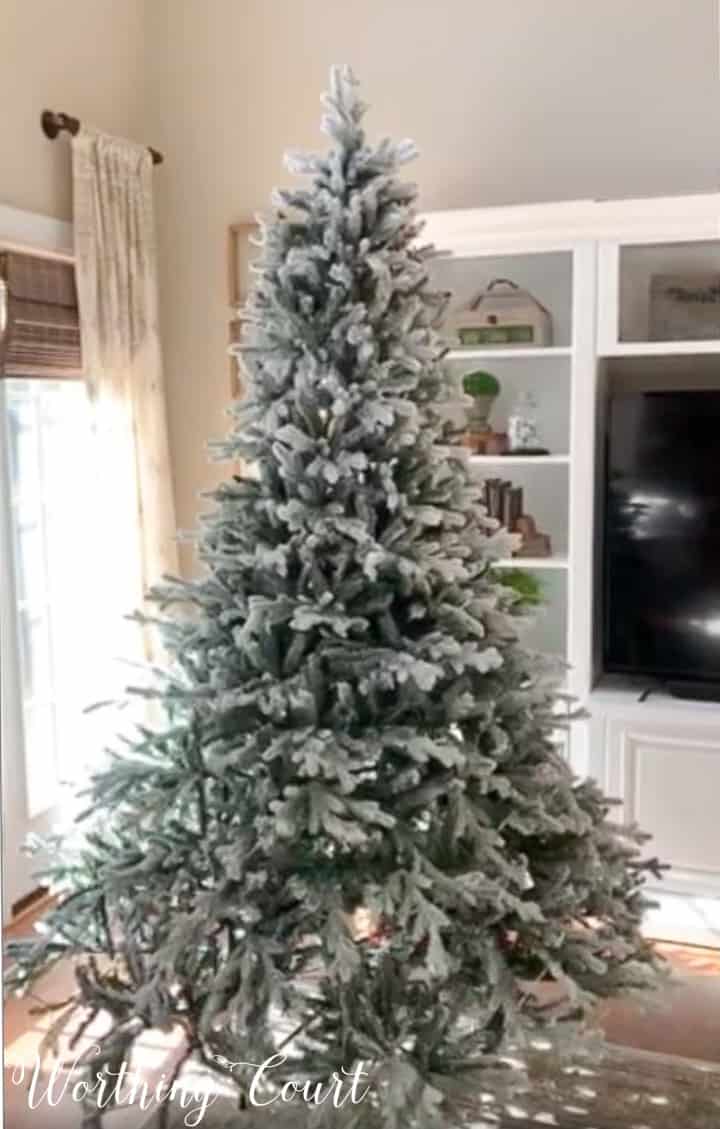
Now that you’re ready to decorate, don’t forget to check out How To Professionally Decorate A Christmas Tree – Designer’s Step-By-Step Directions.
Happy Christmas tree decorating!
I don’t see the link to the list of good Christmas trees to purchase.
My apologies for not replying sooner! I’m having a technical difficulty that’s been preventing from being notified of new comments. To view the tress, click on the photo of any tree that you’re interested in. That should take you right to it. 🙂
Thanks for the fluffing tips. We bought a flocked tree for the first time this year. It’s going up later this week. Can’t wait!
My apologies for not replying sooner! I’m having a technical difficulty that’s been preventing from being notified of new comments. I hope these tips helped you with your new tree!
Suzy I did this exact same thing this year! I laughed at myself for not thinking of it sooner. I didn’t fluff the top in my lap, though. I’ll have to try that next year.
Same here! I totally couldn’t believe that I didn’t think of this before. So, so much easier!
Where and what size tree is the one you used for your blog? I love it, and have been looking for a great flocked tree!
Please Help!
It’s a 7′ tree and I found it at At Home. I’m sorry that I can’t provide a link for you!
Thank you so much for the fluffing tips! Oh my goodness. Being a widow now, you made it so easy for me! And my tree looks beautiful! Something so simple, yet so brilliant! Merry Christmas.
I’m so glad that this helped you! Merry Christmas to you as well!
suzie, I could not find any trees to click onto. the only tree that I saw in your blog was the flocked tree from At Home. ( Very Beautiful !) Please post the other trees that you mentioned.
thank so much for a wonderful blog.
If you click on the picture of the tree that you’re interested in, it will take you directly to that tree. Hope that makes sense! 🙂
Omgosh Suzie, this is exactly how I do mine!!! Been doing it for years this way. Thanks for showing others how to do it the easy way.
Suzy,
Thanks for the information on “fluffing” a tree. I have never done it this way and yours looks very full and “real!” I will certainly take my time this year and fluff mine – thereby hoping for a prettier, fuller tree. I am movingon to your “How to Decorate a Tree Professionally.” Although our home is personal and should reflect our tastes, your tips should be very helpful.
Merry Christmas!
Barbara
Great fluffing tips! This is my first year going with an artificial tree, so I’m a bit new to it all. After years of cleaning up pine needles and having wobbly trees fall down (and having to refinish our floors), my husband said no more live trees! The artificial trees you linked to though seem like a great alternative, thanks for your help!
Oh my gosh, am I glad I clicked on this link! Why didn’t I think of fluffing my tree this way? You can be sure on November 29th, when we pull out all the Christmas decorations, that’s the first thing I’ll do. Thanks so much for this idea.
Glad you found a good tip. It was life changing for me when I started fluffing this way! Happy decorating.