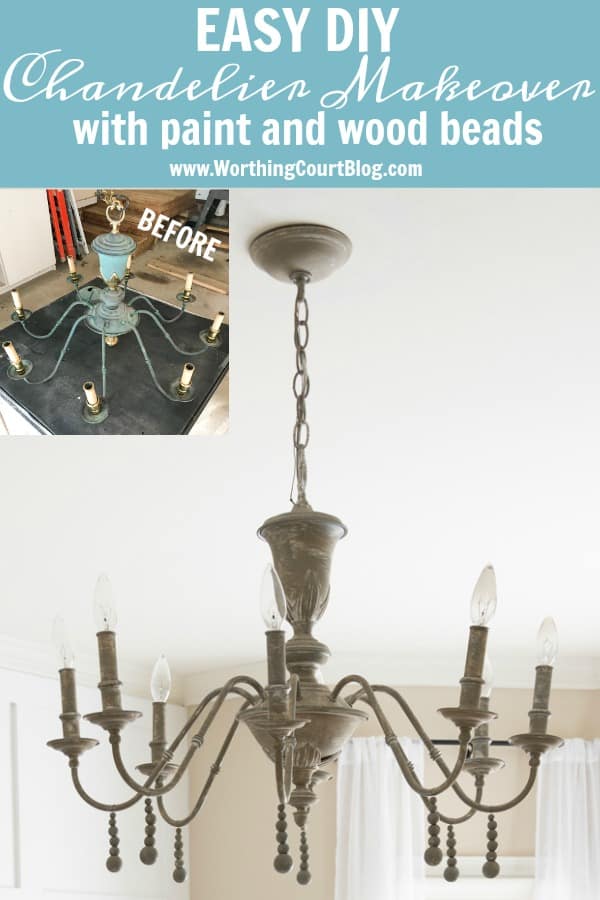
Easy DIY Vintage Chandelier Makeover With Paint And Wood Beads
If you’re decorating on a budget, finding an affordable chandelier can be a challenge! Let me show you how you can give a vintage (not vintage in a good way) chandelier a totally new look for only a few dollars.
When we purchased our house 4½ years ago, we “inherited” a perfectly good chandelier that the former owner had hanging in their dining room. When I say perfectly good, I mean that it worked. I definitely don’t mean that it was attractive! 😀
I loved the overall style of the light fixture, but not the verdigris green finish with shiny brass accents that was super popular back in the 80’s and 90’s.
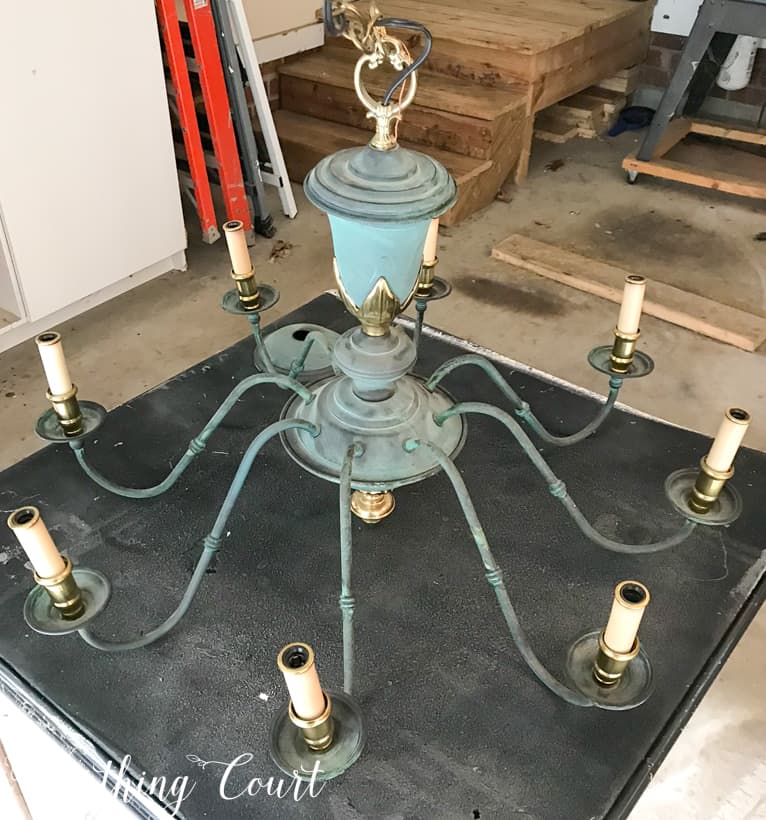
Thankfully, I knew it was a great candidate for a makeover and I had the foresight to hold onto it, even though I had no idea where I’d wind up using it! So, it sat in a hallway closet for four years until I realized that it would be the perfect replacement for the ugly shiny brass and frosted glass ceiling fan in the bedroom I was giving a complete makeover to.
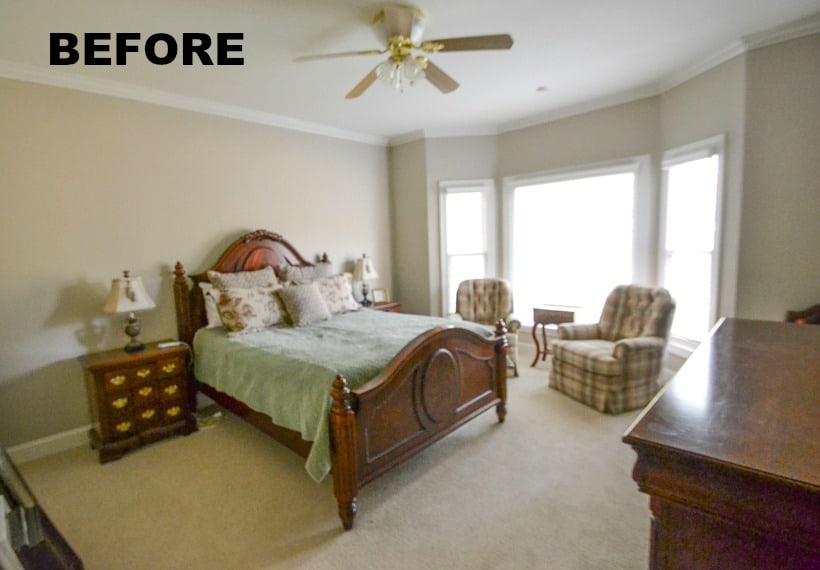
This blurry photo that I snapped right after we moved in gives you an idea of what the bedroom and dated ceiling fan looked like.
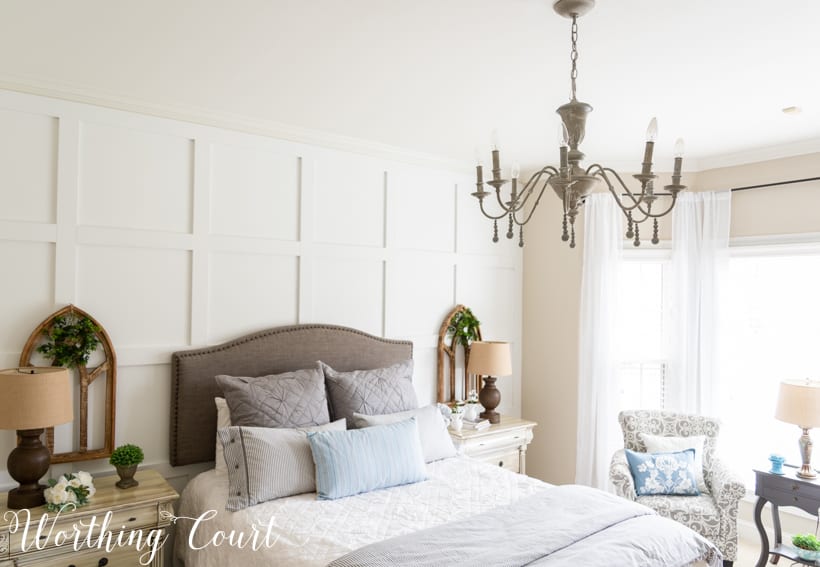
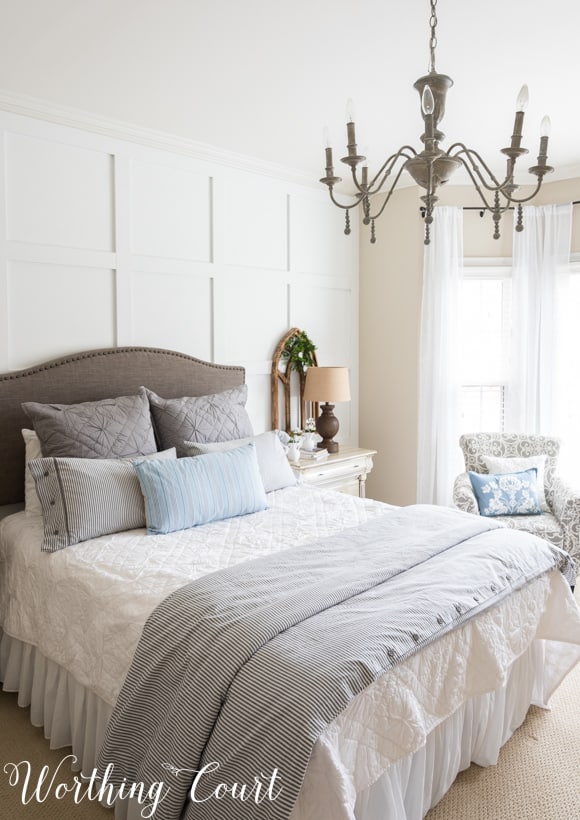
And here’s what the beautiful room is looking like today with it’s new light fixture in place!

Looking for inspiration
The very first step in the chandelier makeover process was to look for inspiration. I honestly didn’t know exactly what I wanted the makeover to look like other than it was pretty obvious that the “new” light fixture needed to compliment the French country/farmhouse/shabby chic vibe that I have going on in the room. After much searching, I came up with these four images that acted as my inspiration.

It was pretty clear that I was most drawn to distressed finishes and beads and dangling things, so I needed to figure out a way to turn the old green and brass chandelier into something that would incorporate my favorite parts of each of my inspiration pieces.
HOW I ACHIEVED THE DISTRESSED FINISH
After giving the old fixture a thorough dusting and taping up all of the exposed wires and connections, I gave it a complete coat of white spray paint. First turning it upside down and then right side up to make sure every surface, including the chain and wire woven through the chain, were completely covered.
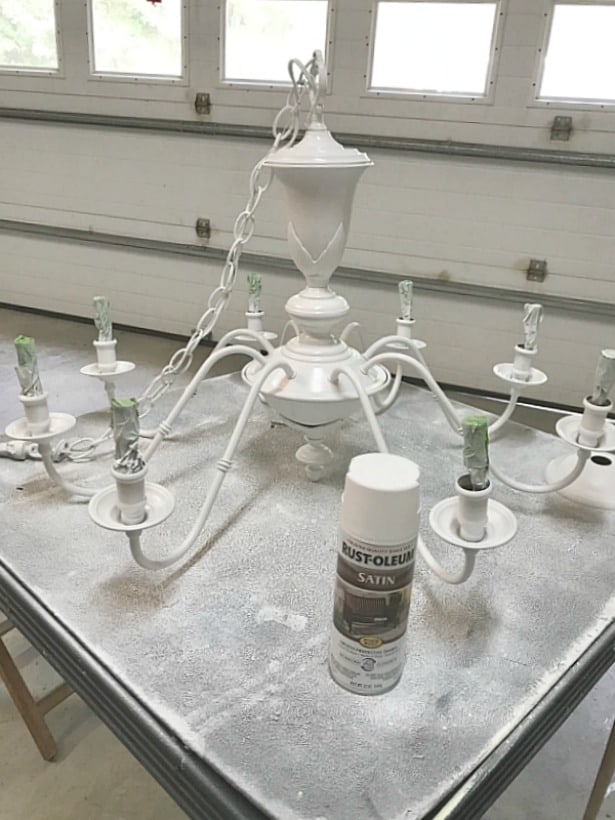
Next, I grabbed some random gray paint (not spray paint) that I had lying around and gave it a fairly light dry brushing of that color. My intent with the gray was to add just enough to peek through the third color that I was going to use.

The last color that I added was Annie Sloan Chalk Paint in French Linen. I applied it more heavily than the gray, as you can see in the finished product.
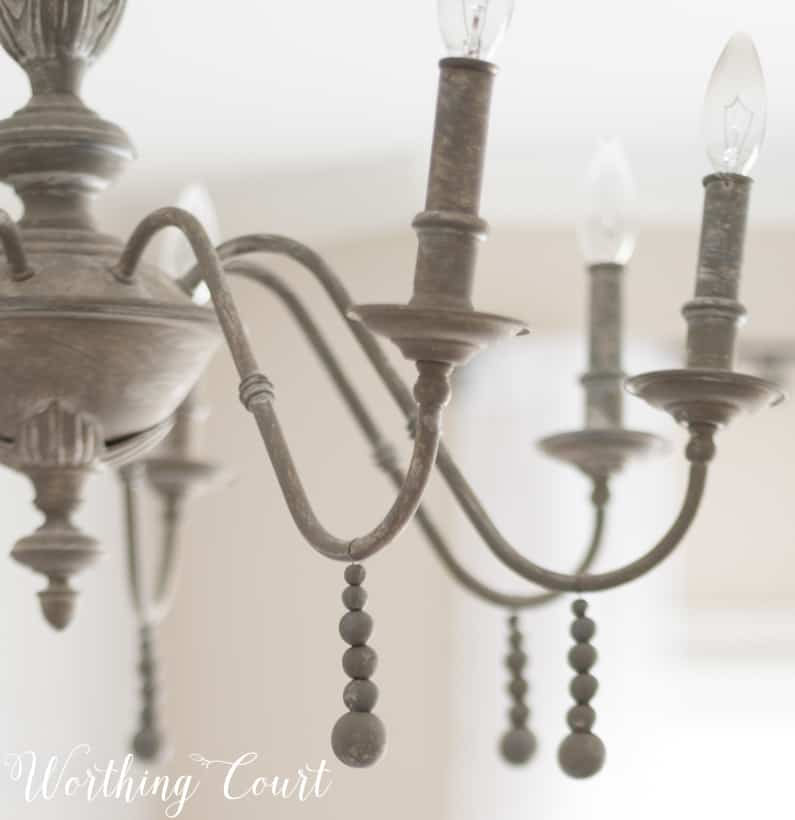
THE SECRET TO ADDING WOOD BEADS
I definitely wanted to include something bead’ish and dangle’y, so I strung wood beads together and then painted them the same way that I painted the rest of the chandelier.
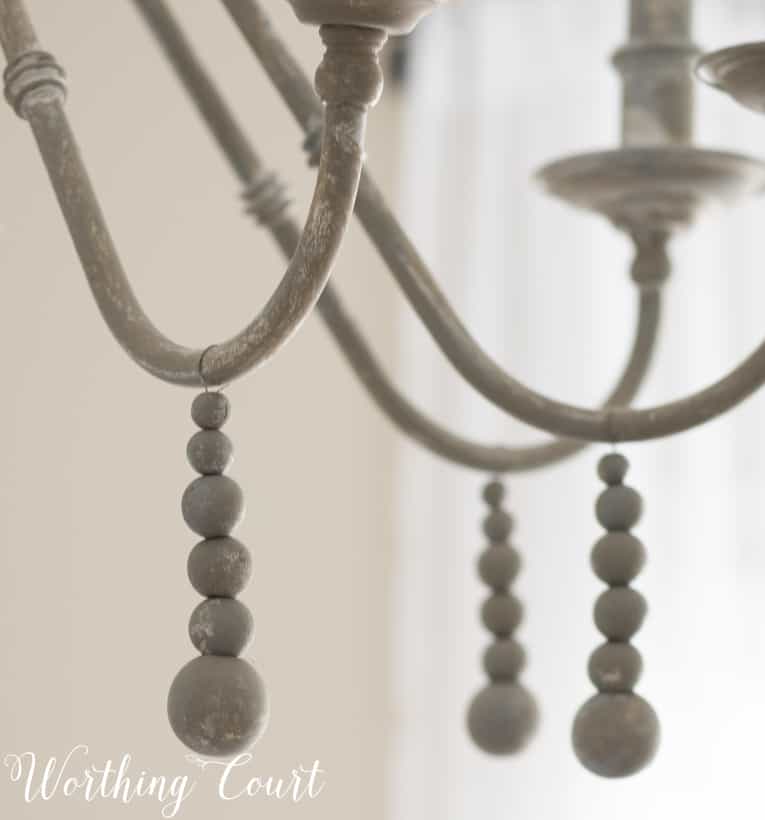
My stumbling block with the beads was figuring out how to keep a piece of wire from wrapping around the outside of the bottom bead. You can see how I solved that problem, plus learn more about my paint technique in the below video.

That looks great!! Your finished chandelier looks very similar to the one on the top right of your inspiration board. Good job.
Thank you sweet friend! We need to get together for lunch soon!
Thank you for the well-done instructional video! I have a chandelier similar to this I’m going to try this out on. Your chandelier looks great!
So glad you found some inspiration that you can use in your own home! 😀
This turned out really nice. Perfect call on matching up with the style in the room. Thanks for sharing the instruction video. That was helpful !
So glad you like it – thank you!
Beautifully done. What a really clever way to conceal the wire. Thanks for the very instructive video.
Thank you! Hope you find a way to use it for something in your own home!
Oh that’s so pretty! You had great vision…it looks great in your room! 😉
Thank you so much!
Brilliant solution to bottom bead. Love your updated chandelier!!! Thanks for sharing!! ♥
Thank you! I can honestly say that had I not figured out a solution for the bottom bead, I probably wouldn’t have added them to the chandy. 😀
It’s a great idea. Thanks for sharing !
Thank you!
Suzy first let me wish you a Happy and healthy New Year. Your chandelier looks beautiful love the way that it turned out.As for the video, how nice of you to show us the clever way to strand the beads without the wire showing. it was a very helpful tip for other projects one might have. As for the rest of the beads that you have left over just thinking they would make nice Christmas ornaments.[just a thought] .God bless and hope you have a great day. XOXO from Corfu Grecce.
Hi Barbara. That’s a wonderful idea! I was wondering how in the world I would ever use all those beads up! Hope your New Year is off to a great start!
I loved this idea! You were super clever with the wood beads. Way to problem solve and thanks for passing it along.
Thank you!
Your chandelier turned out beautifully! Thank you for sharing.
I just found your site because I got a yard sale chandelier and was looking for ideas to upgrade it when I stumbled onto your post. First, what an amazing project! It’s absolutely gorgeous! Second, I love your style and blog! Following! And thank you for all the great advice to help me with my chandelier project!
Thank you so much! Please let me know if you have any questions. 😀
That is gorgeous! What a great eye to see it’s potential!
Awesome makeover. Putting the smaller bead into the largest bead is brilliant!
Great idea and tutorial, with a beautifully finished chandelier!
What kind of light would you recommend for those with 8 ft ceilings? The same mounted with no chain or something different?
I’m so sorry about the delay in replying! For some reason I haven’t been getting notified of new comments. It’s hard for me to recommend something without seeing the room. I’d be happy to take a look if you want to email me a photo to worthingcourtblog.com.
This is amazing! I love it. I would love to share this on my newsletter this week. Such a great idea.
Love the chandelier, very well done video! thank you
Very creative. Would the paint adhere on all brass ? I am so glad to see a different type of ceiling fan online without paddles collecting dust.
If you’re painting a shiny brass chandelier, I’d spray it with spray primer first. Then it should adhere. 😀