Family Room Tour – Before And After
I’ve shown you lots of images of our family room over the last few months, but I’ve never given you the full tour or shared the before and after photos with you.
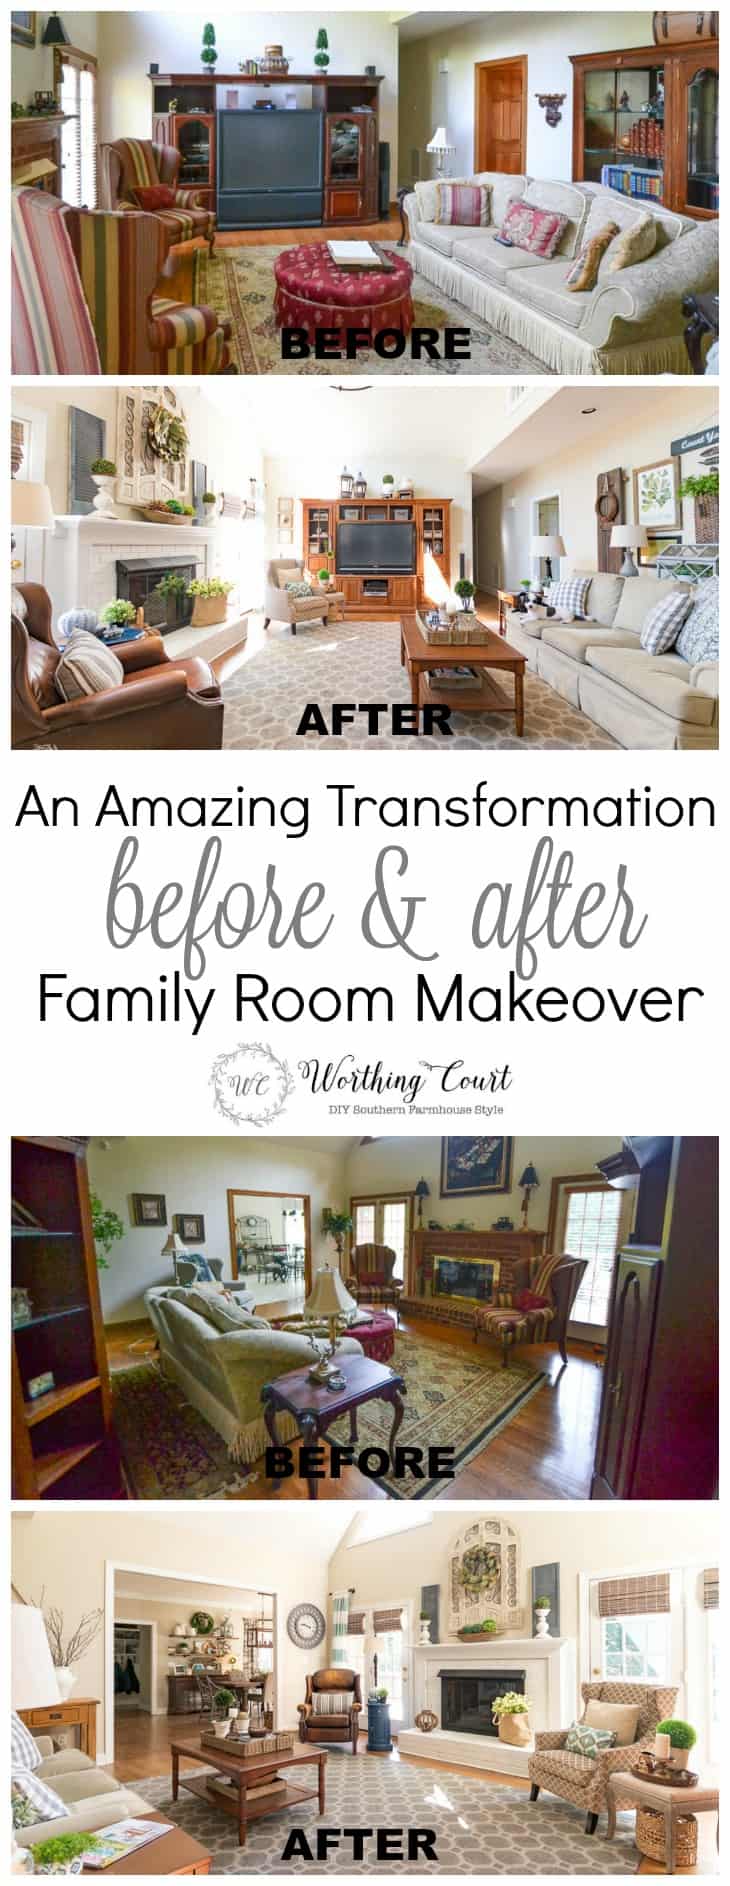
They (they, being the blogging experts) say the first picture in a blog post should always be a beauty shot, but today I guess I’m being a bit of a rebel because I want you to see some before’s first. But, if you don’t care about seeing any of those, just scroll right on down to the after’s.
Before
We’ve come a long way and totally changed the look of this room since we first started the whole house remodel in July 2015. This is what the room looked like on the day that we looked at the house.
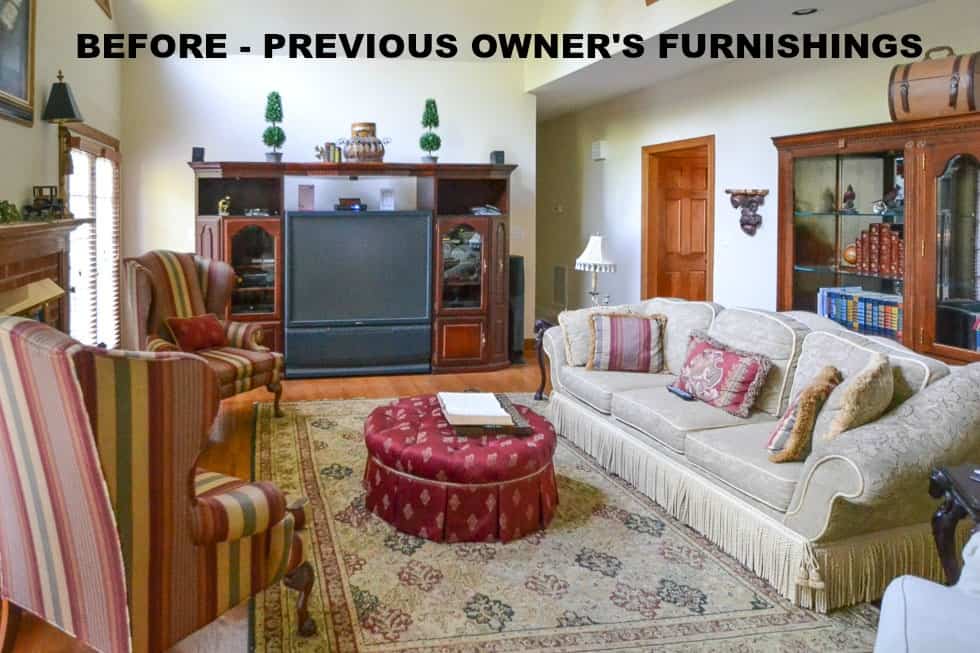
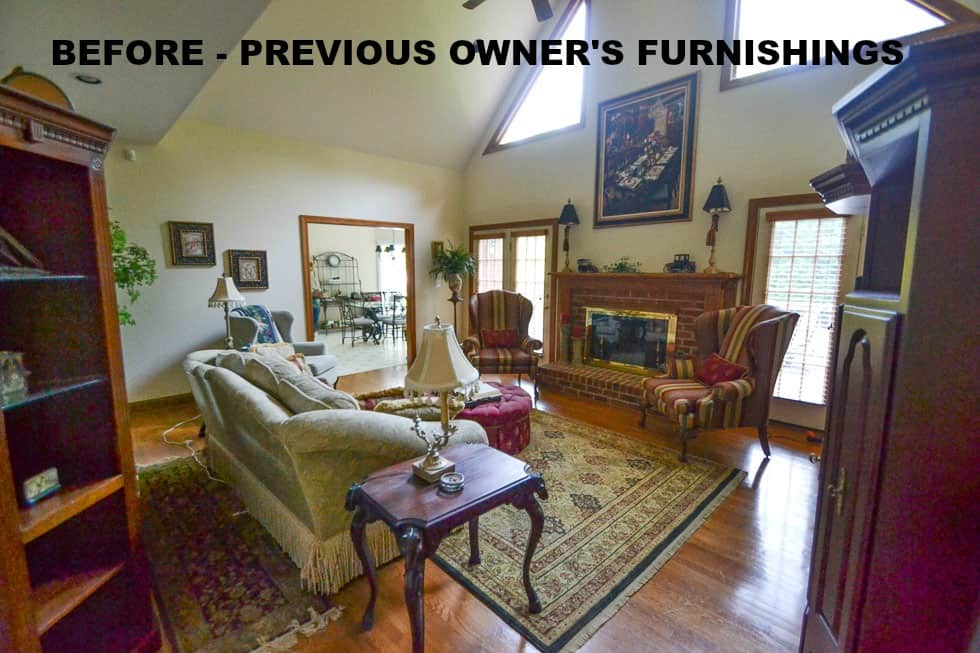
Not a bad room, but it was very traditional and filled with lots of cherry and heavy furnishings. It’s a generously sized room, but the owner had placed a large bookcase behind the sofa, which took up a massive amount of floor space. The hardwood floors were the traditional orangey color that we’re all so familiar with and every bit of wood trim in here was stained brown. Oddly enough, I probably would have loved a lot about this room twenty years ago, but not any more.
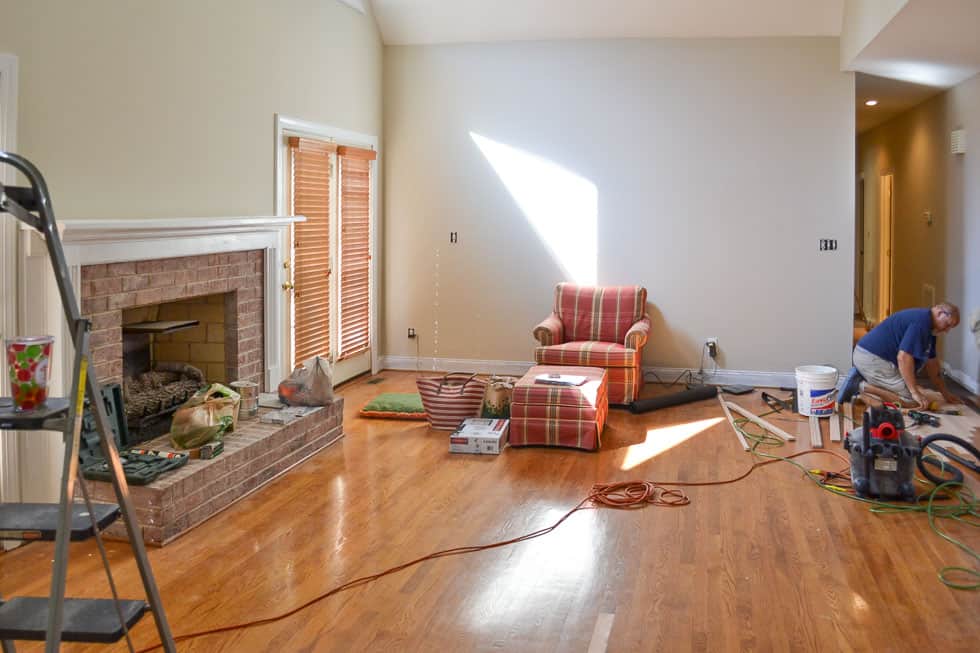
Here’s a shot of the same area of the room after we closed on the house, but two months before we moved in. At this point, we had already painted all of the walls and trim (paint and stain colors are listed below). You can see our work crew feathering new hardwood into the existing family room hardwoods because we replaced the pale pink carpet (yes, pink), that was going down the hallway, with hardwood floors. (As a side note, we realized that many of the bulbs in the can lights were pink too. Lovely.) We brought one lone chair over for me to come sit in every day while the guys were working.
New hardwood had to be feathered in on the other side of the room too, where the family room goes into the kitchen, which previously had linoleum flooring. The only other construction project that was done in this room was to enlarge the opening between the family room and kitchen. We made it a couple of feet wider and taller. That was Pookie’s idea, not mine, because I didn’t want to spend the extra couple thousand that it cost. It turned out to be a great call on his part.
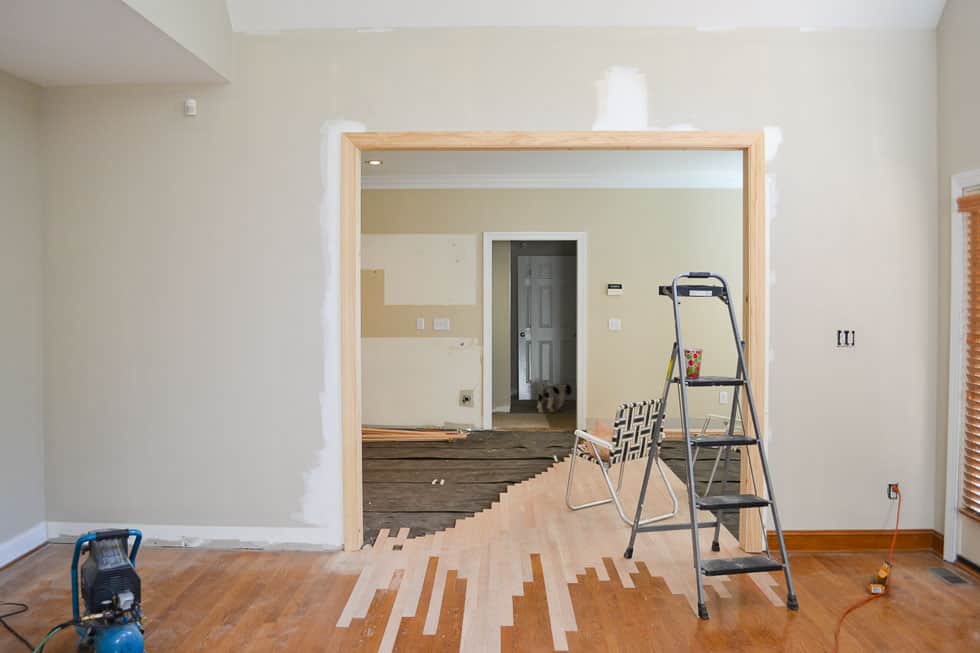
This before shot is looking at the room as if you were entering from the foyer. Maybe you can tell that the opening into the kitchen was quite a bit smaller.
I hope you’ll find the difference between the before and after as dramatic as I do. It helps for me to take a look back to how far we’ve come since we’ve been here!
After
And here’s how the entire room looks today. We needed an oddly sized area rug for the room, plus I wanted it to be made of indoor-outdoor material, since we have two dogs, so I had a rug custom made. The material that I chose is different that most indoor-outdoor carpeting, in that it has a bit of nap and is soft and plush. I’d say that the cost of the custom rug was right about what a ready-made rug this size would have been.
There originally was an ugly verdigris-green ceiling fan in here. Remember when verdigris-green finishes were all the rage back in the 90’s? In the south, ceiling fans are often a necessity, but I decided to forego one in the family room, so I replaced it with a large round chandelier.

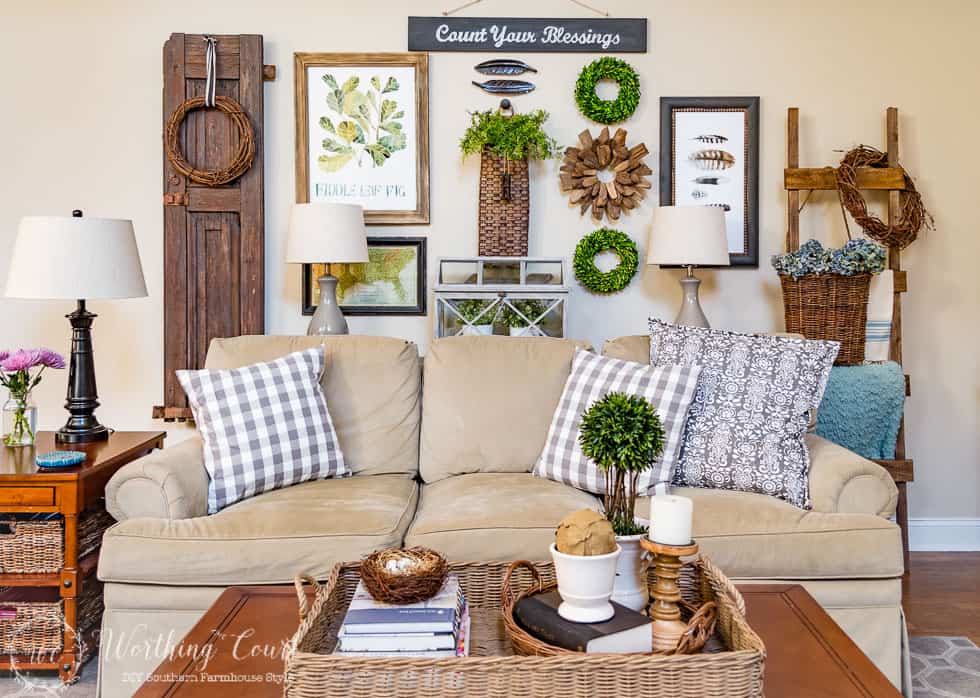
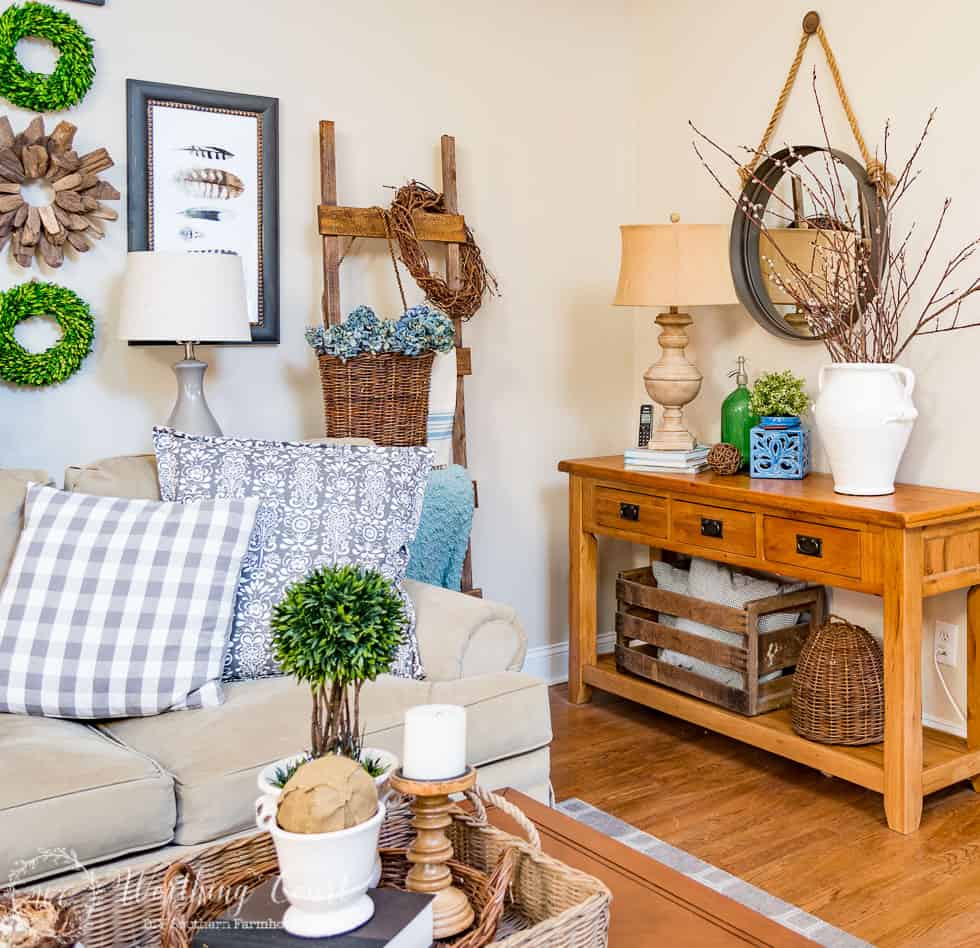
The sofa wall has a bit of an overhang because of the hallway upstairs. I originally had the sofa pushed all the way up against the wall underneath it, but I never liked it that way. So, I built a 12″ deep rustic sofa table to put the behind the couch, which pushed it out into the room just enough. An added advantage of having the sofa table is that it allowed me to add a couple of extra lamps to this side of the room, which was a little bit darker at night than I like. The table was easy to build – click HERE to get the full tutorial. You can get a peek at the side of the table in this photo.
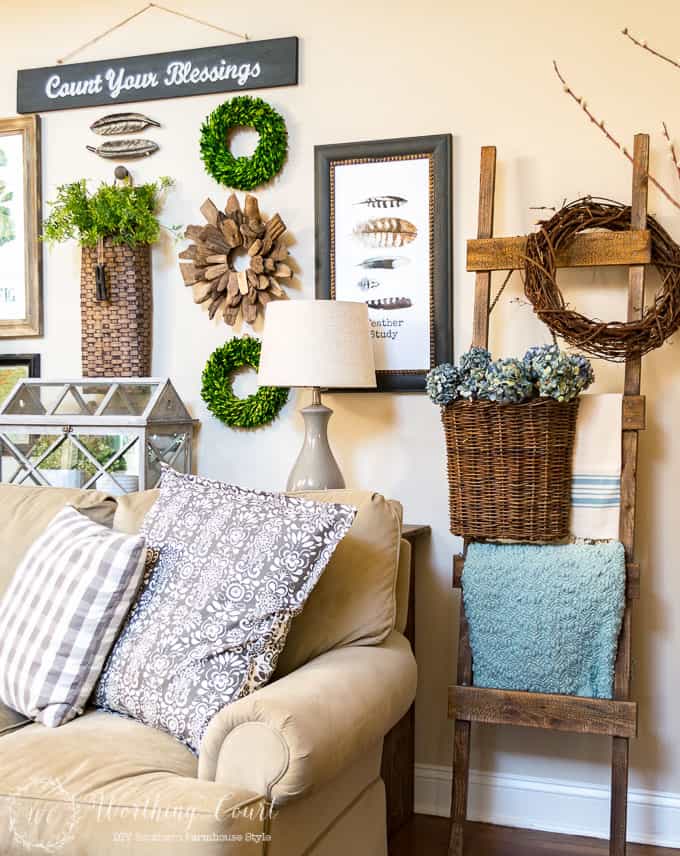
You almost can’t tell that the table is there when looking at the sofa from the front. This is the second version of my gallery wall. My first attempt was too wimpy looking and the scale of the items that I used wasn’t quite right. I widened the gallery by hanging an old, old shutter on the left and adding a diy rustic ladder to the right side. I’m enjoying being able to change what I display on it for the different seasons. Click HERE for the complete tutorial for building this easy rustic ladder.
Our entertainment center was previously located in the basement of our former home. In that house, we had a basement family room area where we watched movies and played video games, so the ginormous tv was great. At first, I was resistant to having such a large tv in this house, but Pookie really wanted it, so I found a way to work with it. Shhh – don’t tell, but I secretly love having the big screen to watch.
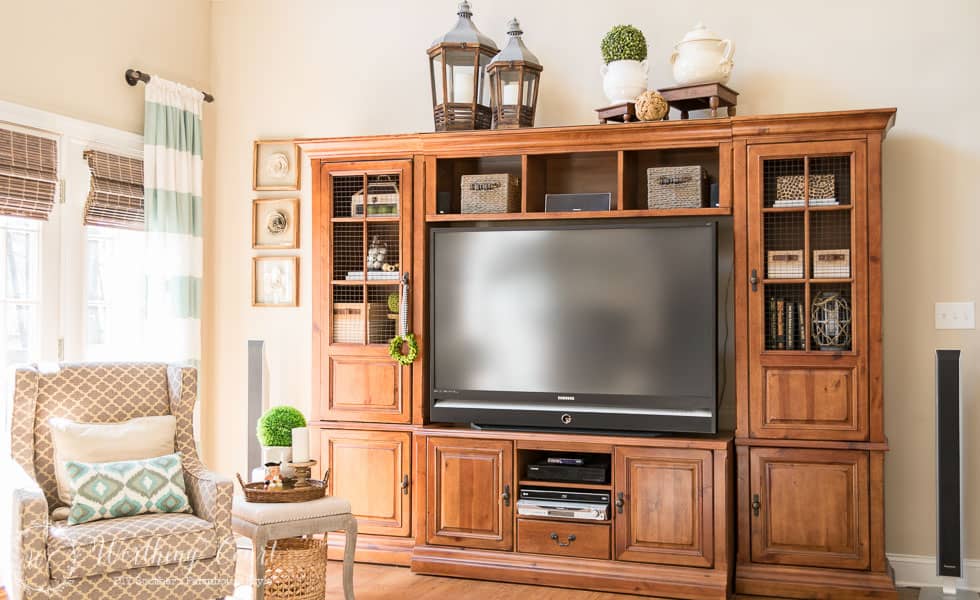
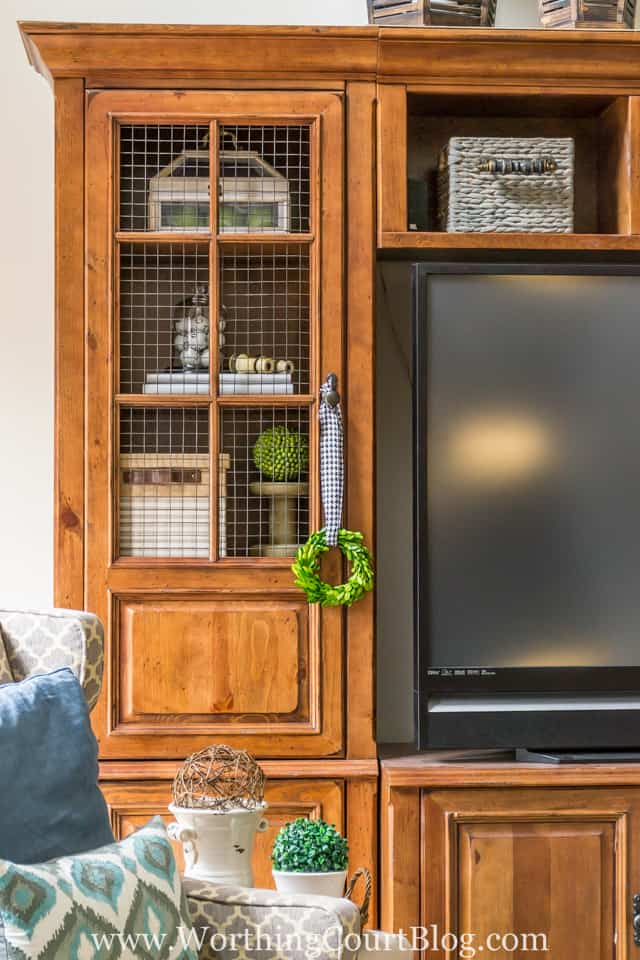
To make the entertainment center a little more farmhouse looking, I gave it a mini makeover by replacing the glass doors with wire, painting and adding handles to the baskets above the tv and changing out the accessories.
From the other side of the room, this is how it looks today, as you enter from the foyer.
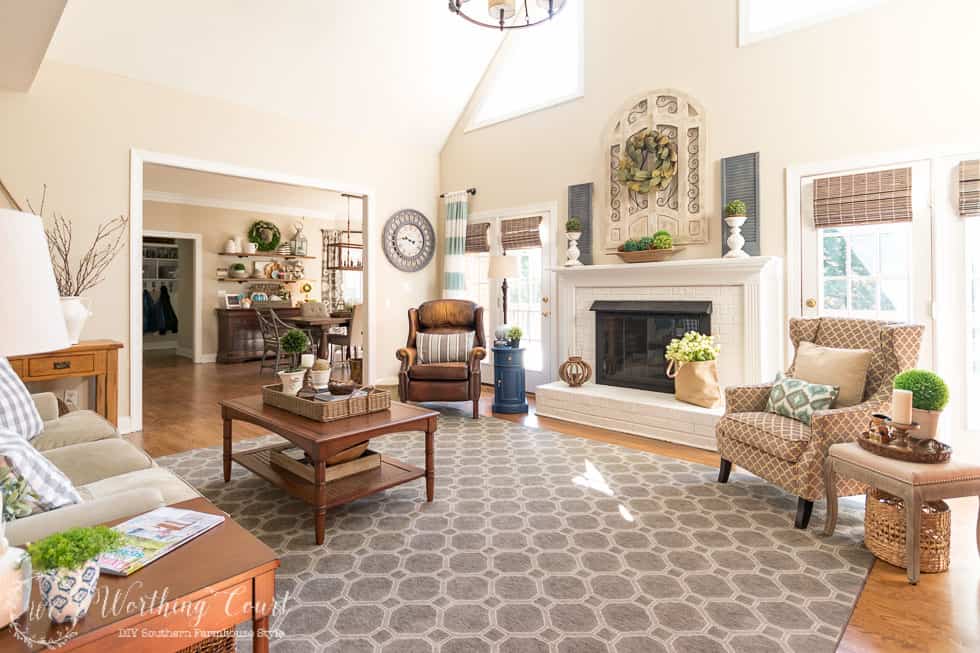
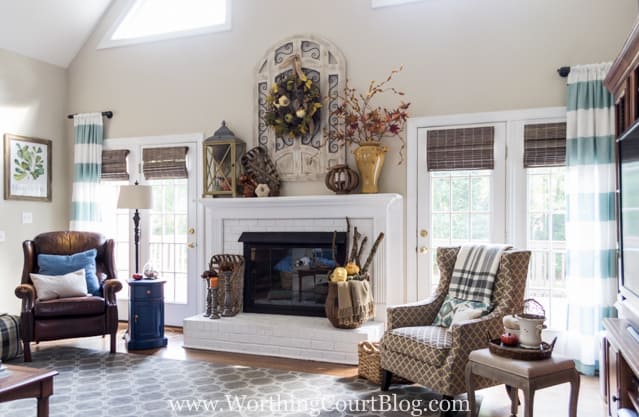
The changes on the fireplace side of the room are pretty dramatic, mainly because of painting the brick on the fireplace and all of the surrounding trim. We painted the inside of the fireplace too, with black high-temp paint.
I’ve loved the arched wood and metal piece that I hung above the mantel. It makes a great backdrop for anything that I hang on it and it helps to fill the height of this wall. I purchased it a Kirkland’s, but it was a little too yellow, so I dry-brushed it with a little cream paint and swiped some gray paint over that. It’s currently sold out on the Kirkland’s website, but it says it’s temporary so I’m guessing they’ll get it back in stock. Click HERE (affiliate link – see my full disclosure HERE), if you want to keep an eye out for its return.
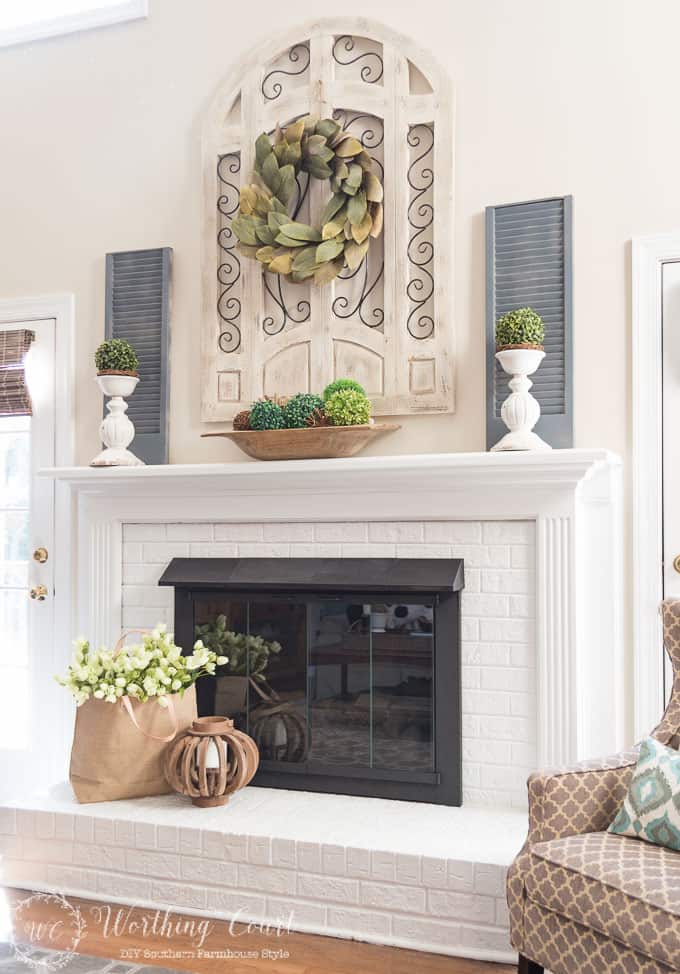
The other thing that we did on this side of the room was to remove the brown wood blinds from the French doors on either side of the fireplace. They made the room so dark, even after all of the trim was painted white. Privacy isn’t an issue for us on this side of the house, so I decided to add slatted roman shades that we could close if we ever wanted or needed to. The shades that we used are Flatweave Bamboo Roman Shades in Driftwood from Home Depot (affiliate link – see my full disclosure HERE). They’re very affordable and the really nice thing is that they’re already sized to fit a French door.
To soften the windows and to add a bit of color to this side of the room, I used a pair of drapery panels that I found at TJ Maxx. On each door, I used one panel and hung it to the side, which frames the whole wall out nicely. I made my own budget friendly drapery hardware to keep the cost down. Click HERE to see what I did.

This shot, taken when my fall decorations were up, shows the entire wall and both sets of French doors.
There are a couple of other small changes that I’d like to eventually make in here, one of which is painting the console table that sits at one end of the sofa. It has that same gold’ish, orange’ish finish that the floors used to have. Right now my dining room makeover is sucking up all of my creative energy, so it will have to wait.
Thank you for stopping by for a visit in our family room today! I always enjoy seeing before and after room makeovers and hope that you did too.
Walls – Sherwin Williams Accessible Beige, in flat finish
All trim, fireplace surround and brick on the fireplace – Sherwin Williams Extra White, in gloss finish
Floors – Minwax Special Walnut
Sharing at THESE great parties.
I love seeing before and afters, and what a good one! I adore your decorating, so special it came out. You can see this home had potential – it just needed the right touch. I do like the widening, and I never knew you could paint the inside of the fireplace – with the special paint, of course. Wow!!!
Loved your family room make-over. I am in need of one as well. I really need a new floor from my kitchen through to family room; mine was linoleum as well. Love the white fireplace surround and mantle. I have red brick currently but that may make a huge change in my room.
Keep all the changes coming. So love seeing your home evolve. Thanks for all the ideas too.
So beautiful , Ive just bought a little reno and i’d love to arrange my furniture in a similar way to yours whats the dimentions of your family room , id love to do something similar . Your home is spectacular, love it .
Rating: 10! Extremely professional yet inviting.
What is the paint color of the trim with the accessible beige walls? I have been looking for ideas for at least 10 years! This is the first room that has made my heart happy! Thank you so much for sharing!!
Hi Amy. We used Sherwin Williams Extra White on all of the trim and on the fireplace brick.
Beautiful! Could you tell me what color paint was used on the walls?
I see someone mentioned “accessible beige”. Is that it?
Yes, it’s Sherwin Williams Accessible Beige. 😀