Update On My Guest Bedroom Makeover
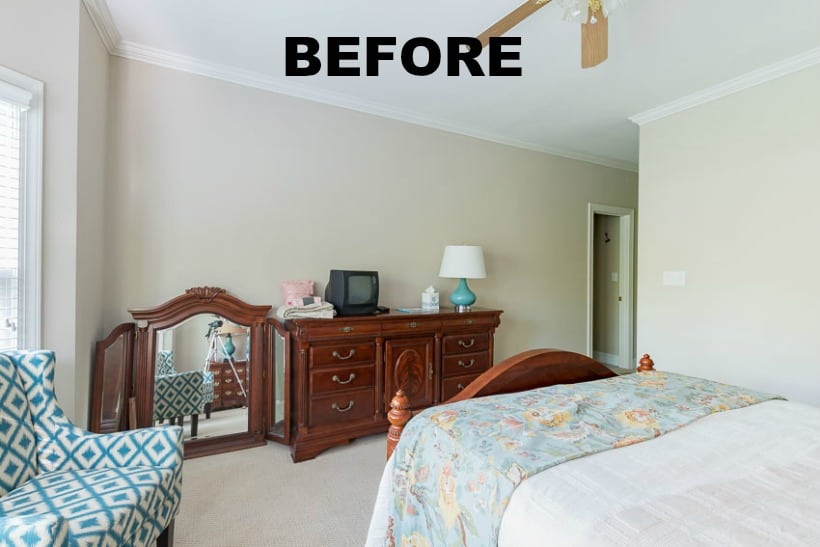
An update on turning a dated, ho-hum, boring bedroom into a beautiful, cozy, inviting, retreat.
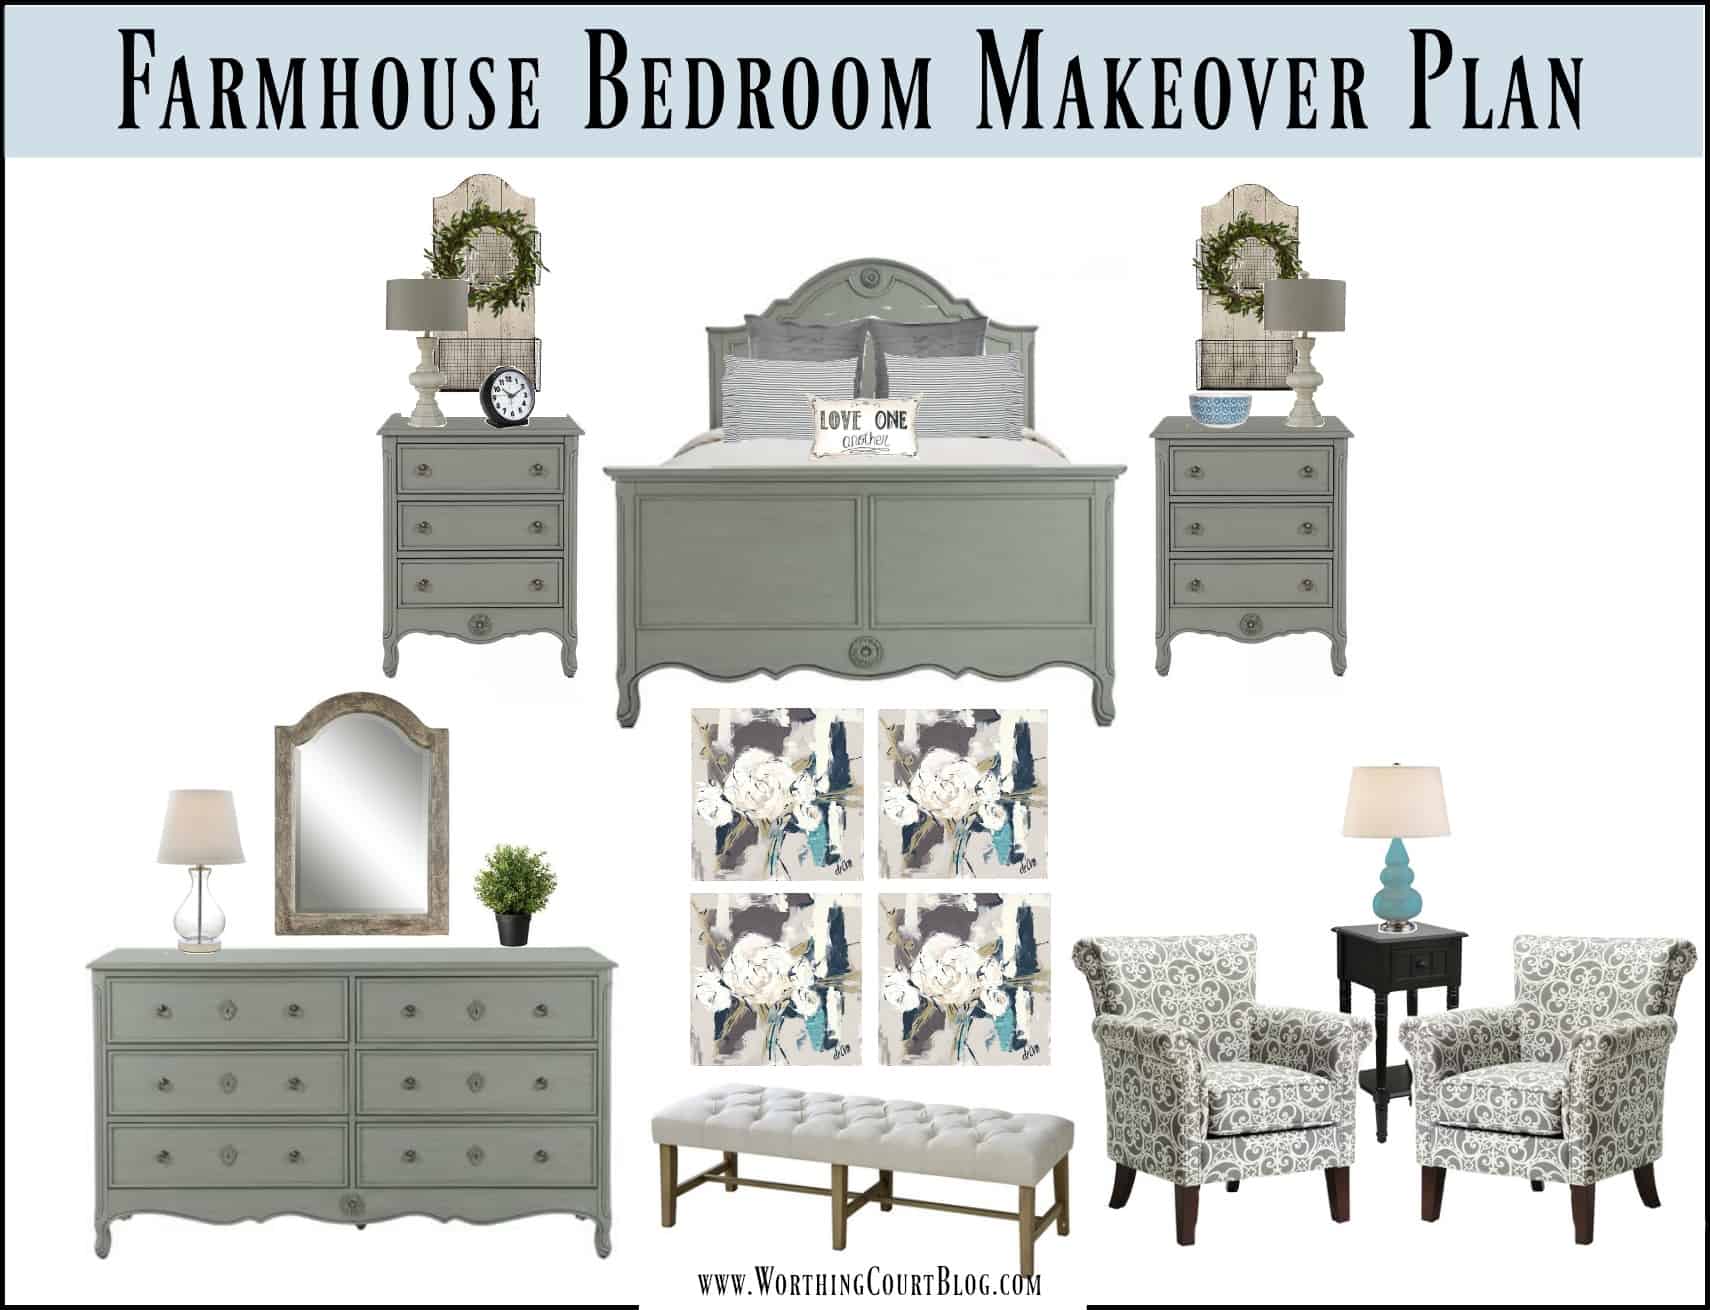
Well, my friends…I’m getting SO close to finally finishing the makeover of our guest bedroom. I can’t believe that I created the mood board and started the makeover process more than a year ago!
The first major project in the room was to paint all of the furniture that remained after I donated the bed – the two nightstands, the massive dresser and the mirror that hangs above it. I have to say that I love, love, love how the furniture turned out!
I painted the dresser at the same time that I painted the nightstands. Even though I already shared the nightstands with you, I never shared the dresser and mirror because that side of the room was still such a mess and I had a few details I wanted to take care of before showing it to the world. 😀 Here’s what the dresser and mirror looked like before painting.
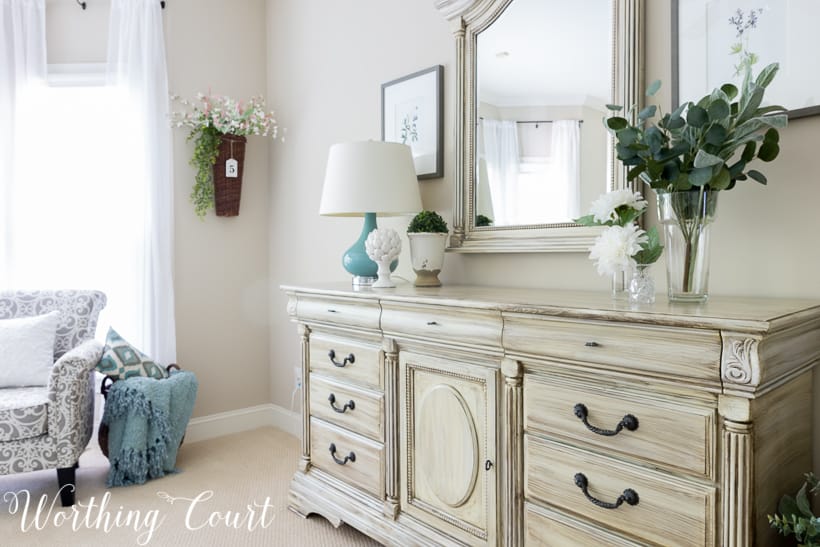
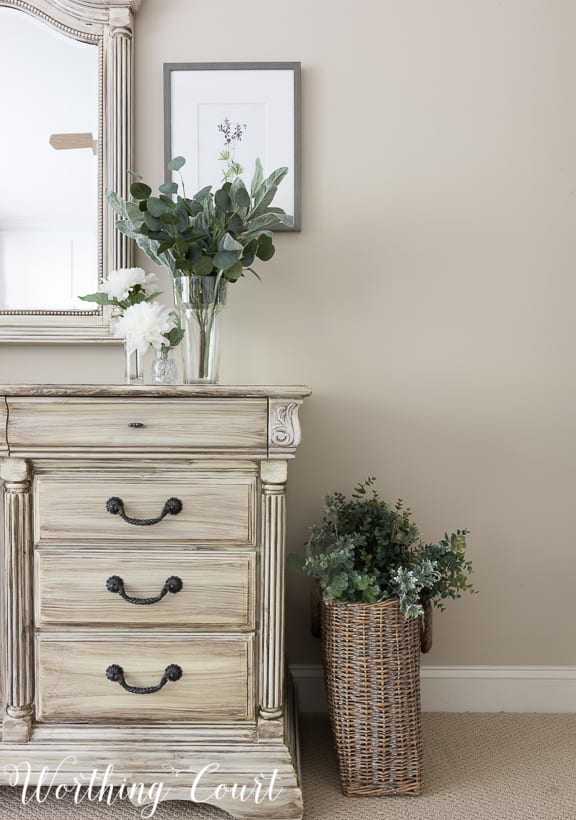
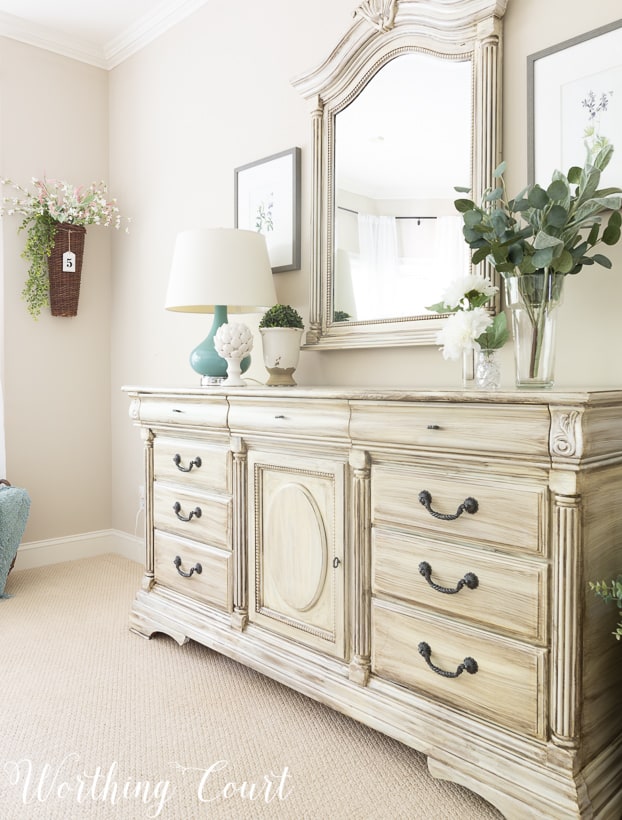
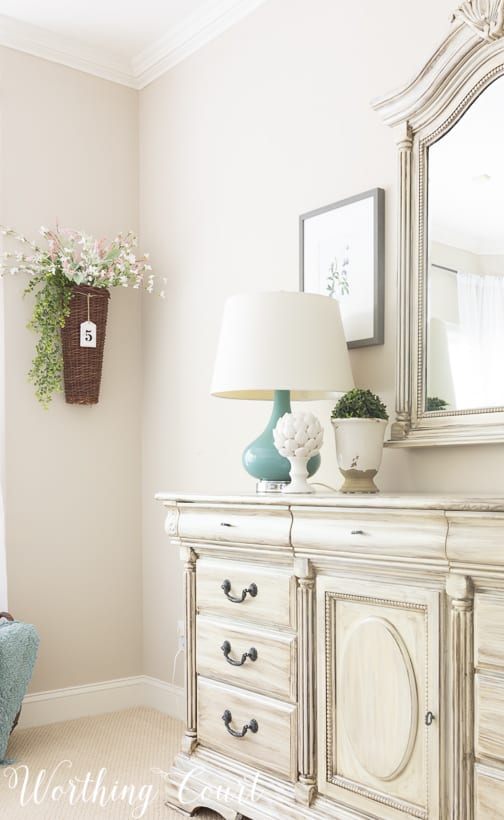
And this is how both pieces look today! I’m so, so glad that I held onto this furniture and gave it a makeover instead of donating it along with the bed, which I seriously considered.
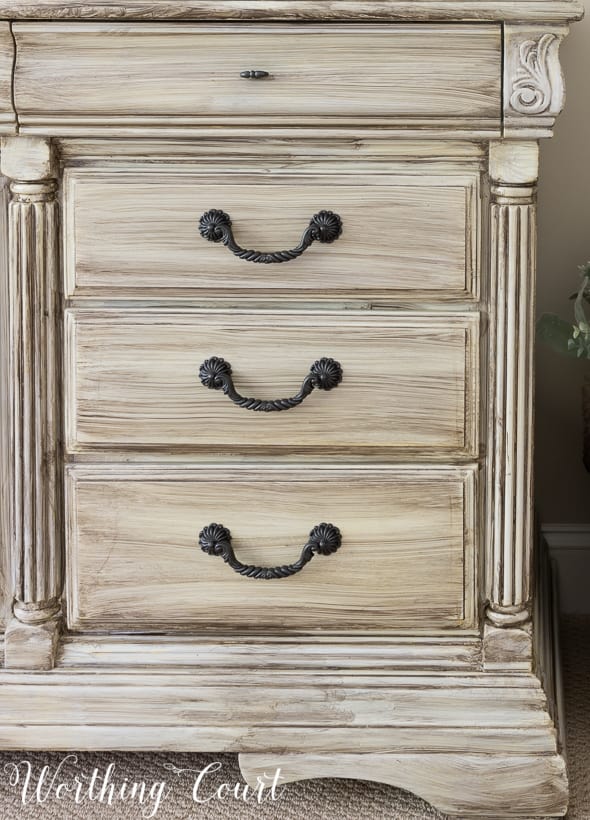
This furniture was perfect for the type of paint treatment that I gave it because of the detail of all of the scrolls and grooves. Adding the “wash” of gray paint layered over the white looks so much better to me than if I had just left it plain white. It was such a fun and easy project! I created a step-by-step video of the painting process that you can view HERE.
For a while I was stumped about what to do on the walls close to the dresser. I felt like the mirror was too plain looking on its own, but then there was also a spit of wall space adjacent to the dresser, beside the window, where I felt needed something too. It seemed that pictures flanking the mirror and more pictures on the wall beside the window would just have been too much.
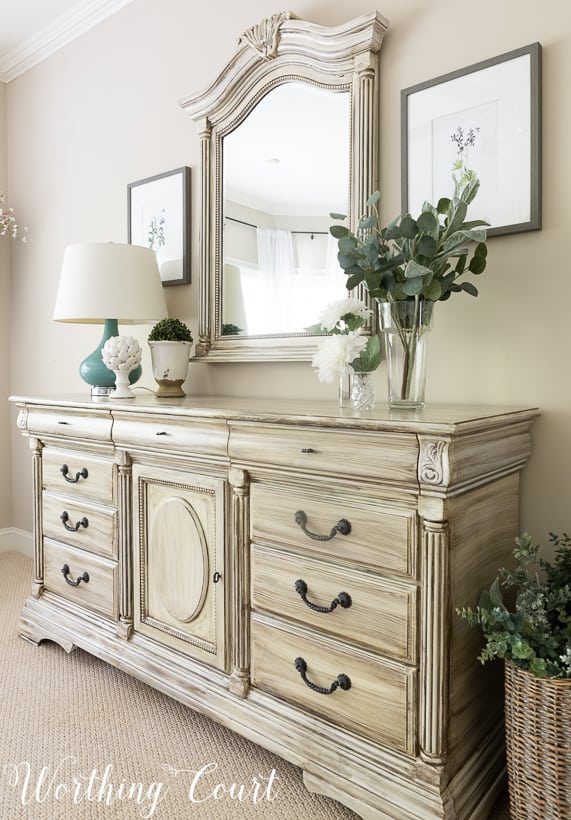
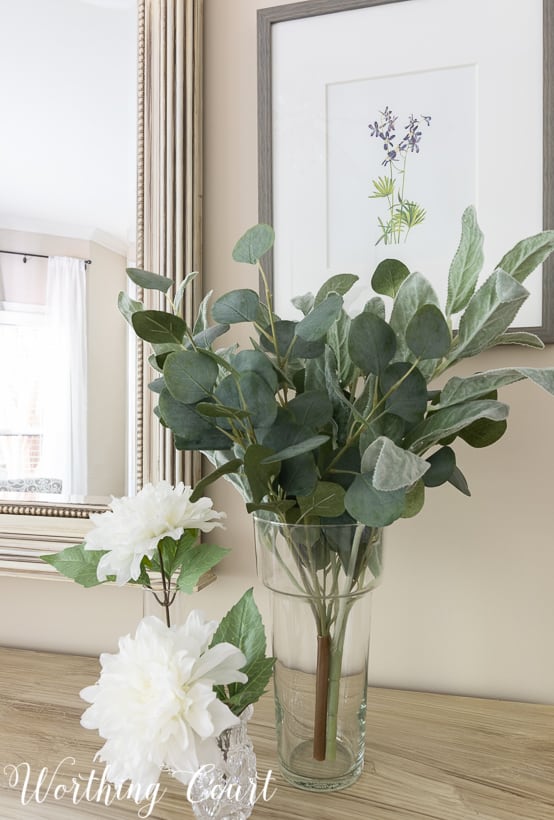
After a lot of indecisiveness, I finally settled on blue floral botanical prints to flank the mirror. The prints that I used are from a set of six digital downloads that I found on Etsy and can be viewed HERE (affiliate link, see my full disclosure HERE).

I chose two of my favorites from the collection and put them into frames and hung one on each side of the mirror. I think that their sweet simplicity fits in perfectly with the overall look and feel of the bedroom.
With art prints flanking the mirror, adding a long basket filled with pretty flowers to the wall beside the window fills that blank corner, plus it makes walking down the short hallway into the room that much more inviting.
You can see from some of the photos that I’ve already added draperies, but I’ll share more about those in another post. The very last project left to complete in the room is the replacement of the awful ceiling fan. If you watch my Instagram stories, then you’ve already seen what I’m replacing it with. I can’t wait to see that thing go!
WOW!! It looks fantastic. So beautiful that your guests will not want to leave
Thank you, Donna!
It is beautiful!! Can you tell me the wall color?
Thank you, Linda! The walls are Sherwin Williams Accessible Beige.
What a transformation! I am now looking at all of my dark furniture with different eyes! Love the lighter look. Thanks for sharing.
Glad I was able to inspire you, Kate!
Another WOW ! Now I know what to do with the dark pieces I have that are too good to give away but certainly look dated.
Hi Carol. That was my whole issue with the furniture in the room. I caved in on giving the bed away because even with paint, it still would have looked too old fashioned for me. The power of paint never ceases to amaze me! 😀
Looks great Suzy! Are those the same chairs but reupholstered? Do you use PicMonkey, or a different program for your mood boards? PicMonkey is not free anymore.
Hi Donna. Glad you like the room! No – those aren’t the same chairs with new upholstery. It would have cost me more to reupholster those chairs than the new ones cost. The old chairs found a home in a different bedroom that I haven’t started working on yet.
Oh…that looks great! Looks very serene…your guests may never want to leave! 😉
Thank you, Donnamae!
Great job!
Thanks, Gina! Hope you’re doing well!
Looks lovely! I love the mirror mounted on the wall above the dresser instead of being attached to it.
Thank you, Esther! I agree with you about the mirror.
Oh wow! The dresser and mirror are magnificent. So inspiring. I would love to do the same!
Thank you so much, Justina!
I have a triple mirror like the original dresser. Thinking to take side mirrors off and hang the center one now that I’ve seen yours! Any thoughts on repurposing the side ones?
The sides that I removed from my mirror are currently residing in my attic until I think of a place to use them. lol I think it would look pretty to remove the mirrors, paint the frames and hang the empty frames on the wall. I actually thought about doing that (hanging one above the other) on the small piece of wall where I added the long hanging basket. I also thought about removing the mirror, but keeping the backing and painting it with black chalkboard paint to create a couple of cool chalkboards. And I’ve also thought of adding chicken wire to the empty frames and using it to clip cards, photos, notes, etc. to it. Let me know if you do something with yours!
Suzy, I am dumbfounded that you painted that dresser yourself. That is pure genius! It looks so professionally done – I don’t see one brushstroke that isn’t spot-on. Brava! Can’t wait to see the entire room. Thanks for sharing.
Thank you, Maggie. You’re too sweet!
Suzy, I am new to your site, love your creativity! Could you explain how you painted your dresser?
Hi Gail. You can get the step-by-step tutorial in this blog post: https://www.worthingcourtblog.com/how-to-paint-furniture/
Love the guess room! Painting furniture is not as easy as it looks and you did a marvelous job. Could you come live with me and teach me all your hands on tricks, tutorial just aren’t the same. As always love you and your blog!
My door is open,
Martha
Oh, if only I was able to do that! I’m a very visual learner and love it the best when someone can teach me how to do something one-on-one. I try to keep that in mind and put together my tutorials as if we are in the same room together. I know it isn’t the same though!
What a huge difference on the furniture ! And extra points for not going all white ! I will go read about how you accomplished this ! How big is your guest room? I am putting ideas into my guest room (10×11.5) and all that is in there is a bed with no headboard/footboard and a chest (like a hope chest). I am at a loss for getting the right size of things in there! Yours turned out great !
So glad you like my guest room! It measures 13×13, not counting the bay window area.
Hello Suzy! I am new to your site. Such a lovely guest room inspiration! As it happens, I am also decorating our guest room…. a long process since moving in about 3 years ago involving “new” antique furnishings, new woodwork design on the walls and dealing with cathedral ceilings! But, it has been fun and I am adding some finishing touches. Your digital downloads idea from ETSY was just perfect! I just did the download of Blossom Vintage in blues. I do have a question for you regarding printing and framing. Did you simply print yours yourself, or did you have them printed for you in matte? Thank you for sharing your beautiful, new guest room! Simply lovely and restful….
Hi Karen. Nice to “meet” you! As far as I know, you could certainly print them yourself, but my printer doesn’t do that great of a job, so I saved them to a thumbdrive and took it took my local FedEx store and used their printer. They have a printer that allows you to insert a thumbdrive for printing. They’re printed on just regular printer paper.
Thank you, Suzy! I look forward to completing my guest room and really enjoy your ideas!
Suzy, thank you for letting me feature you on My Wee Abode. The post went live today! Hope you have a minute to check it out! Hugs!
Thank you, Julie! Off to check out your post!
I loved the way your guest room turned out. It looks very cozy, warm and inviting. I have honey oak furniture I am going to refresh with paint. You have inspired me. Thank you! 🙂