Hallway Decor Ideas for Narrow Spaces
Do you have a boring hallway? Using these hallway decorating ideas will take your long, narrow space from lackluster to stylish!
Affiliate links have been used. See my full disclosure HERE.
You know how it goes – we all tend to give our hallways the cold shoulder when it comes to decorating. Honestly, they’re usually an easy space to ignore.
Add to that the fact that most of us get stumped trying to figure out how to add visual interest to them without making them feel cramped or cluttered. Plus, hallways aren’t exactly where we hang out, so they often end up at the bottom of our home makeover list.
They end up being these plain, functional spots in our homes that don’t get much love. But hey, it doesn’t have to be that way! With a few easy tweaks, we can turn a narrow space, like a hallway, into a great place that ties in with the rest of your home and pulls different areas together.
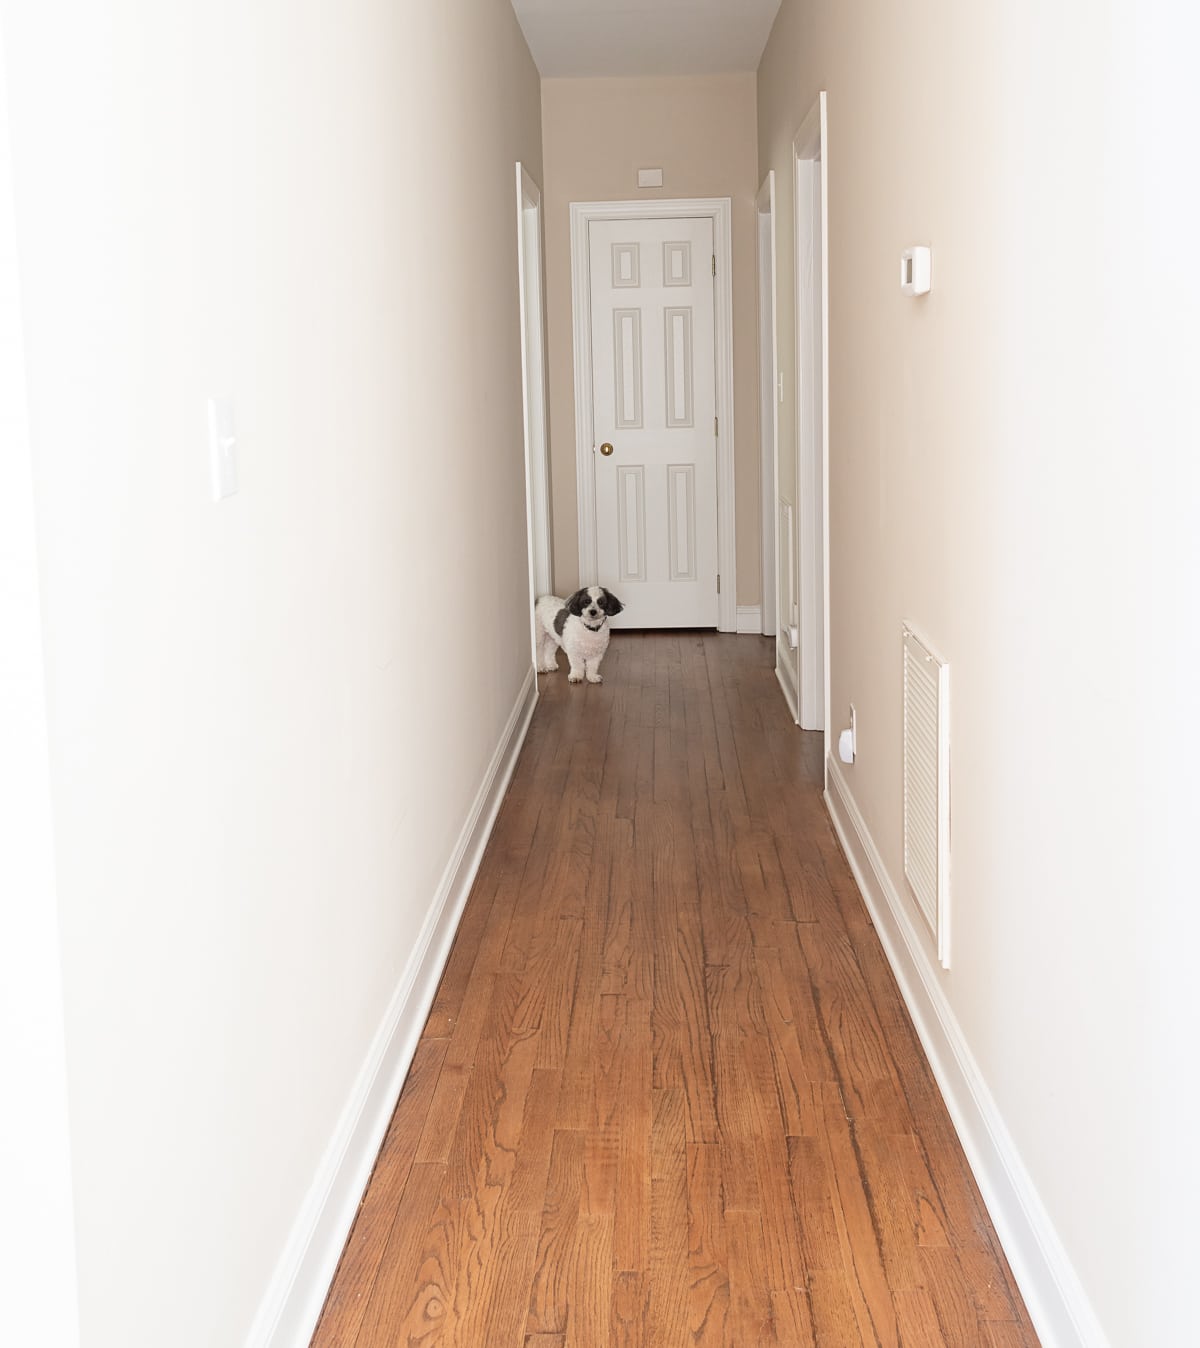
My hallway is probably like many of yours – long, dark, and narrow, lacking a focal point or anything else that might make it the tiniest bit interesting.
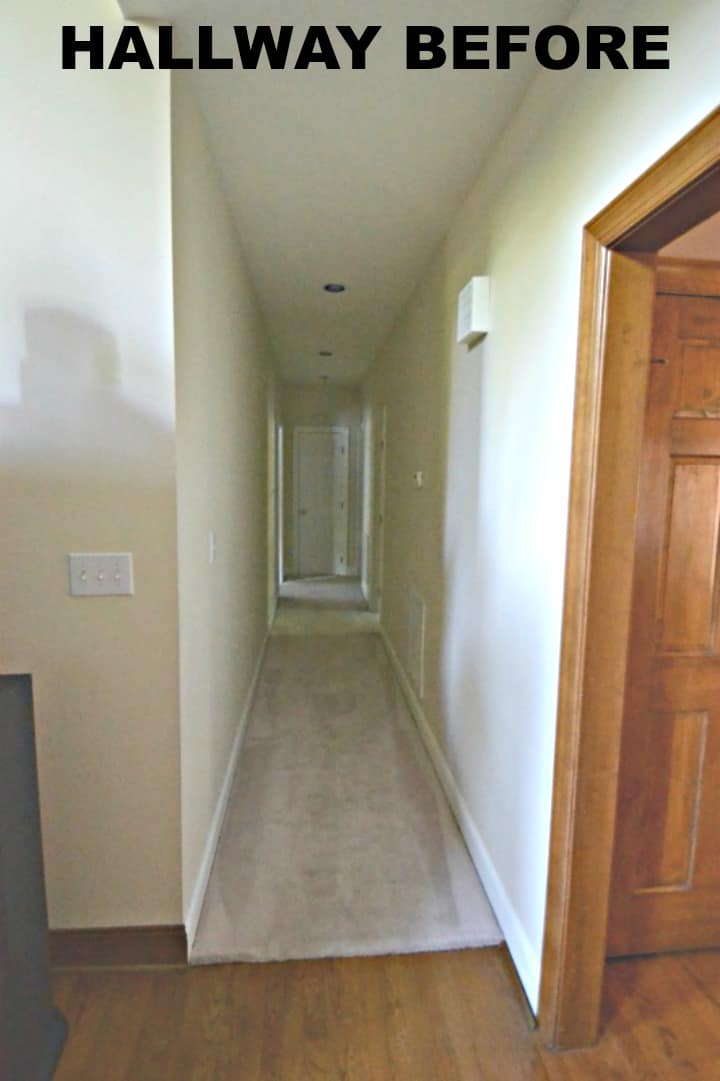
When we purchased our home, the only thing of interest (and I say that rather sarcastically) was the pale pink carpet on the floor and the pink lightbulbs in the overhead lights.
It was dark to begin with, as it gets very little natural light, but the oak trim on the doorway adjacent to it just added to the dark feel.
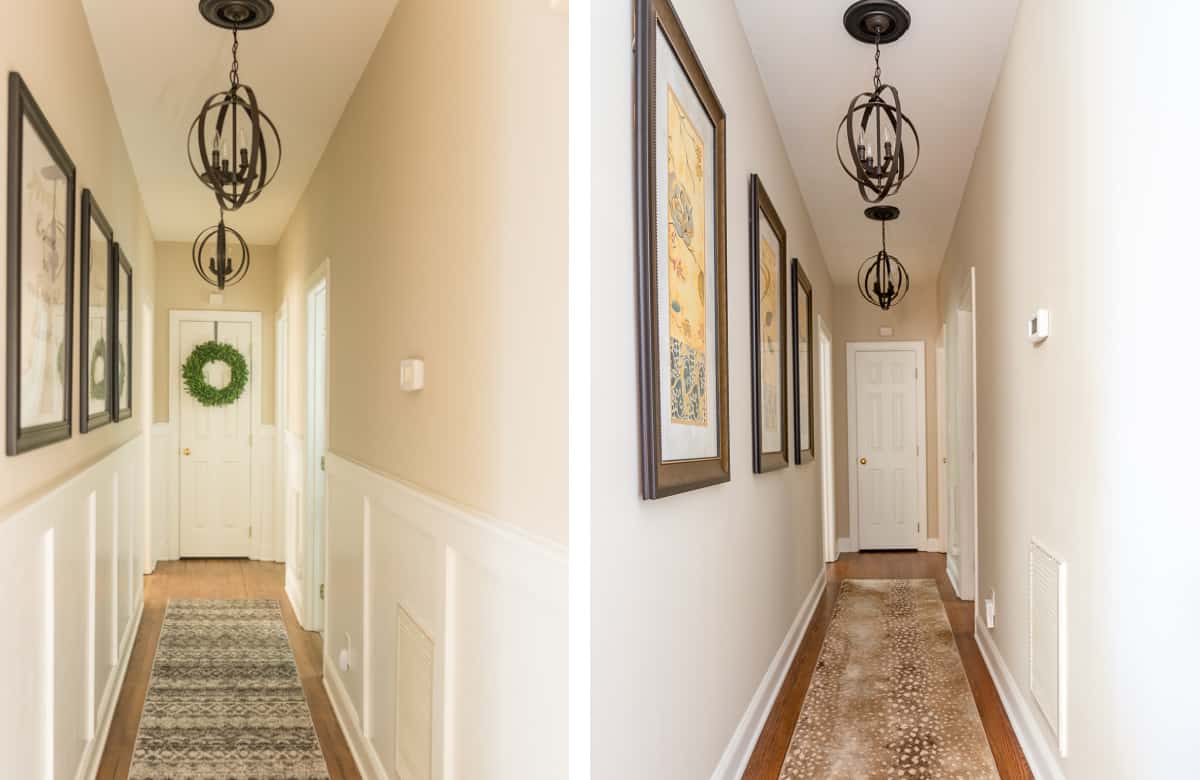
If you’re a longtime reader, then you may have already seen the original hallway decorating ideas that I had and the makeover that I gave it in 2018. I had embraced the farmhouse decorating style and the hallway was a reflection of that.
Getting rid of the carpeting and extending our hardwood floors down the hall made a huge difference. The board and batten treatment that I added to the walls gave the illusion of a wide hallway instead of making it feel more closed in. And the new light fixtures were a major improvement over the original can lights.
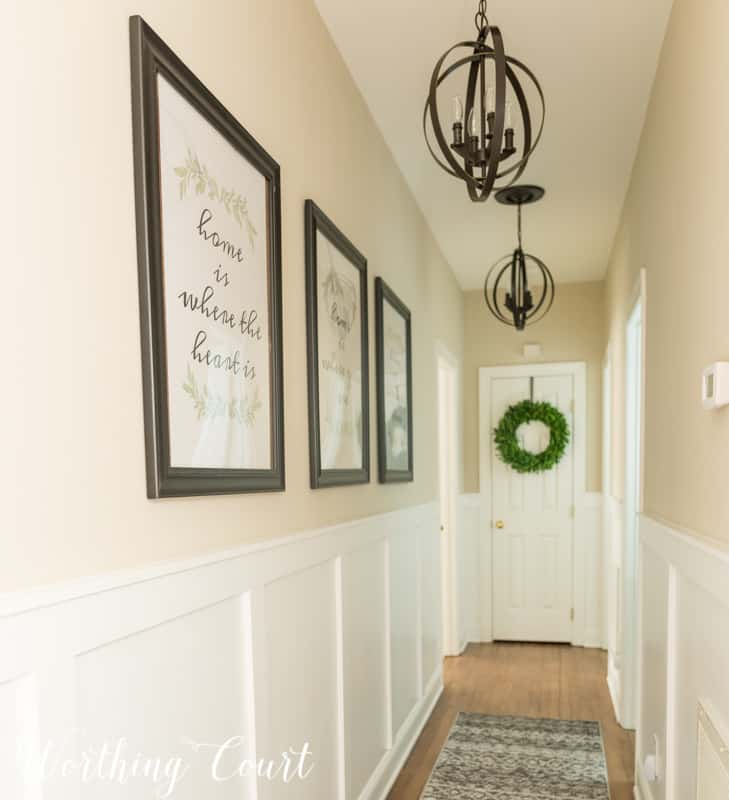
There is zero room to add any decorative items to my hallway, so I gave the area visual interest by creating three large printables and hanging them in a row on one of the walls.
The hallway was fine like this for a while, but as I began to change over the living areas in my home to an updated traditional style, the farmhouse vibe just didn’t fit in anymore. Even so, I probably would have lived with it for quite a while longer, for all the same reasons that hallways tend to get ignored in the first place.
However; a water link from a burst pipe in the wall changed all that. You can see that the repairmen had to tear into a portion of the board and batten wall, to dry things out and make repairs. It was the perfect excuse to get the ball rolling.
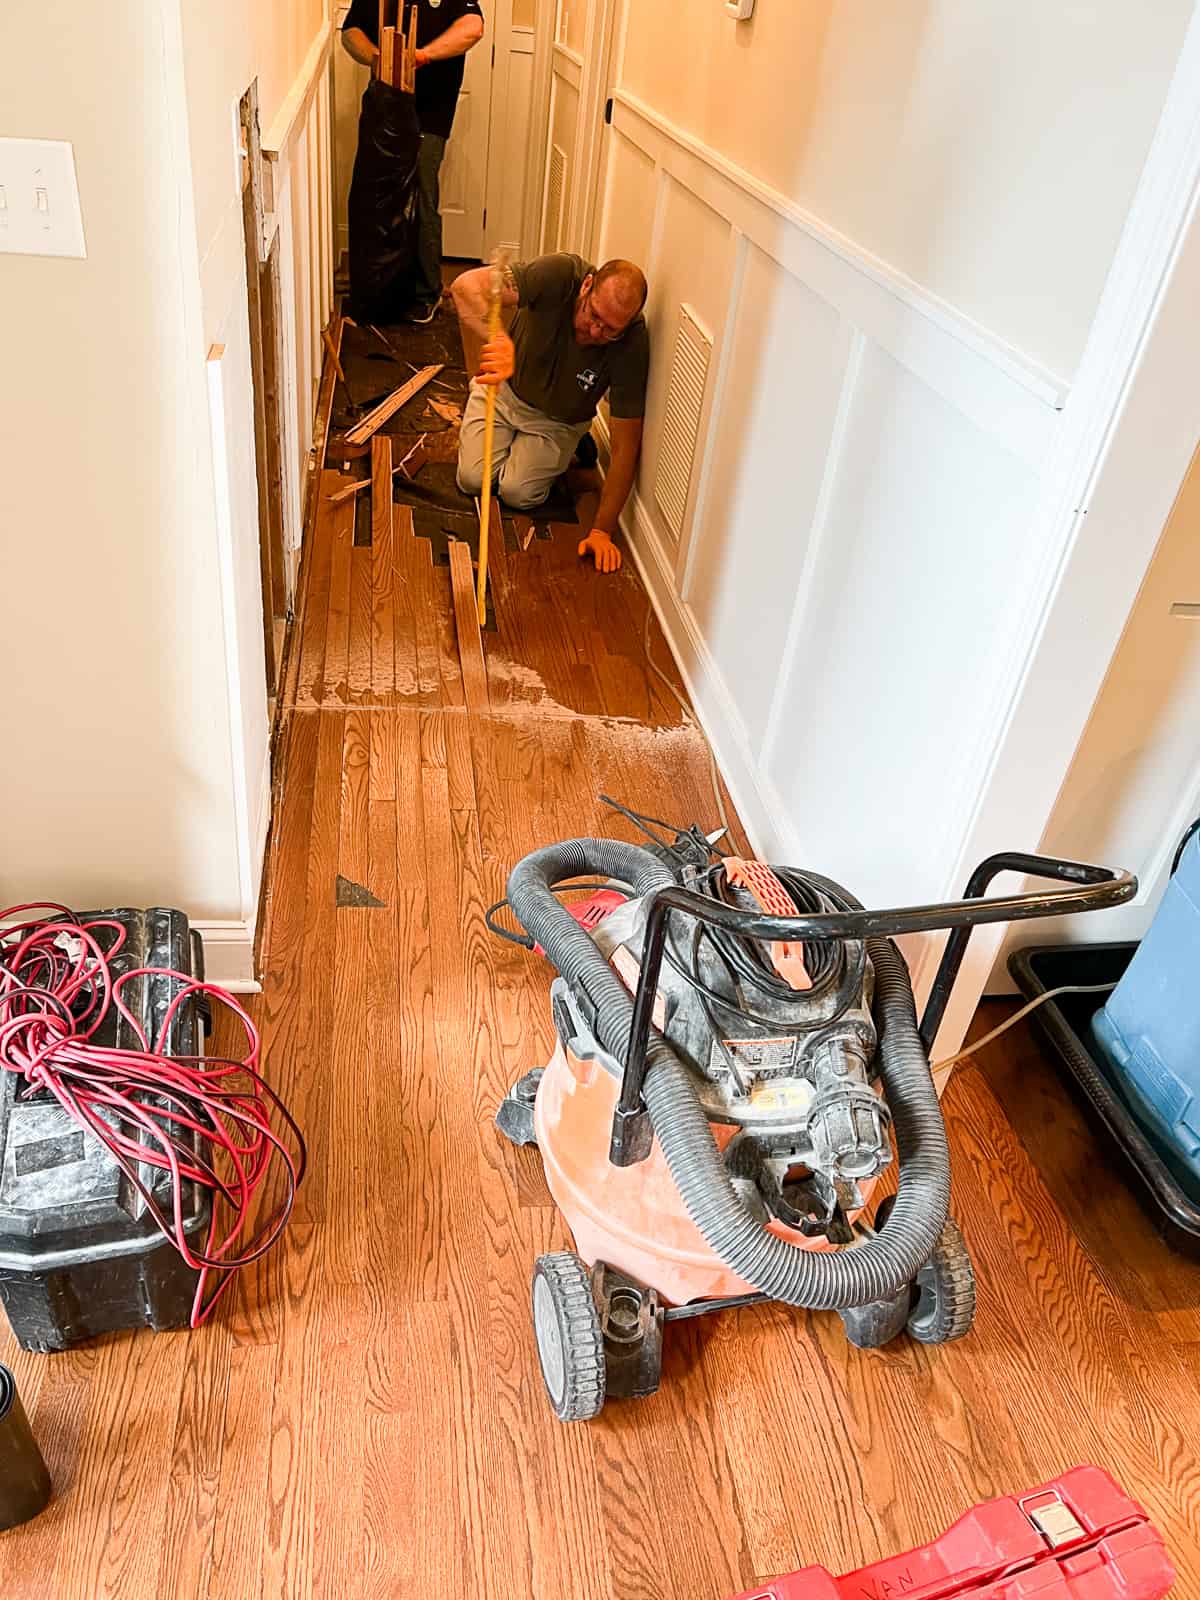
Since I wanted to update the space anyway, I took the opportunity to go ahead and have all of the wall treatment removed, which pretty much left me with a blank slate to work with.
After giving a lot of thought to all of the options that I could have gone with, I decided that keeping it simple, but stylish would be a good idea for making the space feel connected to the rest of the decor in the house.
The pendant lights remained and the paint color stayed the same. But we had to have the hardwood floors on the entire first floor of the house refinished, so I chose a slightly browner stain for a more updated appearance.
I was left with a large amount of wall space to fill, which can be tough in such a narrow space. I considered several options:
- A large mirror would give the illusion of a larger space and bounce any available light around. That seemed too formal to me though.
- A gallery wall would have been the perfect way to display family photos. But I think that would have made the hallway feel too cluttered.
- One large piece of wall art would have been the simplest but would have been hard to view in a smaller space.
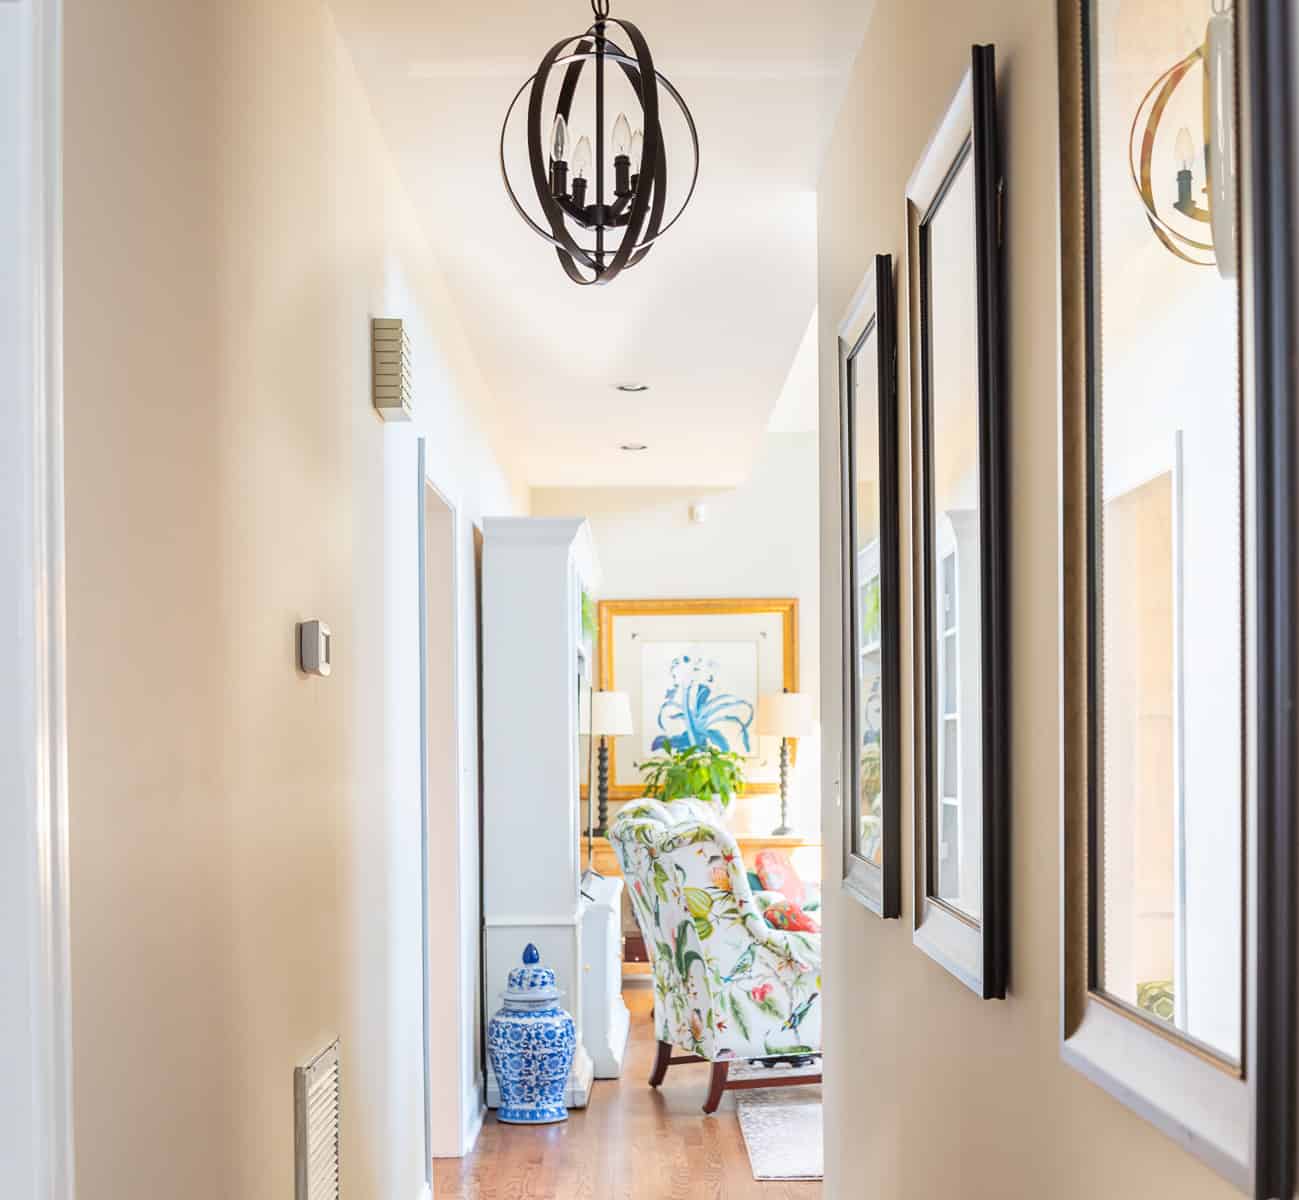
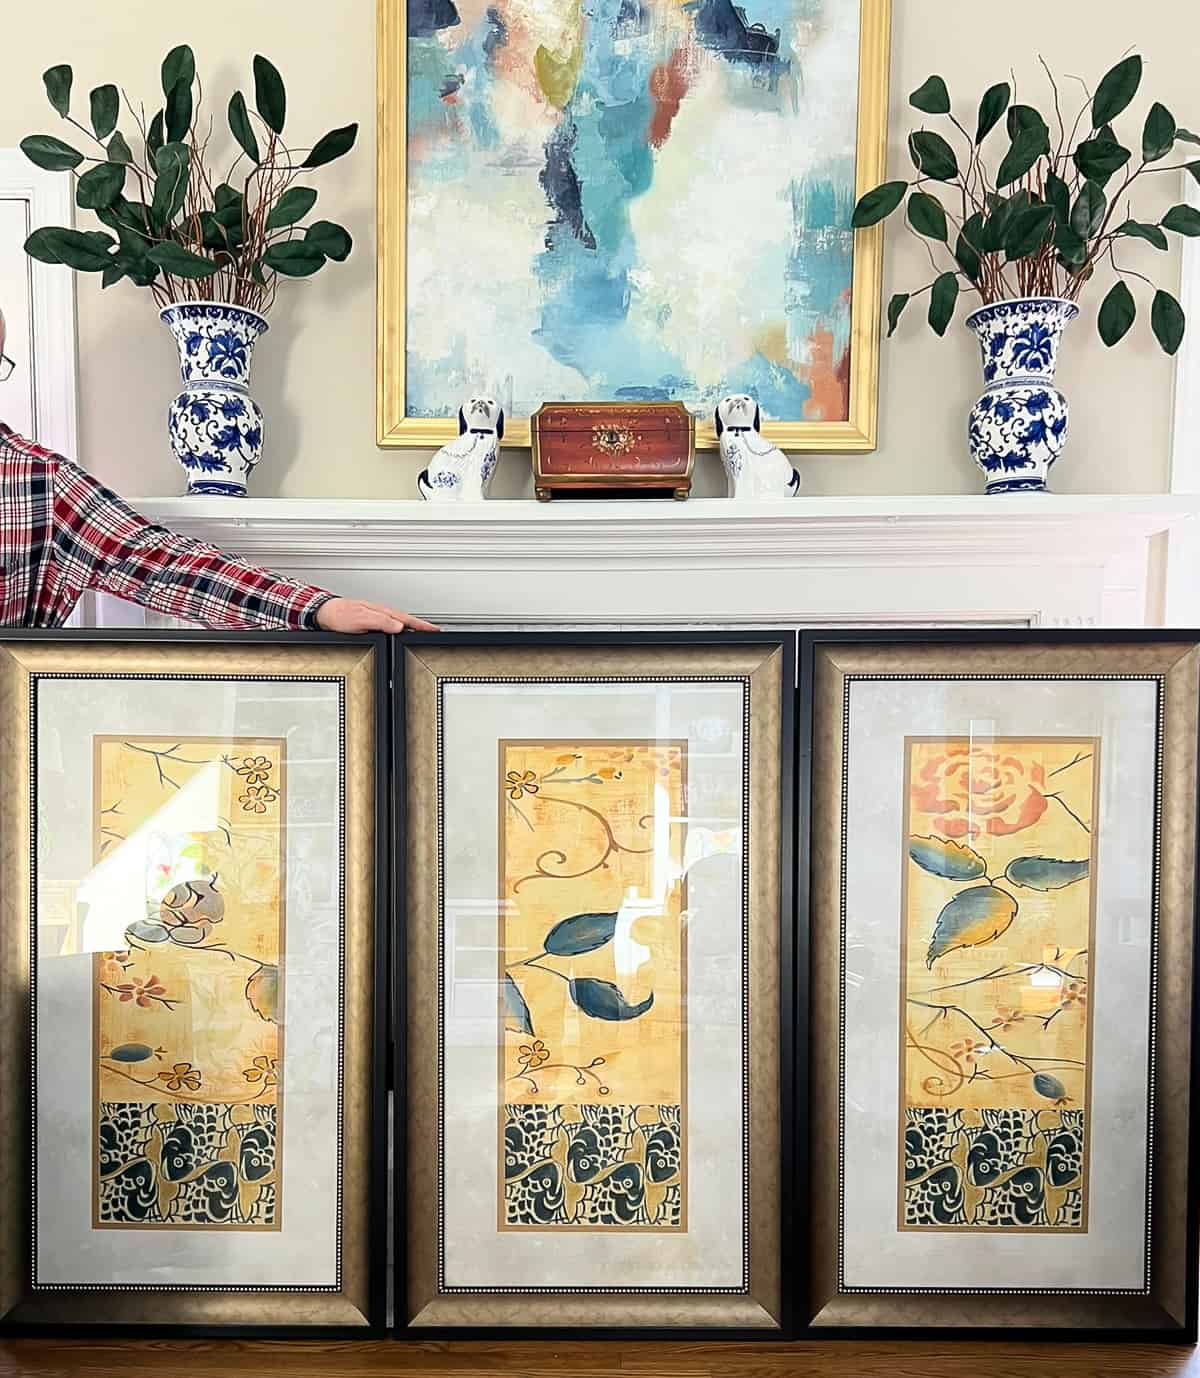
The perfect solution for me turned out to be a set of three art prints that I found at a local consignment store. I had bought them for the frames, but they wound up working wonderfully as is on the hallway walls.
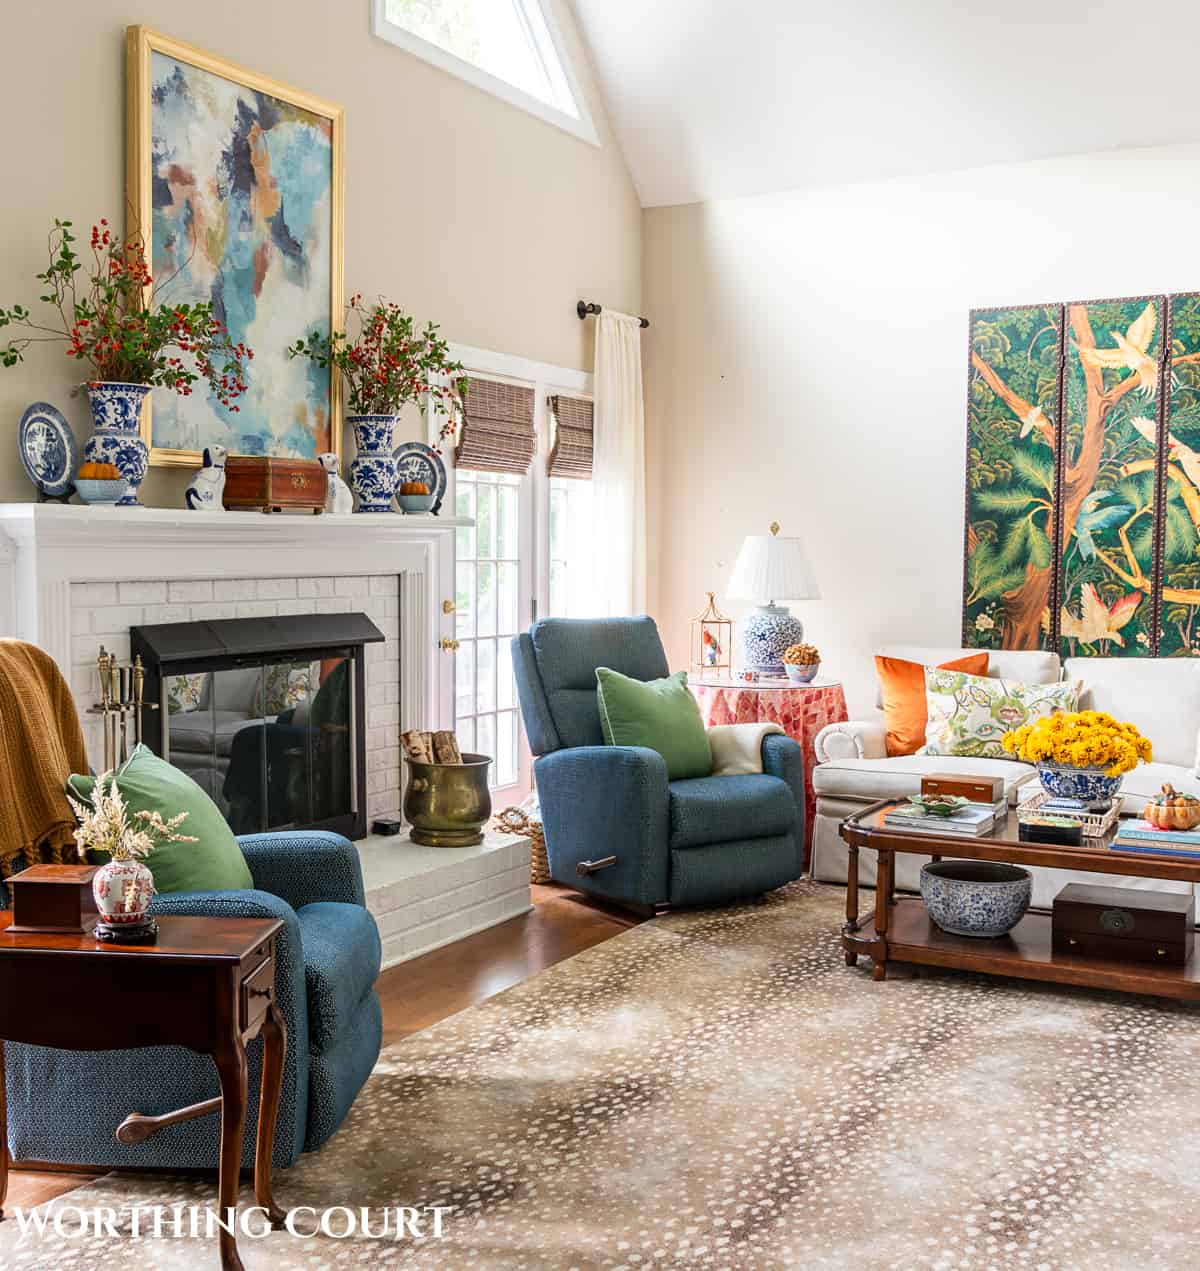
The new cheetah pattern hallway runner has to be the most fun change though! It was made out of the same carpeting that we had our new cheetah pattern rug made from. You may have seen it in recent photos of the living room that I’ve shared.
LINKS TO THE SAME OR SIMILAR PRODUCTS ARE BELOW

We had the runner made from the carpeting that we chose to make a new area rug for the living room.
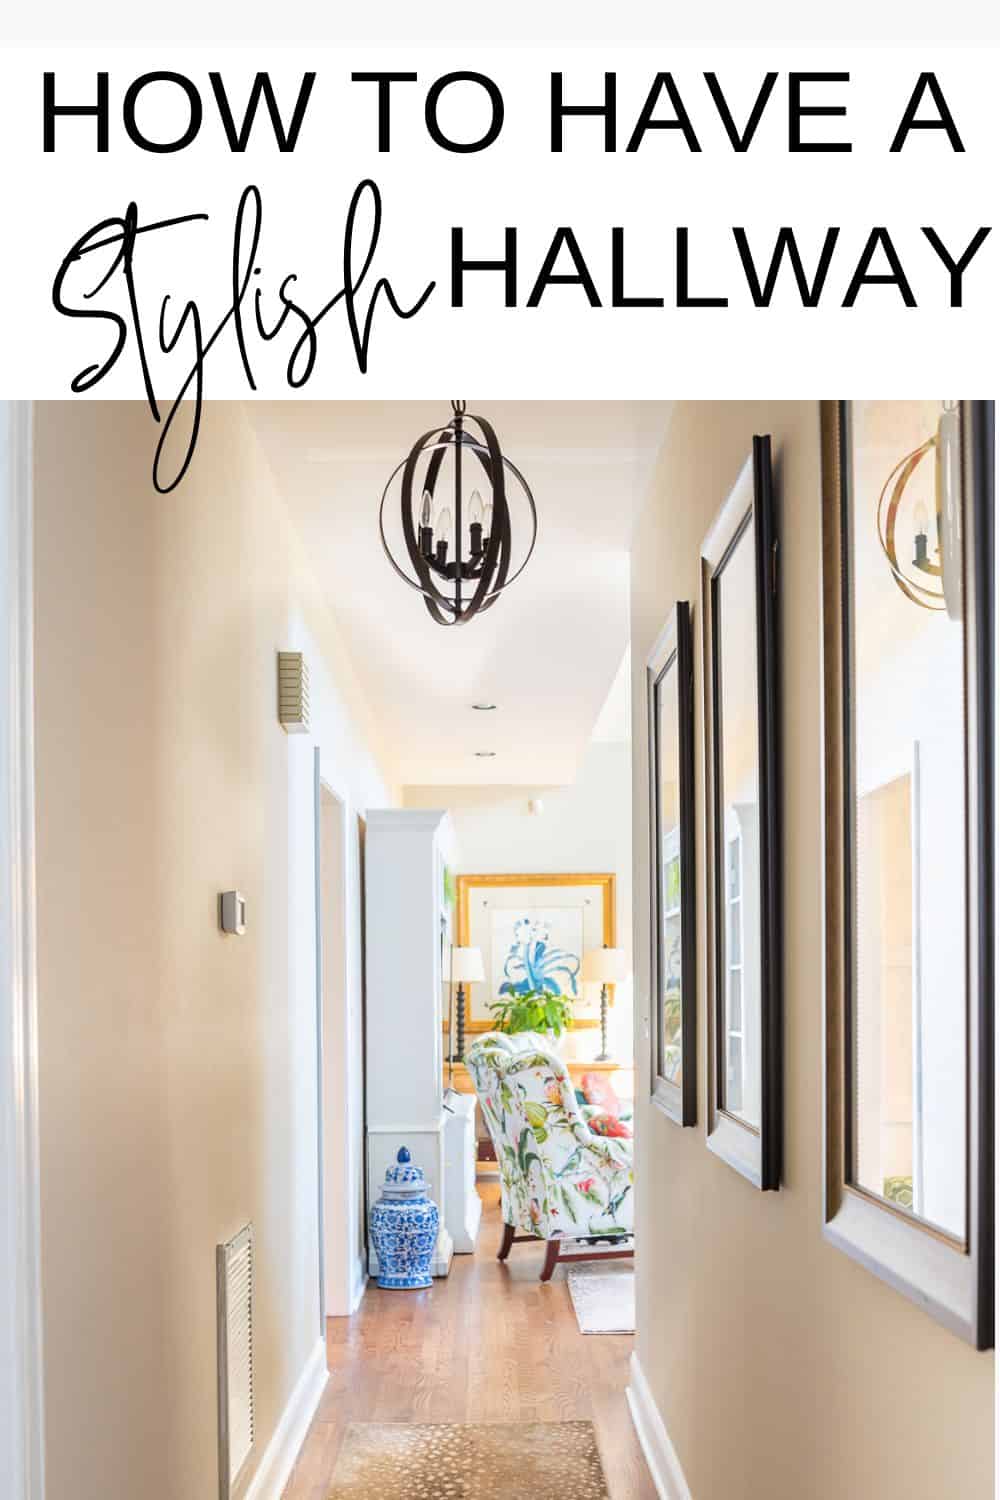
Looking toward the living room, from the other end of the hallway ties it together.
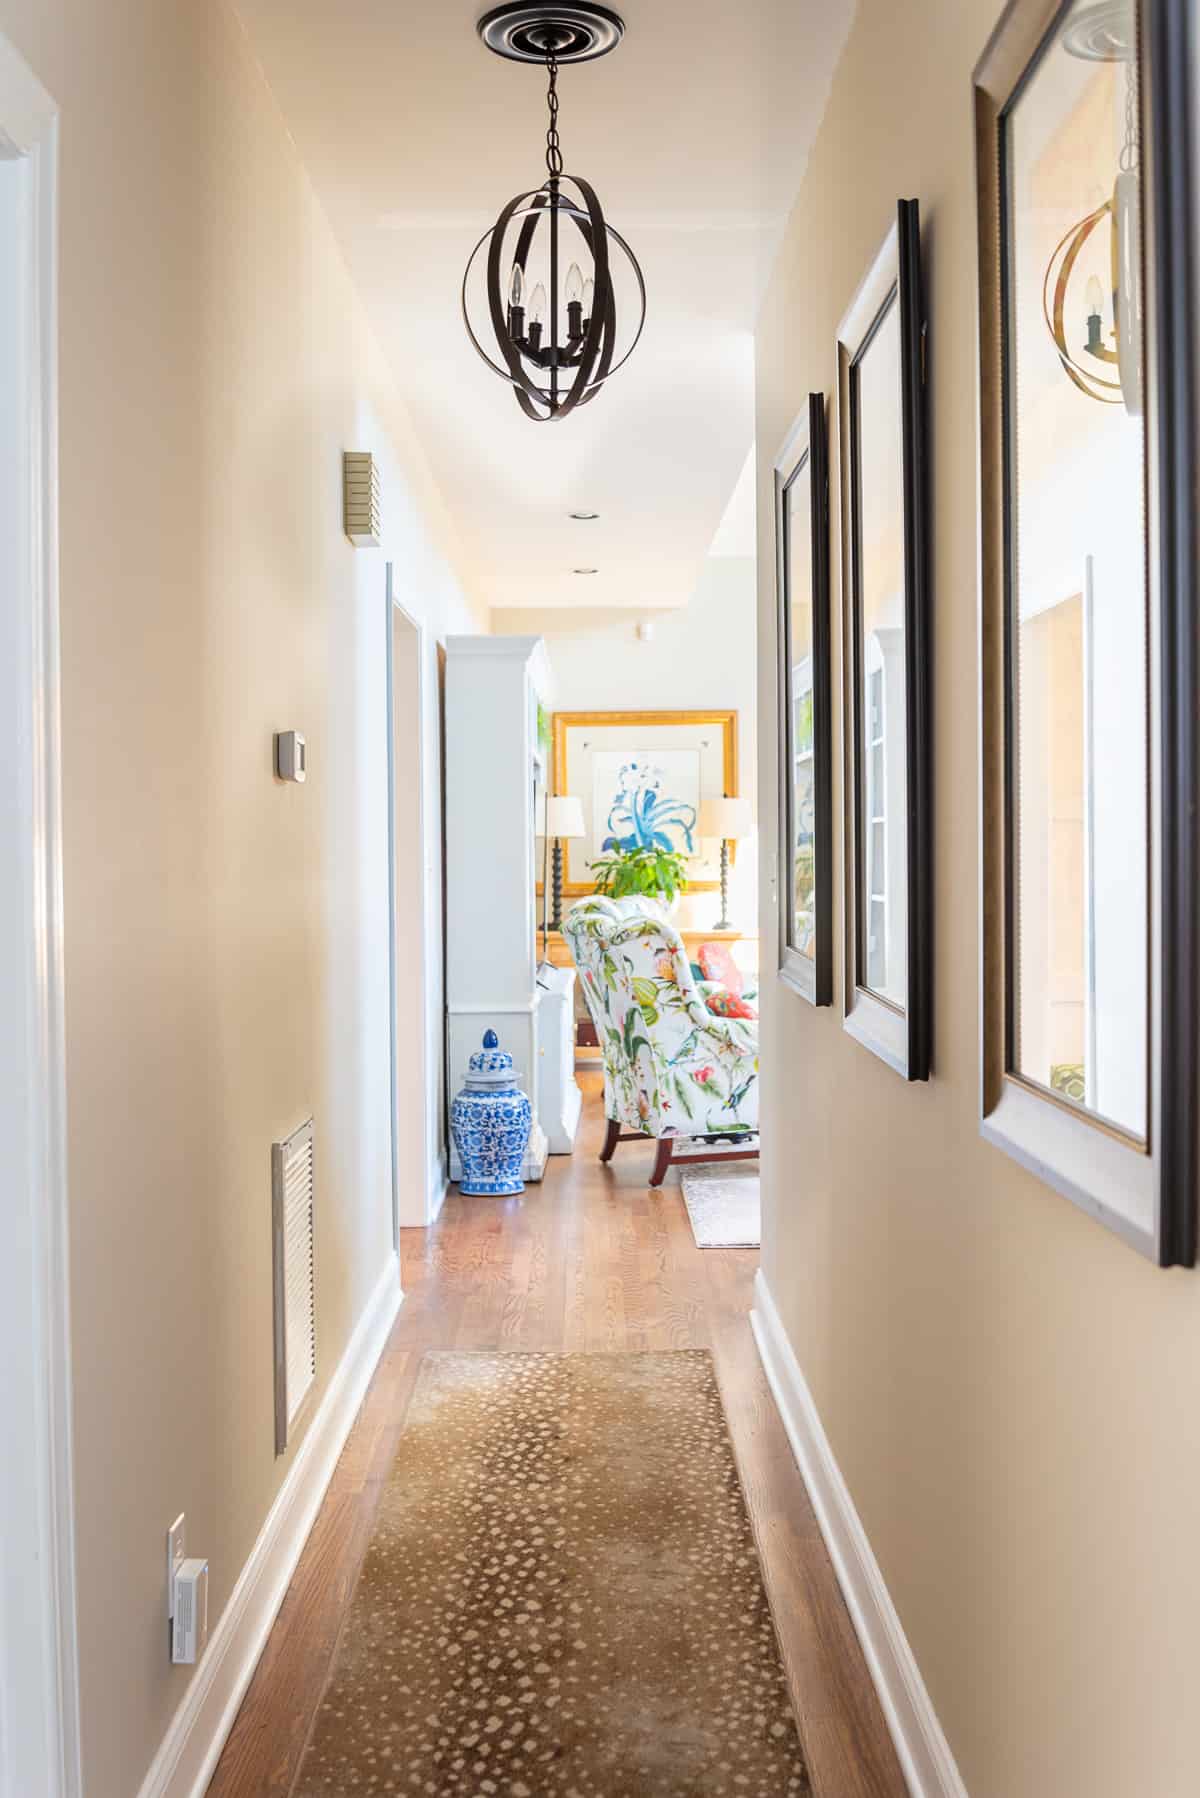
I would love it if I had room for a hall table and cozy table lamp at the end, but having my linen closet door there makes it impossible.
Despite these being pretty simple and basic changes, they all worked together to make a huge difference. It basically went from a slightly cluttered farmhouse look to a fresh, stylish updated traditional one.
When trying to come up with hallway decorating ideas, remember these tips. Of course, all of these would be dependent upon the amount of space you have and your decorating style.
- Good lighting is most important.
- Add visual interest to the walls with a piece of art, wall sconces.
- Use light paint colors on the walls if you want to avoid a cave-like feel.
- Create a focal point with a decorative element such as a table and lamp at the end of a long hallway, if possible.
- Don’t forget about the ceiling. Include stylishly designed light fixtures.
Wall Color – Sherwin Williams Accessible Beige
Trim and Board & Batten Color – Sherwin Williams Extra White
Transforming a hallway from an overlooked corridor to a stylish part of your home is totally doable with some creativity and a few strategic changes. It’s all about playing with light, color, and texture to turn a narrow, possibly dark space into something that feels inviting and blends in with the rest of your home.
So, don’t let that narrow hallway be just a path from one room to another. Happy decorating and I can’t wait to hear about how you’ve transformed your hallways!
Get the Look

Love, love, love the hall way. I have a very narrow hallway, not as long as yours, but , never the less, a challenge to decorate…Well done!!!!!
We hung some artwork on one side of our long hallway and three diamond shaped mirrors on the opposite wall. Really changed the feeling of the space. Next step is a new ceiling light. Still looking. Thanks for your inspiration.
OMG!!! I love your hallway! I am going to try this! Thank you so much also for the printables!
Yes, the hallway looks great! I wish I had a long dark hallway! Love all your decorating ideas!
It looks so much better!! Light and bright. I love the pendants and the ceiling medallions. The board and batten make it look really fresh. Thanks for the inspiration. Hopefully, I can use some of these tips for my hallway. By the way, what paint color did you use? I know that a lighter color is needed for my hallway. Thanks for sharing!
Hi Babette. So glad you like my makeover! The wall color is Sherwin Williams Accessible Beige and all of the white that you see is Sherwin Williams Extra White.
Thank you, Suzy!!!
Amazing what you did with your hallway Suzy. Looks absolutely terrific! Very bright and inviting.
Love your hallway!What a great job!
It looks fabulous. I am loving the rug! When I looked at it on Overstock is appears quite dark but in your pics it isn’t as dark .. I’m just wondering if you think its lighter than it shows on Overstock. I am looking for something in between light and dark and was thinking your rug could be it! ANYWAYS, what a difference from the before pic! Enjoy!
Hi Sandy. I think that the photo on Overstock is a pretty good representation of what the rug actually looks like. 😀
Thanks for the helpful guidance!!
You did a great job brightening up your hallway. I love the pendant lights, and the board and batten look great. Such simple ways to add a lot of style and a facelift to the original hall. The boxwood wreath looks great and draws your eye to that end of the hallway. Good job!
Wow..looks amazing. I love the interest the board and batten provides. Great job.
I love the makeover! Looks wider and MUCH more inviting!!
Outstanding!! What a bright transformation. The pendant lights were a great idea as they add the perfect interest and pull your eye up instead of down. I’m partial to board and batten, so I feel it adds the exact amount of brightness needed. Boxwood, another favorite, defines the end of the hall eliminating any tunnel feeling. Love it! Thank you for some great ideas.
Lovely! You did a great job!!! You’re so talented!!!
I love your hallway!!! I have almost the exact hallway upstairs in my house and this gives me lots of inspiration! I love how you changed out the recessed lights with the pendant lights – what a great idea!
Looks awesome!! People tend to forget about dcoraring hallways. It’s also a great place for collections of paintings that due to colors may not fit in with decor in other rooms.
Wow! What a difference.. It was dark and forbidding and you turned it into a welcoming area. It makes you look all around instead of just straight ahead. Beautiful!
What a gorgeous transformation! I need to work on my hallway going from the kitchen to the garage. After we painted, I left it blank until I decided what to do and now it’s looking pretty sad! Love your lighting!
Shelley
Your makeover came just in time for me! I have an almost identical long, dark hallway with a bathroom at the end. I love the simple green wreath on the door! I have shopped, forever it seems, to find just the right artwork to add to our walls and your printables are just what I had in mind! I really like how the prints tie in with the green wreath! Thank you, thank you! Also I was thinking of adding a mirror on the other side of the hall opposite the artwork. I thought it might widen the appearance of the hallway. I like Kathy’s idea of three diamond shaped mirrors on the opposite side. Do you feel like mirrors will interfere with the artwork?
Hi Nancy. I think art on one wall and mirrors on the other would be fine as long as you don’t make the layout of each side of the hall the same. In other words, if I had wanted to hang three mirrors on one wall, I would have made the art on the other wall look more like a gallery wall in stead of three pictures lined up like I have now. Hope that makes sense!
It looks great! Just wondering if you actually placed board to the walls before the battan or just put battan on top of your walls? If so, do you notice any texture from the walls?
Thanks!
Jane
Hi Jane. We placed the boards directly on the wall and then caulked and painted everything the same color. There isn’t an issue with texture since our walls are just regular sheetrock. But – if my wall had texture, I’d add a thin board to the wall to cover the texture up before adding the batten boards.
Board and batten is genius! The Hubs had to admit that it truly does not narrow the space. Our only problem is that we do not have a long narrow hallway, but I’m thinking this just might accent our little hallway and the alcove that connects our greatroom and master suite. Thank you!