Easy Hallway Decorating Ideas for a Long, Narrow Space
Do you have a boring hallway? Using these hallway decorating ideas will take your long, narrow space from lackluster to stylish!
Affiliate links have been used. See my full disclosure HERE.
You know how it goes – we all tend to give our hallways the cold shoulder when it comes to decorating. Honestly, they’re usually an easy space to ignore.
Add to that the fact that most of us get stumped trying to figure out how to add visual interest to them without making them feel cramped or cluttered. Plus, hallways aren’t exactly where we hang out, so they often end up at the bottom of our home makeover list.
They end up being these plain, functional spots in our homes that don’t get much love. But hey, it doesn’t have to be that way! With a few easy tweaks, we can turn a narrow space, like a hallway, into a great place that ties in with the rest of your home and pulls different areas together.
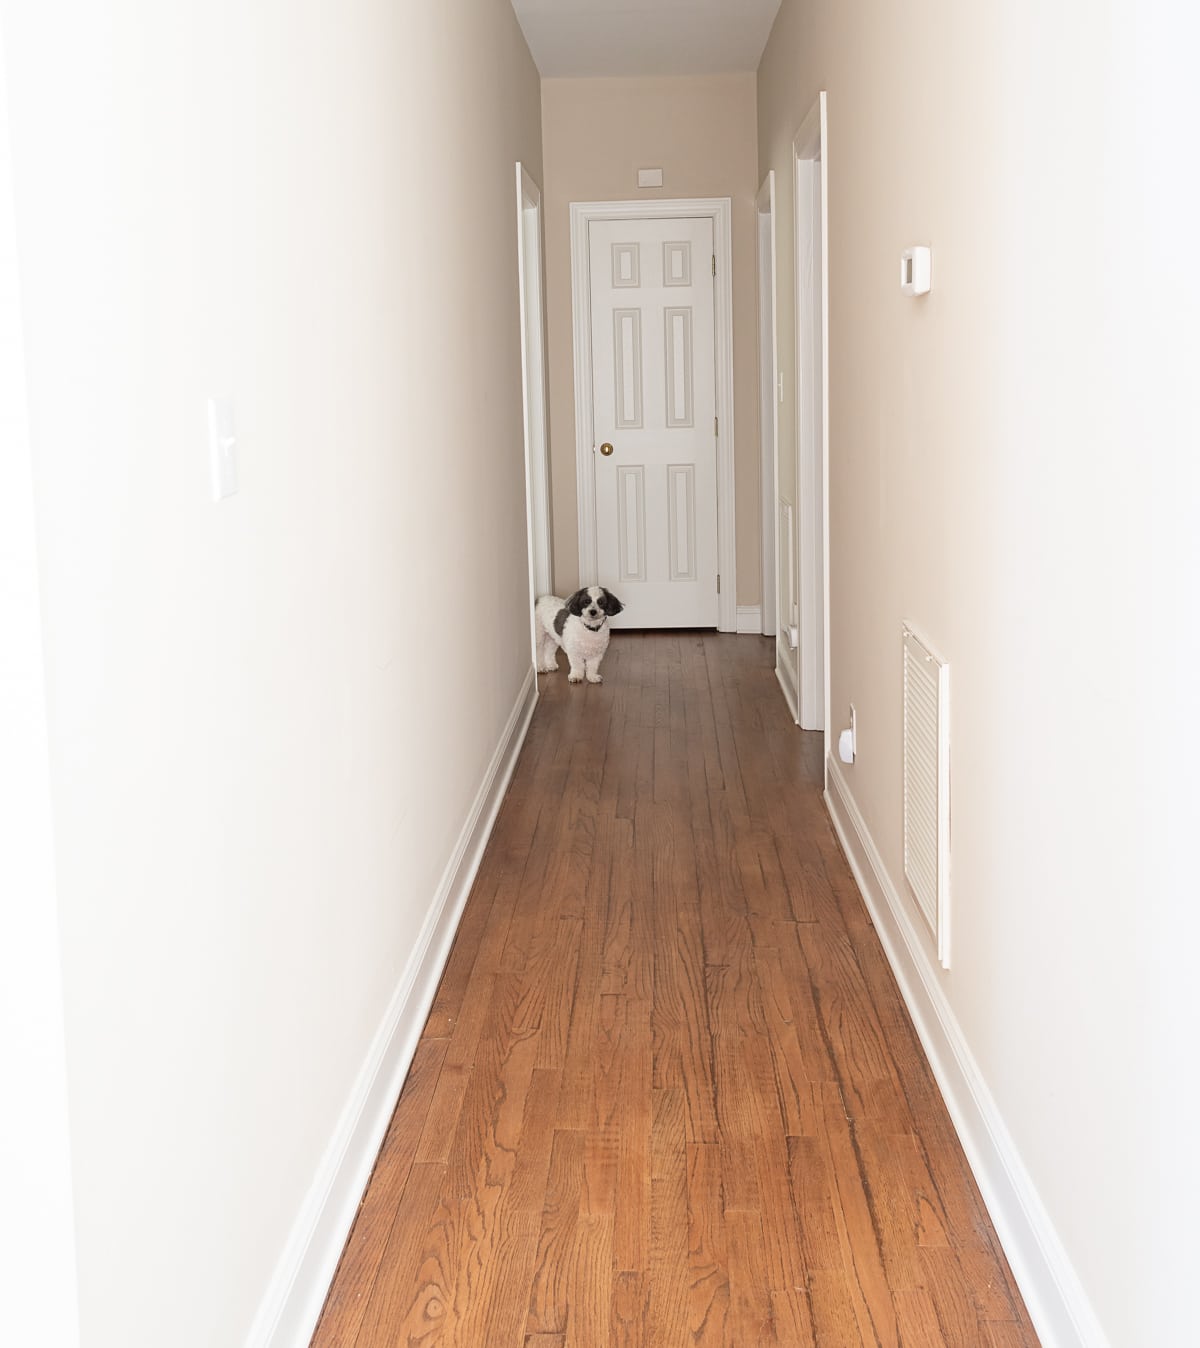
My hallway is probably like many of yours – long, dark, and narrow, lacking a focal point or anything else that might make it the tiniest bit interesting.
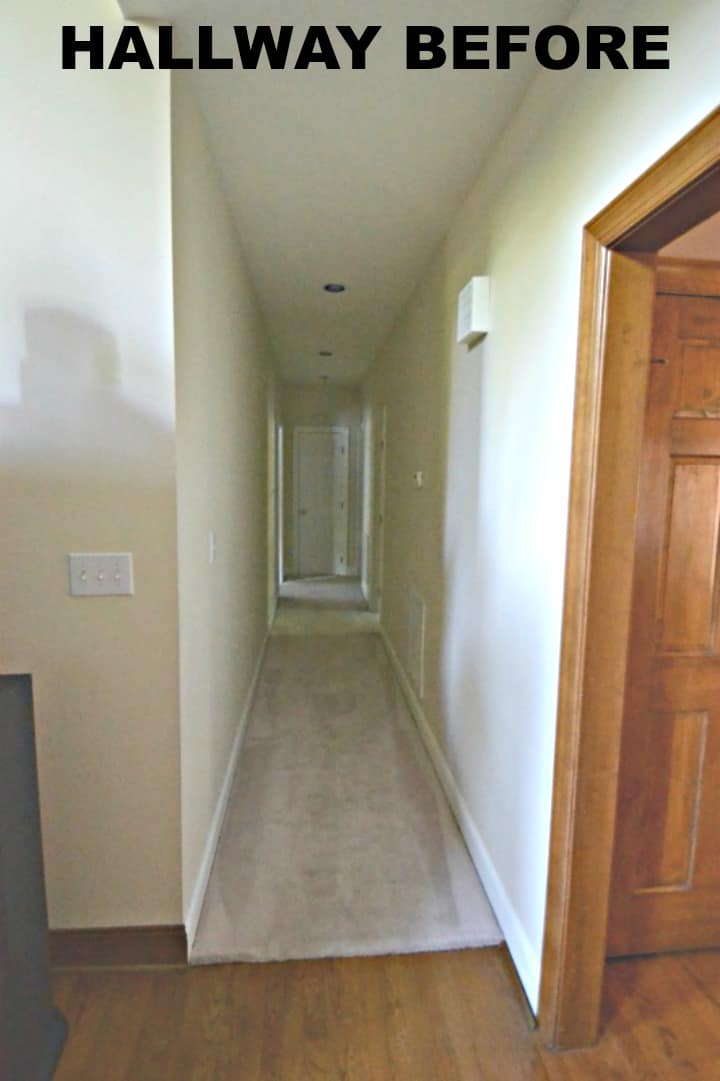
When we purchased our home, the only thing of interest (and I say that rather sarcastically) was the pale pink carpet on the floor and the pink lightbulbs in the overhead lights.
It was dark to begin with, as it gets very little natural light, but the oak trim on the doorway adjacent to it just added to the dark feel.
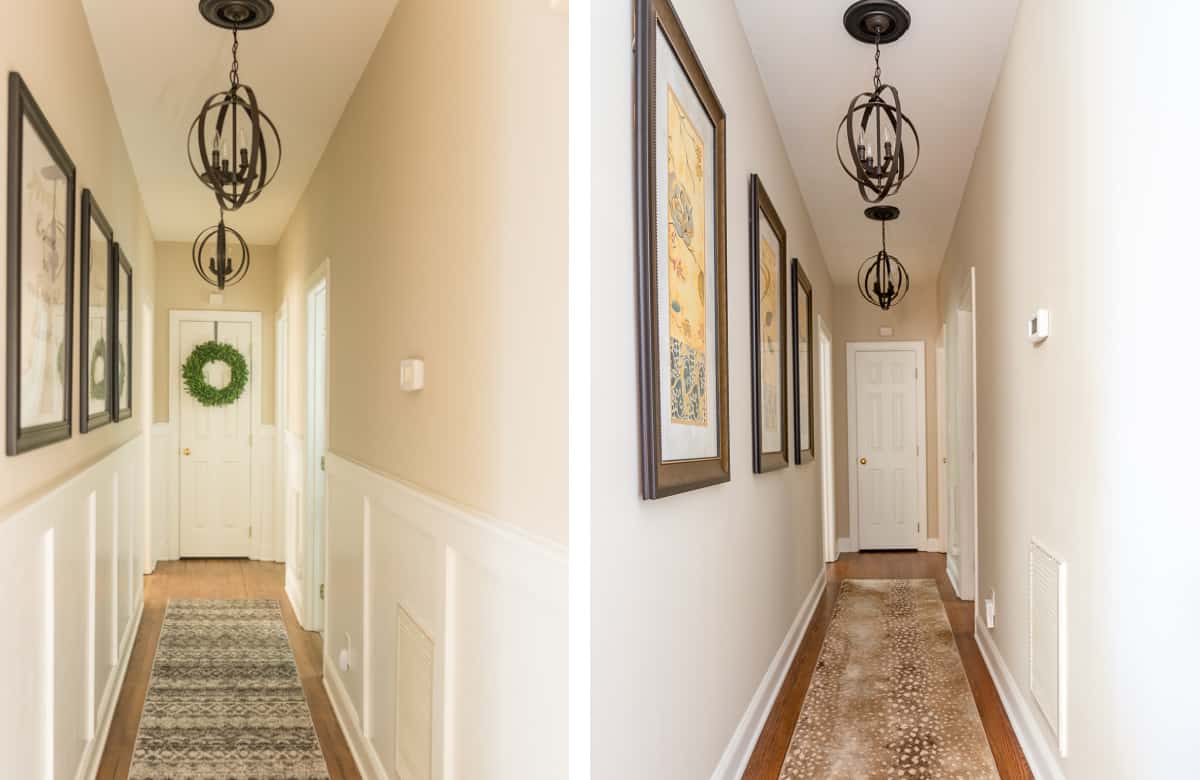
If you’re a longtime reader, then you may have already seen the original hallway decorating ideas that I had and the makeover that I gave it in 2018. I had embraced the farmhouse decorating style and the hallway was a reflection of that.
Getting rid of the carpeting and extending our hardwood floors down the hall made a huge difference. The board and batten treatment that I added to the walls gave the illusion of a wide hallway instead of making it feel more closed in. And the new light fixtures were a major improvement over the original can lights.
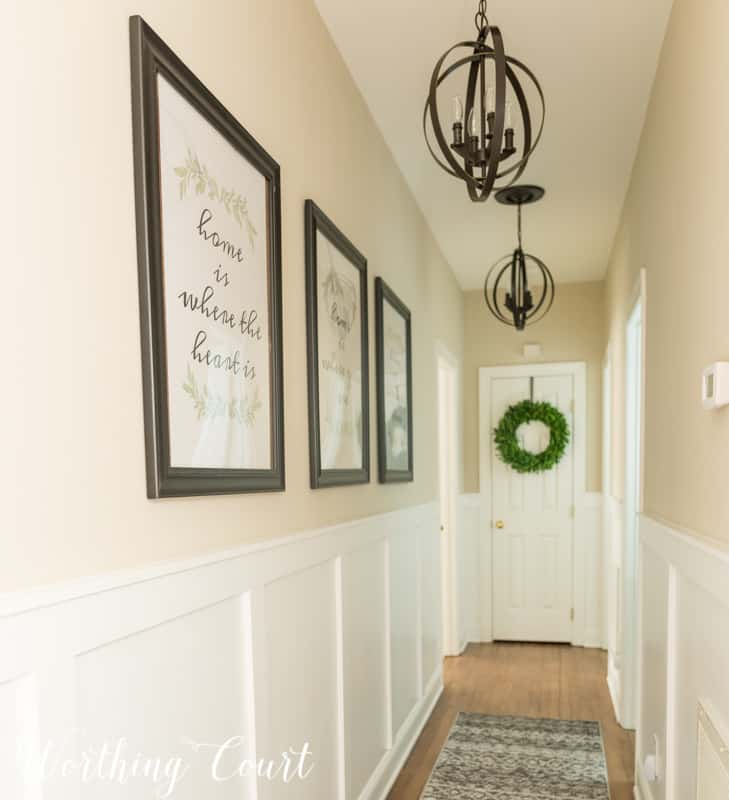
There is zero room to add any decorative items to my hallway, so I gave the area visual interest by creating three large printables and hanging them in a row on one of the walls.
The hallway was fine like this for a while, but as I began to change over the living areas in my home to an updated traditional style, the farmhouse vibe just didn’t fit in anymore. Even so, I probably would have lived with it for quite a while longer, for all the same reasons that hallways tend to get ignored in the first place.
However; a water link from a burst pipe in the wall changed all that. You can see that the repairmen had to tear into a portion of the board and batten wall, to dry things out and make repairs. It was the perfect excuse to get the ball rolling.
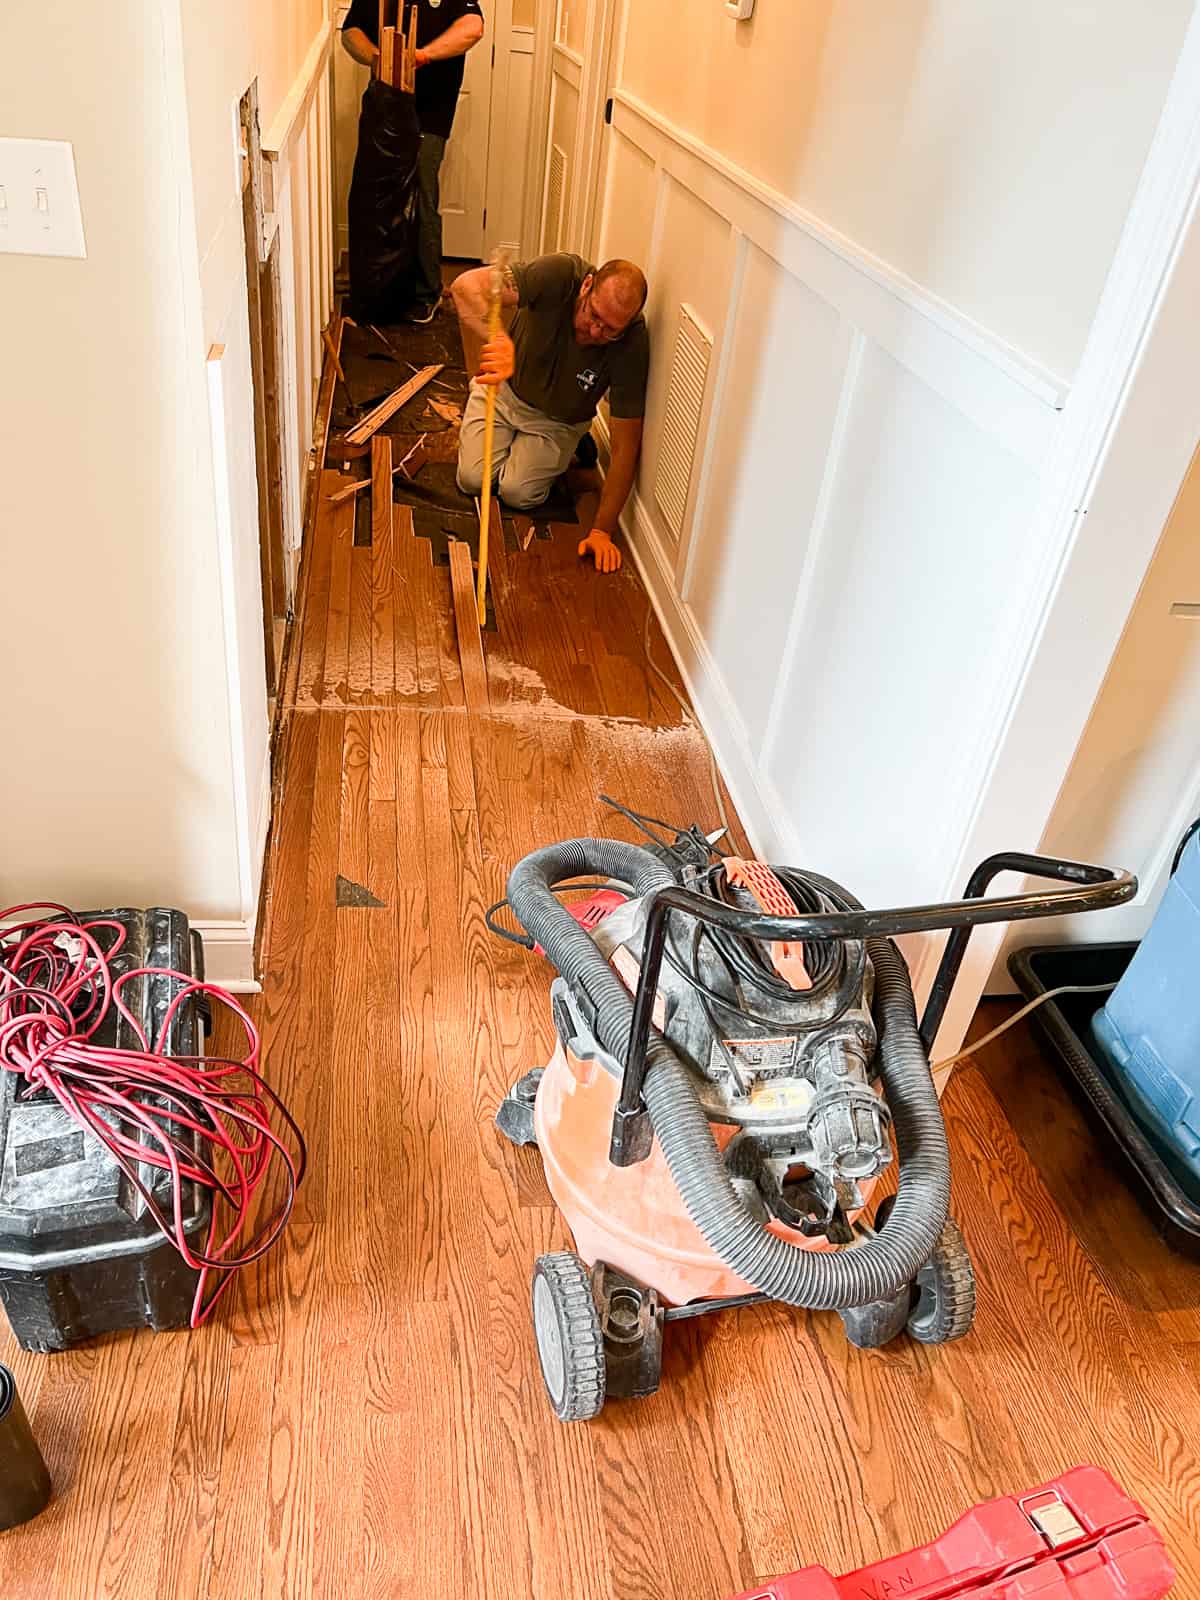
Since I wanted to update the space anyway, I took the opportunity to go ahead and have all of the wall treatment removed, which pretty much left me with a blank slate to work with.
After giving a lot of thought to all of the options that I could have gone with, I decided that keeping it simple, but stylish would be a good idea for making the space feel connected to the rest of the decor in the house.
The pendant lights remained and the paint color stayed the same. But we had to have the hardwood floors on the entire first floor of the house refinished, so I chose a slightly browner stain for a more updated appearance.
I was left with a large amount of wall space to fill, which can be tough in such a narrow space. I considered several options:
- A large mirror would give the illusion of a larger space and bounce any available light around. That seemed too formal to me though.
- A gallery wall would have been the perfect way to display family photos. But I think that would have made the hallway feel too cluttered.
- One large piece of wall art would have been the simplest but would have been hard to view in a smaller space.
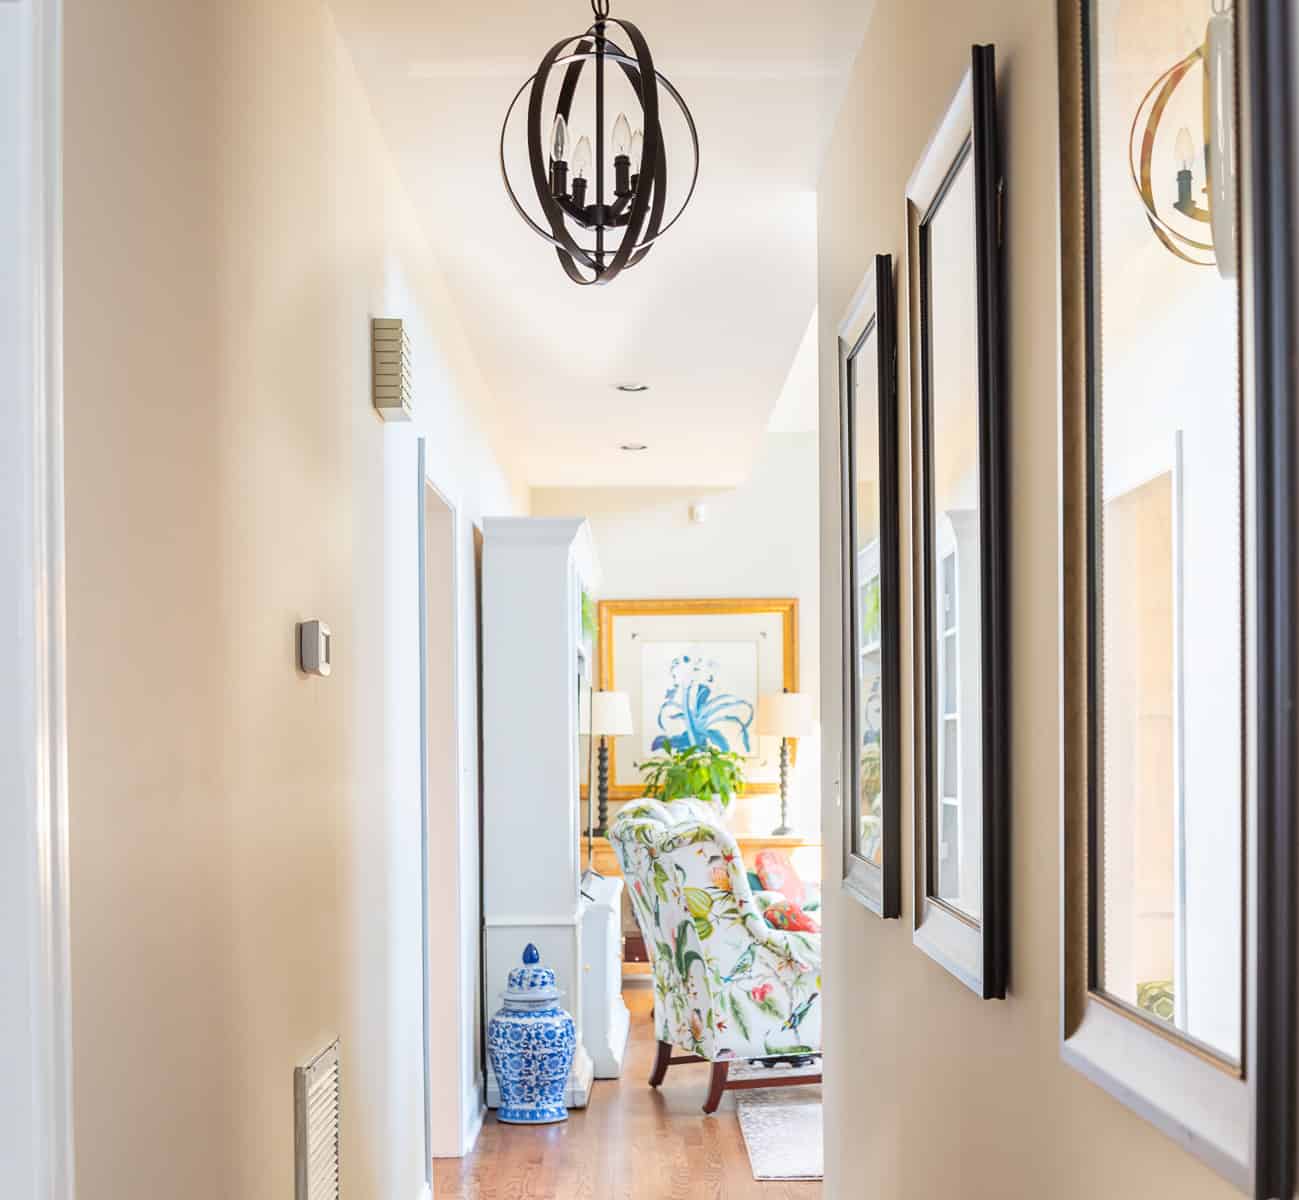
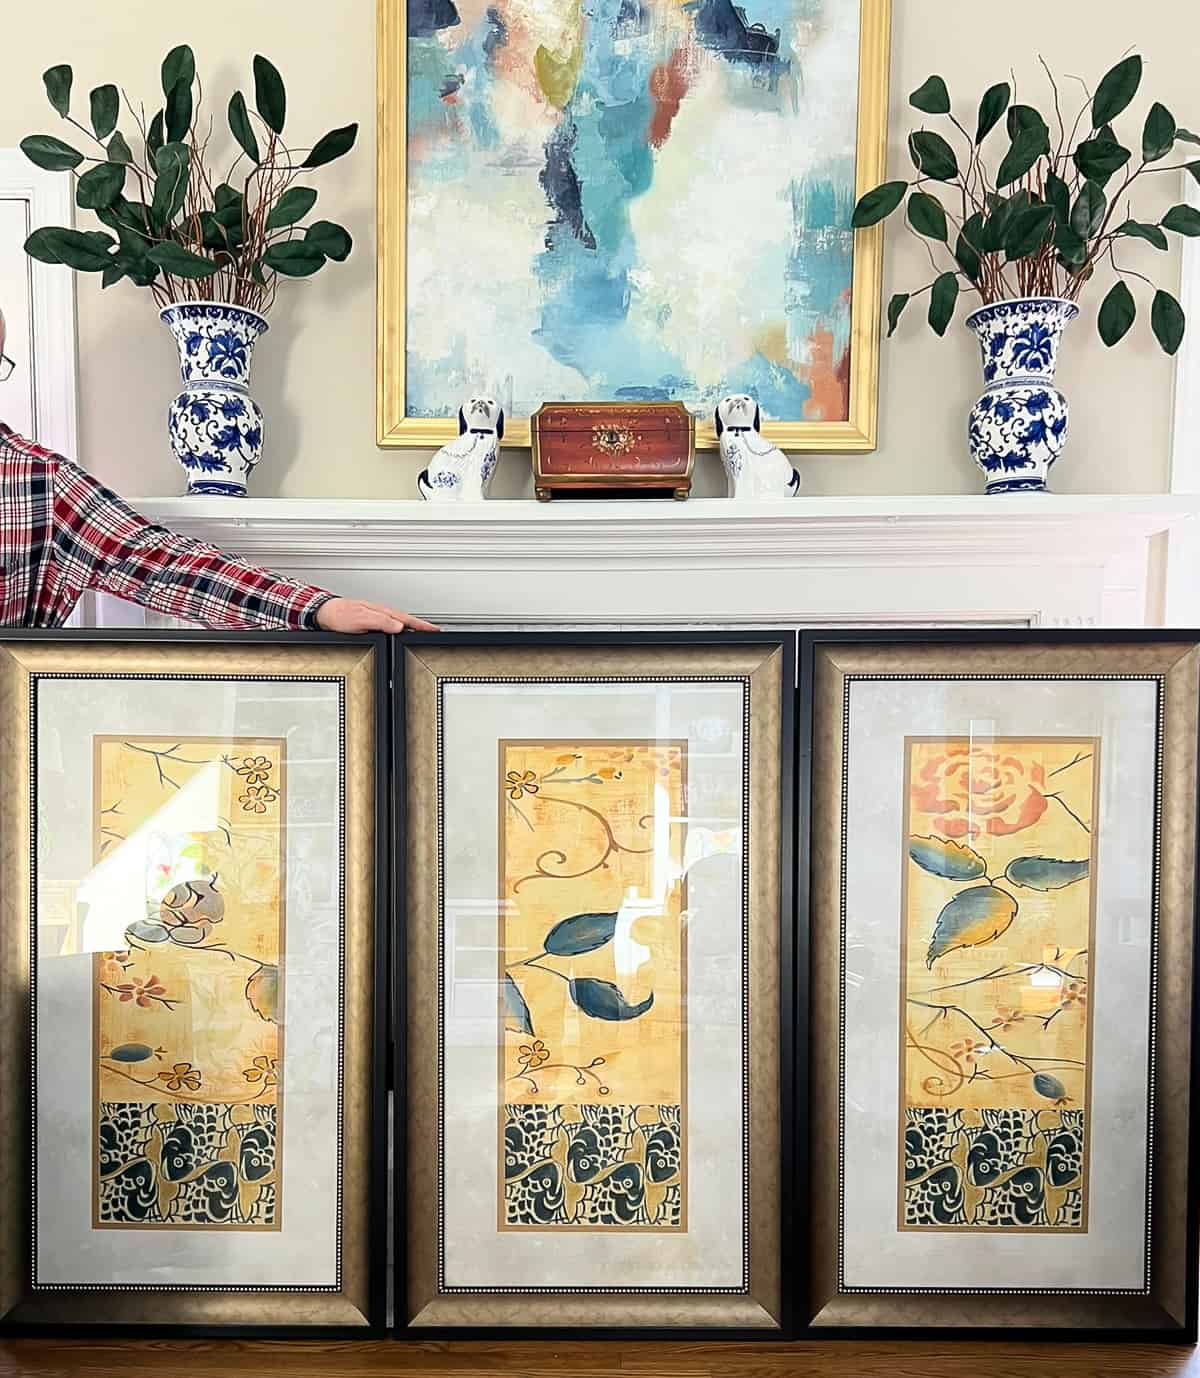
The perfect solution for me turned out to be a set of three art prints that I found at a local consignment store. I had bought them for the frames, but they wound up working wonderfully as is on the hallway walls.
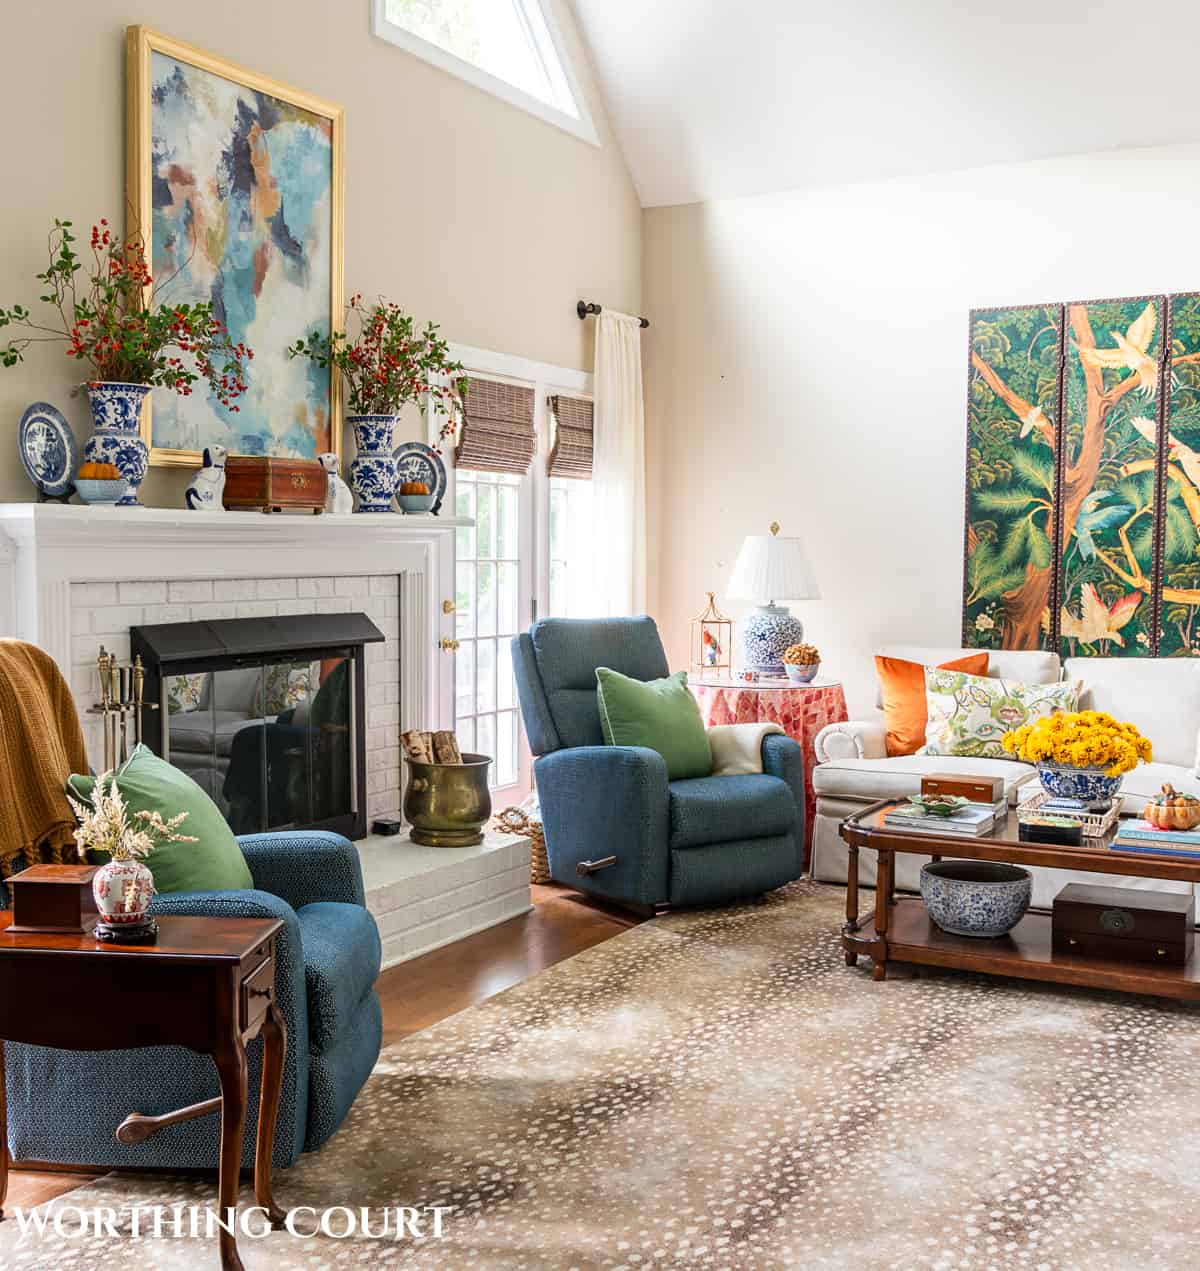
The new cheetah pattern hallway runner has to be the most fun change though! It was made out of the same carpeting that we had our new cheetah pattern rug made from. You may have seen it in recent photos of the living room that I’ve shared.
LINKS TO THE SAME OR SIMILAR PRODUCTS ARE BELOW

We had the runner made from the carpeting that we chose to make a new area rug for the living room.
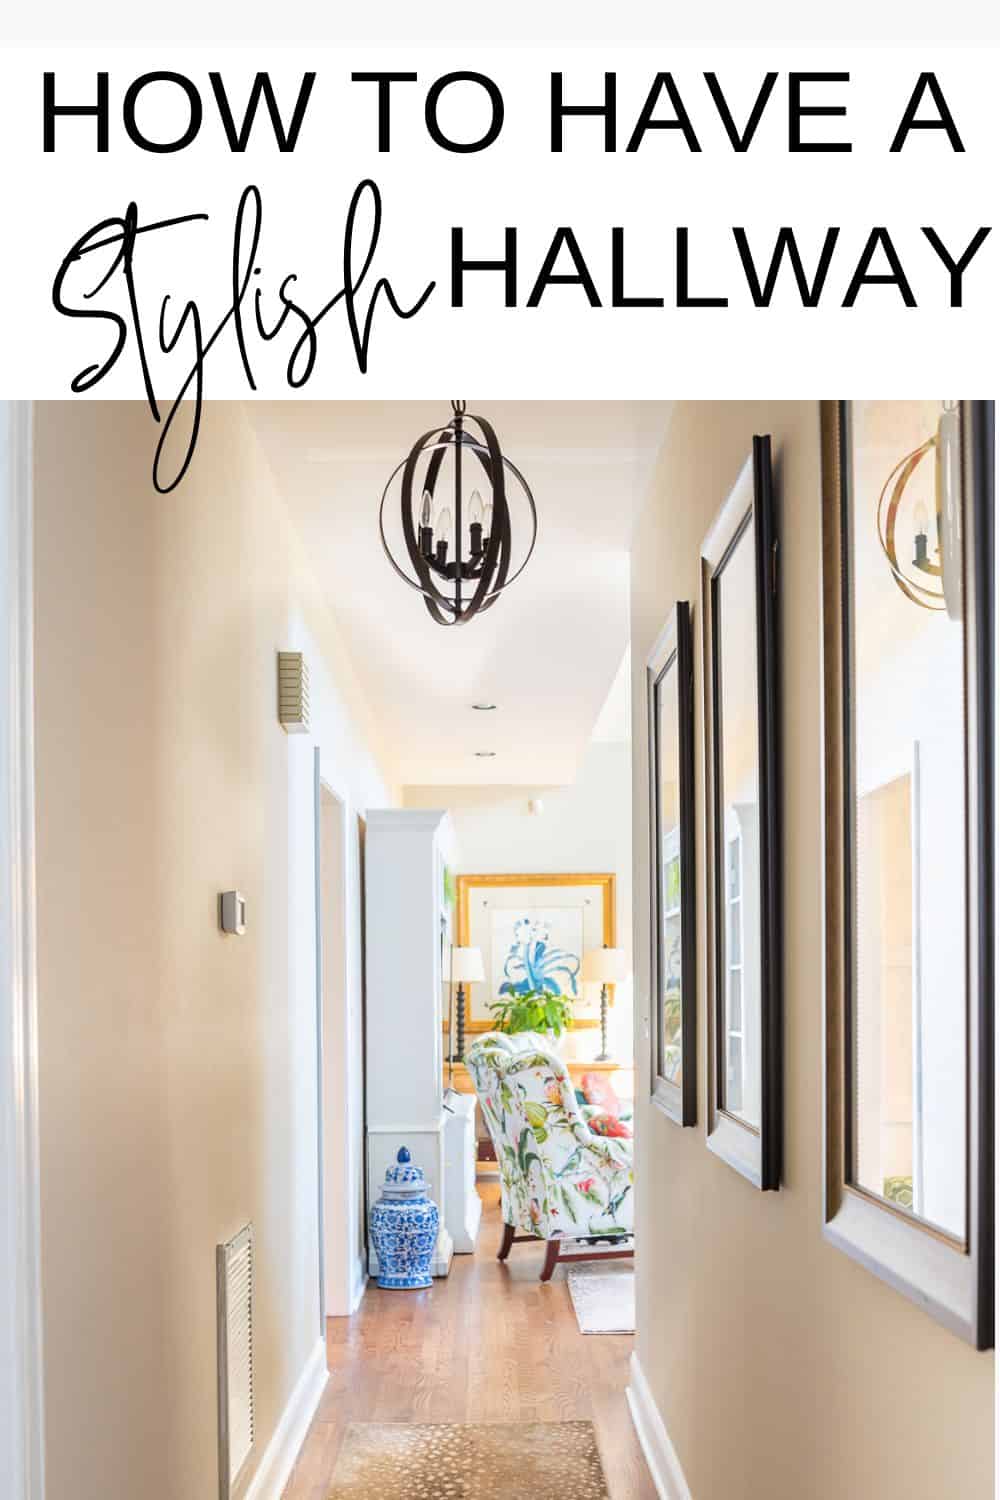
Looking toward the living room, from the other end of the hallway ties it together.
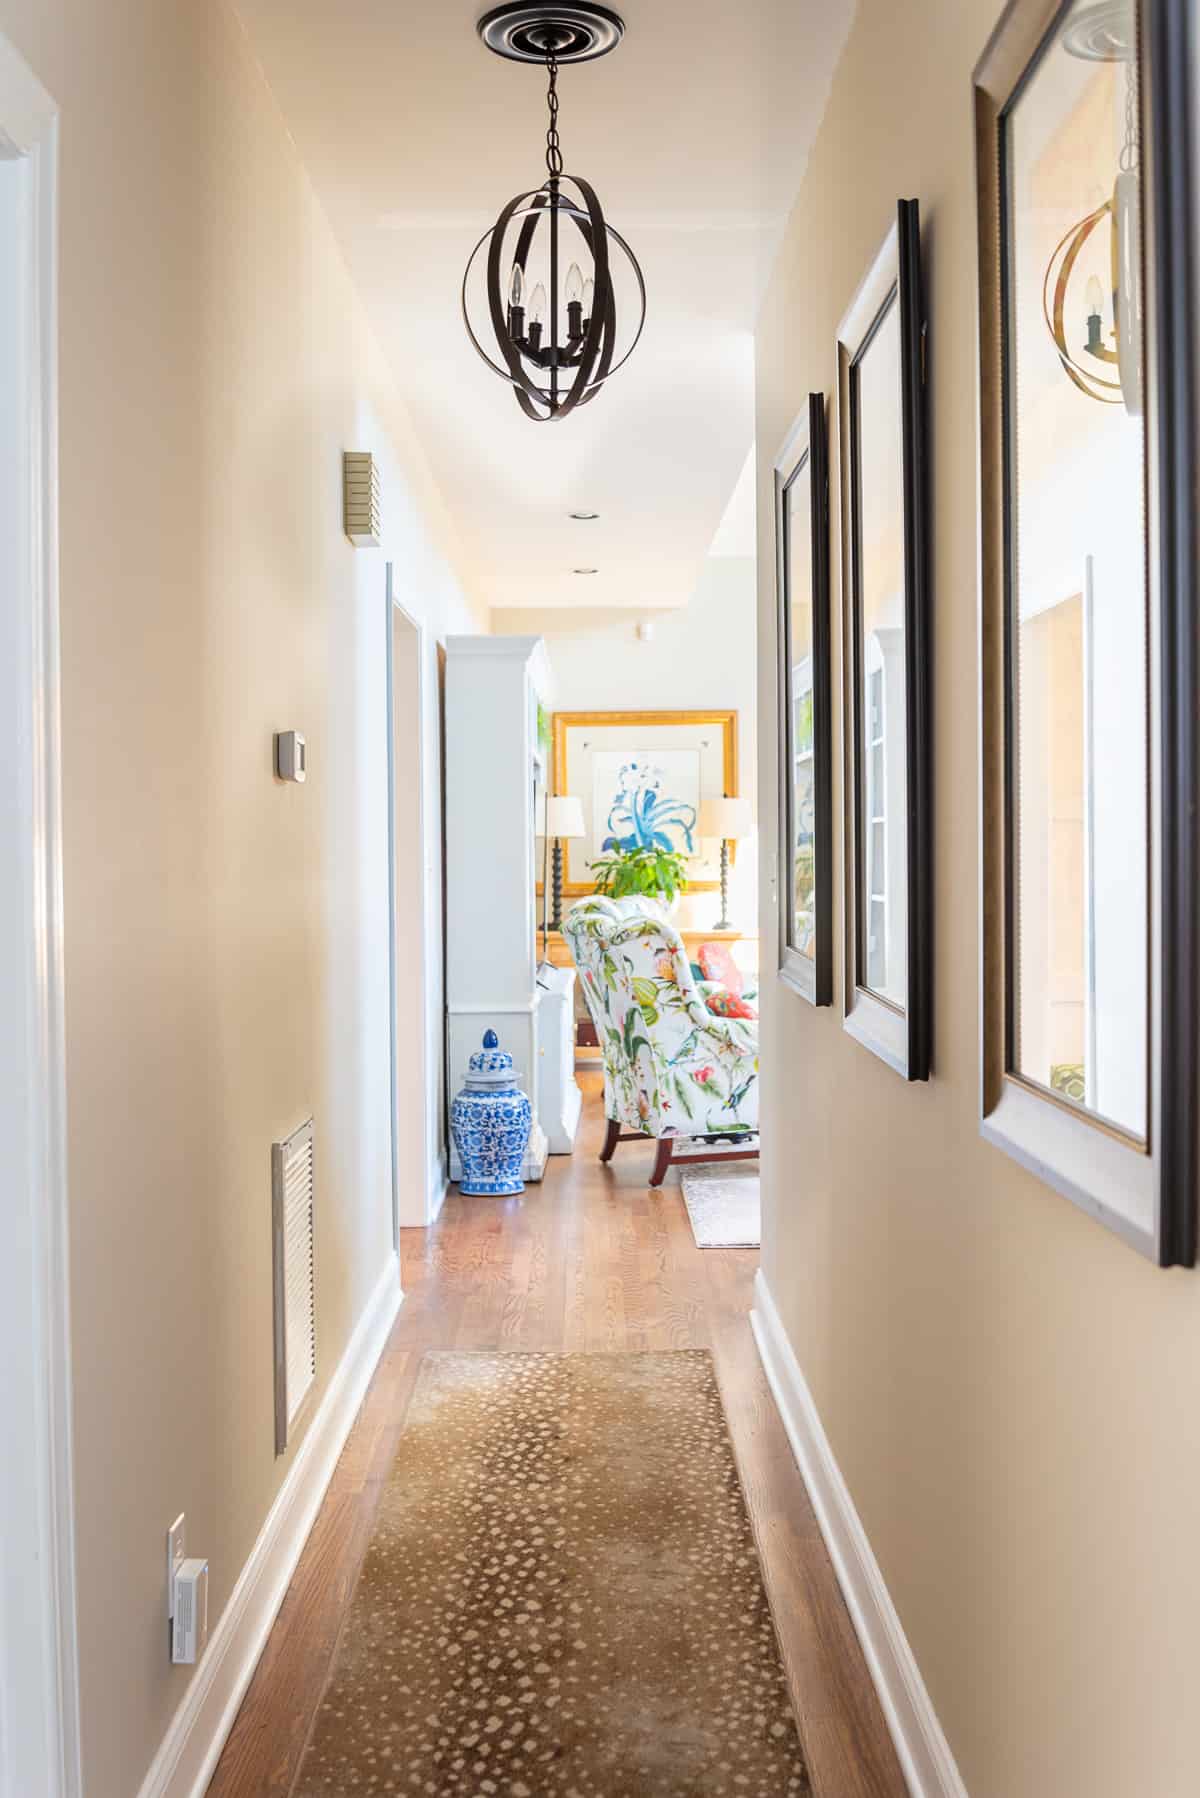
I would love it if I had room for a hall table and cozy table lamp at the end, but having my linen closet door there makes it impossible.
Despite these being pretty simple and basic changes, they all worked together to make a huge difference. It basically went from a slightly cluttered farmhouse look to a fresh, stylish updated traditional one.
When trying to come up with hallway decorating ideas, remember these tips. Of course, all of these would be dependent upon the amount of space you have and your decorating style.
- Good lighting is most important.
- Add visual interest to the walls with a piece of art, wall sconces.
- Use light paint colors on the walls if you want to avoid a cave-like feel.
- Create a focal point with a decorative element such as a table and lamp at the end of a long hallway, if possible.
- Don’t forget about the ceiling. Include stylishly designed light fixtures.
Wall Color – Sherwin Williams Accessible Beige
Trim and Board & Batten Color – Sherwin Williams Extra White
Transforming a hallway from an overlooked corridor to a stylish part of your home is totally doable with some creativity and a few strategic changes. It’s all about playing with light, color, and texture to turn a narrow, possibly dark space into something that feels inviting and blends in with the rest of your home.
So, don’t let that narrow hallway be just a path from one room to another. Happy decorating and I can’t wait to hear about how you’ve transformed your hallways!
Get the Look

I’m getting the requested page doesn’t exist. Help please : (
What page are you trying to get to, Shelly?
Thank you for sharing your beautiful decorating ideas! So often we overlook spaces that may be smaller and awkward because they are more challenging., however , the visual impact with the updates you’ve made are amazing.
Looks beautiful, Suzy! Are you going beige on us? 😉
Beautiful as always!
I absolutely love what you did to your hallway! It is so inviting!
What a great hallway renovation! It’s beautiful and has inspired me to redo our long hallway. It’s just about the same length.
May I ask, what is the width of your hallway?
Many thanks for such great ideas!
Hi Rebecca. So glad you like the makeover! Our hallway is 42″ wide.
I love your hallway makeover! The changes you made are wonderful!
OMG I can’t believe the transformation!!! It’s gorgeous – go you! I LOVE the pendant lights, and I love everything else you’ve done here too. It’s absolutely unique – the prettiest hallway I’ve ever seen! I wouldn’t have believed it possible to make a hallway feel so different!
Hey Suzy,
Love your ideas. Shared your blog with some friends and they love your style. We decided we could truly be friends. Thanks for all the information, I will use them in my home.
I love the artwork! I am inspired to redo the overlooked hall in my 1970’s ranch. Did you print the downloads larger than 8 1/2 by 11? I would like to frame them in a poster frame. I just downloaded the printables and I’m so excited to get started.
I had no idea that anyone would want the larger size images, so I only created 8 x 10 ones that are available for free download. Did you try to print them larger? If so, and they turned out blurry, I can try to find my larger size if you’d like – just let me know. 😀
I would LOVE the bigger size!!!!
I’m sorry that I can’t increase the size of the printables, but you might want to try what I did. I downloaded them to a thumb drive and took them to my local office supply store for printing, but had them printed in a larger size. The edges of the letters won’t be as crisp as with the smaller size, but they’re perfectly fine for framing and hanging on the wall.
Choir hallway is so appealing! Can I ask the size frames you have the printouts in? They look bigger than 8×10 but there isn’t any matting. Thanks for sharing your make-over with us.
I believe that the frames I used them in are 22 x 24, but I only created free downloadable images for an 8 x 10 frame. I had no idea that anyone would want the larger size. You could trying to print the 8 x 10’s larger, but they might be blurry. If you do want the larger version, let me know and I’ll see if I can locate my larger images.
Did anyone ever respond about enlarging the printable images?
Hi Suzy,
I know I am late on this post but I have a long dark hallway too and I would like to do the board and batten look. What type of boards did you use and what did you use for your top rail? Did you just do the vertical boards to make it look like board and batten? Your hallway is beautiful and looks so bright.
Thank you,
Maggie
Can you provide larger downloads for the prints? I absolutely love them and your new hallway is fabulous!
Hi Kathy. So glad you like my hallway! I can’t increase the size of the printables, but you might want to try what I did. I downloaded them to a thumb drive and took them to my local office supply store for printing, but had them printed in a larger size. The edges of the letters won’t be as crisp as with the smaller size, but they’re perfectly fine for framing and hanging on the wall.
For the board and batten, did you continue it at the turn of the wall at the end of hall? My hallway is almost exact as yours. There’s a door at back end, and front end opens to foyer. I love the look and feel you created and would love to replicate, but not sure about whether to continue to board and batten into the foyer. Thanks!
No, I wasn’t able to do that. Even though my hallway opens into the foyer like yours, there’s a coat closet door there. I do however, have board and batten in my foyer too.
I love how it turned out! I am trying to talk my husband into board & batten in our hallway … it’s same as yours, long and dark. He is afraid it is already to narrow to add it. I think the walls are too plain and need something, but decorating both sides isn’t an option cause it’s so narrow. If you don’t mind me asking, do you know your width? Ours is about 31 1/2”. Thanks so much
I had the exact same fear as your husband about making my hallway appear more narrow by adding board and batten. That’s why it took me living here a few years before I actually got up the nerve to try it! I was pleasantly surprised to see that it now visually appears even wider than it really is (41.5″) and the white paint makes it so much brighter. 😀
Can you please send me the password for the free printables?
My printable library is available to those who subscribe to my newsletter, which you can do by clicking the green “CLICK HERE TO ACCESS YOUR FREE PRINTABLE” button located within the blog post. Once you’ve subscribed, and confirmed your subscription, you’ll receive a welcome email from me with the password in it. Thereafter, the password will always be at the bottom of every email that I send. 😀
Hello! I started out with a vision to make the space (much like yours) a “wall of fame” using family photos (grands). I stumble onto your page via Pinterest. My hallway is almost identical. Where did you get the board and batten???? Forgive me if you already said so. I scanned the feedback and didn’t see anything. My hope is to leave the remaining baseboard and only go about 36″ high. I think the space between vertical boards is based on studs?? Although, I’m not sure it matters. I went to home depot and have been searching online. Did you buy a package of some sort, cut your own boards. Please share. Thank you. –Robin
Hi Robin. No, we didn’t buy pre-packaged or pre-made board and batten. Ours is made with pre-primed mdf boards (size 1″ x 4″) attached directly to the wall. You can also use regular less expensive pine boards, but you’ll likely have knots to deal with. They are attached to the wall with brads from a nail gun, but you could hammer small nails in yourself if you don’t have a nail gun. You don’t need to attach them to studs – simply angle your nails slightly, alternating the direction of the nails as you move down the board, instead of nailing them straight in. They shouldn’t come loose unless someone actually pulls on them. If you’re concerned though, you could add Liquid Nails for some other type of construction adhesive to the back. We left the original baseboard and simply cut the bottom of the boards at an angle where they meet the baseboard. Once the boards are attached, fill in all the nail holes, sand the filling smooth once it dries and caulk all of the seams, when the caulk is dry paint everything the color that you desire. Hope this helps!
Thank you Suzy!
Where did you get the pre-primed MDF board? You say 1″ x 4″….. I can’t really tell… are the horizontal boards the same width (4″) as the vertical boards? Love the angled nail idea to work around studs! Thank you!! Also, it appears you have a lip at the top of the horizontal board. Am I seeing things? Also love the angled cut at bottom to line up with original baseboard.
My hallway has the option for me to turn corners into door jambs on both ends of the hall vs. ending like yours does. The “after” picture doesn’t show what you did at the open end. Not that it matters for my project but I am a curious. 🙂
Last question, how tall are your vertical boards? I assume they can be cut to any size. I’m thinking 36″ ish inches. Again, just curious. Love how yours turned out! –Robin
Quite a difference……for the better. These are great ideas. So pretty.
Delightful! Thank you for the shopping list, i ll check them out
Love your runner, wreath & print outs!