Way back in September, when I revealed my lighter and brighter powder room, I asked if any of you would be interested in seeing a tutorial for how I made the upholstered cornice.
Several of you expressed an interest and I’m so sorry that it has taken me this long to get around to it.
Before we get started, let me say a few things:
*All of the pictures were taken in my workroom, so they are not beauty shots. In fact, you’ll notice that I need to change the canvas cover on my work table.
I don’t like showing the less than pristine canvas, but that’s okay – this is real life in a small home-based workroom and the smudges just happen.
Trust me – there is nothing there that gets on any fabric.
*I used some tools that you may not have (like the air compressor staple gun for example), but you don’t need to run out and buy them. You can use normal everyday tools. I only have them because I own a professional drapery workroom. These tools make my life in the workroom so much easier, so why not use them!
*In addition to specific directions, I plan to give you lots of tips along the way.
That’s going to make the tutorial longer, soooo I’ll be dividing this up into two parts. Not because it is difficult – it isn’t! But because I want to break it down into all the steps and hopefully not overwhelm you.
*And lastly, every professional workroom (no matter how large or small) does things a little differently. These are the methods and tips that work for me.
Let’s break all these words up with a picture! 😀
Supply List:
{*denotes an optional item}
1/2″ or 3/4″ thick plywood (I don’t recommend using plywood any thinner than this because it can warp over time.)
1″ x 4″ boards
decorative fabric
white lining or another white fabric
flat white gimp
cording*
batting
staple gun
hammer
drill or screw driver
1/2 ” long staples
1.5″ long wood screws
clamps*
work stand*
Anatomy of a Cornice:
The parts that actually make up a cornice are pretty straight forward. These are the parts prior to assembly {In this shot, the pieces of wood have already been covered with lining. I’ll go into that below.}
This is the backside of cornice after assembly.
This is the frontside of cornice after assembly.
Come Up With a Plan:
- Measure your window. Determine how high you want the cornice to hang and how far down you want the legs to come on each side. Do you want the cornice to hang on the outside of your window frame or directly on the window frame? I typically always hang my cornices outside and above the window frame.
- Determine the design/shape of the cornice that you want to have. You can buy patterns for a cornice, but I always find it much easier to just sketch the design out myself.
- Determine how tall and how wide you want each section of the design to be. In my picture above, you can see that I specified how tall the center of the arch should be, how wide the sides should be at various points, etc.
- Don’t forget to account for the thickness of the wood you will be using when determining what size each of the pieces of wood should be cut to. The 1″x4″ boards that I was using were 3/4″ thick. The outside of the frame measurement of my actual window is 26.75″ wide, but you can see that I wanted the finished width of the cornice to be 29.25″. That is to allow 1″ of space between the interior of each cornice leg and the side of the window frame and to allow for the 3/4″ thickness of each legs. This should make sense as we go along.
Prep the plywood face:
Sketch the life size pattern onto a piece of paper. I have found that using a piece of cord or string to mock up my shape is a huge help. Once I’m happy with the shape, I simply trace along it with a pencil. You only need to sketch half of the pattern because you can flip it over to get the other half of the pattern onto the plywood.
After cutting along the line you drew, trace the shape of your design onto the plywood. You can see in the below picture that I’ve already traced my pattern on the left side. Remember that you only need to do this along the bottom edge, assuming that your cornice will be straight across the top.
Cut your plywood to the overall finished height and width that you want the cornice face to be. Then use a jigsaw to cut the design.
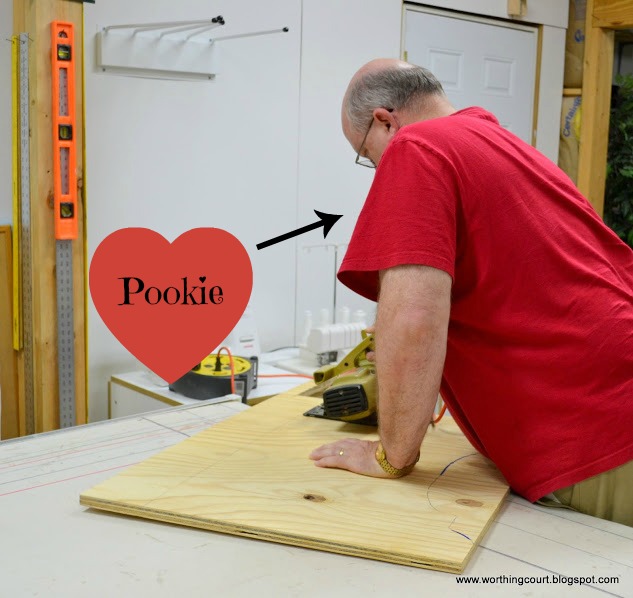
My sweet and supportive employee aka Pookie.
Gather and Cut the Legs and Dust Cover:
BTW – Dust Cover is just a fancy term for the board that is on the top of the cornice.
You will need two legs and one dust cover for each cornice that you make. These are all cut out of 1″ x 4″ boards.This is where is becomes important to have accounted for the width of your wood. You are going to build a frame out of the 1″ x 4’s” and the plywood face needs to cover the entire frame.
The legs should be cut the same length as the sides of the face minus the thickness of the dust cover board. In my case:
20″ – finished height of cornice
-3/4″ – thickness of dust cover board
19.25″ – length of each leg
The dust board should be cut to equal the width of the face.
That equals 29.25″ in my case.The face should be cut to equal the finished height and width of the cornice.
Prep the Individual Pieces:
For a professional looking cornice, you should line the interior with fabric. In this example I’ve used scraps of white drapery lining, but in situations where you will be able to see up under the cornice, you may want to line it with the same fabric that you’re using on the outside of the cornice.
Cut pieces of fabric long and wide enough to wrap around each individual 1″ x 4″. It doesn’t matter if there’s a gap on one side because it will be covered. Use a staple gun to attach the fabric to the wood and make sure to finish the ends off nicely.
Cut a piece of fabric to exactly fit the plywood face. Run a thin bead of glue around the perimeter to attach the fabric. Don’t worry – you won’t see any glue when the cornice is completed. Everything will be covered.
Here are all of the pieces covered with fabric. They are laying where they will be located once the cornice frame is put together. I’ve photographed two pieces with the gap side showing. The sides with the gap will be turned to the outside when cornice is assembled. Since you’ll be covering the entire box with fabric, the gaps won’t be visible.
Assemble the pieces:
First, attach the legs to the dust cover. Notice that my legs are attached to the underside of the dust cover. I accounted for the 3/4″ thickness of the dust board when I calculated how long to cut each leg.
I like to use 1.5″ long wood screws to put all of the wood pieces together. Any longer and I have trouble keeping them from coming out of the sides of the pieces of wood and any shorter – well, they’re too short. I get them started with a hammer and then just drill them right in. You can pre-drill if you want to, but I don’t find it necessary. I just eyeball the placement of the screws as I go.
Here’s how the finished box should look.
Backside:
Frontside:
Notice how many screws that I put on the sides of the plywood going into the legs. Don’t want any warping over time!
Topside:
Ignore the batting that you see. That step comes later.
This is a good place to stop for now. Part II will take your cornice to completion!
Please make sure to let me know if you have any questions.
FABRIC USED: Richloom Lucy Eden


Thank you for sharing all of this…what an amazing post! The end result is just beautiful too. Well done!
I have ceilings that are 18 ft high, and the window width is 42 inches. There are 4 windows with a window on top of each window, 36″ between windows. What length size should I make my cornice board? to fit on the bottom windows?
So sorry for the delay in replying – for some reason I didn’t get a notification of your comment. Can you email me a photo of your windows, so that I can see exactly what you’re talking about? My email is worthingcourtblog@gmail.com.
I do love that fabric. Great tutorial can’t wait for Part II either.
Cynthia
I am impressed! I had no idea this is how you made it. I love your workroom too! Looking forward to seeing how you finish this up!
You are such a pro! Wish I had your sewing talent. And please, please, please, can I play with your air compressor staple gun, just once? Those things are so cool!
Hey Suzy…thanks for sharing your professional knowledge…and now I am “in suspense” waiting for Part II…I have always lusted for that fabric!!
Great tutorial. I have made a few upholstered cornice boards over the years, a few from styrofoam which makes them lighter. I love the detail on yours. Can’t wait to see part 2.
Yay!!! Did you know I am getting ready to recover my two in my foyer? I’ve done itbefore but can’t wait to read your Part II to get a pro’s advise. Love our new powder room, btw.
This is so pretty, Suzy! The shape and the fabric — love, love, love! Glad to see you got Pookie involved in this project!
Carol
Thank you so much for sharing! I had mentioned to my hubby not a few days back that I would love to add cornices to our living room jet to give it a more formal appearance. I can’t wait to show him hoe beautiful yours are!
Where do you buy patterns for cornices? We have baseboard heat registers so I can’t hang anything below the window sill. So would I be better off placing any curtain rod or valance close to ceiling? Wouldn’t that make the room look taller?
You should be able to Google “cornice patterns” and find several resources for them online. MFay(dot)com is one such resource. Since window sizes vary, you’re likely to wind up having to make adjustments to any pattern that you use. That is the very reason that I just prefer to draw my design out myself as opposed to buying one. 🙂 To answer your question about hanging curtains – yes, it will make your room look taller to hang a valance or cornice closer to the ceiling.
Wow, this is amazing.I am visiting you via No Minimalist Here. I would love for you to stop by My Dream Canvas. I am hosting a Giveaway for my blog’s birthday. Please join in if you like it 🙂
Visiting from Overflowing from Creativity, I love cornices, great job! Your fabric looks great with your pictures.
A beautiful cornice and an excellent tutorial! Thank you so much!
Hi I am going to make one that is 15′ wide- how do you reccommend handling the width because i have to attach 2 pieces of plywood together I am pretty sure.
thank you for any hints or tips on this part.
Thank you for contacting me, Lissa. I’ve sent you a separate email. Please let me know if you don’t receive it.
Thanks for the directions. I am toying with the idea of making one but attaching it nearer the ceiling.
By the way, I have a Pookie too. It is a German Shepherd registered with the AKC.
I love the colors you have used in this project. They are so beautiful together in that small of a space. I love the bird pictures. They look great in the bathroom. We have to give this project a try for our bedroom.
I am so very impressed! Is there anything you and Pookie can’t do? The two of you have super talents! Saving this and the calendar print idea for future projects . Again, your directions are very detailed and easy to understand, I need that. Just lovely redo of your bathroom. Thanks again for all of your lessons, keep ’em coming!??
I’ve read lots of directions but I do appreciate that you put so many photos in. I have always wondered if there were advice on how high up looks good ? Like drapes for instance you can take to the ceiling but what about these? hmmmm
Hi Loyda. It depends upon the window and the room that it’s in, but I usually mount my cornices halfway between the top of the window and the bottom of the crown mould, if there is any. If there isn’t any crown mould, then just halfway between the top of the window and the ceiling. Just remember to make sure that you aren’t mounting it so high that it allows the framework around the top of your window to show.
Your cornice tutorial is great. I am not sure that mine would look like yours! I will pin this for further reference.
This tutorial is great! Thank you so much for sharing!