Way back in September, when I revealed my lighter and brighter powder room, I asked if any of you would be interested in seeing a tutorial for how I made the upholstered cornice.
Several of you expressed an interest and I’m so sorry that it has taken me this long to get around to it.
Before we get started, let me say a few things:
*All of the pictures were taken in my workroom, so they are not beauty shots. In fact, you’ll notice that I need to change the canvas cover on my work table.
I don’t like showing the less than pristine canvas, but that’s okay – this is real life in a small home-based workroom and the smudges just happen.
Trust me – there is nothing there that gets on any fabric.
*I used some tools that you may not have (like the air compressor staple gun for example), but you don’t need to run out and buy them. You can use normal everyday tools. I only have them because I own a professional drapery workroom. These tools make my life in the workroom so much easier, so why not use them!
*In addition to specific directions, I plan to give you lots of tips along the way.
That’s going to make the tutorial longer, soooo I’ll be dividing this up into two parts. Not because it is difficult – it isn’t! But because I want to break it down into all the steps and hopefully not overwhelm you.
*And lastly, every professional workroom (no matter how large or small) does things a little differently. These are the methods and tips that work for me.
Let’s break all these words up with a picture! 😀
Supply List:
{*denotes an optional item}
1/2″ or 3/4″ thick plywood (I don’t recommend using plywood any thinner than this because it can warp over time.)
1″ x 4″ boards
decorative fabric
white lining or another white fabric
flat white gimp
cording*
batting
staple gun
hammer
drill or screw driver
1/2 ” long staples
1.5″ long wood screws
clamps*
work stand*
Anatomy of a Cornice:
The parts that actually make up a cornice are pretty straight forward. These are the parts prior to assembly {In this shot, the pieces of wood have already been covered with lining. I’ll go into that below.}
This is the backside of cornice after assembly.
This is the frontside of cornice after assembly.
Come Up With a Plan:
- Measure your window. Determine how high you want the cornice to hang and how far down you want the legs to come on each side. Do you want the cornice to hang on the outside of your window frame or directly on the window frame? I typically always hang my cornices outside and above the window frame.
- Determine the design/shape of the cornice that you want to have. You can buy patterns for a cornice, but I always find it much easier to just sketch the design out myself.
- Determine how tall and how wide you want each section of the design to be. In my picture above, you can see that I specified how tall the center of the arch should be, how wide the sides should be at various points, etc.
- Don’t forget to account for the thickness of the wood you will be using when determining what size each of the pieces of wood should be cut to. The 1″x4″ boards that I was using were 3/4″ thick. The outside of the frame measurement of my actual window is 26.75″ wide, but you can see that I wanted the finished width of the cornice to be 29.25″. That is to allow 1″ of space between the interior of each cornice leg and the side of the window frame and to allow for the 3/4″ thickness of each legs. This should make sense as we go along.
Prep the plywood face:
Sketch the life size pattern onto a piece of paper. I have found that using a piece of cord or string to mock up my shape is a huge help. Once I’m happy with the shape, I simply trace along it with a pencil. You only need to sketch half of the pattern because you can flip it over to get the other half of the pattern onto the plywood.
After cutting along the line you drew, trace the shape of your design onto the plywood. You can see in the below picture that I’ve already traced my pattern on the left side. Remember that you only need to do this along the bottom edge, assuming that your cornice will be straight across the top.
Cut your plywood to the overall finished height and width that you want the cornice face to be. Then use a jigsaw to cut the design.
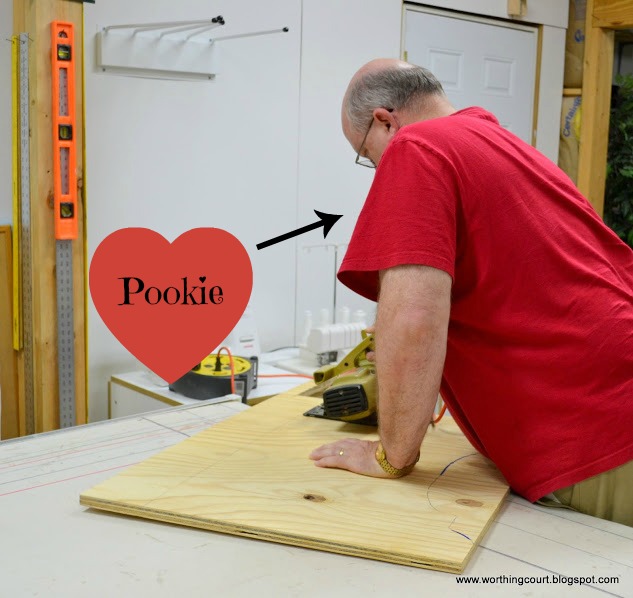
My sweet and supportive employee aka Pookie.
Gather and Cut the Legs and Dust Cover:
BTW – Dust Cover is just a fancy term for the board that is on the top of the cornice.
You will need two legs and one dust cover for each cornice that you make. These are all cut out of 1″ x 4″ boards.This is where is becomes important to have accounted for the width of your wood. You are going to build a frame out of the 1″ x 4’s” and the plywood face needs to cover the entire frame.
The legs should be cut the same length as the sides of the face minus the thickness of the dust cover board. In my case:
20″ – finished height of cornice
-3/4″ – thickness of dust cover board
19.25″ – length of each leg
The dust board should be cut to equal the width of the face.
That equals 29.25″ in my case.The face should be cut to equal the finished height and width of the cornice.
Prep the Individual Pieces:
For a professional looking cornice, you should line the interior with fabric. In this example I’ve used scraps of white drapery lining, but in situations where you will be able to see up under the cornice, you may want to line it with the same fabric that you’re using on the outside of the cornice.
Cut pieces of fabric long and wide enough to wrap around each individual 1″ x 4″. It doesn’t matter if there’s a gap on one side because it will be covered. Use a staple gun to attach the fabric to the wood and make sure to finish the ends off nicely.
Cut a piece of fabric to exactly fit the plywood face. Run a thin bead of glue around the perimeter to attach the fabric. Don’t worry – you won’t see any glue when the cornice is completed. Everything will be covered.
Here are all of the pieces covered with fabric. They are laying where they will be located once the cornice frame is put together. I’ve photographed two pieces with the gap side showing. The sides with the gap will be turned to the outside when cornice is assembled. Since you’ll be covering the entire box with fabric, the gaps won’t be visible.
Assemble the pieces:
First, attach the legs to the dust cover. Notice that my legs are attached to the underside of the dust cover. I accounted for the 3/4″ thickness of the dust board when I calculated how long to cut each leg.
I like to use 1.5″ long wood screws to put all of the wood pieces together. Any longer and I have trouble keeping them from coming out of the sides of the pieces of wood and any shorter – well, they’re too short. I get them started with a hammer and then just drill them right in. You can pre-drill if you want to, but I don’t find it necessary. I just eyeball the placement of the screws as I go.
Here’s how the finished box should look.
Backside:
Frontside:
Notice how many screws that I put on the sides of the plywood going into the legs. Don’t want any warping over time!
Topside:
Ignore the batting that you see. That step comes later.
This is a good place to stop for now. Part II will take your cornice to completion!
Please make sure to let me know if you have any questions.
FABRIC USED: Richloom Lucy Eden


Gorgeous fabric. Your wall paint is so warm . Perfect match.
We are moving into a new home in Arizona that being said my eating area and the actual kitchen are side by side sharing one wall. On that wall in the eating area is our patio door then a bit further down the wall into the kitchen is a window over the sink. The window is over 5′ long possibly 6 (i have not moved yet to see it just by skype). trying to find a drapery style for both . I love the cornice but maybe this window is too big for one?? and if it is then I have no idea what to do ! LOL
Hi Loyda. I once made a cornice for a set of windows that was over 12′ long, so I don’t think that 5′ or 6′ would be too long for one at all! And let me just say, that if you have a window that large above your kitchen sink, I am totally jealous! 😀
Ha everyone needs Pookie, mine is perfect as well, he thinks he may be my employee due to the Honey list but he is the most amazing husband in the world. I really love your style. I love how you have a very classy taste but your budget minded. Thanks for your post. Blessings!
Where can I find that fabric?!
Hi Natalie. Here’s a link to where you can purchase the fabric online: https://onlinefabricstore.net/richloom-lucy-eden-fabric-.htm
Hi! Love your tutorial and tips. I’ve already read Part 2. Brilliant stand idea for holding the cornice.
I am planning a cornice that will need to be 118″ long. It will be over a 9′ wide, 8′ tall sliding glass door with new panel tracks, to hide the bracket, and to coordinate with a wide (same width) window (actually 3 separate windows stacked next to each other) right next to it on the same wall, which I covered with 3 Roman shades and 4 floor-length grommet panels. Both sliding glass door and window have same-width arched-eyebrow lights above on a high vaulted ceiling.
Do you have any good idea how much that size of cornice would weigh? It needs 6″ returns to clear the track bracket. Because I am concerned that this would end up being very heavy, I was considering using what looks like a cleverly designed kit (wood, not styrofoam) by diydecorator(dot)com. Do you think 16″ is enough of a drop for a 9′ wide slider that is about 98″ tall? Also, these kits do not have a dust cap. Do you think the cap is needed? Perhaps it could be added on.
Unfortunately, I made the grommet panels a few years ago, and only just got around to replacing old vinyl verticals on the slider, so the coordination has to be limited to the fabric, and not the same top treatment on the side-by-side slider and window. The window has a decorative curtain rod, and the slider will have a cornice because a curtain rod doesn’t provide the needed clearance for the width of the panel track bracket. (I didn’t plan ahead properly.)
Thanks for any advice on weight and design.
Hi Jo. I once made a cornice for a client that was over 12′ long. To keep the weight of the cornice down, I used a specialty product for the face called Firmaflex, instead of plywood. It’s sold exclusively by Rowley Company. Rowley typically only sells to the trade, but you may be able to contact them and get an exception (they’re usually very accommodating). Here’s a link to their site: https://www.rowleycompany.com/. To join the face pieces, I used several wood joiner nails running vertically at each joint on the face. Here’s the link to those: https://www.lowes.com/pd/Hillman-8-Count-1-in-Zinc-Plated-Wood-Joiner-Nails/3036054. You don’t have to have a dust cap, if you can’t see the top of the cornice from above, but I believe that in the case of such a wide cornice, you’ll need it for stability to keep the face from eventually bowing in or out. You’ll also need the cap to lay on top of the angle irons when you mount the cornice to the wall. It’s hard for me to say whether or not a 16″ tall cornice would be wide enough without seeing a photo of the space, but my first inclination is that it would be too narrow. My tendency would be to go at least 18″ – 22″ tall and I would hang the cornice several inches higher than the frame of the door itself. Feel free to email me a photo if you’d like!
Wow! Thank you so much for this information! I think you are right; about 20″ would be better. I will try to get a decent photo (the lighting is very poor for it).
Rowley does sell this product retail, and it looks like the perfect solution. Do you use wood for everything except the face? It looks like one could build the whole thing out of Firmaflex. Thanks again!
Glad to hear that! Yes, I only usually use only Firmaflex for the face (it’s a bit pricey) and use wood everywhere else. The only exception would be if my cornice was going to have an arched top, then I would use Firmaflex for the top too. Let me know how it goes!
This was so helpful. It’s so funny that this is the same style a client wants.
Thks,
Lois
We’re I find part 2?
Not sure what happened to the link to part 2 that used to be in the post – so sorry! Anyway, here you go: https://www.worthingcourtblog.com/how-to-make-upholstered-cornice-part-ii/
I’m loving these insider tips for making a cornice. I can hardly wait for part 2.
Love that fabric!! What is the pattern called?
It’s made by Richloom and the pattern is called Lucy. 😀
I have made similar ones out of foam core board. It works if they are not too wide and is sooo light weight! I have hung them temporarily with straight pins and realized 8 years later when changing decor that I had forgotten to permanently attach them!
You’re right – foam core works right if the cornice isn’t too heavy. It’s an easy alternative to actually constructing a wooden frame.