How To Make A Moss Covered Wreath
My moss covered wreath creates a big impact in my decor and is easy to make. Let me show you how!
One of the things that I love about spring is the return of lushness to the carpet of moss that we have on one end of our home. In spite of our struggle to get grass to grow in the rest of our yard, this is one place where I don’t want any! I love to take off my shoes and walk around there. That shady spot with its soft, cool blanket of moss is exactly what I was thinking of when I made this wreath to go above my spring fireplace mantel.

My friends, making this pretty wreath is sooo easy! It’s a little messy to construct, so keep that in mind when choosing your crafting location. Let me show you how I did it.
SUPPLIES:
Affiliate links for all supplies have been added for your convenience. See my full disclosure policy HERE.
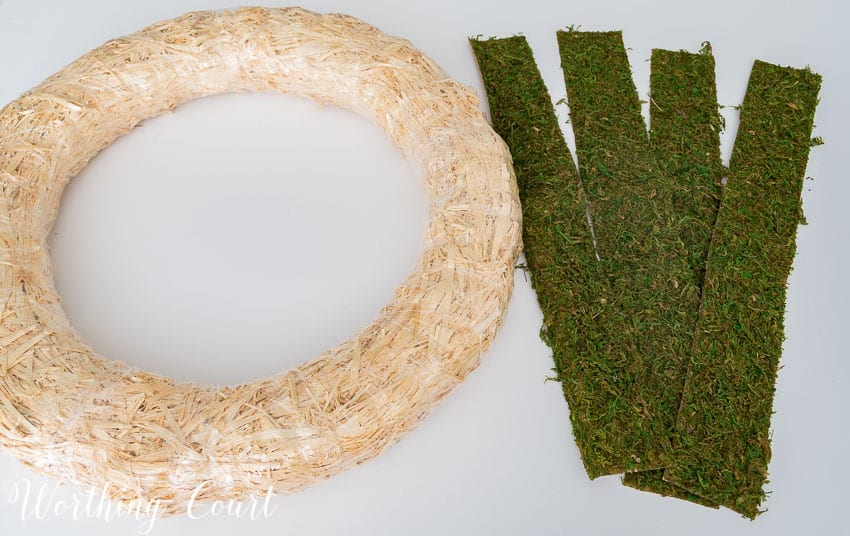
3 packages – peel and stick sheet moss
STEP 1:
Cut the sheet moss into strips roughly 3″ wide. Do not remove the paper backing.
TIP: Cut the moss with the paper side up to keep from gumming up your scissors.
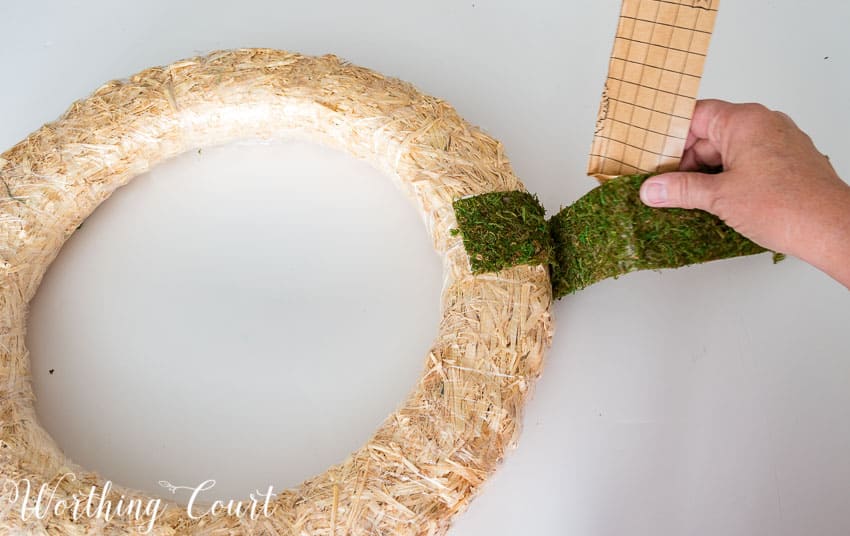
STEP 2:
Begin wrapping the moss strips around the wreath form. Don’t remove the plastic! Apply the moss directly to it.
TIP: Remove the paper backing from the moss as you go, not all at once.
STEP 3:
Continue cutting strips of moss and wrapping them around the wreath until it is completely covered with moss.
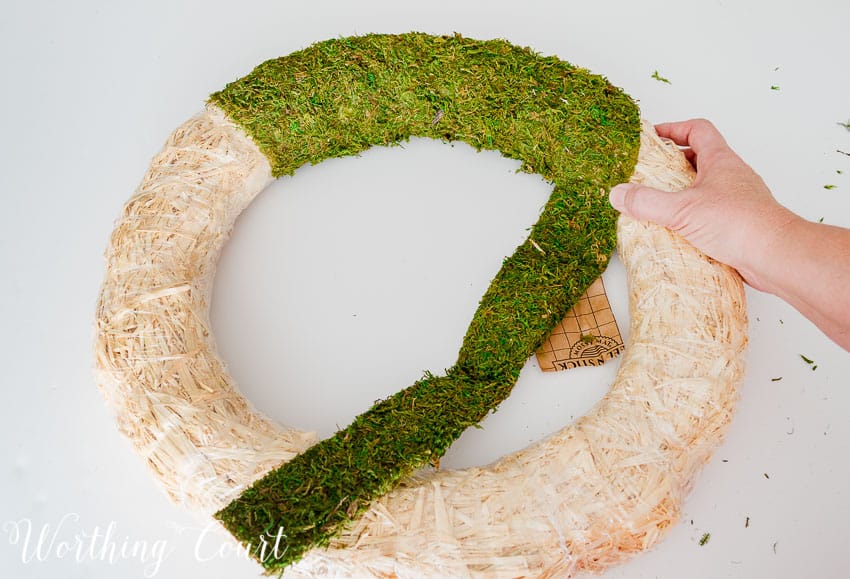
Any spots that aren’t completely covered can be patched with small pieces of moss cuttings.
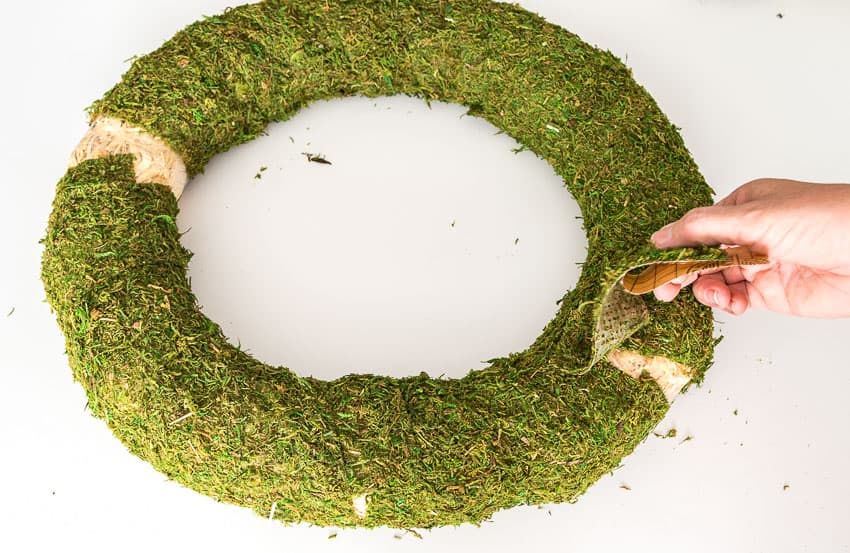
TIP: You may wind up with gaps or raised up areas of moss on your wreath. Simply press them down and they will disappear!
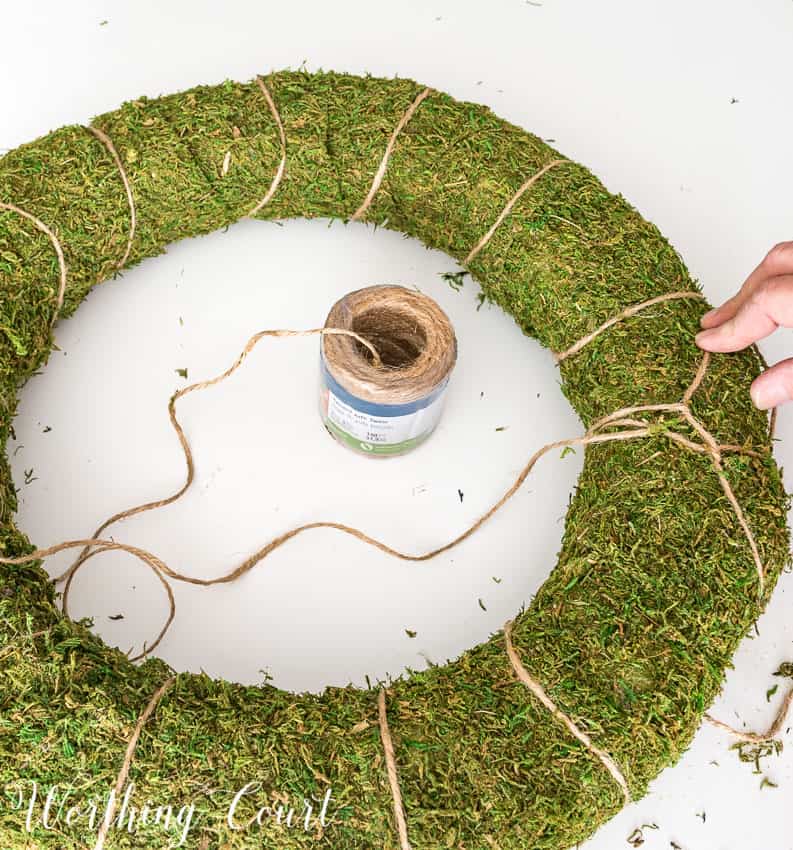
STEP 4:
Wrap twine around the moss covered wreath in one direction. I started with a long tail of twine (that is what my wreath will hang from) and tied a loop around the wreath. I just eyeballed the spacing as I went.
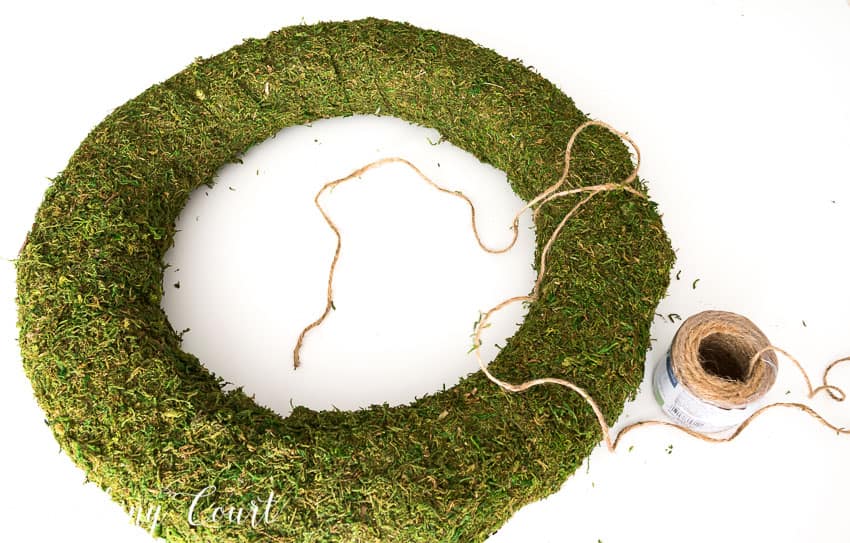
Tie a second loop, leaving another long tail, and wrap the twine around the wreath in the opposite direction. This will give a crisscross affect when completed.
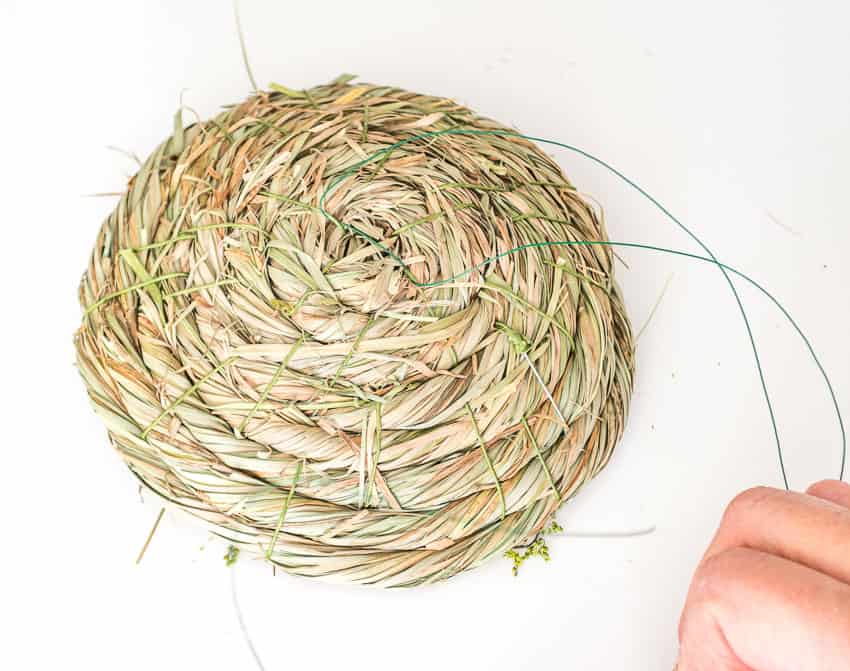
STEP 5:
Run a piece of floral wire, that is long enough to wrap around the wreath, through the straw on the bottom of the bird’s nest. Position the bird’s nest in your desired locationand attach it to the wreath with the wire.
STEP 6:
You can see that I chose to wrap a few additional strands of twine diagonally around my moss covered wreath. I chose to add the twine because I wanted to give the wreath more presence based on where I planned to hang it. You can skip this part if you don’t care for the look.
TIP: Spray the entire wreath, front and back with a good coat of spray sealer to help prevent shedding.
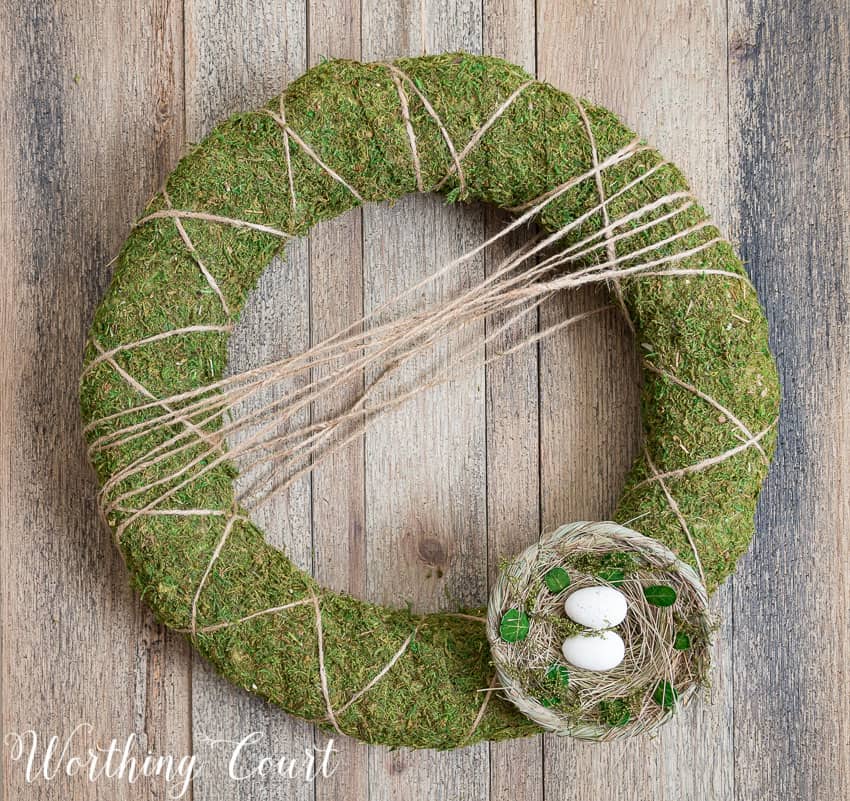
Enjoy your moss wreath – it will be the perfect addition to your spring decor and will last for many years to come!

PIN IT FOR LATER!

Sharing at THESE great parties.
So cute! In Step Two, you said not to remove the plastic. Do you mean from the straw wreath itself? (I couldn’t really tell from the photos.) This sounds like it would help to contain the mess, perhaps? Thanks for the idea. I never knew there was such a thing as peel and stick moss!
Hi Marilyn. Oh yes – I meant don’t remove the plastic from the wreath. It would be a ginormous mess!
Thanks, Suzy!
I love how these look. I think I am going to make two for my front doors. So fresh and springy.
This is a great craft- thank you for the directions!
I wonder if this sticky moss will adhere to those green styrofoam wreath forms. Thanks for the tip about sealing the moss.
I think that it probably would, Leslie. It’s pretty sticky stuff. If you give it a try, I’d love to hear how it worked. 😀
Your wreath is so pretty and your mantle it to die for! Gorgeous! Pinned & Sharing on Fb. Thank you for sharing on Merry Monday! Have a great week!
Kim
Very pretty wreath Suzy! I used moss on mine for this year too and it was so much fun to make. Thanks for sharing your project with us at the Family Joy Blog Link Party this week!
Such a pretty wreath! Thank you so much for sharing!
Thank you so much for linking at #overthemoon! I look forward to seeing what you share every week. Please come back for #WonderfulWednesday or #ThursdayFavoriteThings. Enjoy your week ahead.
Beautiful! Love peel and stick anything 😉 Thank you for sharing with us at Funtastic Friday! Pinned
Love your DIY moss covered wreath. Pinned & sharing. Thanks for sharing at the #InspirationSpotlight @DearCreatives
Love the look of moss! Thanks for sharing with us at Funtastic Friday!
Love your mantle area! I think I will make a moss covered wreath. Thank you for the inspiration!! Your home is lovely!!
Your Mantle is so beautiful; love everything about it!! Thank you for the wonderful inspiration to try my hand at the moss wreath!!!
blessings!!
This wreath is so cute ~ love the simplicity of it! Great tips for working with the materials too! Thanks…
Whoops! Forgot to ask – where did you get the great wrought iron ‘stand’ for the vases on the mantle? Love it!
Hi Leslie. I picked that thing up at a thrift store a while back. I have no clue what it’s original use was, but I knew what I could do with it as soon as I saw it! 😀
Hi, thanks for sharing this awesome craft.
I just use whatever brand of clear sealer that I happen to have on hand. 😀 I think that the sealer you’re looking at will work just fine!
Ok Thanks Suzy!
I love this wreath…thanks for providing details
Thank you for sharing this moss wreath! Love it!