Plans And Design Board For Our Master Bath Renovation Completion With Before Photos
A full before tour and modern traditional plans for updating and completing our master bathroom renovation.
This post contains affiliate links. See my full disclosure HERE.
When we purchased our home (it’s been almost 6 years ago!), we gave it a complete remodel from top to bottom. It was a mid-90’s house that was extremely dated and every single room needed lots of design love.
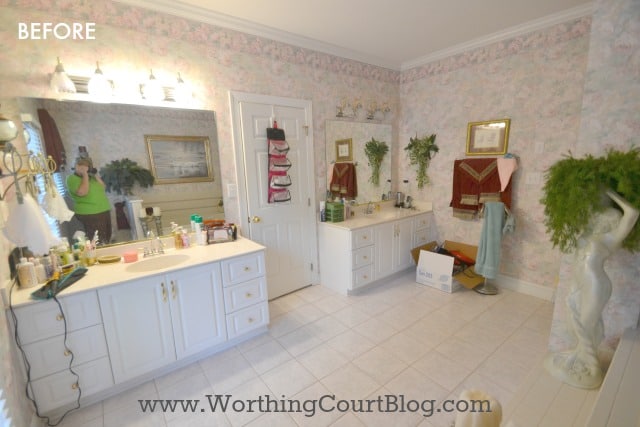
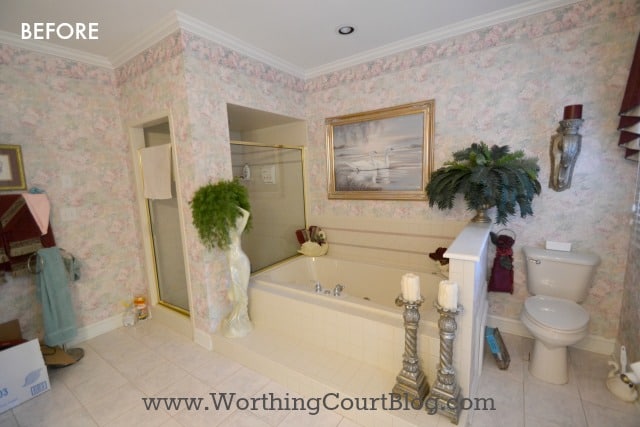
Some of the rooms only required cosmetic updates (such as new flooring and paint), but others required a much more extensive intervention. The master bath fell on the more extensive intervention spectrum of things. 😀 Here’s what she looked like on the day that we toured the house when it was for sale.
During the initial remodel, we ripped out all of the wallpaper and painted the walls and removed and replaced the floor tile. Oh – we added a ceiling fan to the room too.
Additionally, on this side of the room we (scroll to see how it’s looking today):
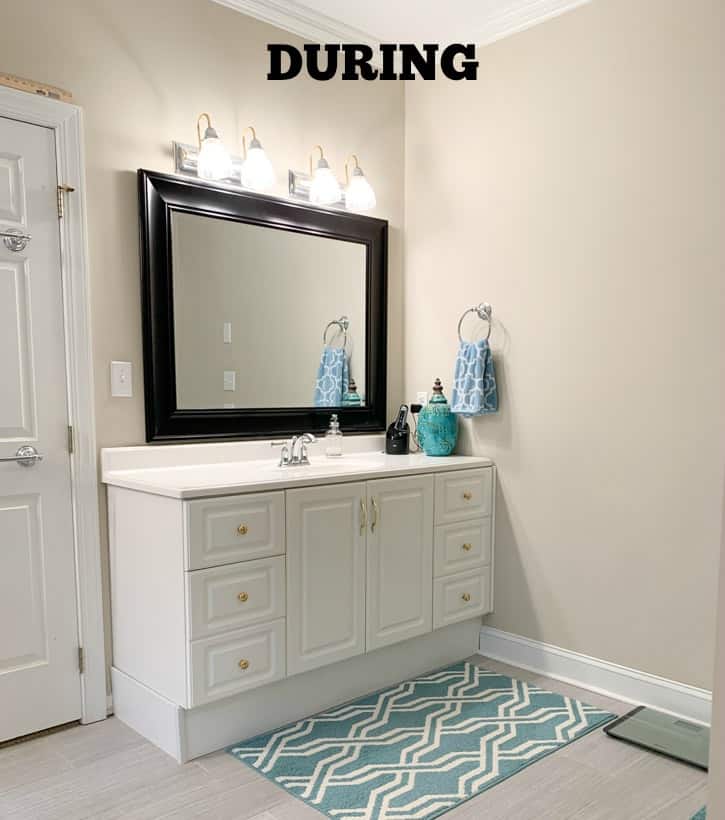
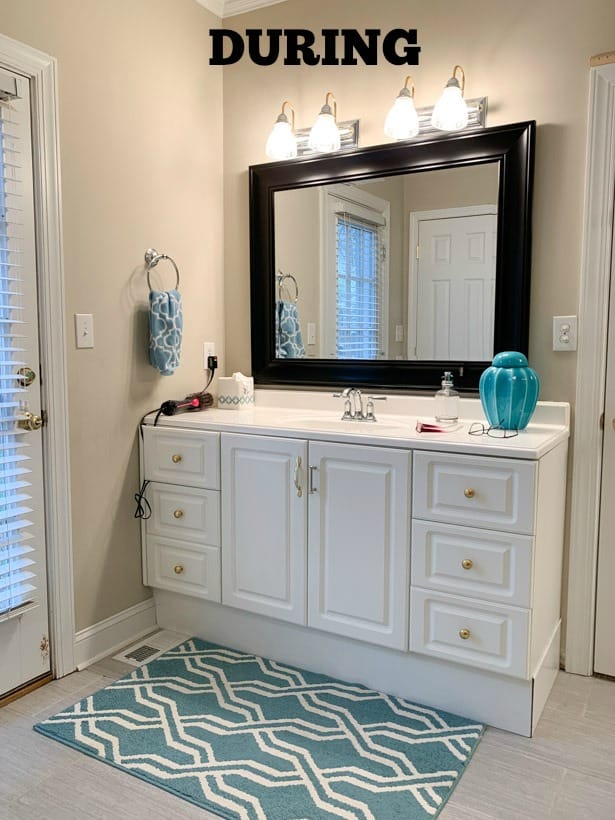
- raised the vanities 6″
- replaced both vanity tops
- replaced the faucets
- removed the large mirrors and replaced them with cheapo temporary ones.
This side of the room saw the most major changes:
- tore out the tub and step
- completely opened up the shower ceiling
- extended the width of the shower
- built a bench in the shower and replaced the tile and glass door and sides
- tore out the knee wall and added a potty room and replaced the toilet.
After the preliminary remodel, the next photos are what she’s looking like today. I didn’t use my wide angle camera lens to take these photos, so you’ll only be able to see smaller parts of the room at a time.
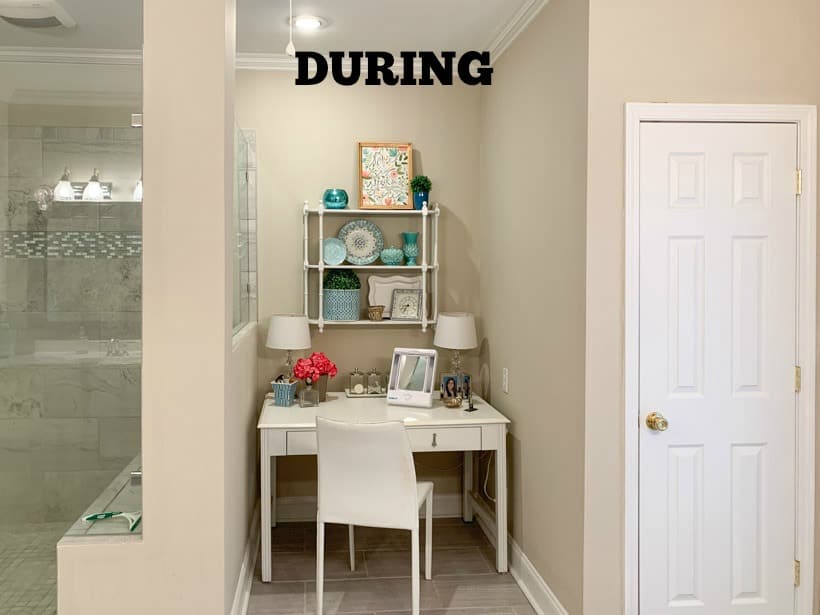
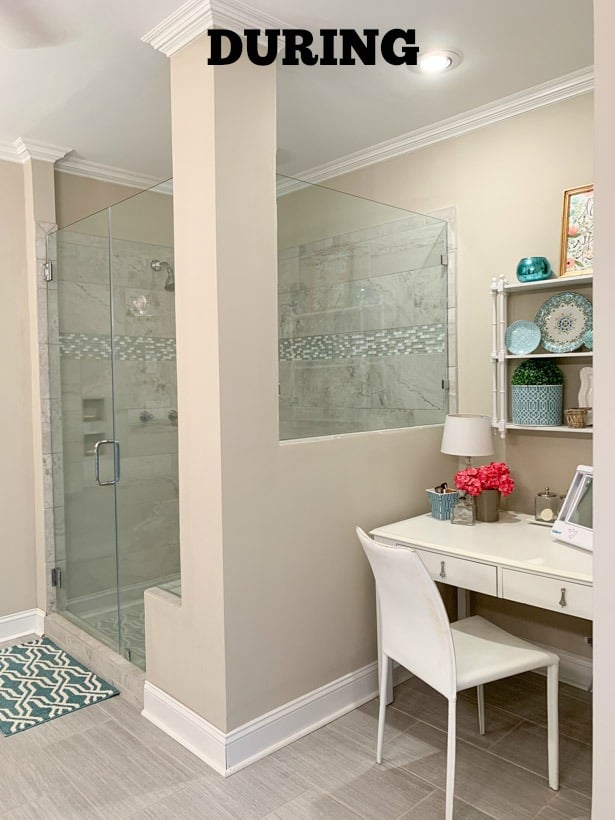
The original bathtub was located directly across from the door into the bathroom and was the first thing you saw as you entered the room. In the nook that was created where we tore out the tub, enlarged the shower and added the potty room, you’re greeted by a prettier makeup spot instead. There are changes coming to this spot too!
The makeup table is an old desk that I found at a thrift store and painted white. An old, old set of shelves was painted and hung above it to add some decorative accessories to.
You can see the bench that we added to the shower in this shot. The closed door to the right is the added potty room.
This is the larger bathroom shower with new tile, new glass walls and door, new shower head and new water handles.
And here’s a look inside the potty room. Very plain right now.

The original vanities are in good shape and have really good storage, so we decided to save a few thousand dollars by keeping them.
After giving them a thorough cleaning, all we needed to do was to build a base under them to raise them to comfort height, add temporary skirting around the base and add a new vanity top to each one.
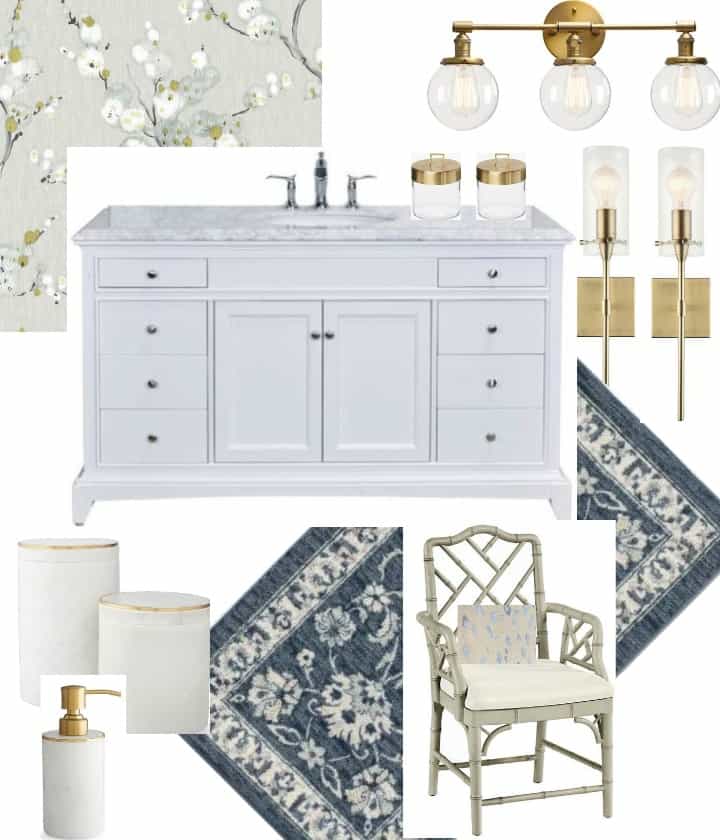
Here’s the design board that I created that I hope will result in the clean and fresh modern traditional look that I’m after for this room. And yes, I’m absolutely going to mix metals in here!
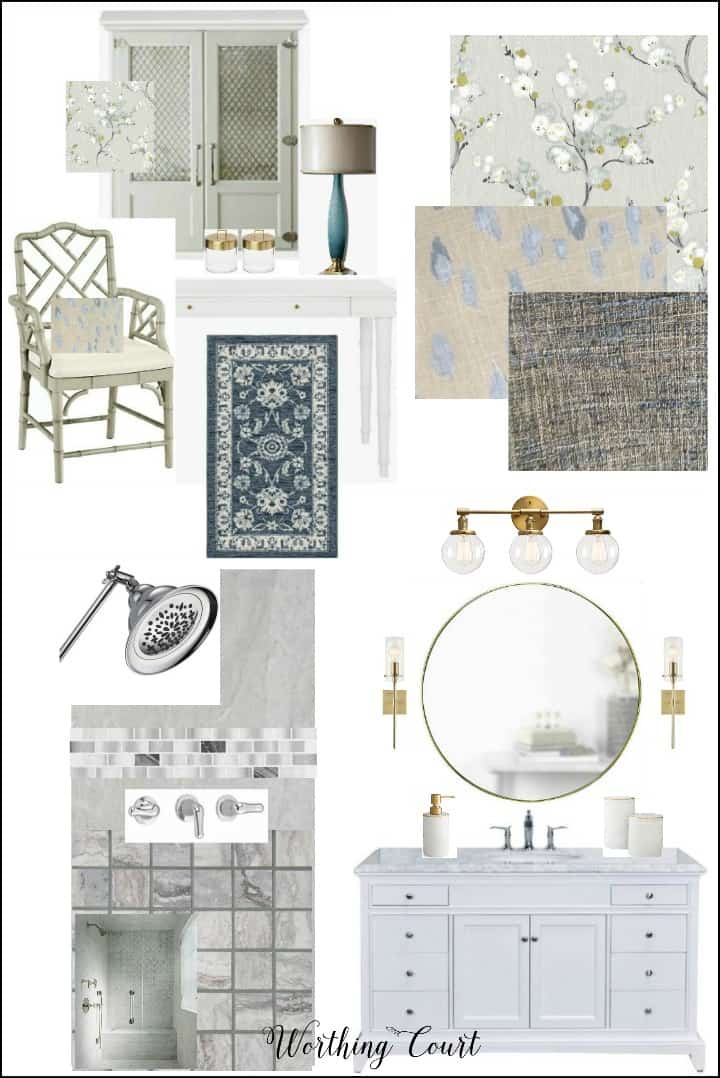
CLICK ON THE BELOW IMAGES TO SHOP

I’m SO excited to finally finish up the remodel of this bathroom! If you’ve been watching my Instagram stories, then you know that we’ve already completed one of the projects for this room. And that’s the new cabinet that my husband built to go above the makeup table using the doors that came off of our entertainment center when it received its makeover. It looks so good!
If you’d like to watch the changes as they’re happening, be sure to follow me on Instagram and sign up for notifications so you won’t miss any of my stories.
Here’s our to-do list for the room:
- change mirrors above the vanities
- add a new light fixture above each mirror and add sconces to each side of the mirrors
- change the hardware on each vanity
- re-do the skirting around the base of the vanities
- caulk where the new baseboards were added after the floor was re-tiled
build a new cabinet to go above the makeup table- wallpaper the back of the new cabinet and decorate the interior
- repaint the vanity table
- replace or paint the lamps on the makeup table
- replace the current chair I’m using at the makeup table with something fun
- replace the bath mats
- gussy up the potty room
- accessorize!
You did a beautiful job! Love the sconces and tiled shower.
What a difference you’ve made in the look and feel of your master bath.
Thank you! I can’t wait to see it all come together!
Wow! What a great space you have to work with. I can’t wait to see the after!
I’ll be so happy when it’s finished! Hoping to add wallpaper to the back of the cabinet today. 😀
Looks lovely. We are ready to remove our oversize garden tub and expand the shower. Would you provide the dimensions of your shower?. Also raising rather than replacing your cabinets a great money saver especially when the cabinets are in great shape and in the style you like.
Thank you! The inside dimensions of our shower are 55″ deep x 88 wide. We have a bench in the shower also – the seat is 18″ x 20″ high, but I believe 18″ high would have been better. The top of the tile is at 90″ (our ceilings are 9′),
HI!
Love your new Bathroom.
Personally I don’t care for enclosed potty
closets in private home bathrooms. But if you like it I’m happy for you😌
Looking forward to your home office redo.
Your office has no doors?
Macheda
Do you have a link to your tile you used in shower redo? Floor and walls? I may have missed it. We currently have a slate shower I love but the lower slate needs attention and trying to figure out if I could just replace the lower half with another tile that would be easy to clean and compliment the existing slate above that I would leave. Also, need to redo tile in floor. And, replace our wood floors with slate possibly to tie in with the shower. Your thoughts and suggestions (any thoughts and suggestions) would be much appreciated. Thank you, Teresa
Hi Teresa. It has been several years since we remodeled our bathroom, so I don’t have the exact links. It came from Home Depot and here’s a link to a very similar tile that we used on the the walls and bathroom floor: https://www.homedepot.com/p/Corso-Italia-Alpe-Graphite-12-in-x-24-in-Porcelain-Floor-and-Wall-Tile-15-50-sq-ft-Case-610010002399/308736405
This looks similar to the shower floor tile, but if I had to do it over again, I would go with something a little easier on the feet than small squares: https://www.homedepot.com/p/EMSER-TILE-Cabo-Shore-12-99-in-x-13-03-in-x-9mm-Ceramic-Mesh-Mounted-Mosaic-Tile-1-19-sq-ft-1408673/303234867
I hope this helps, but I really need to see images of your space to be able to offer any advice. 😀
James Vaughan