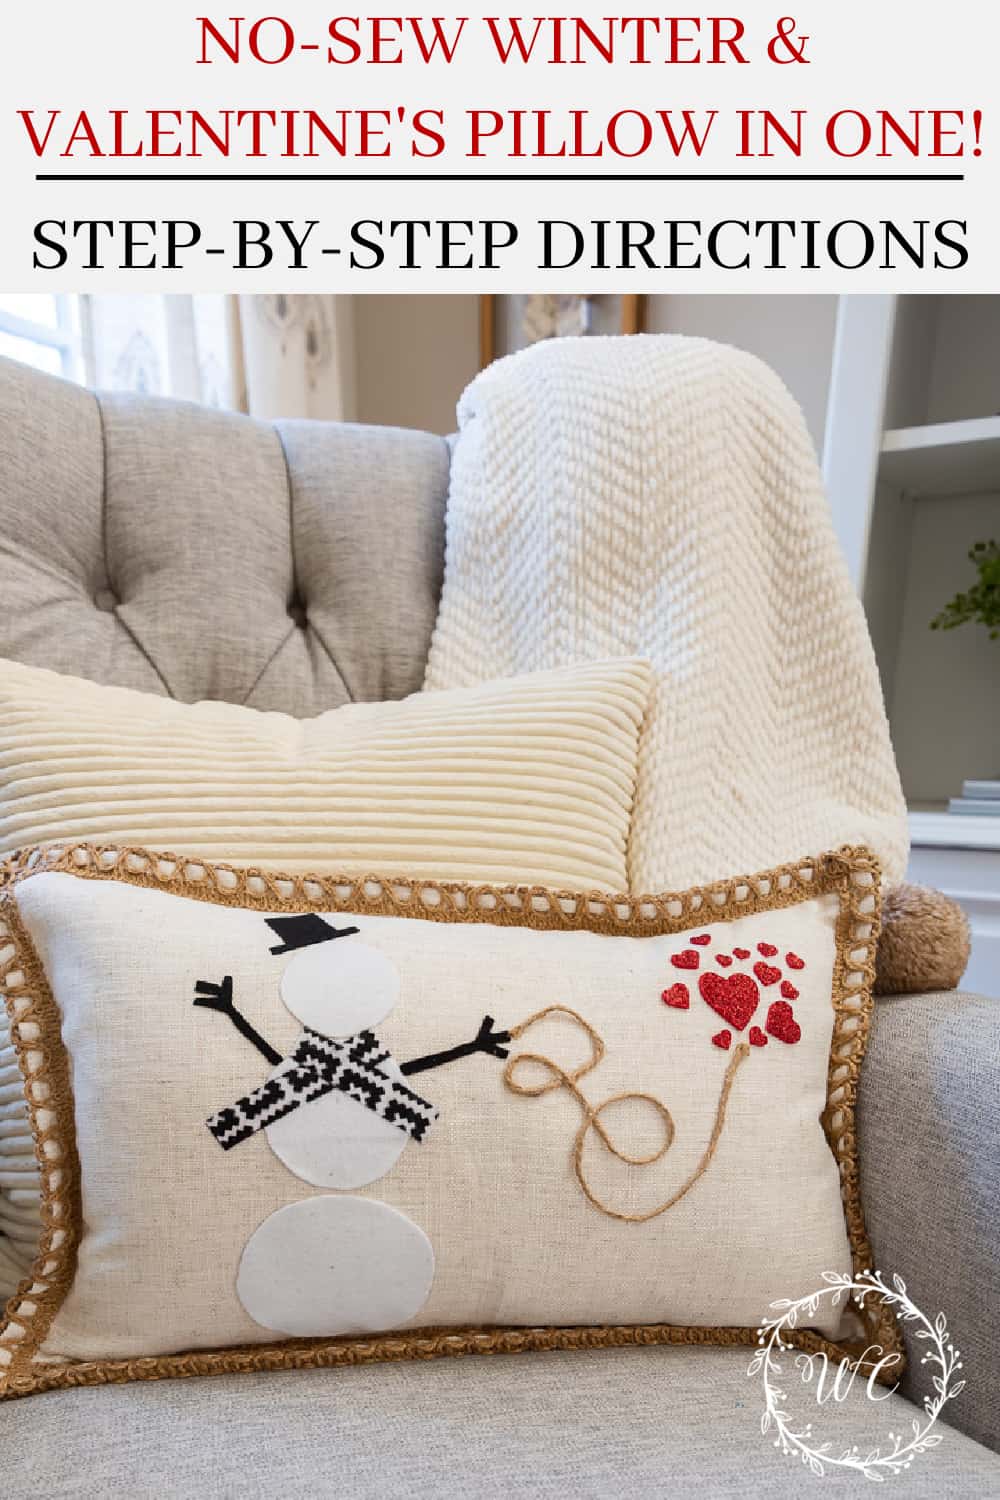
How To Make A No-Sew Winter & Valentine’s Pillow (All In One)
Step-by-step directions for making a cute and easy no-sew pillow that works for both winter and Valentine’s Day.
Do you decorate your home for Valentine’s Day? As a general rule, I don’t do a lot of decorating, but I do enjoy adding little touches here and there and a cute little pillow is perfect for that!
This post and photos may contain Amazon or other affiliate links. As an Amazon Associate I earn from qualifying purchases. If you purchase something through any link, I may receive a small commission, at no extra charge to you. All opinions are my own. See my full disclosure HERE.
I do decorate for winter though, so when trying to come up with an idea for an easy-to-make, no-sew winter pillow, I thought “why not combine them into one?”.
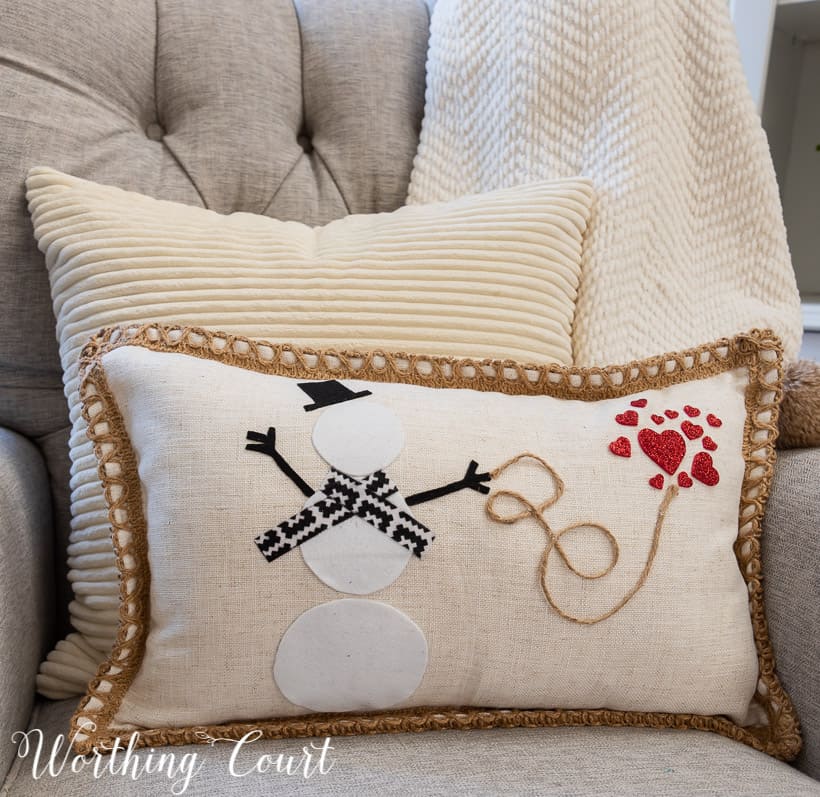
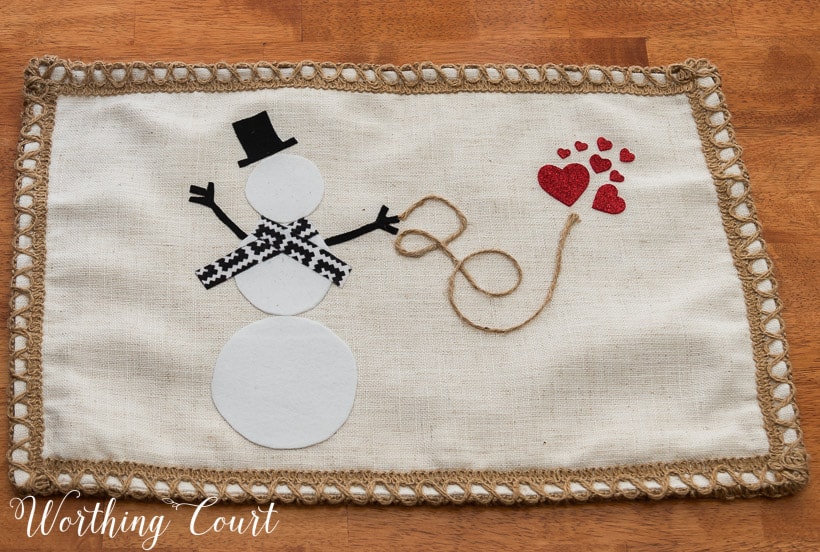
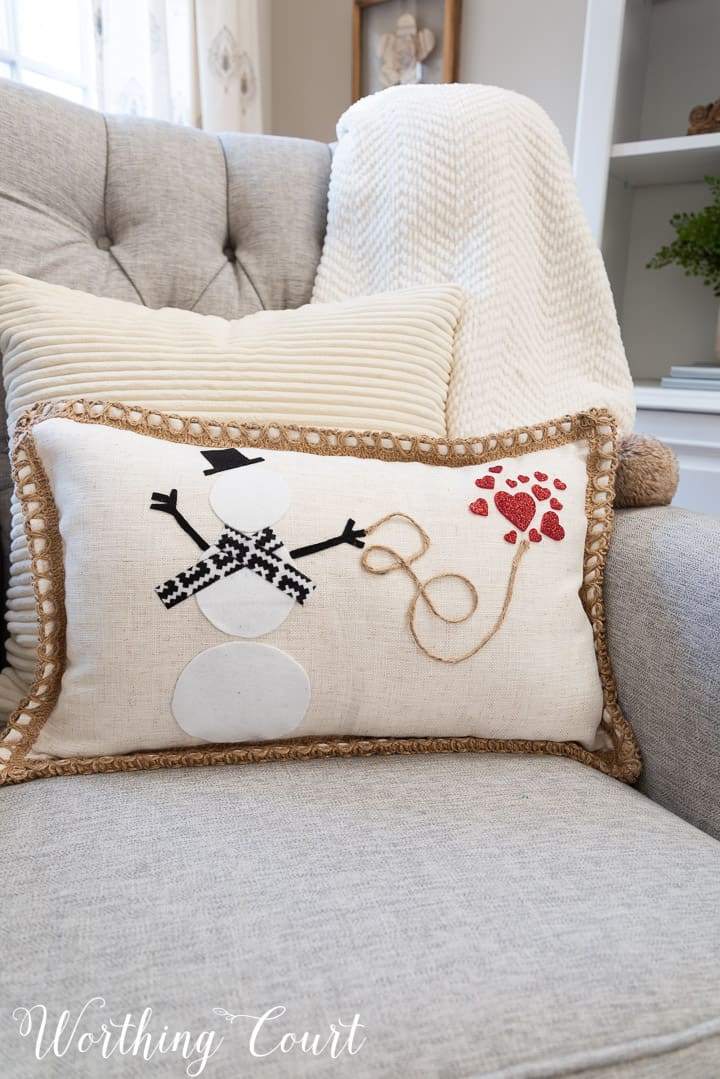
This snowman pillow, tossing hearts into the wind, will work not just for Valentine’s Day, but works for leaving out all winter too. It works because it doesn’t scream “I’m a Valentine’s Day pillow!”, but the snowman definitely says winter.
In reality, this is a pillow cover that I added an insert to. I don’t know about you, but I have far too many pillows to add another one to my collection. Pillow covers take up SO much less room, especially the way that I store them!
All of the sources for making this pillow cover are in the list below. Just click on the name of any item to be taken directly to the website where you can purchase. You can order everything you need right from home!
HERE’S WHAT YOU’LL NEED TO MAKE THIS PILLOW:
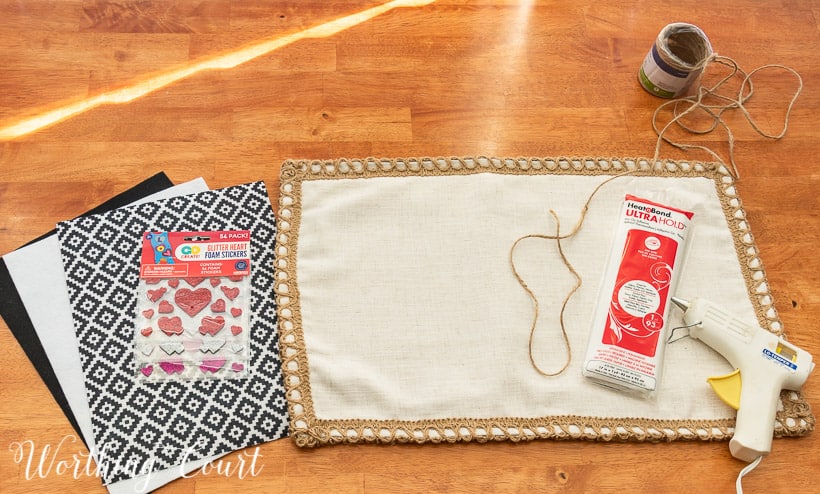
- Pillow cover
- Pillow insert – the one linked fits the above pillow cover
- Heat & Bond Ultra Hold Iron On Adhesive
- One sheet each – white, black and a patterned felt of your choice (note that the patterned felt is a different link than the solid white and black)
- Jute twine
- Stick-on hearts
- Glue gun and glue stick
- Iron
- Craft scissors
HOW TO MAKE THE PILLOW
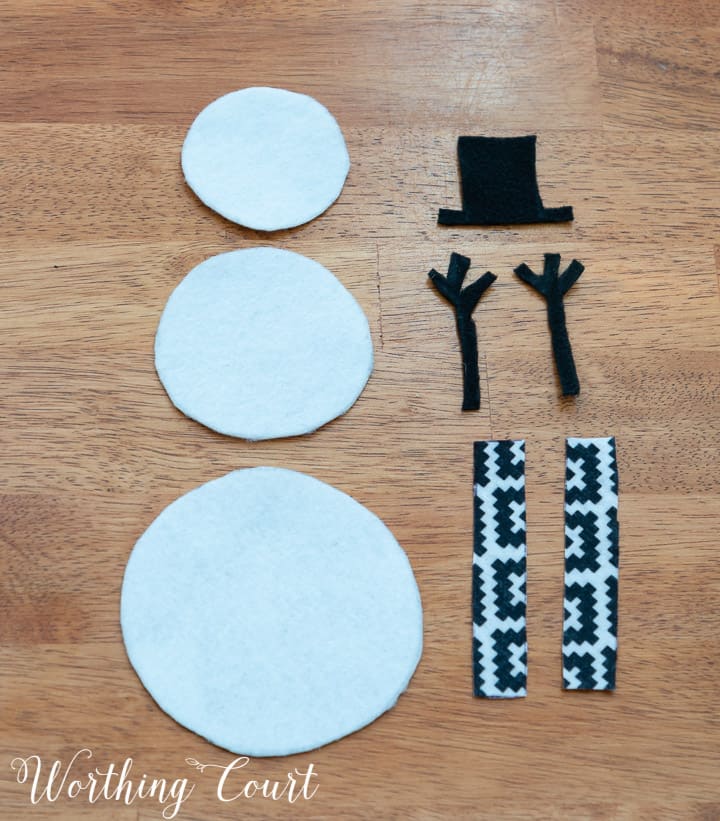
STEP 1:
Iron the pillow cover to remove any wrinkles.
Draw the shapes for the snowman body, arms, scarf and hat onto a piece of felt. I traced around three different round shapes for the snowman’s body. The hat, scarf and arms were drawn freehand. Cut the shapes out.
Following the manufacturer’s directions, adhere the Heat & Bond to the backside of the felt shapes and cut those out.
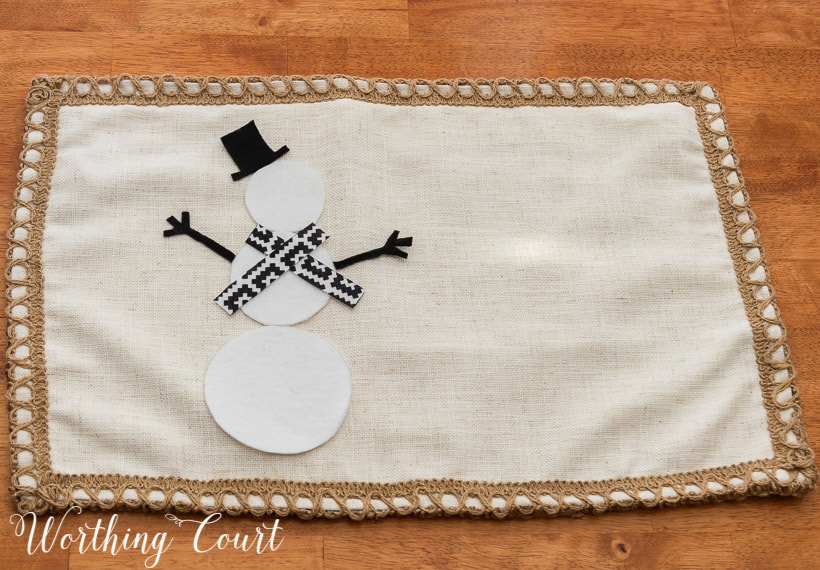
STEP 2:
Do a dry fit by laying the pieces onto the pillow cover to determine exact placement and also to determine that you’re satisfied with the size of everything.
Following the manufacturer’s directions, adhere the snowman shapes to the pillow cover.
STEP 3:
Lay the twine in the configuration that you desire and adhere to the pillow cover with tiny dots of hot glue.

STEP 4:
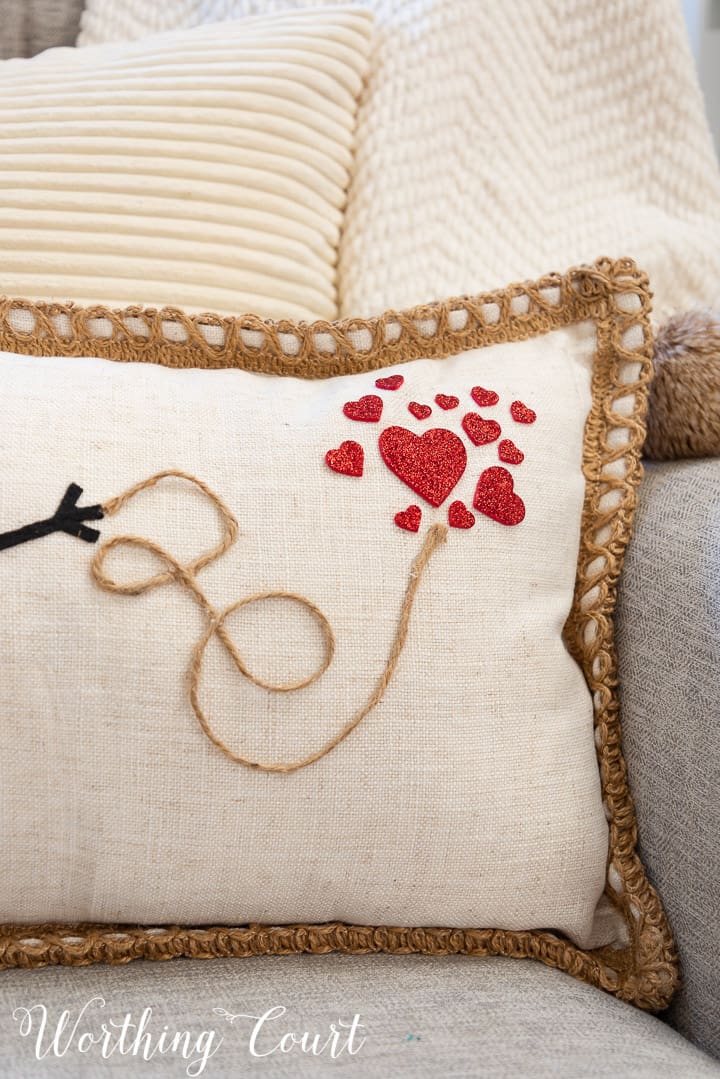
Adhere the heart stickers in a group at the end of twine. Arrange them in such a way as to appear they’ve been thrown into the wind.
Note: I had planned to attach the heart stickers with hot glue, but mine stuck so well that the glue wasn’t needed. But – if you will have anyone actually sitting against the pillow, I would definitely use glue.
STEP 5:
Insert the pillow insert and you’re done! The little snowman is adorable with his imperfect arms and hands.

In the final version of my pillow, you can see that I added a few more heart stickers. I love how they look like Mr. Snowman just tossed them into the wind!
I hope you make one for your own home!
HERE’S MORE VALENTINE’S DAY INSPO:
FREE VALENTINE’S DAY PRINTABLE
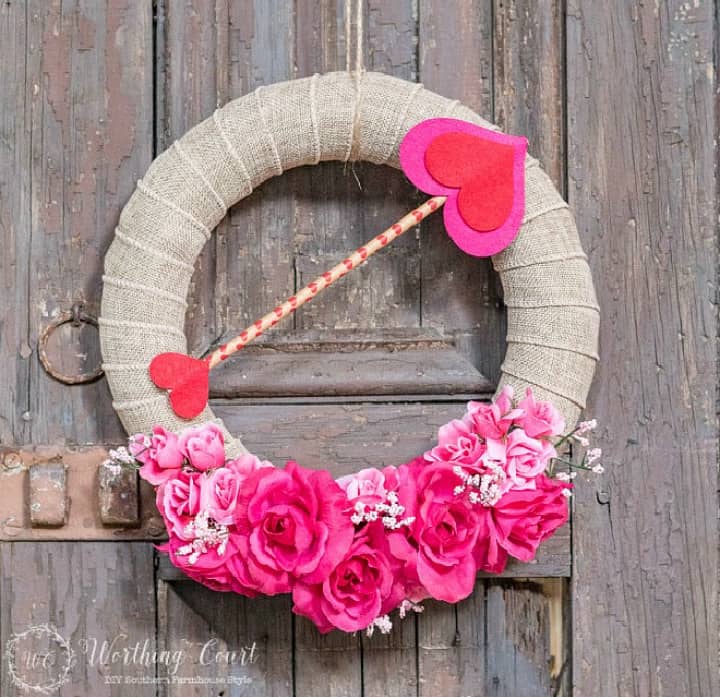
HOW TO MAKE A VALENTINE’S DAY WREATH FOR UNDER $10

I look at your posts everyday and enjoy them. this was a sweet project. Thanks for the ideas!
Thank you so much. Have a great day!