Simple DIY Projects From My Breakfast Area Makeover
Did you happen to catch the Reveal Of My Breakfast Area Makeover yesterday?
As promised, I’m back today to share some of the simple and affordable diy’s that I did in here. Hopefully, you can find some inspiration for your own home.
Chair Makeovers
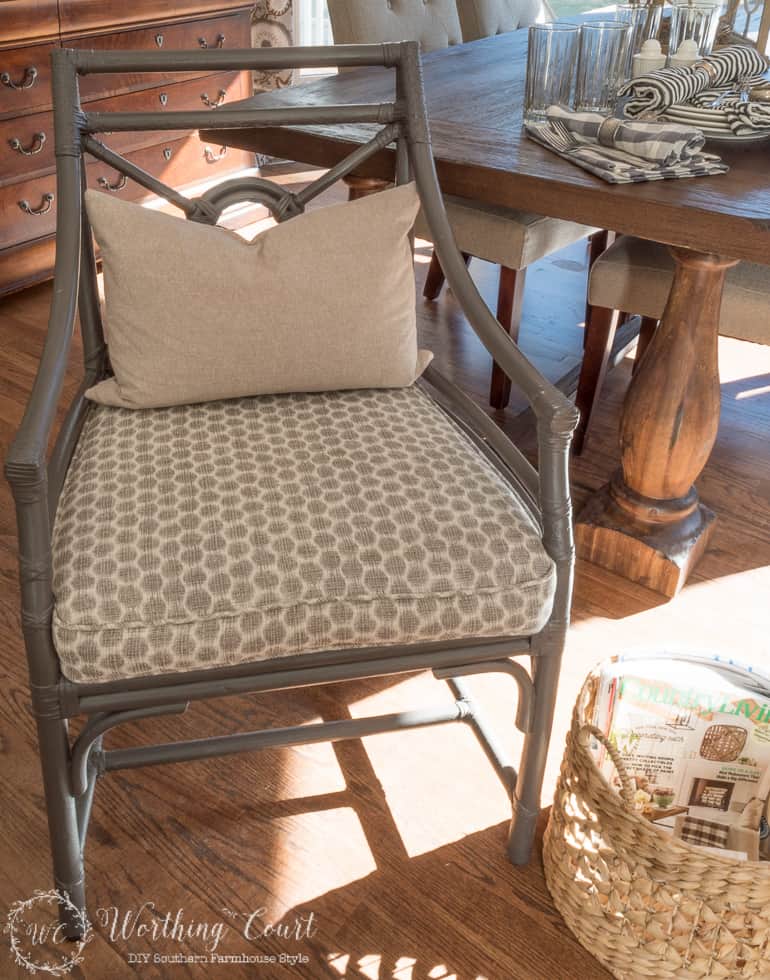
First up is the simplest of the diy’s – the makeover of the two rattan end chairs. The chairs were one of those purchases that I made because I loved them and knew I’d use them somewhere, someday. Have you ever done that – bought something that you don’t know where you’ll use, but that you love? They sat in the basement of our former home until we moved into this house, where it took me almost a year to get around to their makeover. Here’s what they used to look like:

What you don’t see in the before photo is how chipped the paint was. And you don’t see the lovely pale green cushion either.
And here is what they look like after receiving a couple of coats of spray paint and after a getting new cushions made by my upholsterer for only $35 each + the cost of the fabric. I painted them with Rustoleum spray paint in Anodized Bronze. For me, it’s the perfect gray with brown undertones, which warms the color right up. I guess that I should have left the throw pillow out so that you could get a better look at the whole chair.
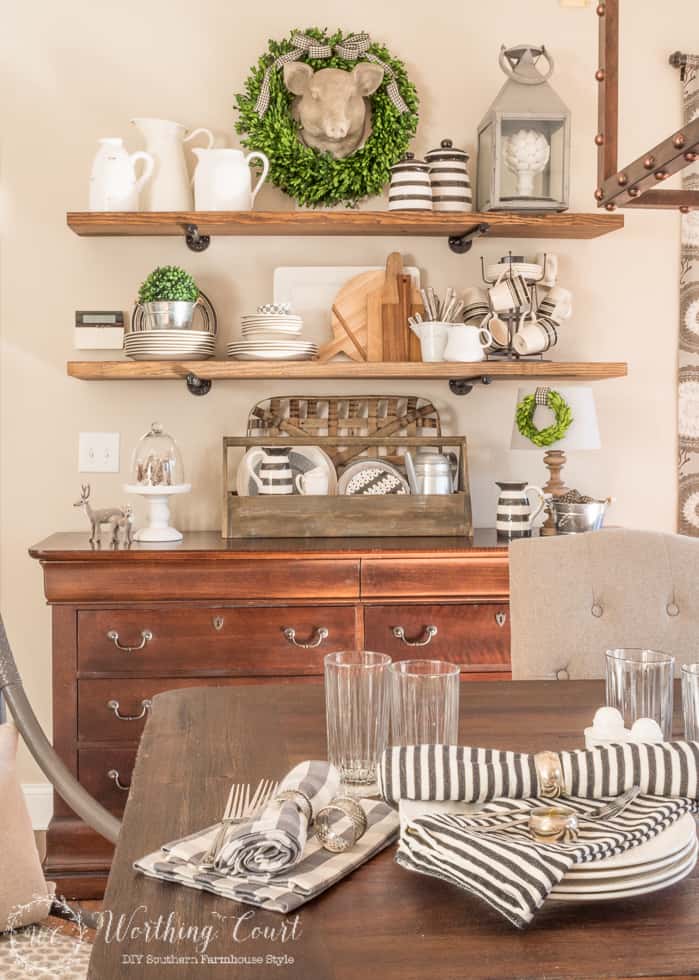
DIY Rustic Shelves
I should have done a tutorial on these shelves, but I didn’t. They were so simple I can probably just explain it to you along with a few photos.
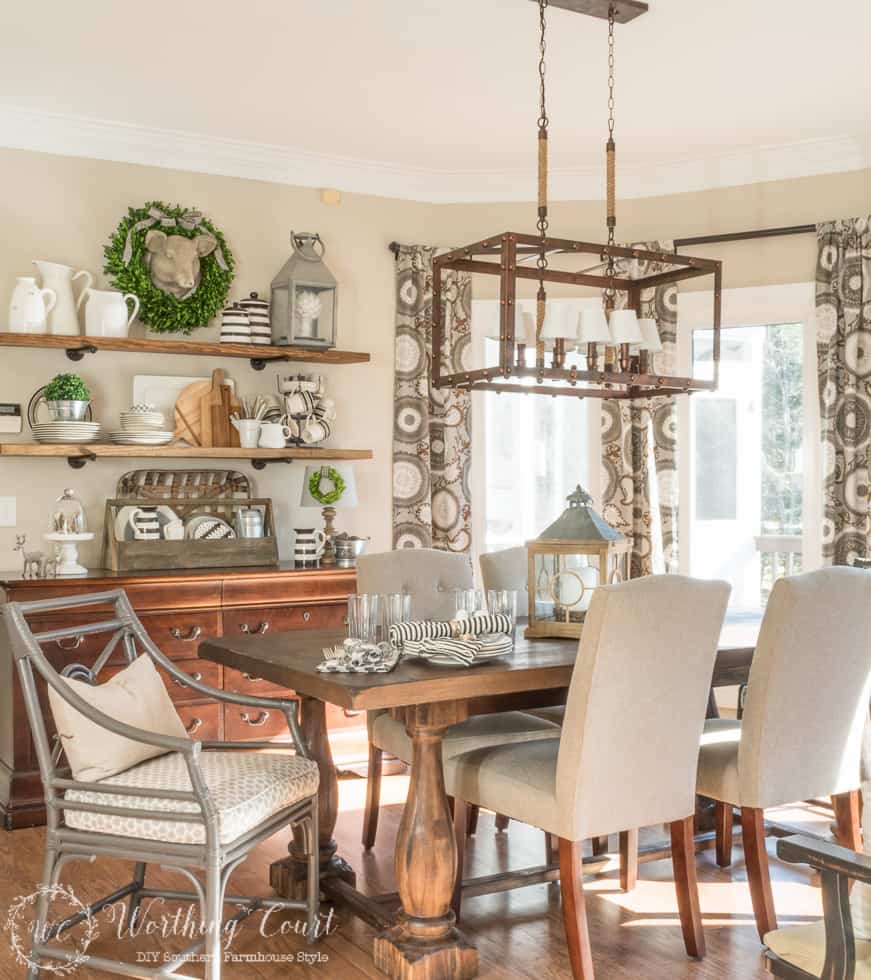
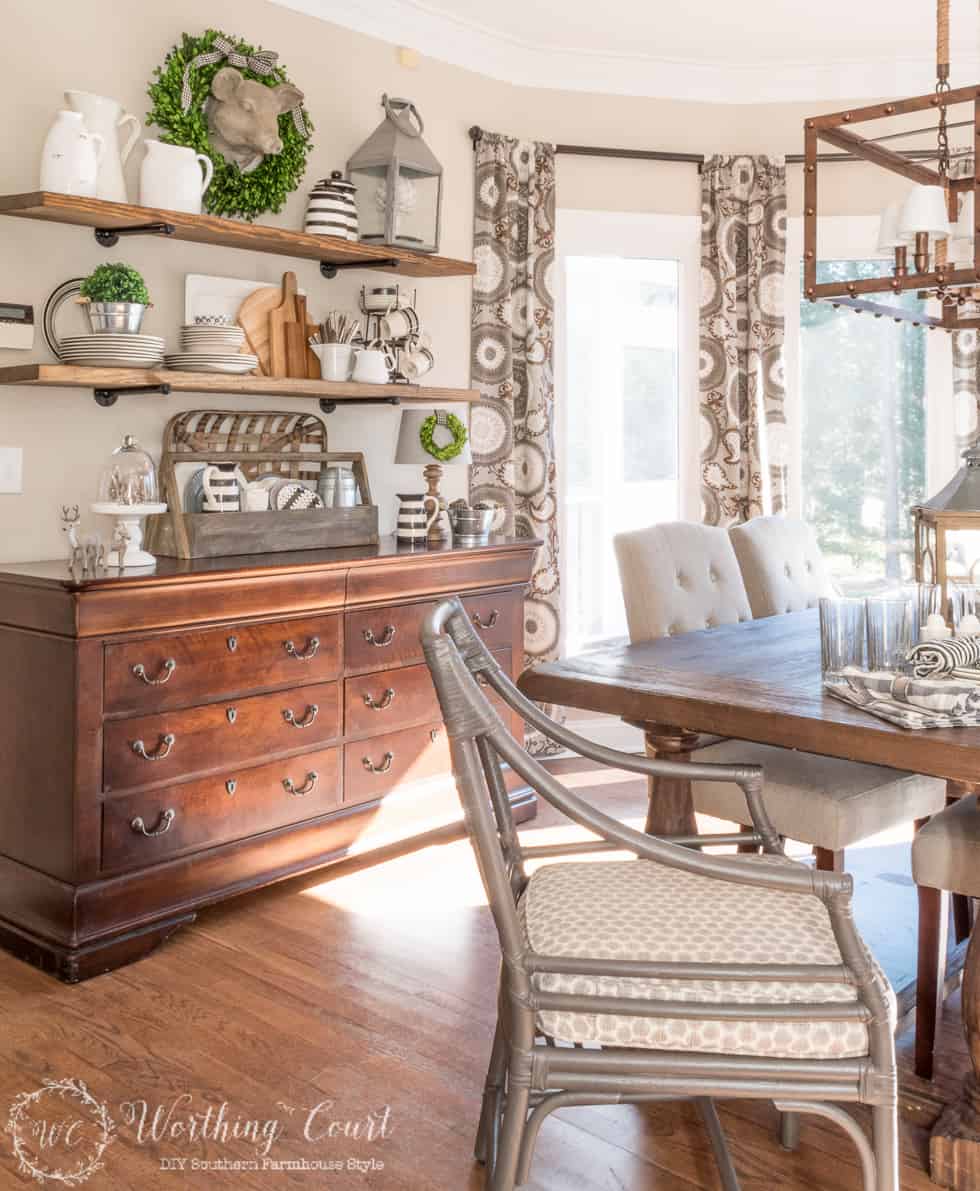
When it came to determining the spacing of the shelves, I knew that I wanted to make sure that I left room to display trays, platters and other larger items. I measured a few of the trays that I thought I might ever use to figure out how much space I should leave. I also was originally planning to put three shelves above the buffet, but then I realized that even though we have 9′ ceilings in this room, that would make the top shelf too high to display anything on. So here’s what I came up with: 1) from the top of the sideboard to the bottom of the first shelf it’s 18″ and 2) from the top of the bottom shelf to the bottom of the top shelf, it’s 15.5″.
Each of my shelves is 5′ long and here are the supplies that I used:
2 – 5′ lengths of 2″ thick x 12″ wide pine boards I used thick wood because I love the beefiness of it and it kept me from having to add a brace in the middle of each shelf.
#80 or #100 grit sandpaper – A palm sander comes in really handy here and will make the work go much quicker.
Stain – I used Minwax Dark Walnut
4 – 3/4″ galvanized floor flanges
4 – 12″ x 3/4″ threaded pipe (you’ll need to buy a shorter length if your shelves aren’t as deep as mine)
4 – 3/4″ galvanized cap fittings
screws
drywall anchors
level or laser level
black spray paint and black touch up paint
Step 1 – The galvanized parts are what the shelf brackets are made from. I found all of the parts in the plumbing section of a big box home improvement store. They are very greasy, so you need to thoroughly wash all of the parts in warm sudsy water, rinse well and allow to dry completely.
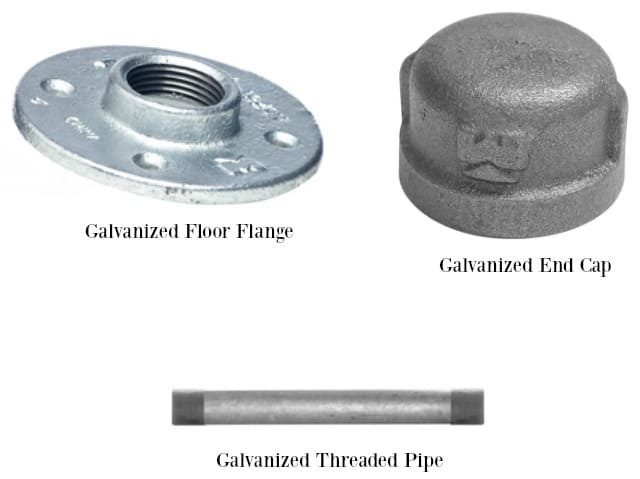
Step 2 – To make the brackets, assemble the painted, galvanized parts as shown in this photo and spray with black spray paint. Allow the paint to dry thoroughly and attach the brackets to your desired location on the wall. Make sure that the brackets are level to each other. The floor flanges have four pre-drilled holes for screws in them. I made sure to turn each flange so that two of the holes would be lined up with the stud behind the drywall. I added drywall anchors for the other two screws. Touch up the screw heads with black paint as needed.

Step 3 – Give the boards a good sanding on both sides and then use a damp cloth to wipe all of the sawdust away. Apply stain and allow to dry completely. I applied two coats of stain, allowing the stain to dry between coats. It’s up to you whether to add a coat of polyurethane or not. I chose not to because I’m impatient and didn’t want to wait for it to dry. I recommend that you do apply poly though, if there’s a chance you’ll be sitting anything wet on your shelves.
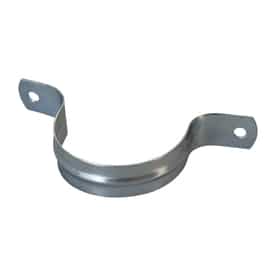
Step 4 – Lay the boards on top of the brackets and decorate. And y’all – that is it. The boards are so heavy that I thought they would stay in place on their own without adding anything to hold them in place. If you’re worried about your boards getting bumped or possibly moving, I would add a U-shaped pipe strap (that has been painted black) over the pipe and attached to the bottom of the shelf.
DIY Large Art
I explained all about how I made the large piece of art above the bench in a previous post. You can see what I did and download the free printable HERE.
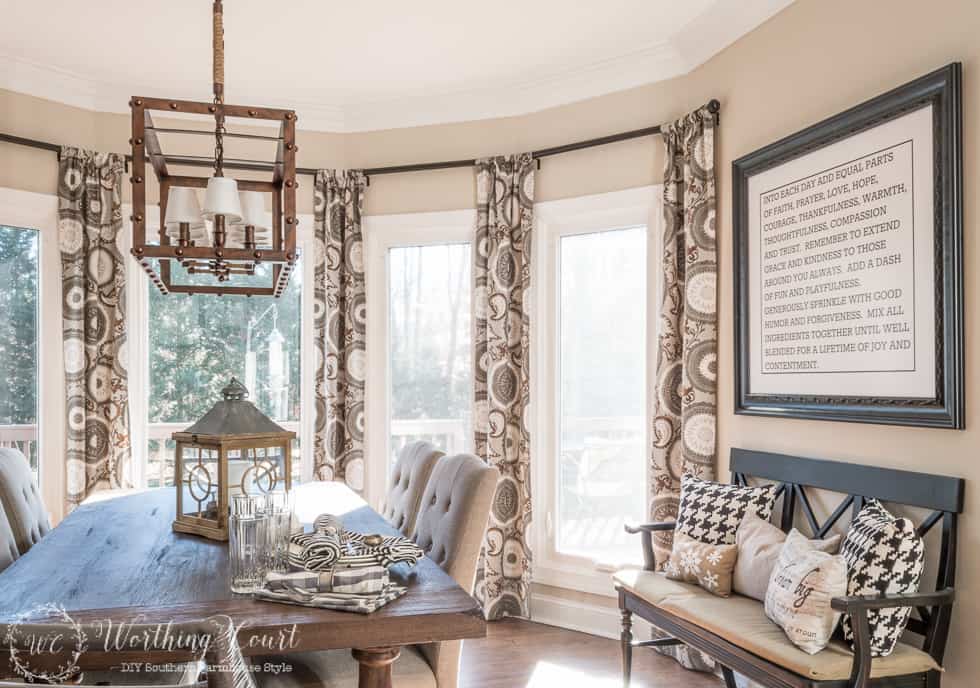
Draperies and DIY Cheater Bay Window Hardware
Anyone who has a bay window or a multiple sided window can tell you how expensive the drapery hardware can be. I guess I’m cheap because I just didn’t see any reason to cough up the amount that the hardware for this window would have cost me. BUT, here’s one thing to consider – I knew that my draperies would be for looks only. They wouldn’t be pulled on and the draperies are unlined so they aren’t heavy at all. If this was a case where I needed the draperies to be functional, then I would have sprung for the real-deal bay window hardware (brackets, rods and adjustable rod connectors). For those of you who have already asked, they do make special connectors for the drapery rods used in bay windows, which can be adjusted to any angle. Just do a Google search for “bay window drapery rod connector” and you’ll get several options to choose from.
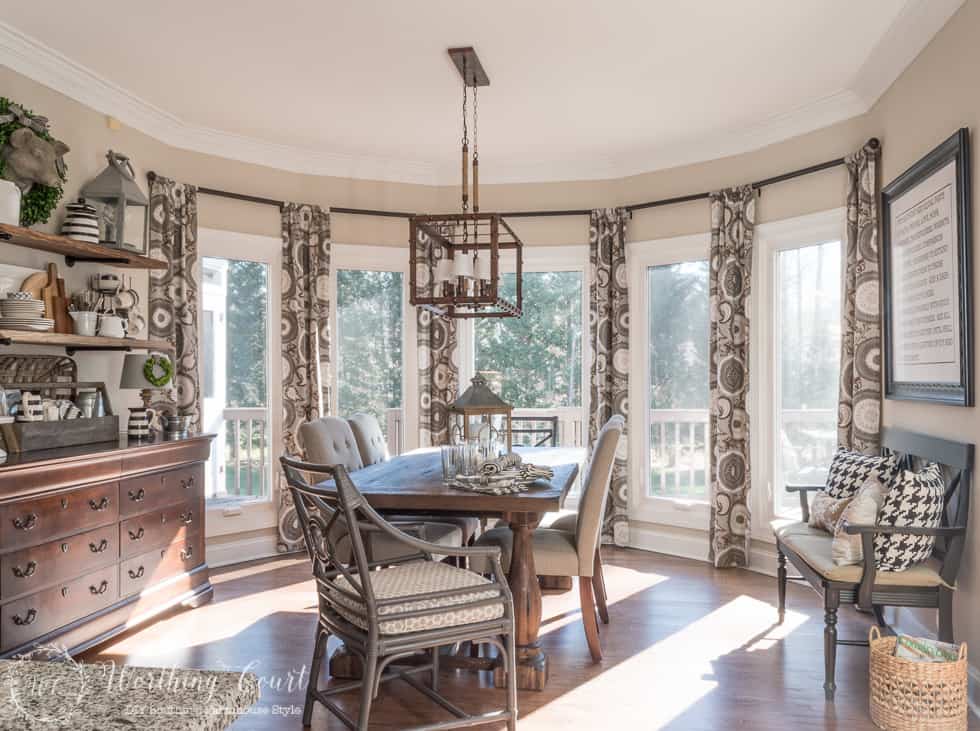
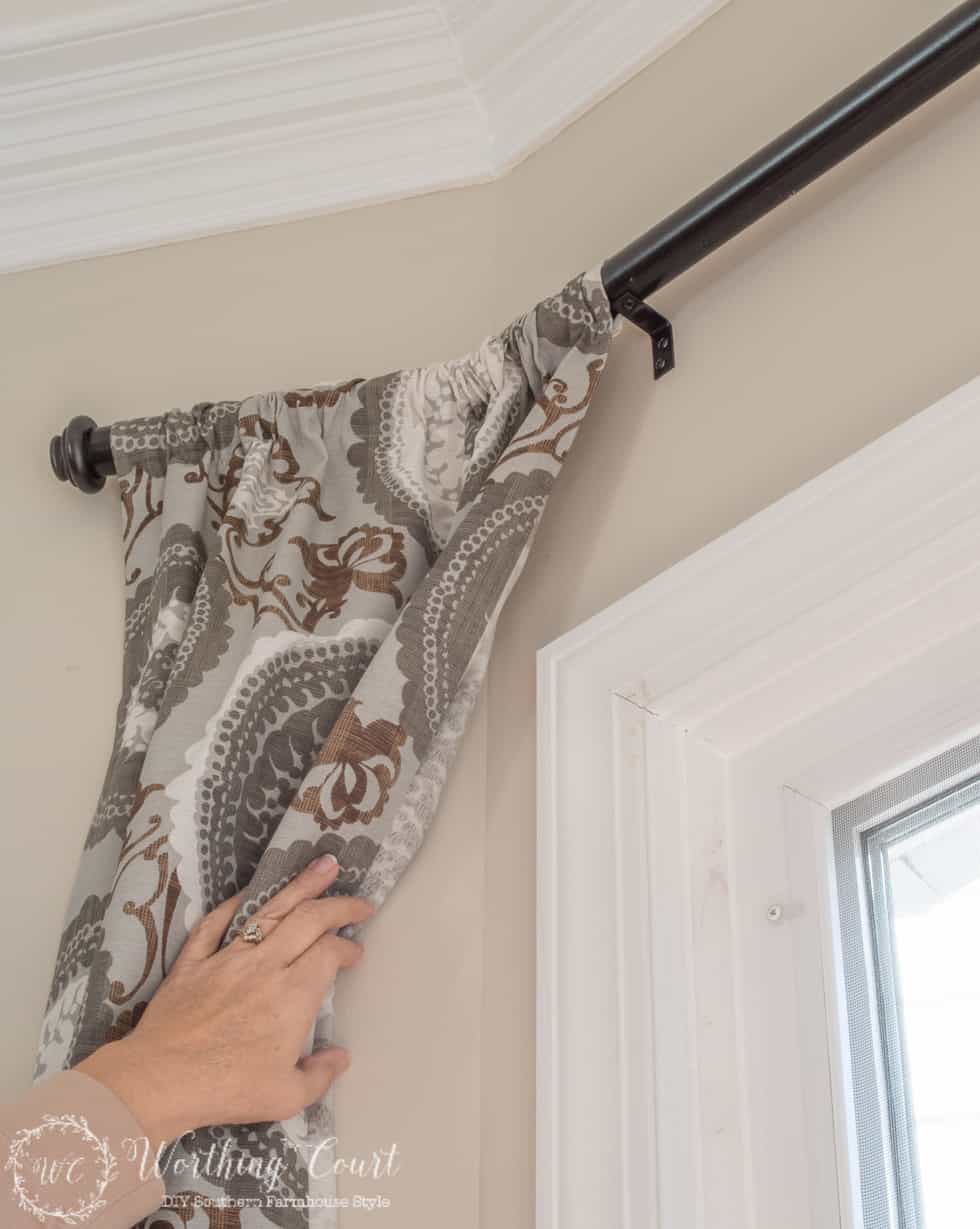
So, here’s what I did. To create the drapery rod, I purchased 2″ pvc pipe and cut it to length for each of my windows. Each one of the rods was then painted with Rustoleum’s Oil Rubbed Bronze spray paint.
To join the rods, I technically should have cut the ends of the pvc pipe at an angle (where the rods meet in each angled corner), but since I knew that the area would be covered by the draperies, I cheated and simply butted the ends against one another. Here’s a closeup of one of the angles. You can’t even tell that the ends are just butted up together.
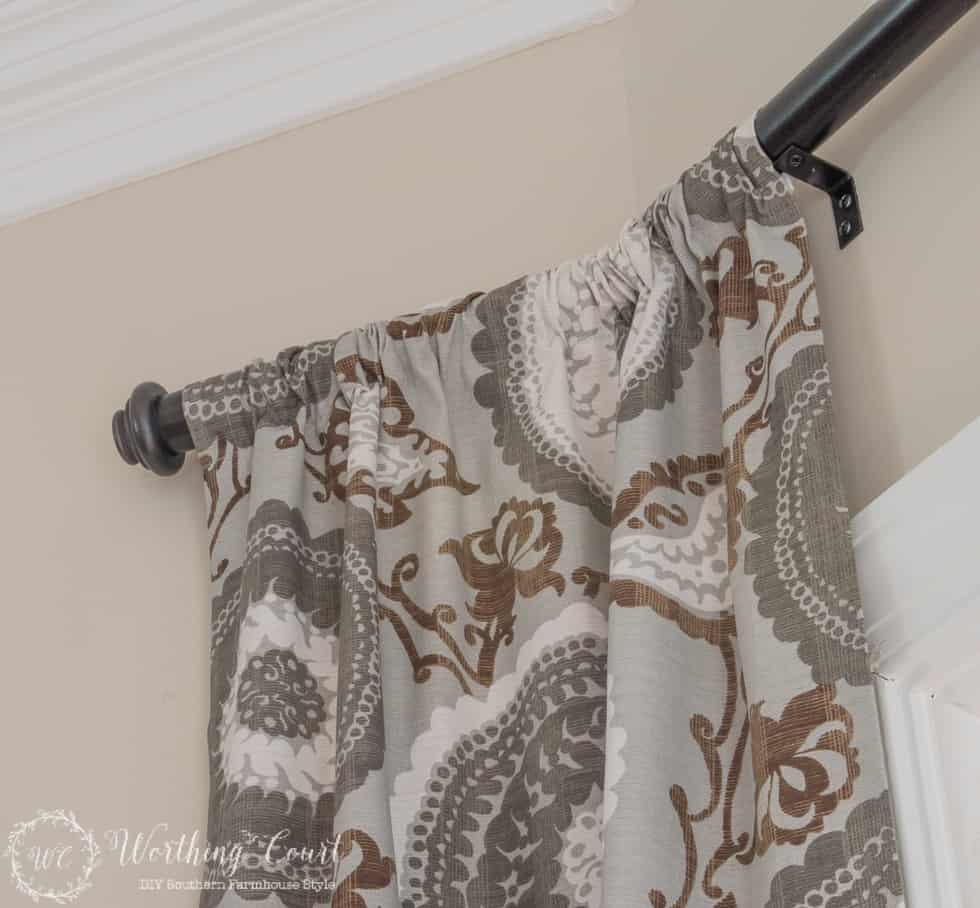
Next came the question of how to mount the cheater drapery rods to the wall. As you can see, I spray painted L shaped angle iron brackets to match the rods and screwed them to the wall (using drywall anchors as necessary). The rods are resting on top of the brackets with a screw going up through the pvc pipe to hold them in place. I placed a bracket on each side of every angled corner and then touched up the screw heads with paint. You can see that I still need to touch up the paint on the trim since the windows were replaced. You’ll want to make sure that your drapery rods are absolutely level across all of the windows. Oh, and that finial? It’s just a regular drapery finial that I hot glued to the end of the pvc pipe. Cheater, cheater, pumpkin eater.
I normally prefer my draperies to be lined, but I knew these would be against the wall and not over a window so sunlight shining through wouldn’t wash out the pattern.
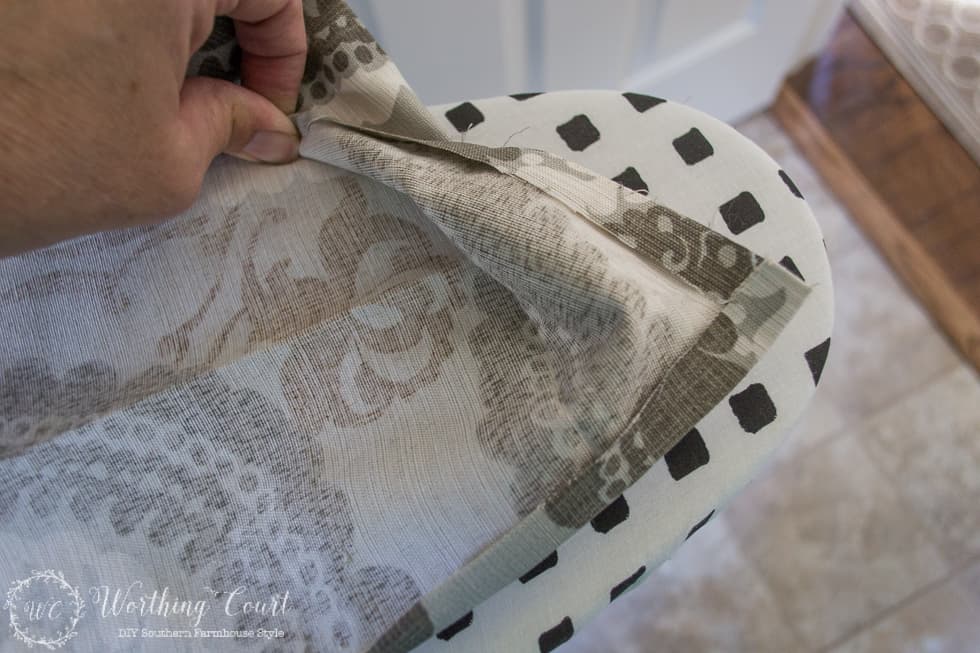
I also knew that I didn’t want to cover any of the glass in the windows at all, so less bulky panels were a must. I solved that problem by cutting each of the 54″ wide panels in half and then double folded and pressed the raw edge under and used iron-on seam tape to put a side hem back where the cut edge was. I redid the edge of the rod pocket and bottom hem using the same method.
As always, putting together any room is a process. For me it’s never a quick one, but it’s always so worth it in the end! Let me know if you have any questions about these or any other projects and I’ll do my best to answer them.
Suzy,
Your dining room looks awesome. Love everything about it. Great job!
blessings, Nellie
I love your shelves – I wanted to do something like that in my kitchen, but we are not sure if there are pipes behind the walls. We live in a condo so God forbid we hit a pipe the person downstairs from us would have a flood.
But……….good news I found a sweet cupboard on decor steals that I can place on the counter.
Can’t wait to decorate it.
Have a wonderful day
Rose
Hi. I have a question-I love the breakfast shelves makeup over you did, where did you purchase all the black and white striped dishes you used on display? Just love the pop they give to the over all look. Thanks for any information you can share with me.
Hi Brenda. The black and white plates, bowls and mugs came from Dollar Tree. The black and white striped canisters were a HomeGoods find and the black and white striped pitchers are from the dollar spot at Target a few months ago. The little small black and white plate in the “toolbox” was another Target find from their clearance section. Hope this helps!
Your shelves in the dining room are just what I have been searching for the farmhouse we built last year. Sometimes the really simple solution is right before my eyes but I need a clue to really look. Thanks for the fix my husband can have done in a day. I will be checking your site often from this day forward.
Such a pretty dining space. So much to love: curtains, shelves & industrial brackets, light fixture. Excellent choices!
I love your dining room. It’s so pretty. Thanks so much for all of the tutorials. The one I like best is about how you made drapery rods out of PVC pipe. I would never have guessed!!
I love the open shelving! It opens up the whole room which all looks amazing by the way! You’ve done a wonderful job!
I love your shelves! What a great way to display things you love and use and be able to easily switch the display up to keep the decor current!
I just love these shelves! Could you tell me the spacing between the bottom shelf and the base and also the spacing between the shelves. You are so talented. Thanks,
Sue
Hi Sue. From the top of the sideboard to the bottom of the first shelf it’s 18″. From the top of the bottom shelf to the bottom of the top shelf, it’s 15.5″. BTW – are ceilings are 9′ high. Hope this helps!
Always an inspiration!
Thank you for this mini turorial. Like I mentioned on another posting I have this bay window just few windows in our Master bedroom and I have been stumped on the rods. Now to figure out what print I want LOL
Beautiful. Where did you purchase your breakfast room table??
Hi Sherry. The table came from World Market. Here’s a link to it: http://fave.co/1LC6ksj
Love the shelves!
Hello! It is so cozy and beautiful thank you for sharing your talent with us. Question, Where do you got your light fixture above table? I have a similar table with blue velvet chairs but im trying to get something rustic/industrial
Unfortunately, I got it from a company that is no longer in business. The last time I checked (before they went out of business) it was no longer available though. 🙁 Sorry I couldn’t help you!
Beautiful space! Can you tell me what you used to finish the curtain rods as the ends?