The Evolution of a Kitchen-Before, After, and a Refresh
A outdated 90’s kitchen has undergone not just one, but two transformations! The first was a major overhaul and then we refreshed it once again a few years later to make it the perfect space for us.
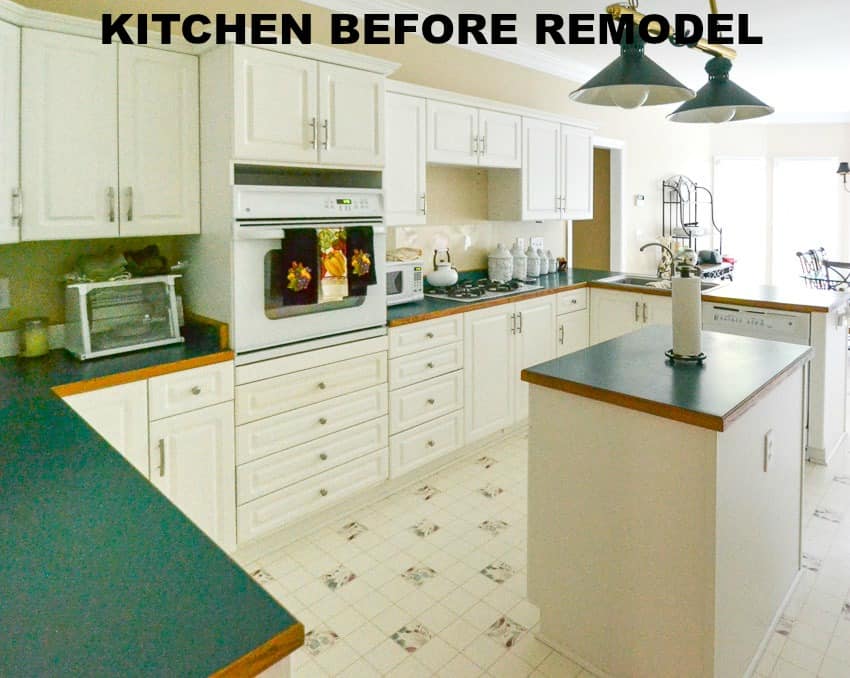
When we first looked at our house (yikes – has it been ten years ago already?!?!), I was so excited that it had a white kitchen!
The layout wasn’t exactly perfect, but I thought that we could get by with making just a few changes to the existing kitchen that would hold down the cost and would still give me the elegant white kitchen of my dreams.
Sadly, it didn’t work out that way. The best laid plans, right?
UPDATE: Check out how we refreshed the kitchen
I knew that we were going to replace the kitchen flooring, but I had hoped that we could keep the original cabinets and add small ones above them (9′ ceilings).
Then replace the kitchen appliances, replace the laminate counters with granite, replace the island with a larger one and replace the billiard table light fixture.
For the sake of saving money, I was even willing to keep the same location for the wall oven and cooktop and to leave the peninsula where it was.
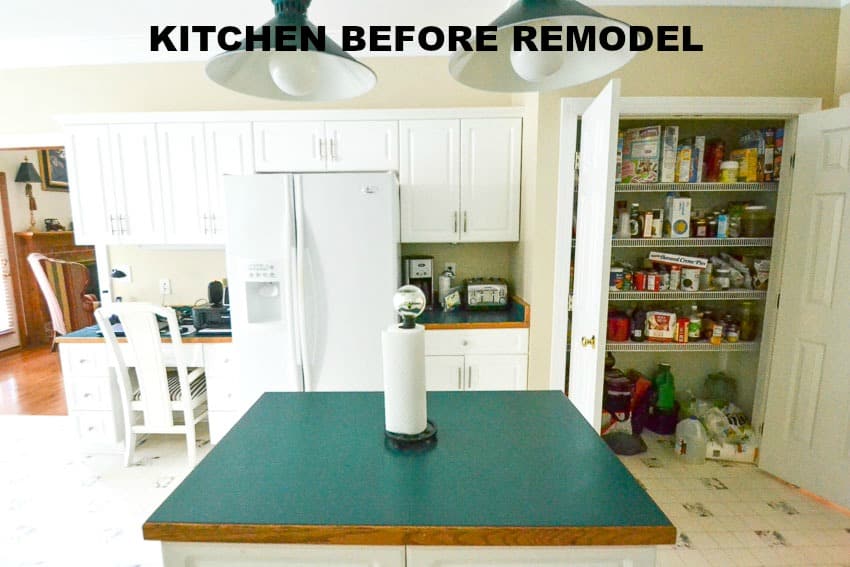
On the opposite side of the kitchen, I was happy with the pantry (except that it was disgustingly filthy!). I was going to keep the fridge location the same and set up my coffee bar in the little nook to the right of the fridge. I was undecided about what to do with the desk.
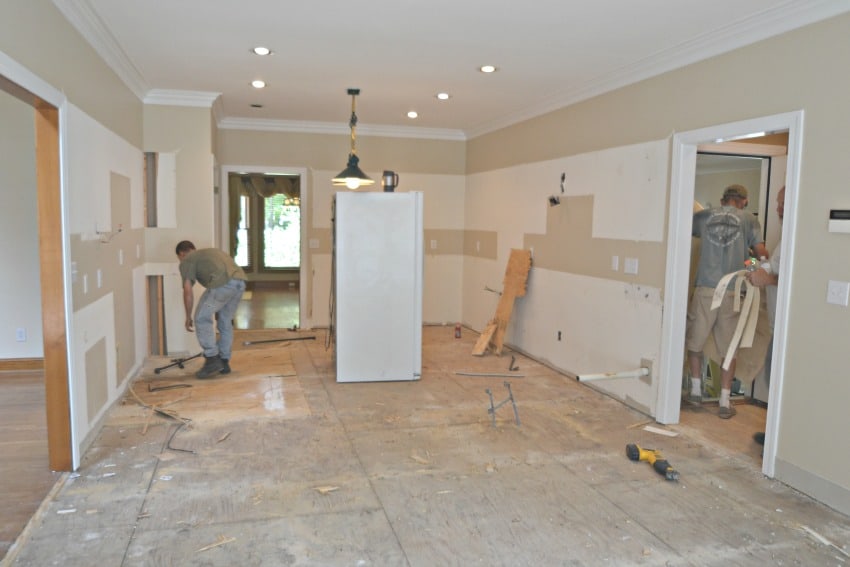
Upon further inspection though, we found that while the cabinet boxes themselves were in good condition, the Thermafoil, that they were covered with, had started to come loose in several places.
I wasn’t about to spend the $$$$ to replace the counters with granite, or some other costly material, when we just didn’t know how long the current kitchen cabinets would last. In addition, we discovered that the cabinet above the wall oven looked a little scorched. Not good.
Sooo….after much research about the longevity and overall quality of twenty year old Thermafoil, this is what happened! Pookie and my daughter’s husband had all of the original counters and cabinets out in a couple of hours or so.
Don’t worry, we were able to reuse several of the cabinets in the laundry room remodel and the rest of them were given to someone who was redoing their basement kitchen.
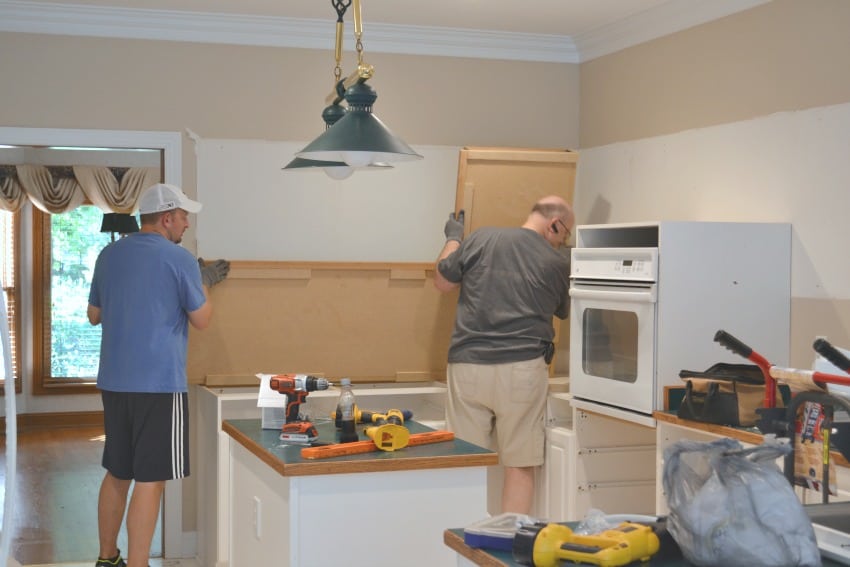
Then the job was turned over to our crew who removed the old and dated linoleum and sub floor. I won’t bore you with the details, but removing the old sub floor turned out to be one of the most difficult demo jobs in the whole house.
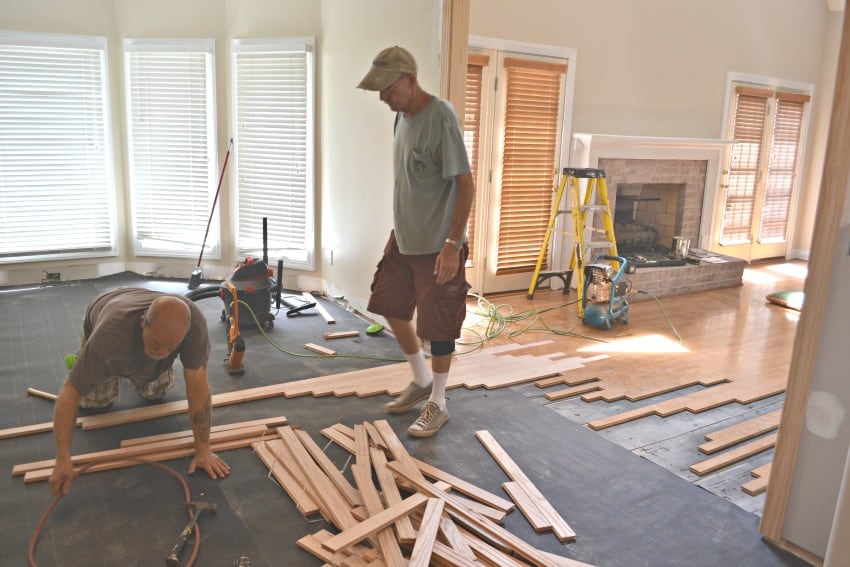
Ever so s-l-o-w-l-y things started to come back together. First came the hardwood floors, which had to be feathered into the adjoining family room and then stained and sealed with poly.
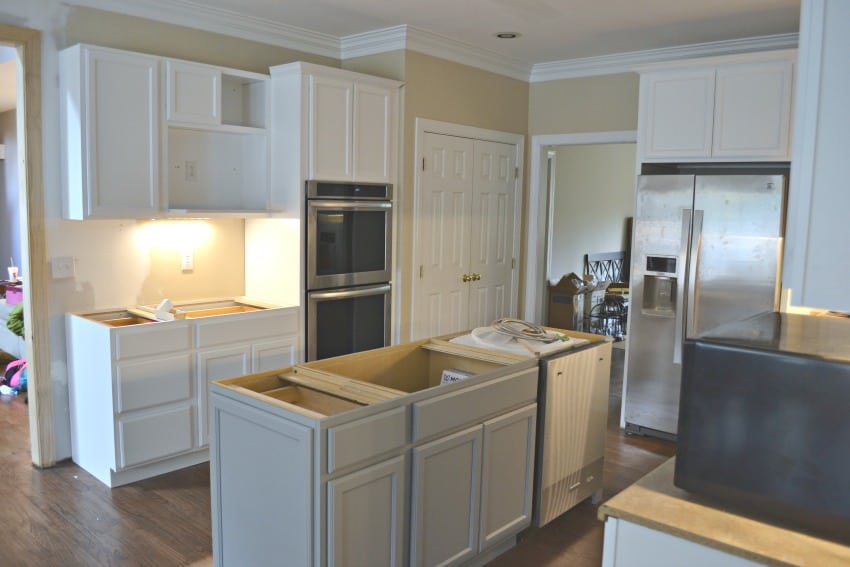
And finally, the new cabinets and kitchen appliances. Then began the long wait for counters and a backsplash. Oh, I was so impatient!
We had moved in at this point and were using an old piece of laminate, that we happened to keep, as a temporary counter on one side of the kitchen. We put an old microwave there and used the ovens for cooking more frozen meals than I care to remember.
All of the dish washing took place in one of our bathrooms. Fun times.
After many, many weeks our kitchen was finished and here she is today!
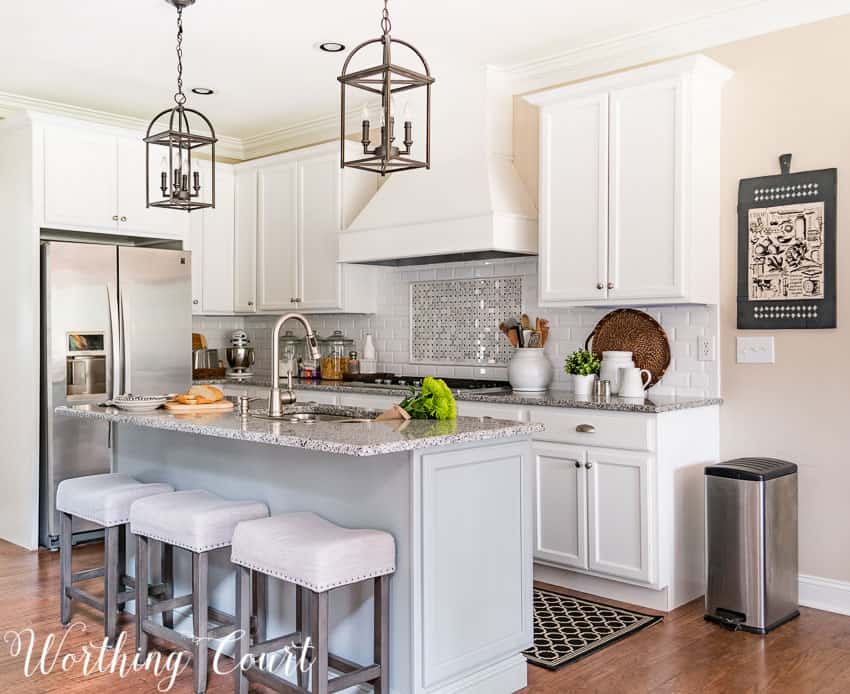
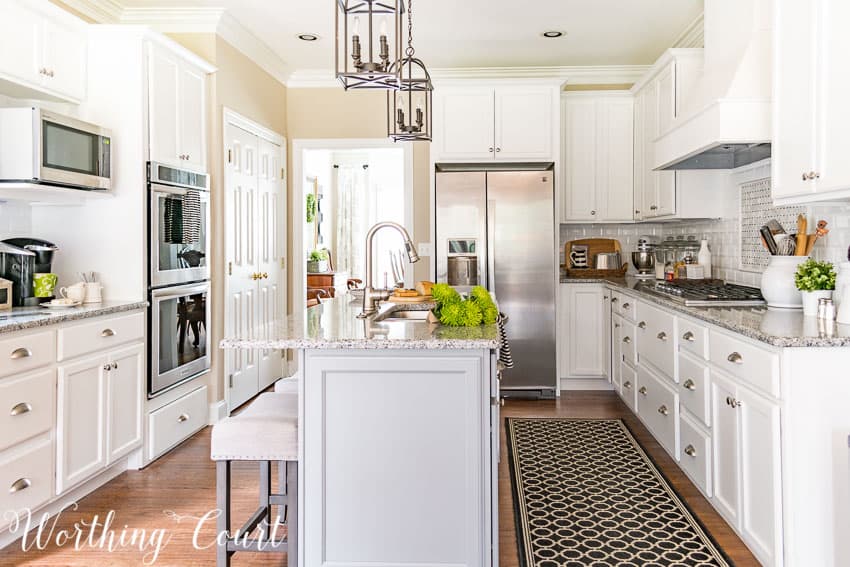
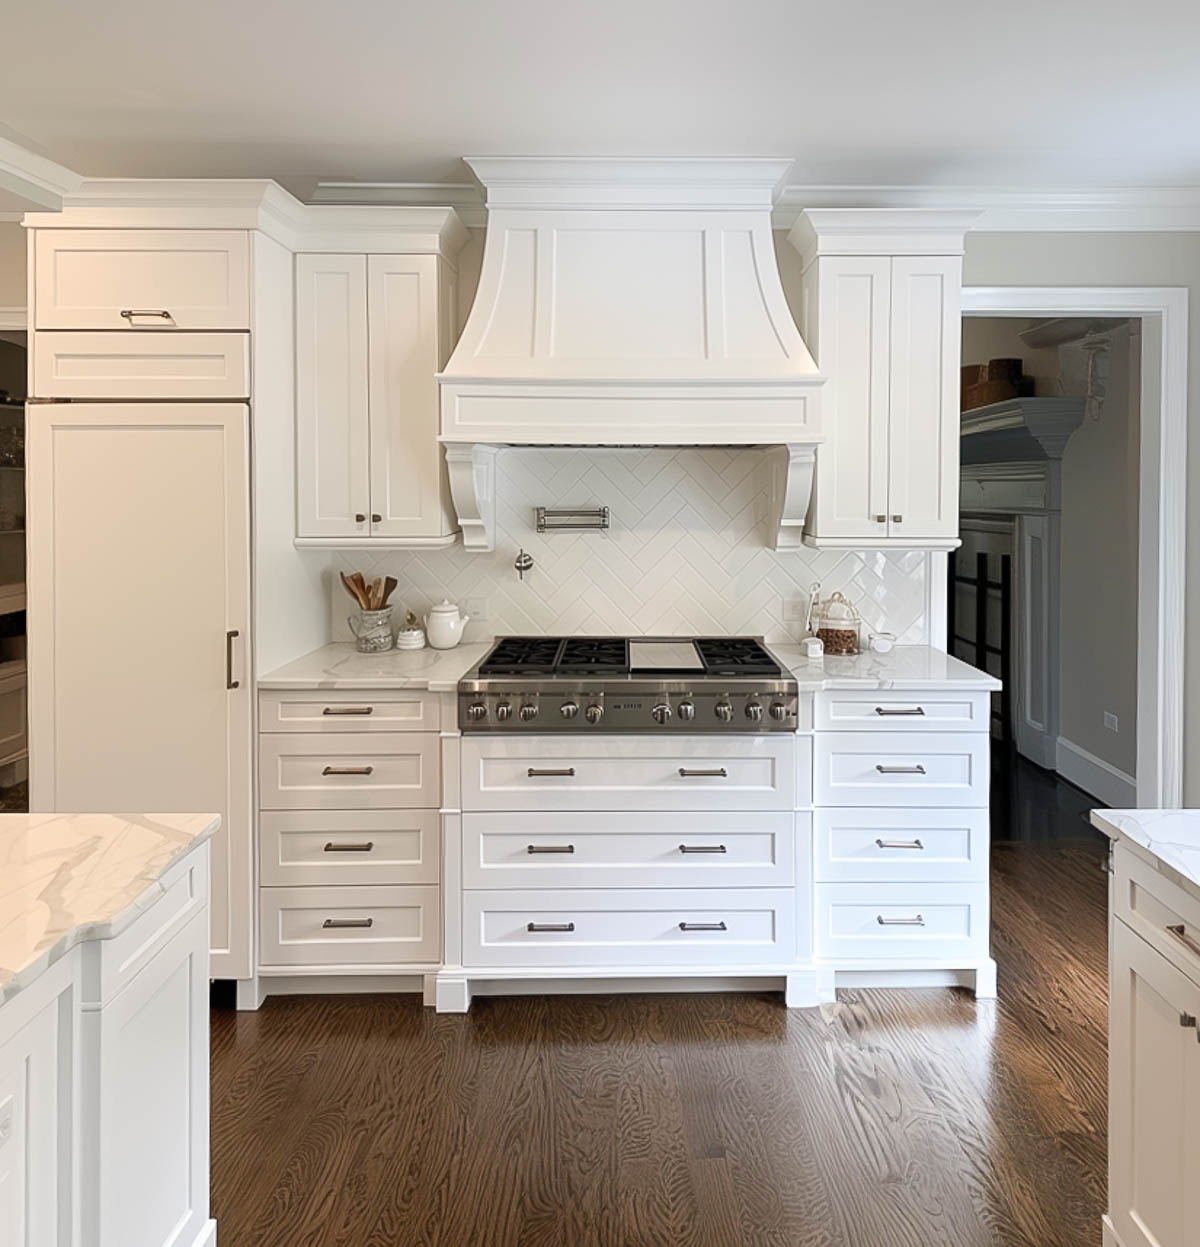
The one single thing in the entire kitchen remodel, that I wanted the most, was to have a large hood as a feature on one wall. I didn’t want a dinky oven hood either.
Our hood measures 48″ wide. For reference, the cooktop is 36″ wide. It makes quite the statement. 😀
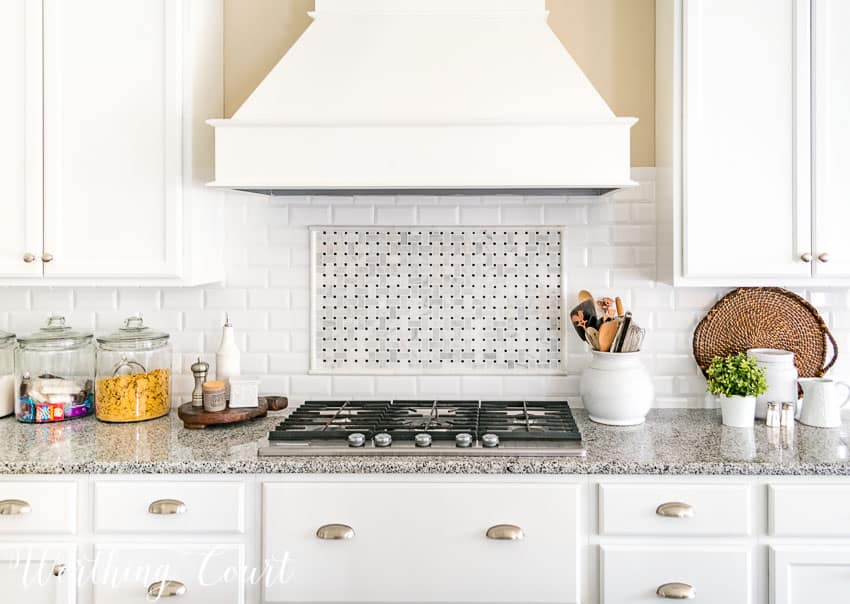
It’s usually the details that trip you up, right? Well, I pretty much knew everything that I wanted in the kitchen, but when it came to the backsplash, I froze.
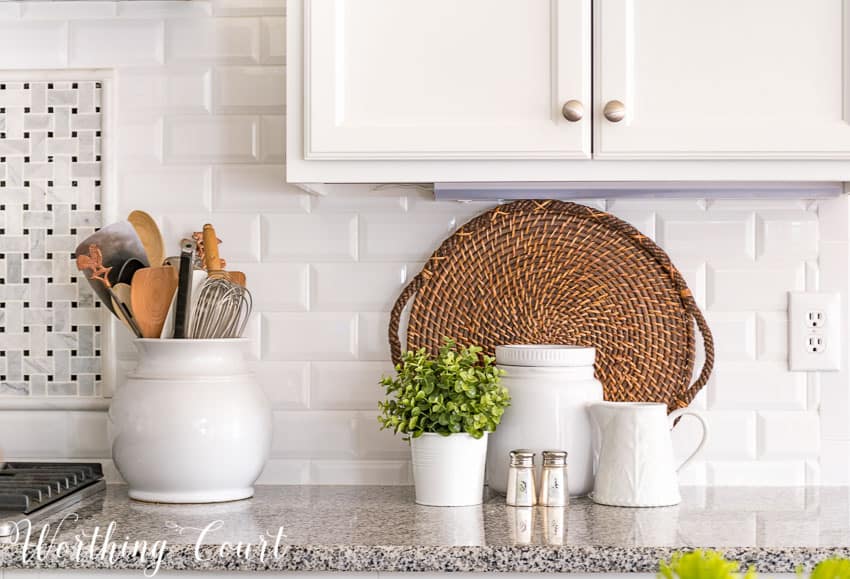
After bringing home a myriad of samples and visiting tons of local tile stores, I wound up using a simple, beveled edge, subway tile. The decorative tile inset above the cooktop is a carrera marble mosaic framed with Carrera pencil tile.
We found every bit of the tile at Home Depot.
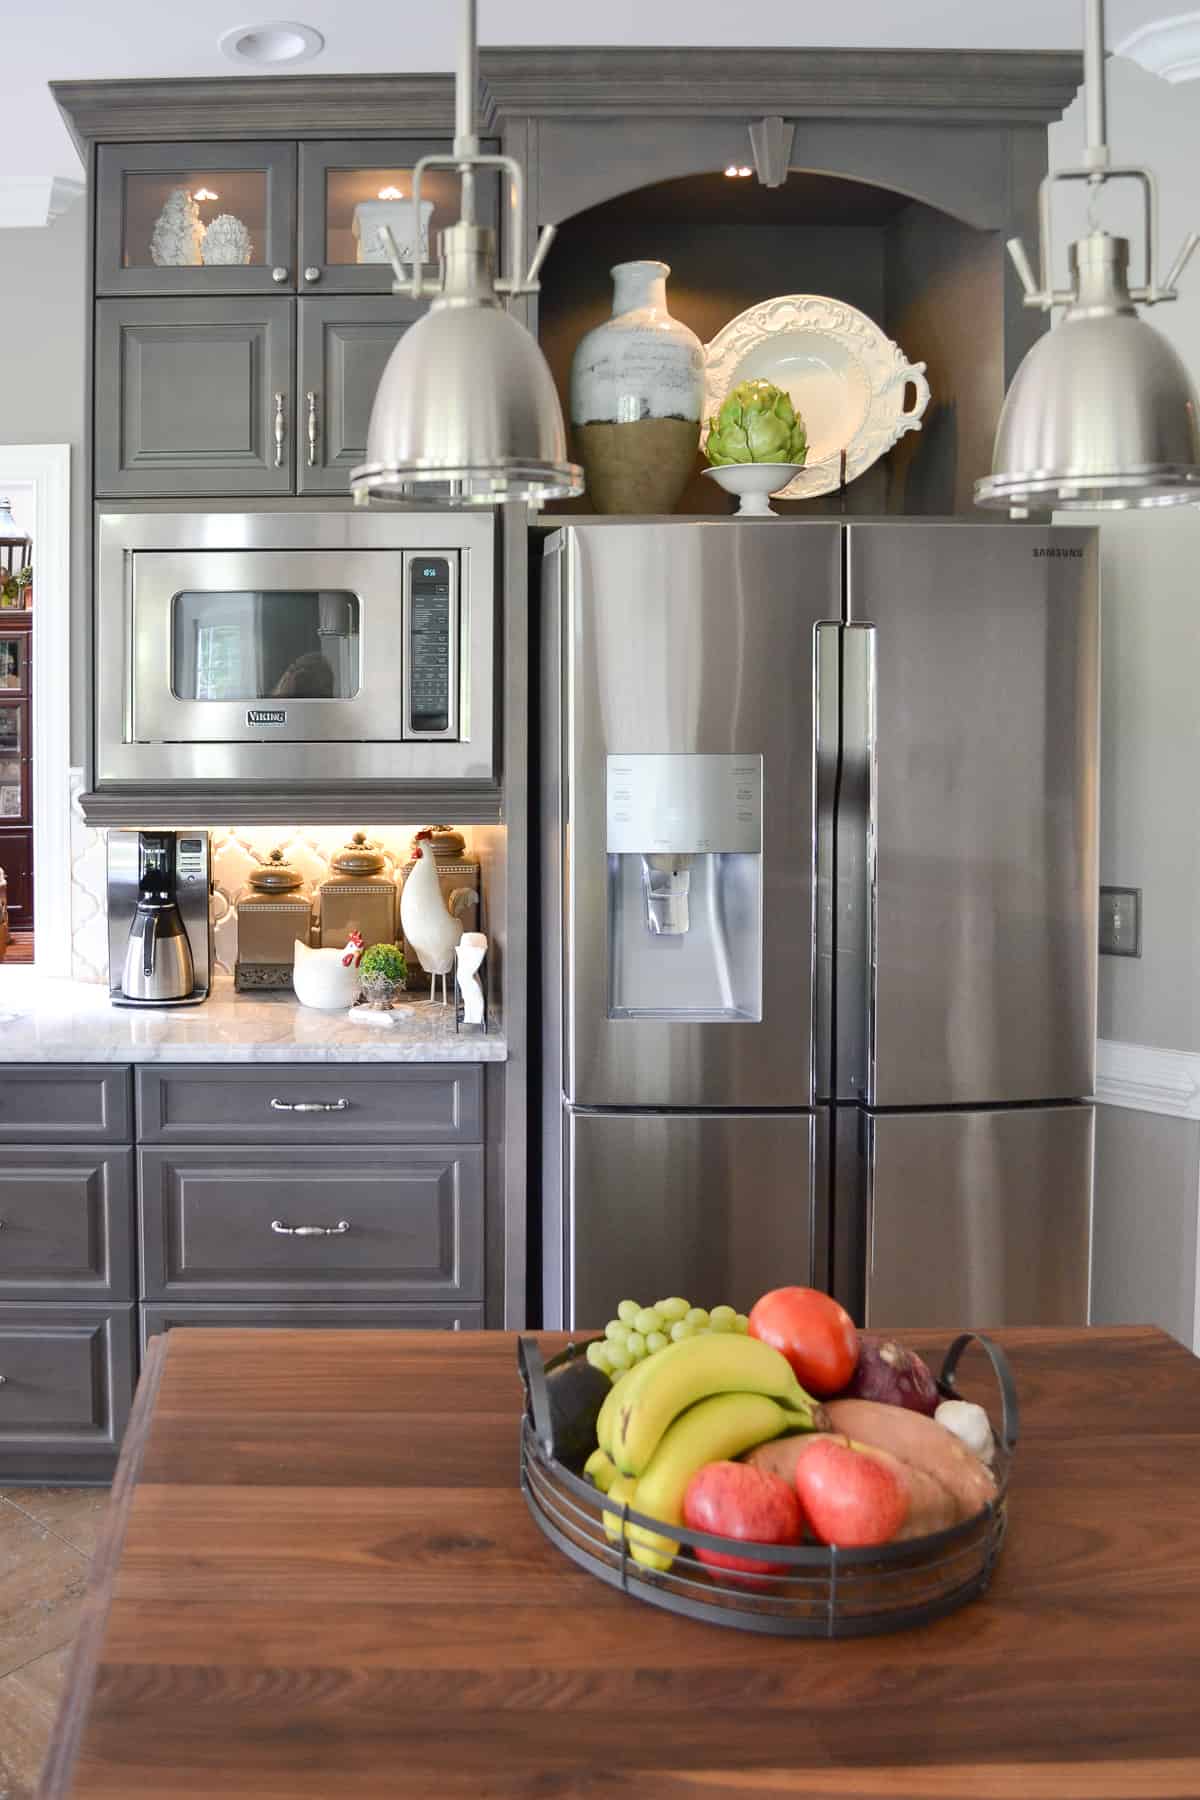
Instead of leaving the refrigerator in its original location, we moved it to the end of the kitchen. Panels were added to each side of it to give it a built-in look.
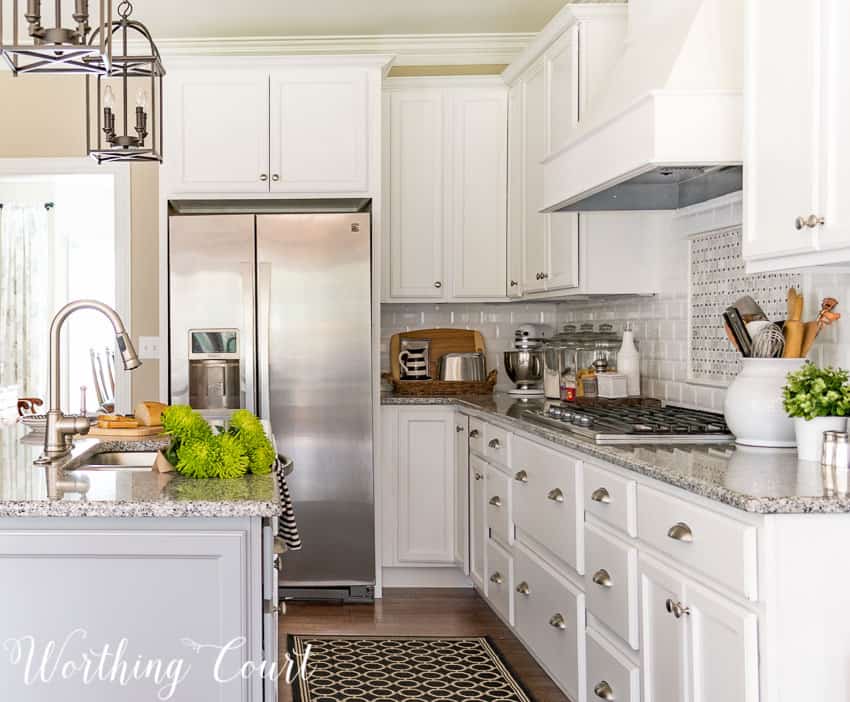
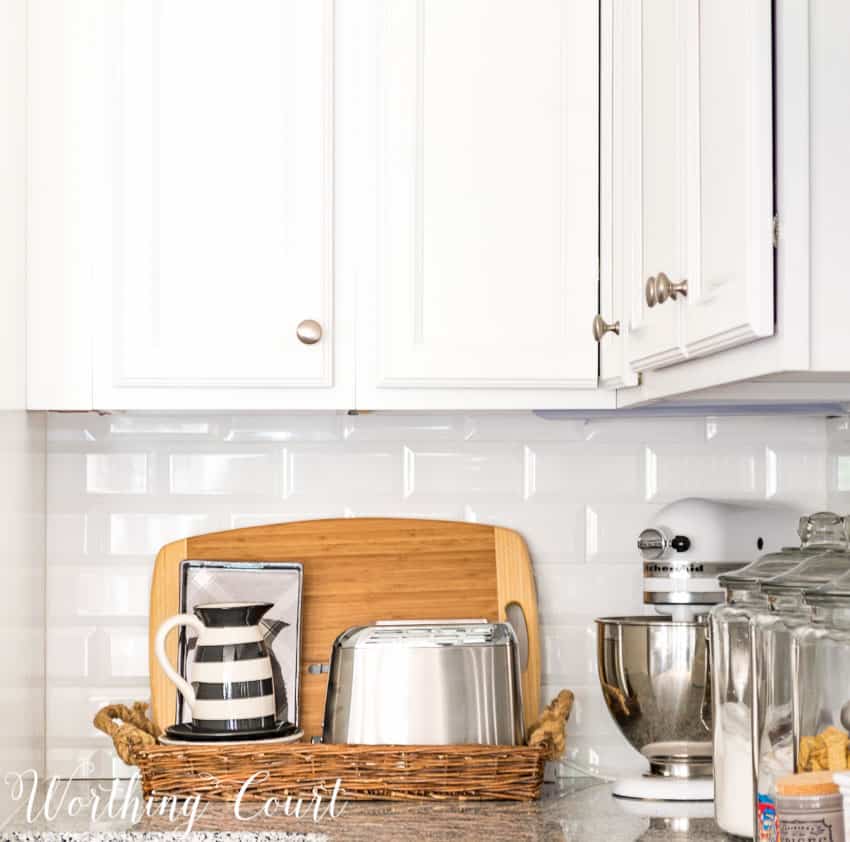
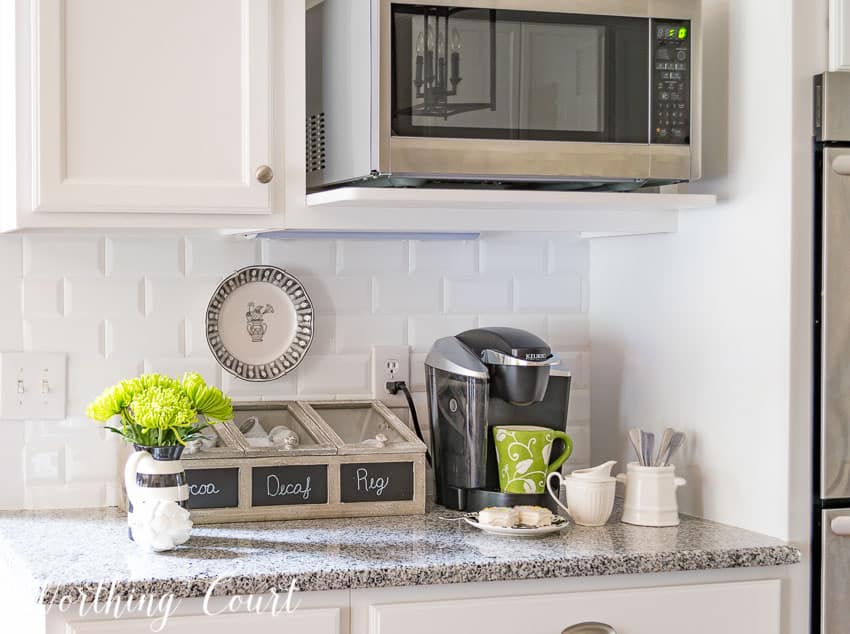
It turned out that the corner beside the fridge made a great little nook to tuck away our toaster and standing mixer.
Two wall ovens and the microwave were added to the opposite side of the kitchen, beside the pantry. The only thing done to the kitchen pantry was to give it a very thorough cleaning.
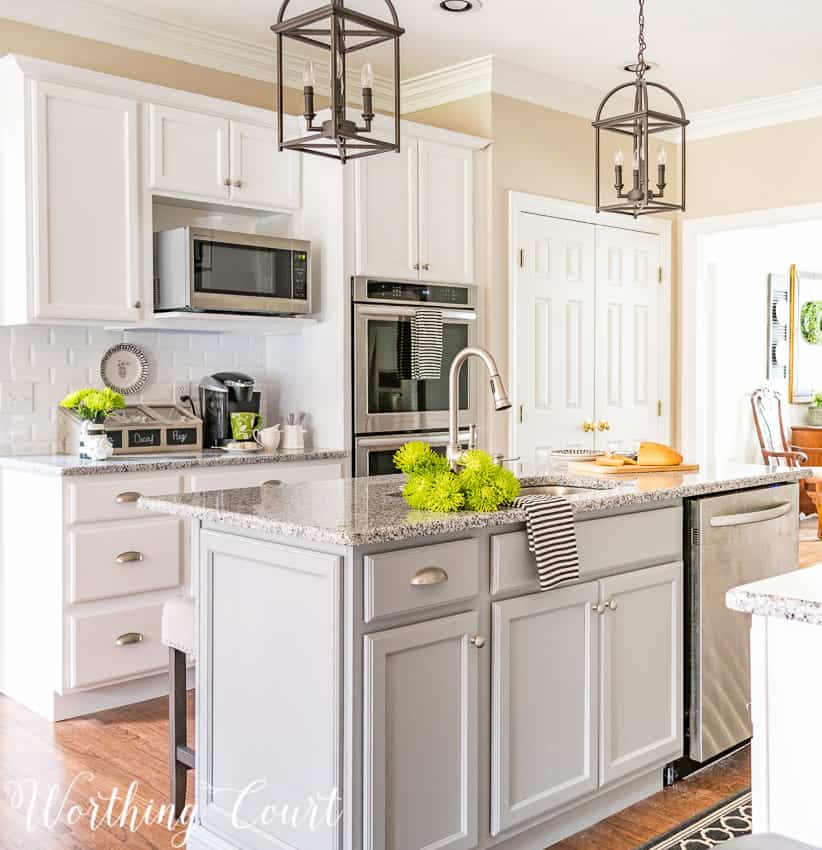
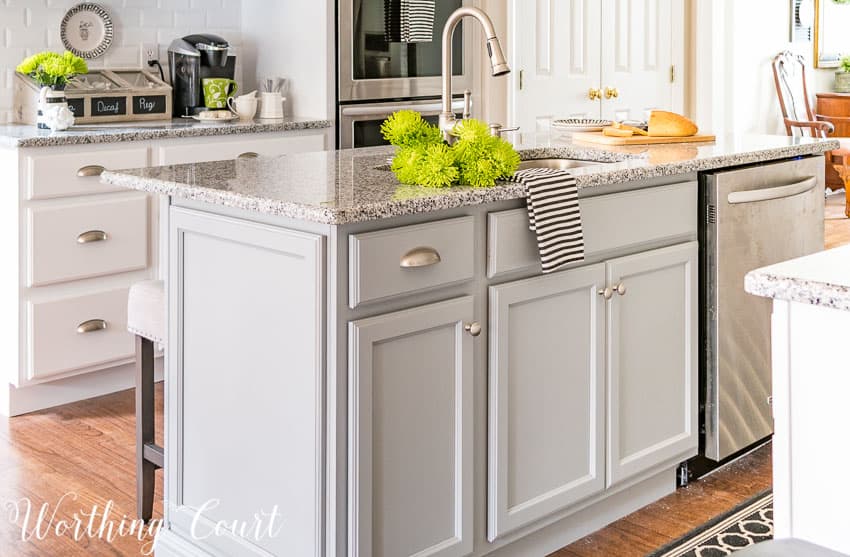
The counter beside the wall ovens is my coffee and hot beverage nook.
Many of our layout decisions were based on not only wanting to enlarge the island, but to provide counter seating as well.
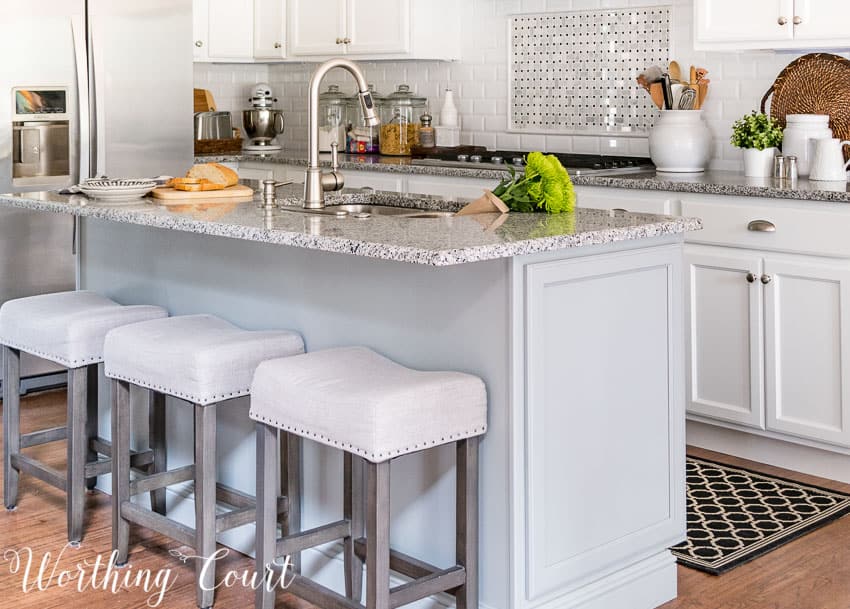
The original layout had the kitchen sink and dishwasher in the peninsula. We choose to eliminate the peninsula in favor of an island and placed the sink and dishwasher there.
The one thing that I could not get in our new kitchen was a large window above the kitchen sink. Boo. But in the end, I realized that it really doesn’t matter.
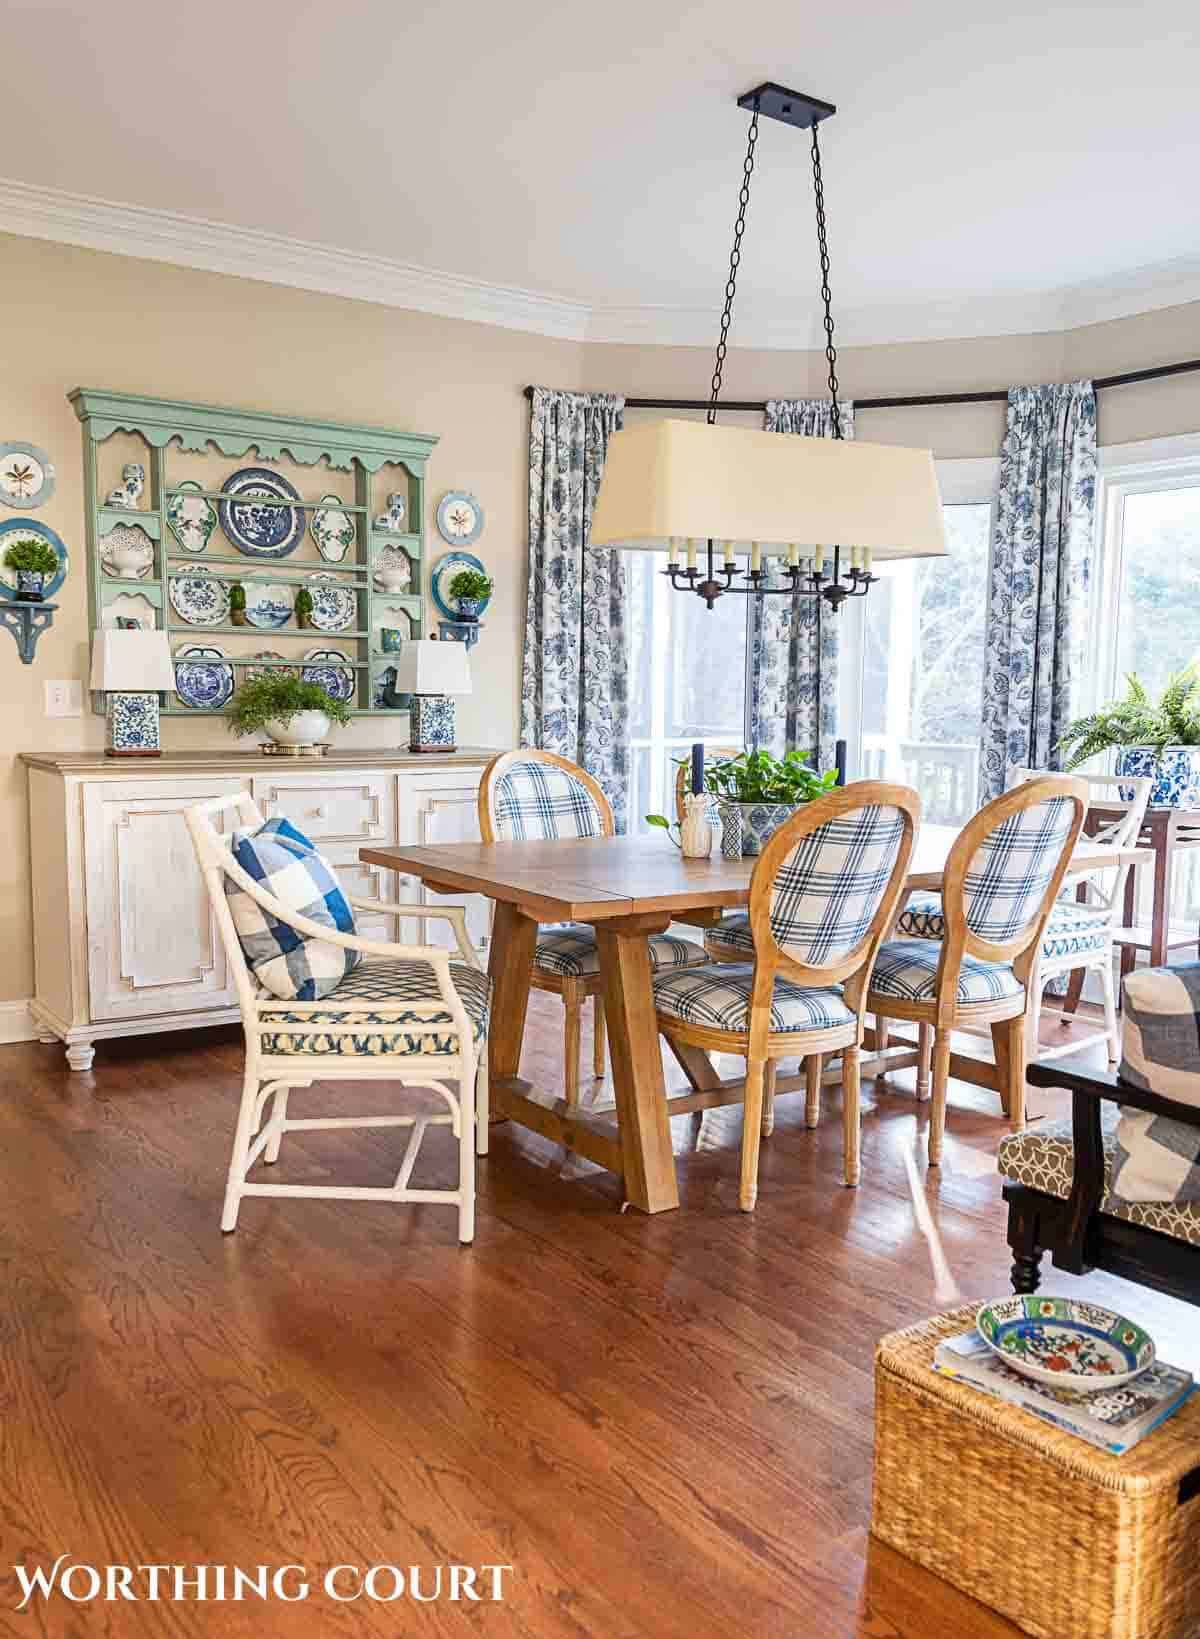
All I need to do is turn my head to the side to see out the windows of our breakfast area, which also recently got a makeover. Our kitchen is a long room with the breakfast area located at the other end.
For two people who have zero experience in kitchen remodeling and design, I’m pretty proud of the end result! It has turned out to be a very functional and easy kitchen to work in.
We gave it refresh once again! Here’s how it looks today after we changed the countertops and added updated accessories.
If you are looking for some decor inspiration, you may want to check out these 7 Ways to Warm Up a White Kitchen.


It turned out beautiful!!!
Thank you so much Penny!
Suzy,
I absolutely love your kitchen! Everything about it is wonderful. I want to come cook in your kitchen and the way you’ve set up your sink and dishwasher I’d even do your dishes! All of that to say It is gorgeous and functional and I know you’re finally enjoying it! Good work guys!
Aw – you’re so sweet, Dolly. You can come over and cook in my kitchen anytime!!!
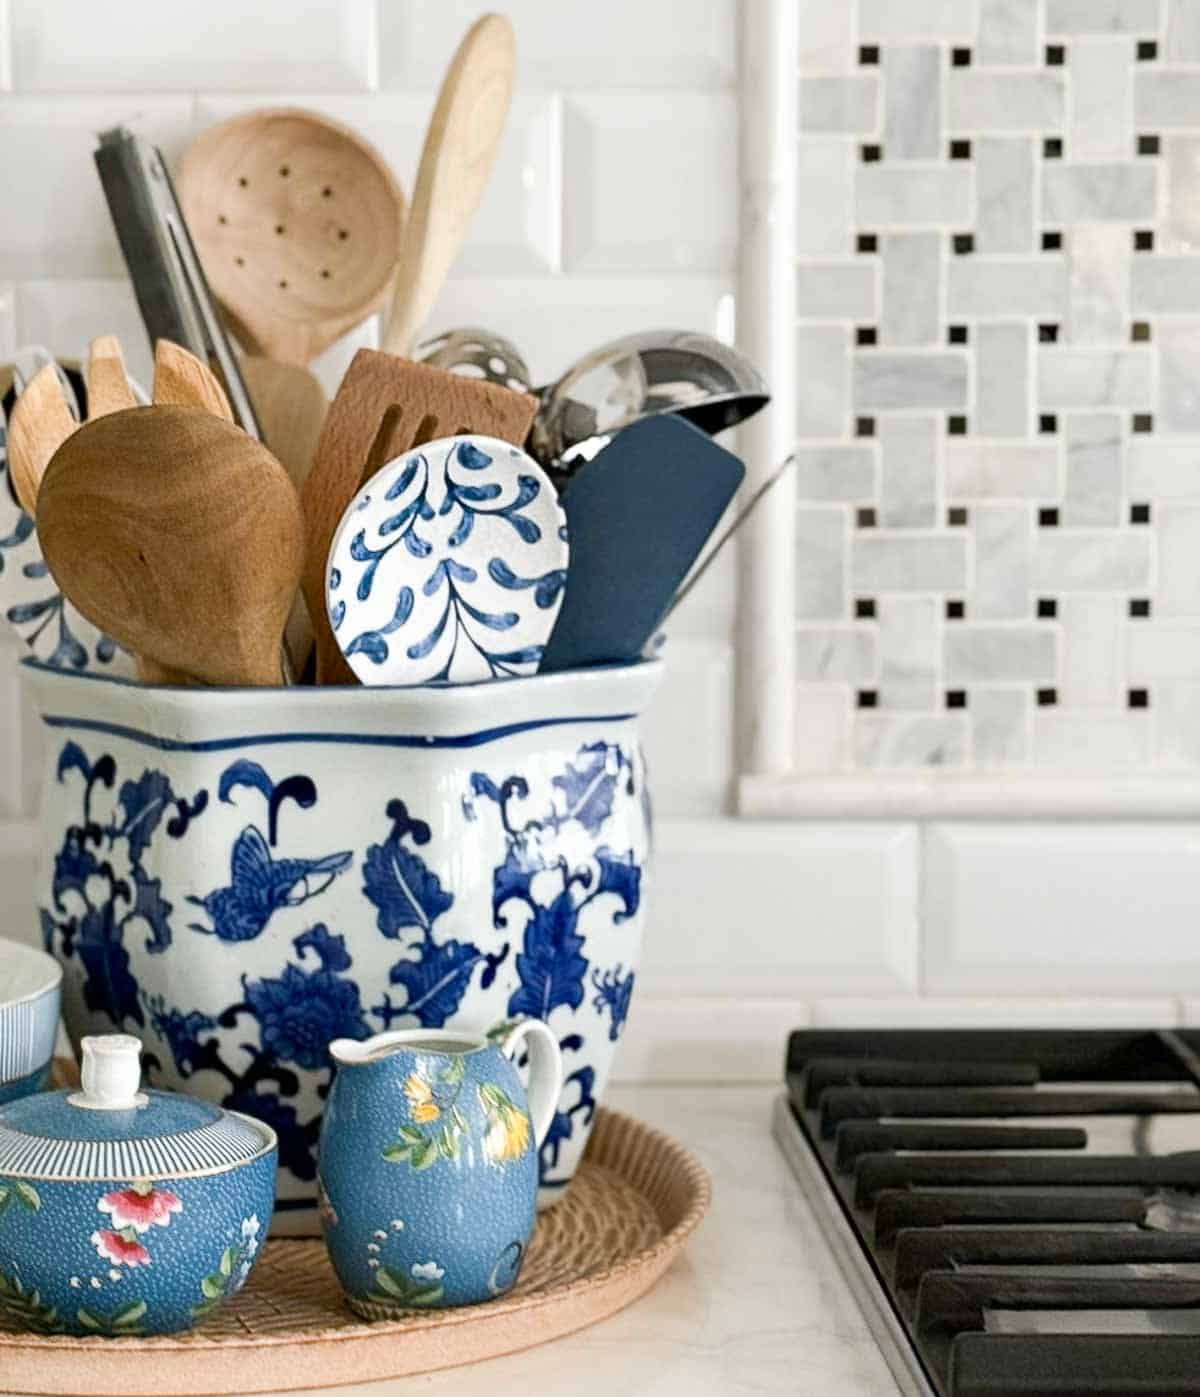
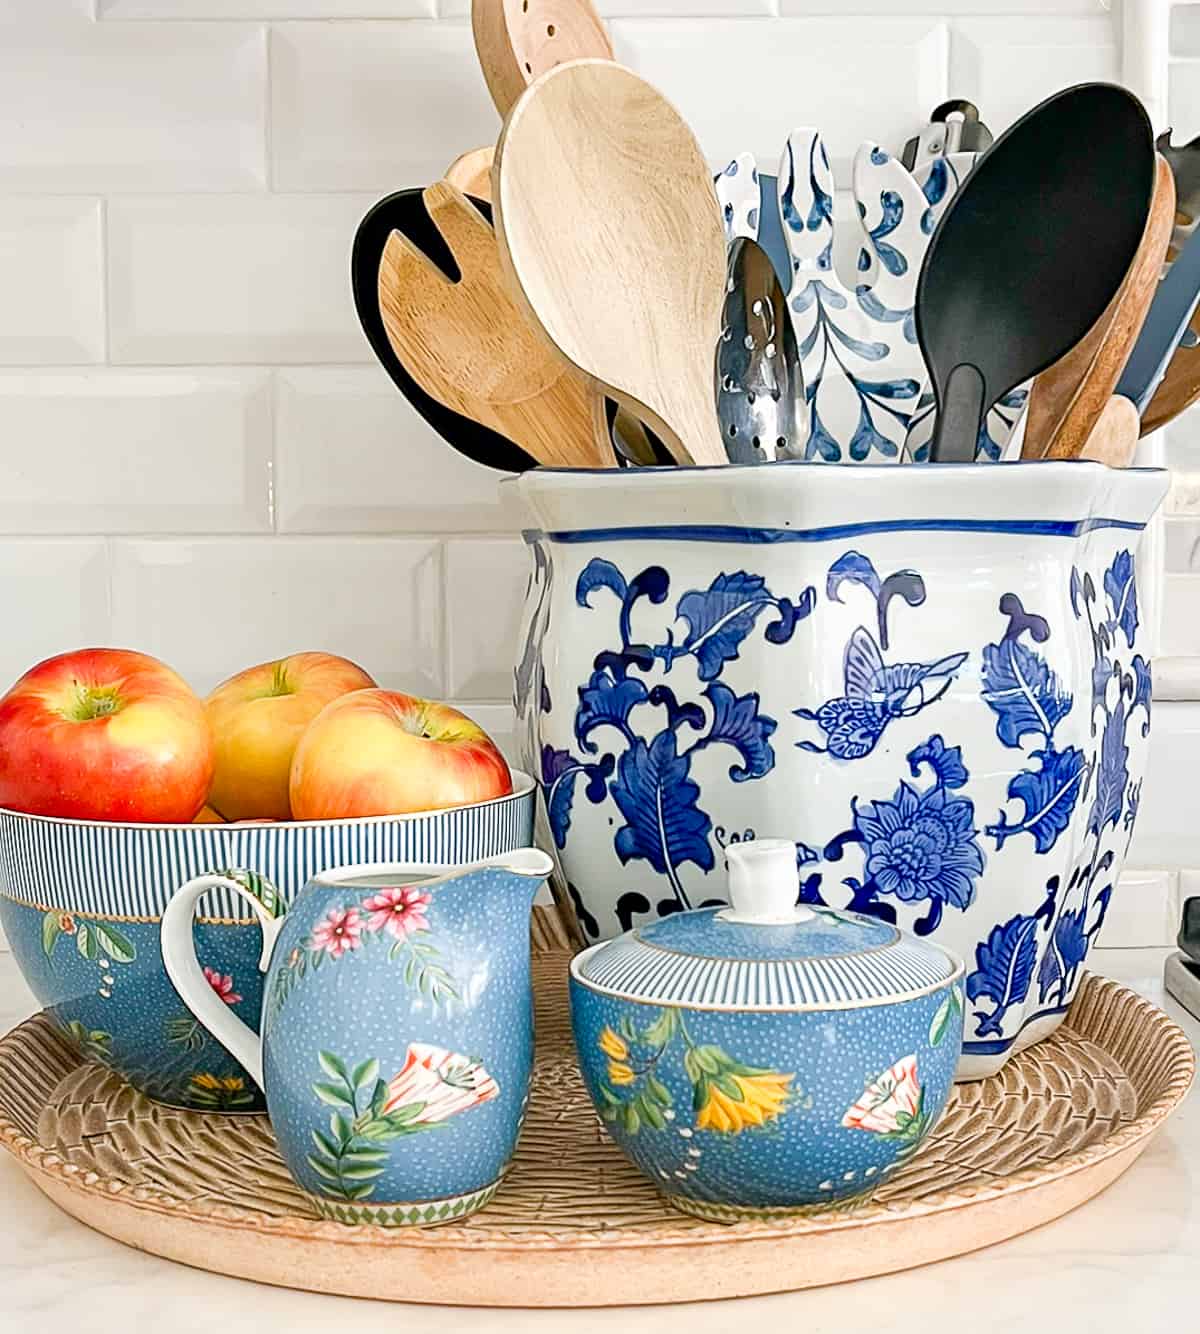
There are so many great details! One thing I really like is the different colored island cabinets. Do you remember where you got the white crock you store utensils in by the range?
Hi Anna. I’m pretty sure that I got the white crock at TJ Maxx.
Thanks, Suzy!
I love a white kitchen and this one is beautiful and functional. I’m impressed.
Thank you so much, Faye!
It turned out super! Love your materials. We are in the process of redoing our kitchen – kept the cabinets and layout as is but new countertops and backslash will transform it. I, too, wanted a big goer window over my sink but it is not to be. You are fortunate to have the view from your dining area. Oh well. We can’t have everything. I’m just glad to get rid of the Formica!
Hi Cecilia. I know what you mean – I was glad to see that Formica go too. Have fun with your makeover!
It is beautiful GF! I love your final choice of the beveled subway tile and basket weave Carrara tile. The perfect final touch!
Thank you so much, sweet friend! You may remember how much I agonized over what to do for a backsplash.
A most beautiful remodel!!!!
Thank you, Shirley! Hope y’all are doing well.
I love the remodel. It’s beautiful!! Please let me know where you found those great counter stools. My kitchen is currently being remodeled and the
cabinets are white Shaker , Carrera Marble countertops with light gray walls and dark gray tile floor. The stools are exactly what I’m looking for!!
Hi Donna. So glad you like my kitchen! The stools came from Target. As far as I know they’re still available – I saw them in the store just the other day. Mine are counter height, not bar height, but I think they’re available in both sizes. Hope you’re having fun with your remodel – your finishes sound beautiful.
Your kitchen is stunning, Suzy. Both In pictures and in person. You did a fabulous job with it!
Thank you sweet friend!
Your kitchen is beautiful! It’s so inviting, just like the rest of your lovely home. Your rearrangement of elements and appliances make it look so much bigger and gives it a wonderful flow!
What an amazing re-do. I love seeing the “before” and “after” projects. I’m addicted to HGTV. Your island is beautiful. I enjoy all of your blogs.
Such a beautiful transformation, your new kitchen is lovely!
Love love your kitchen remodel!! How long did the project take? We’re thinking of remodeling our kitchen but i’m just not sure I can live so long without it!!
Thanks,
Denise from Texas
Hi Denise. It’s kind of hard for me to give you a specific answer. We purchased the house at the end of July, but didn’t move in until the end of September. We started the remodel immediately after purchasing the house, but things were being done all over the house at once – not just in the kitchen. So I guess you could say that we started the remodel in July (demo), but didn’t get the counters installed in the kitchen until sometime in October, I think. We really dragged our feet and didn’t get the backsplash done until after Christmas that year. We don’t have small children living at home anymore, so that made the whole thing a bit more tolerable.
It is stunning! What a huge undertaking…all your hard work certainly paid off!
I seriously love your kitchen! What subway tile did you use? I love the shape of them! I am such a fan of white farmhouse kitchens!
Glad you like my kitchen, Chelsee! Our beveled subway tile came from Home Depot. I don’t remember exactly which brand it was, but here’s a link to several that they carry: http://www.homedepot.com/s/beveled%2520subway%2520tile?NCNI-5 . Hope this helps!
Thanks for the link! I love the beveled edge tile! I am in the middle of an enormous house reno and I so love this tile. I have a farmhouse that I am remodeling and every bit of reno inspiration/tips helps!
Your kitchen turned it fabulous Suzy and how fortunate that everything worked together in just the way it did so you could do some rearranging of the layout. It is a much better one now. We did one kitchen remodel ourselves and it’s a good feeling isn’t it? You and the hubby can be very proud of your hard work.
Blessings,
Patti
I am smack in the middle of trying to make major decisions about our kitchen remodel and must say yours turned out wonderfully! A question I have in trying to configure my own is this: how much space is there between your island and the closest run of cabinetery? I’ve heard 45″ is ideal, 42″ is good and 36″ is acceptable. What are your thoughts, please? Any advice you give will be greatly appreciated!
Hi Carol. This is something that we really struggled with. We heard the same things you did about the ideal measurements, but I really wanted to have a large enough island to have an overhang for stools to tuck under. We have 37″ between the island and the counter on the oven side of the kitchen and 33″ between the island and the counter on the dishwasher side of the island. If you look at the photos, it appears that the island is located in exactly the center of the kitchen though. Our reasoning was that we wanted to be sure that if a hot oven door was opened while someone was sitting at the counter they wouldn’t be burned. Even though there are only 33″ on the dishwasher side, we can still open the dishwasher door all the way and can walk by it while it’s open, if we’re careful. I really helped us to determine our measurements by taping everything out on the floor with masking tape once all the old cabinets were gone. Good luck with your remodel!
Thank you so much! We have 37″ on either side to work with so I believe an island is now a “go” in our renovation plans.
Wow! The kitchen and floor turned out gorgeous!
What a beautiful transformation! I especially like that you were able to find a home for the cabinets! I love the tiles you selected as well as the backsplash on the stove. I’m definitely keeping this for a future reference. When I get around to remodeling my kitchen, I’ll be using yours as an inspiration. Thanks for sharing this with us on #shinebloghop, Suzy!
Wow, that doesn’t even look like the same room – beautiful!! 🙂 Thank you for sharing with us at the #HomeMattersParty