How To Make A Moss Bowl + Creative Examples
A DIY preserved moss bowl is one of the easiest diy projects you can do this season to add a vibrant pop of pretty spring color to your home!
Seriously, you’ll likely spend more time gathering supplies than creating a beautiful moss-filled bowl.
One of my favorite things about them is that they qualify as an indoor plant that is about as low maintenance as you can get.
By using different containers, they will fit in with any style of home decor and can be used just about anywhere.

This post contains affiliate links to products for your convenience. See my full disclosure HERE.
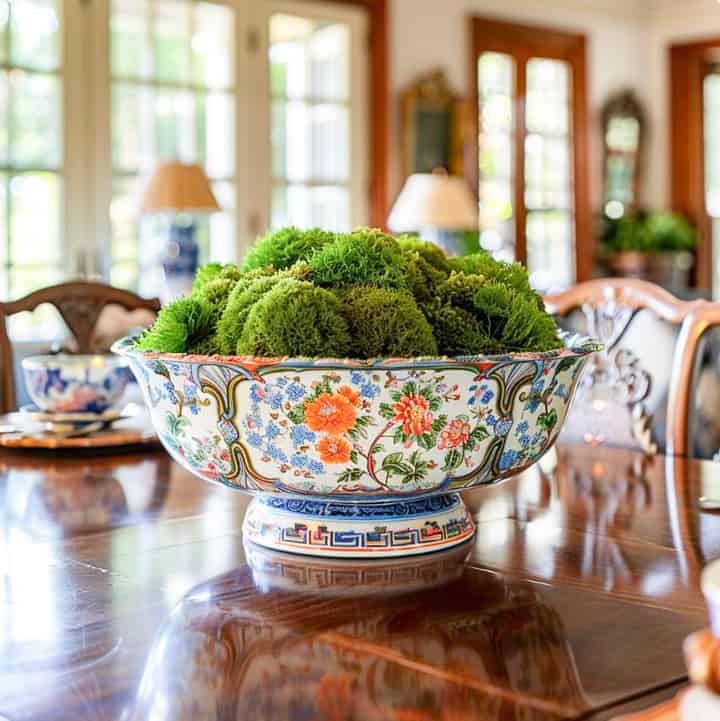
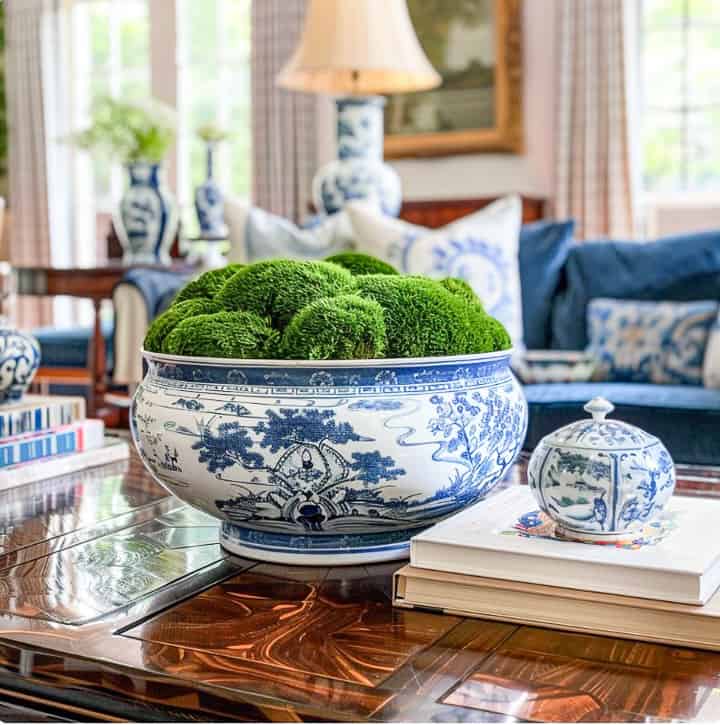
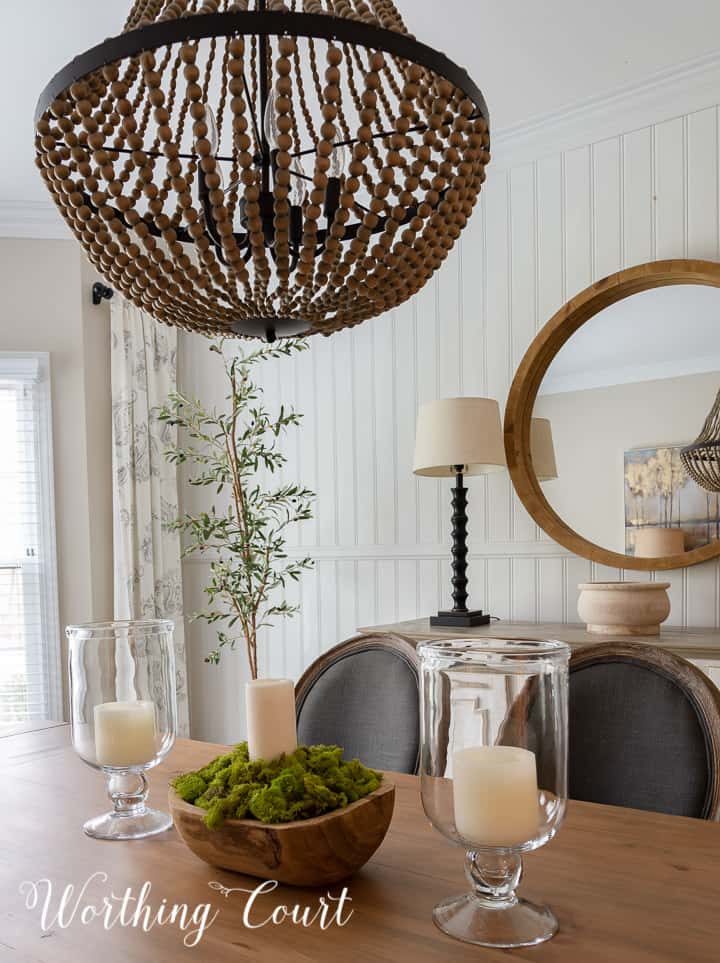
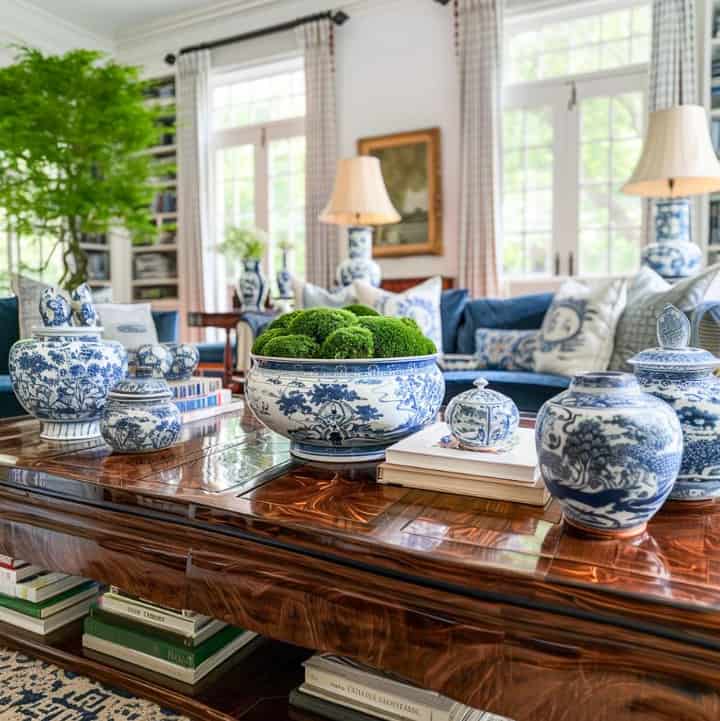
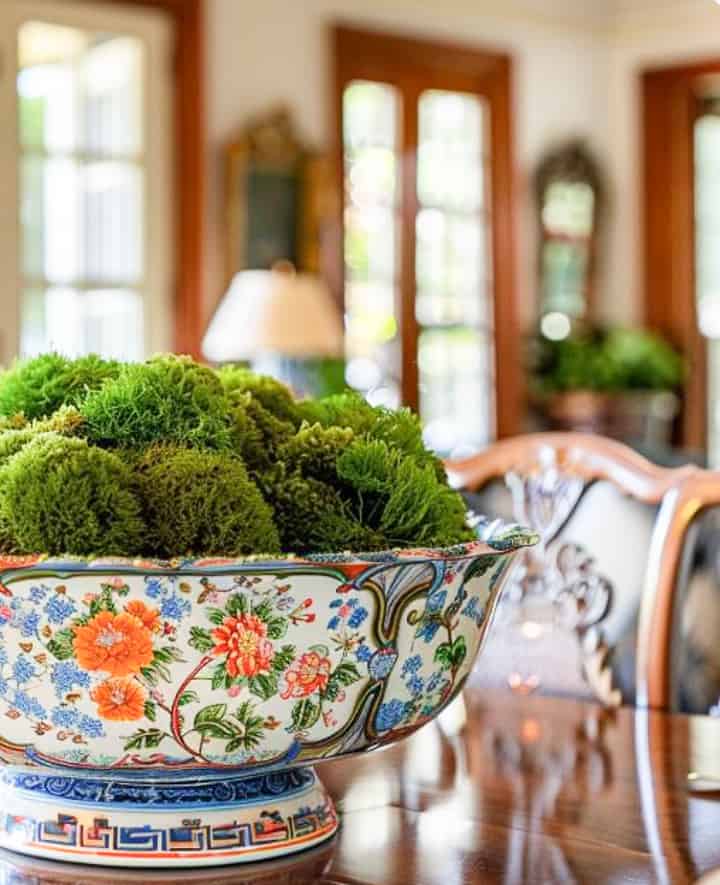
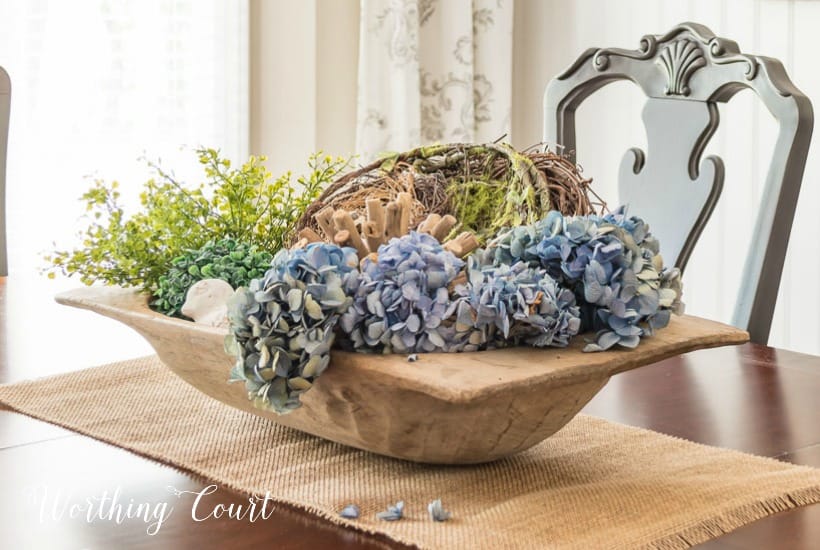
A chinoiserie type of bowl looks beautiful on the dining table in a dining room. Look at how beautiful the vibrant green is with the colors in the bowl.
Don’t worry about the size of your bowl being large enough. You can make one in literally any type or size of container.
It doesn’t even have to be in a bowl! Trays, baskets, and pedestal bowls all work well, as you’ll see in my examples below.
PLACES YOU CAN USE A MOSS BOWL
- As a centerpiece on your table.
- On a coffee table.
- On a side table.
- Tucked into a shelf display.
- On a sofa table.
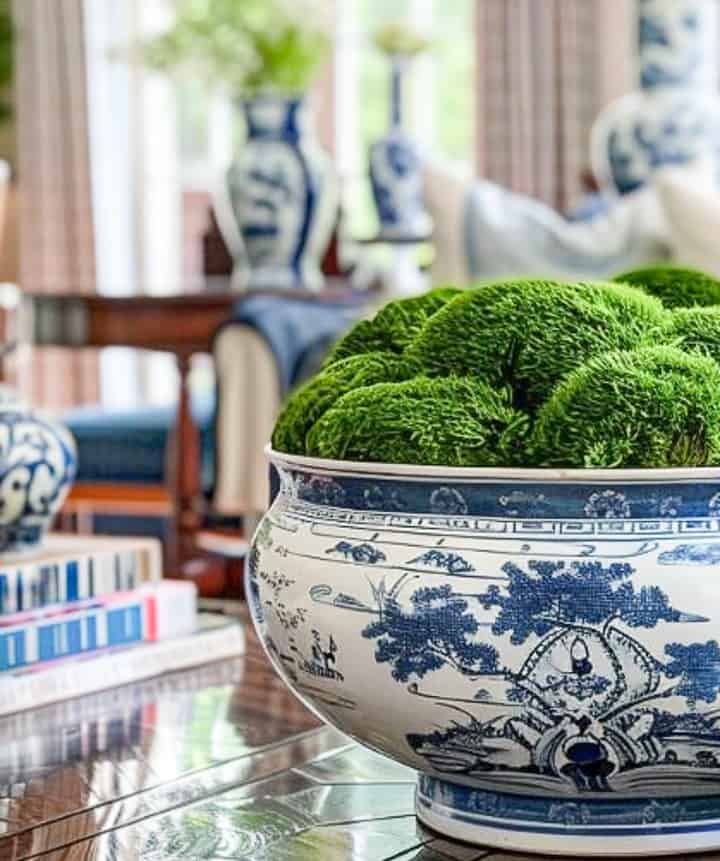
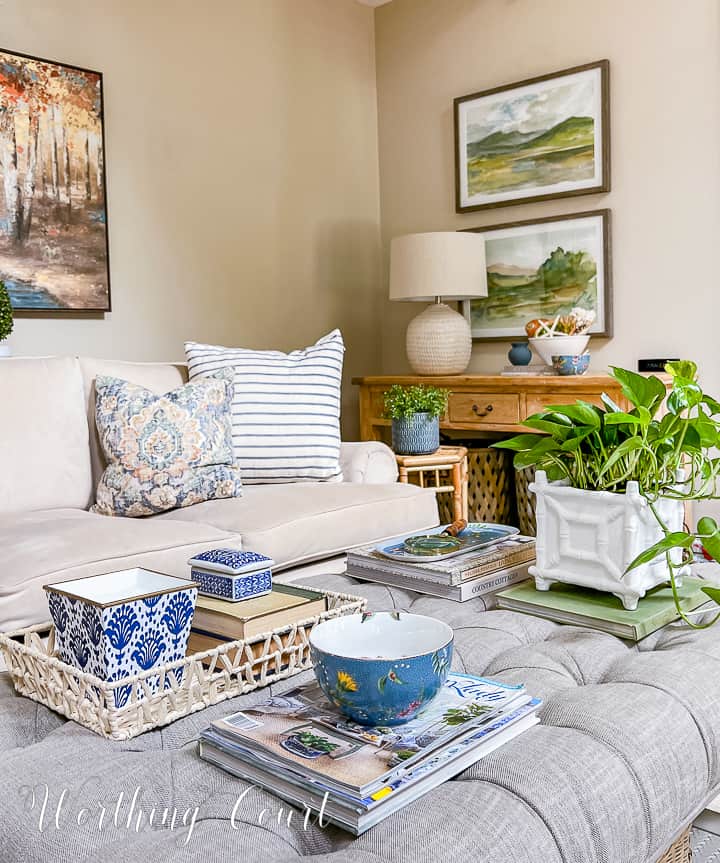
Create a diy moss bowl centerpiece for your coffee table in a pretty blue and white bowl.
The possibilities are endless!
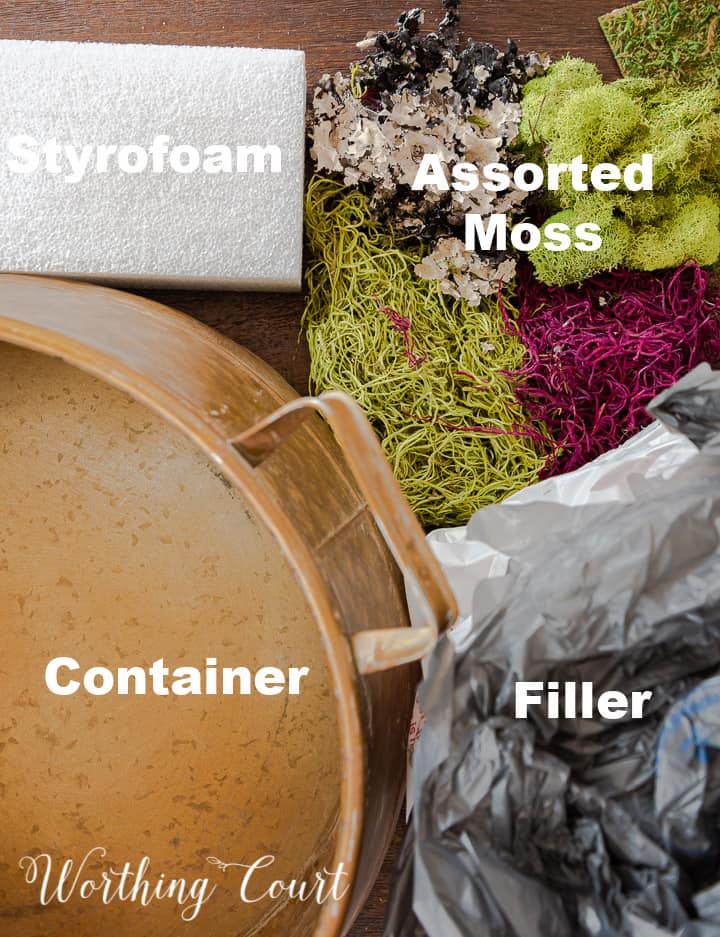
Supplies to Make a Basic Preserved Moss Bowl
To get started, you only need a few basic items.
- a container
- different kinds of moss (I’m using preserved moss.)
- filler for the inside of the bowl (types of filler can be floral foam, plastic shopping bags, etc)
- hot glue gun, possibly.
How to Make Your Own Moss Bowl
To put together a basic moss bowl like this one, you only need a container, filler material, sheet moss, and reindeer moss.
You can purchase sheet moss HERE and preserved reindeer moss HERE.
- Place filler in your container.
- Cover filler with sheet moss (do not peel the backing off to reveal the sticky part).
- Arrange reindeer moss on top of the sheet moss.
Using sheet moss as a base covers the plastic bags and provides a stable base for holding the reindeer moss.
I typically don’t need anything to attach the reindeer moss to the sheet moss. It naturally grabs and holds in place. If a piece happens to get knocked off, it’s simple to put it back into place.
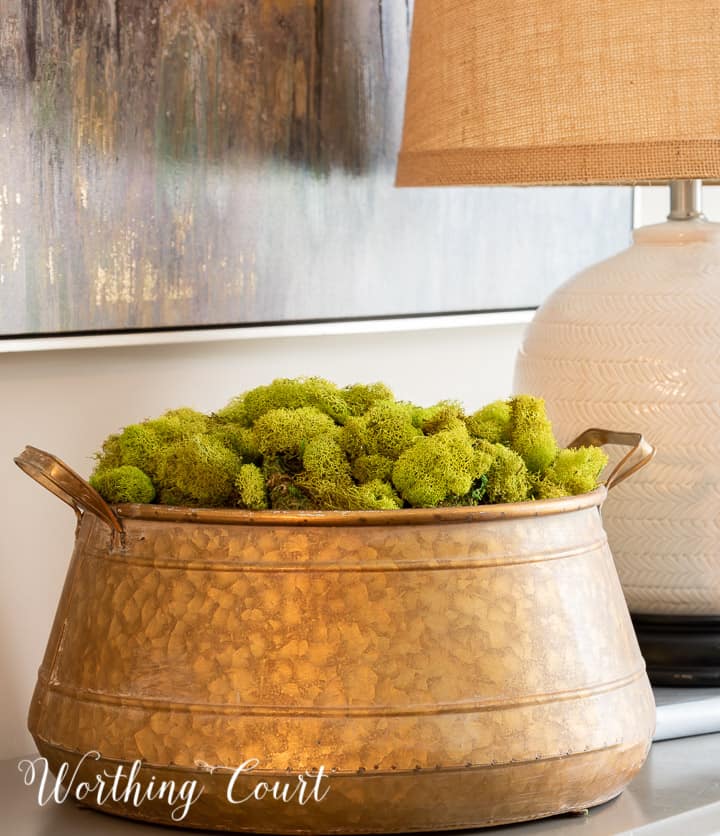
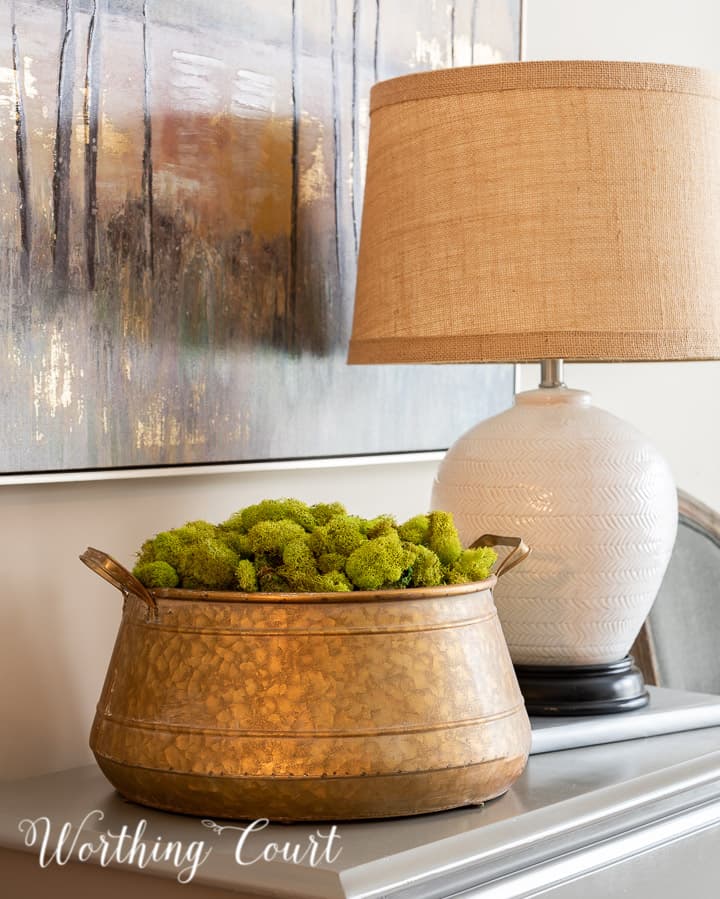
TIP: Moss bowls look best when the top is mounded, so be sure to use enough filler to get that look.
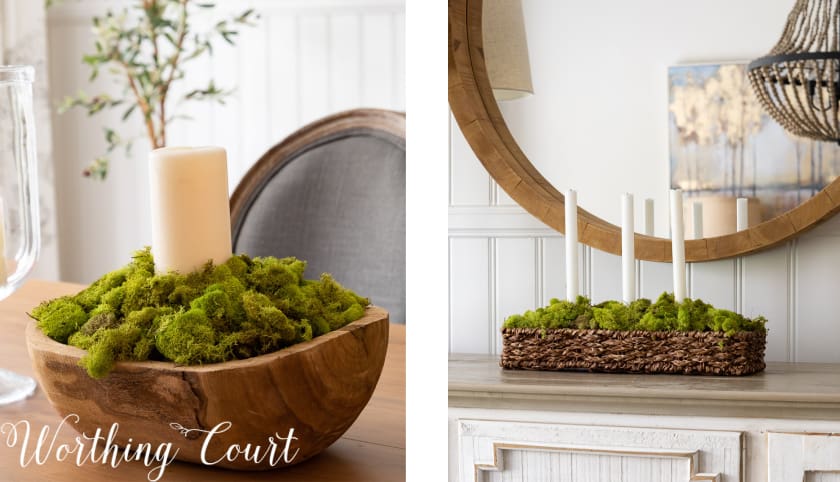
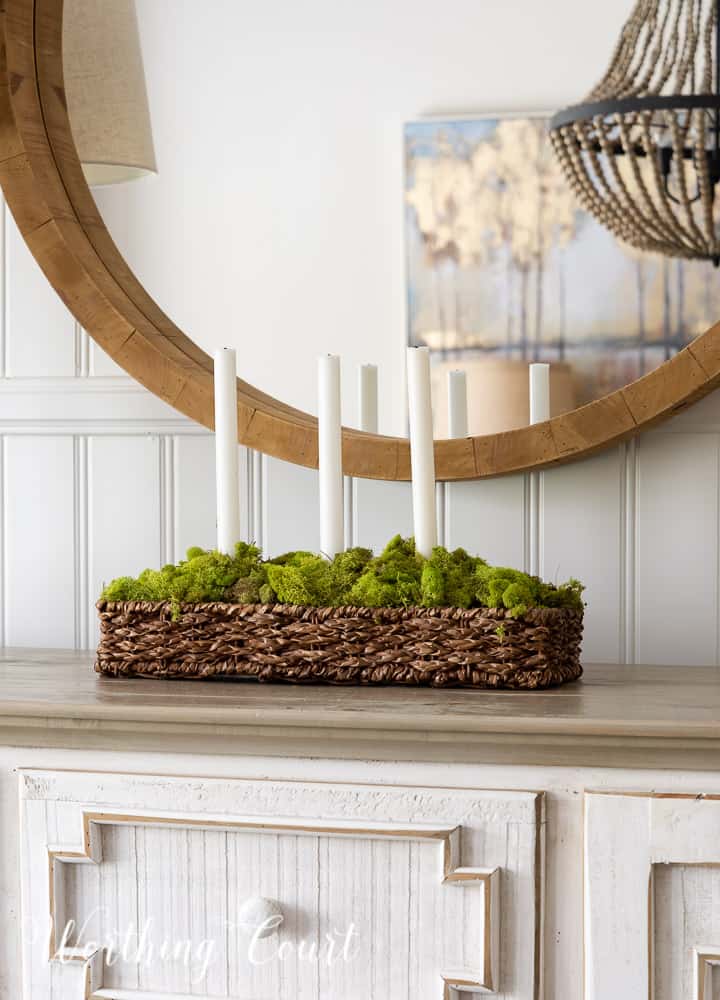
A Moss Doughbowl or Tray with Candles
For these next two arrangements, you’ll need:
Here’s a little step-by-step photographic assembly guide for you. My vintage wooden bowl is a little bit wonky, which is what makes it appear to be crooked. 😀
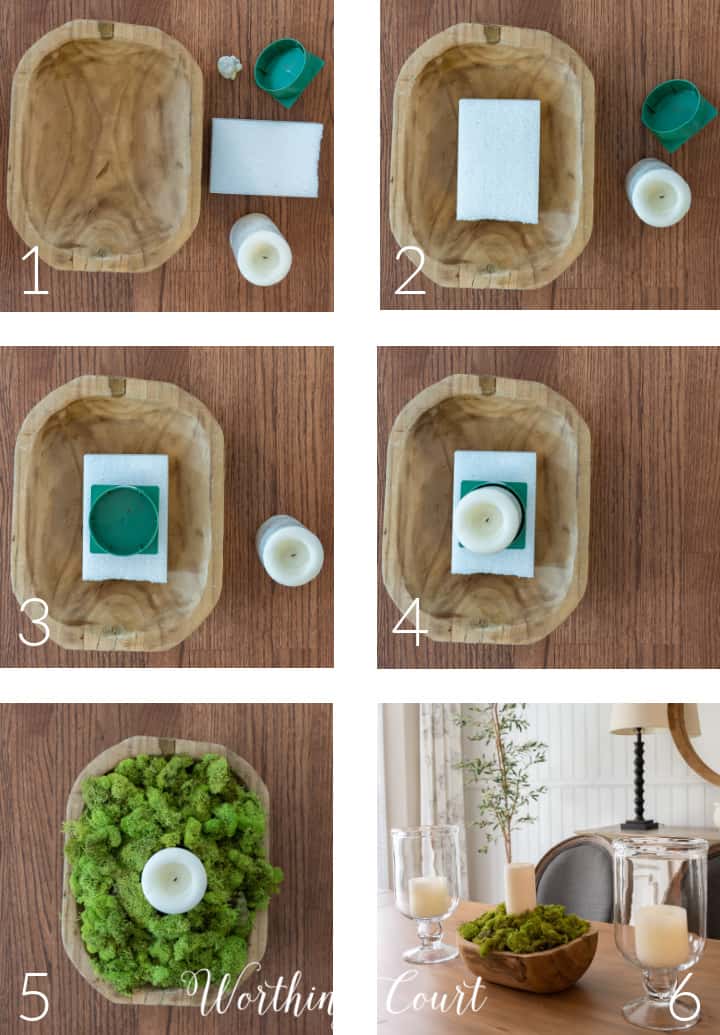
- Shape the removeable adhesive putty into a ball, press down into the center of the container, and press the Styrofoam block onto it.
- Press/push the candle stake(s) into the center of the Styrofoam until secure, then place the candle(s) into the stake(s).
- Fill in with reindeer moss.
TIP: You may not need to add sheet moss if you have a thick layer of reindeer moss.
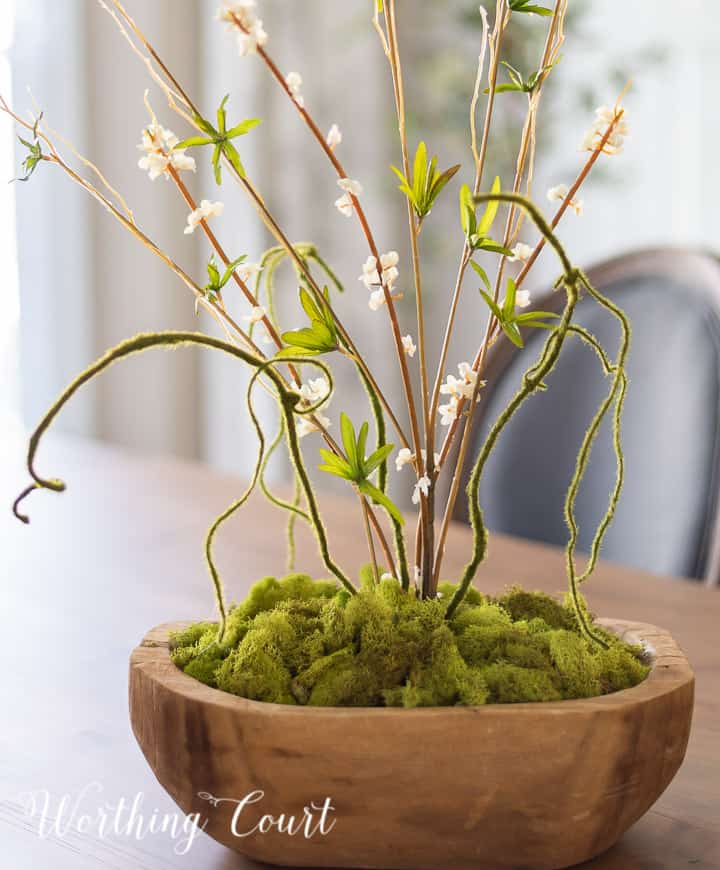
Making a Moss Bowl Centerpiece
To turn your creation into a centerpiece with a little drama, add faux stems to give it height and presence.
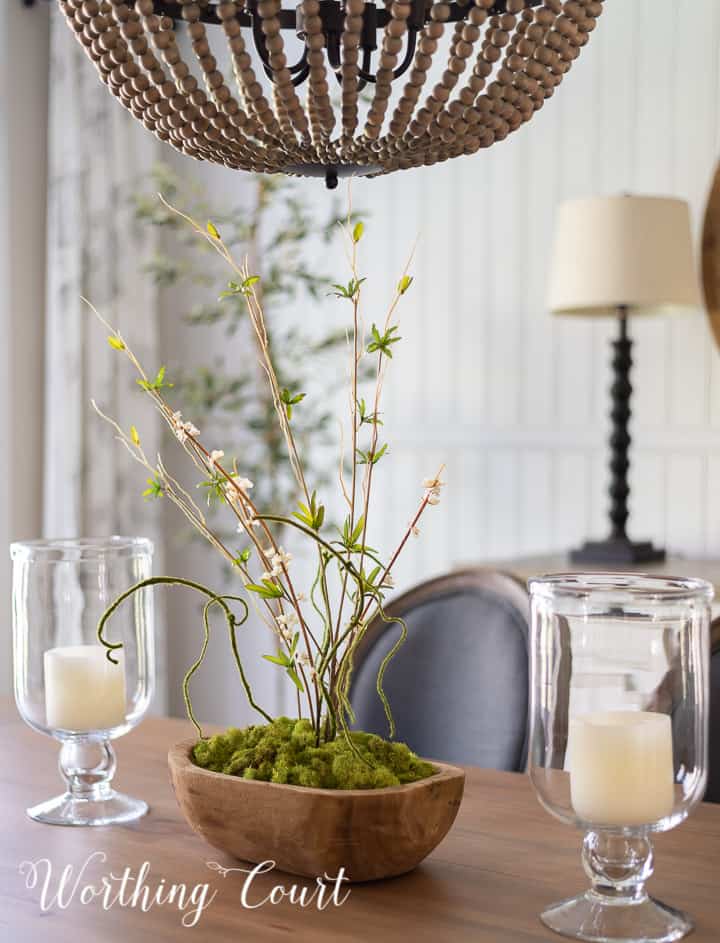
To make this type of moss bowl:
- Add a block of Styrofoam to the bottom of the bowl, using removable adhesive putty.
- Fill in with reindeer moss.
- Pull enough moss away to insert the stems into the floral foam.
- Insert the stems and rearrange the moss.
TIP: I found it easiest to add the stems last, by pulling enough moss away to expose the floral foam, then put the moss back into place.
I think the addition of the squiggly moss-covered branches is what really makes this bowl appealing.
They are actually pieces that I cut from some bendable, moss covered vine, which can be purchased HERE.
Making Customized Bowls
This is where is gets really fun! To make this type of moss bowl, you’ll use the same ingredients as a basic moss bowl, plus any other items that you’d like to display.
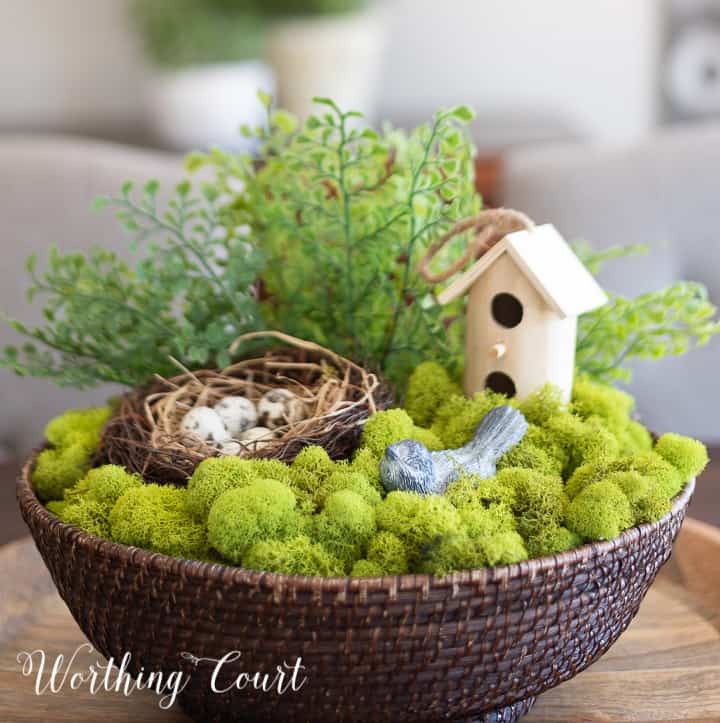
In the above example, I didn’t add a Styrofoam block to the bottom of the bowl. It’s simply filled with plastic grocery bags. The plastic bags are then completely covered with reindeer moss.
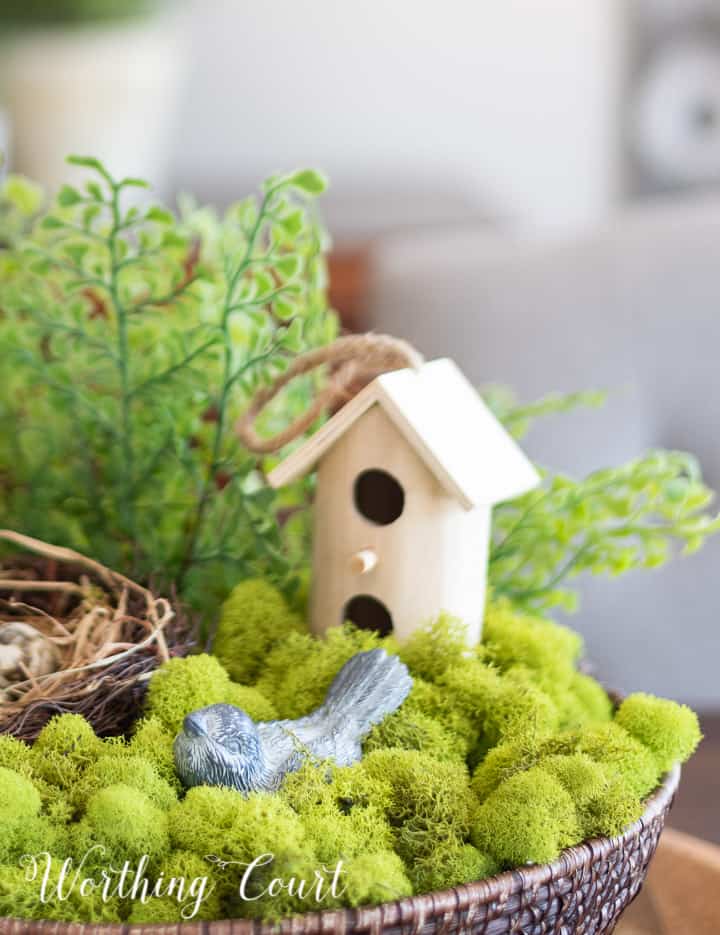
For a spring and summer theme, I added a bit of faux greenery, a couple of small wooden birdhouses, a nest with eggs and a cute little bird.
All of the items are simply arranged in a manner that’s pleasing to my eye and sort of pushed down into the moss to hold them in place.
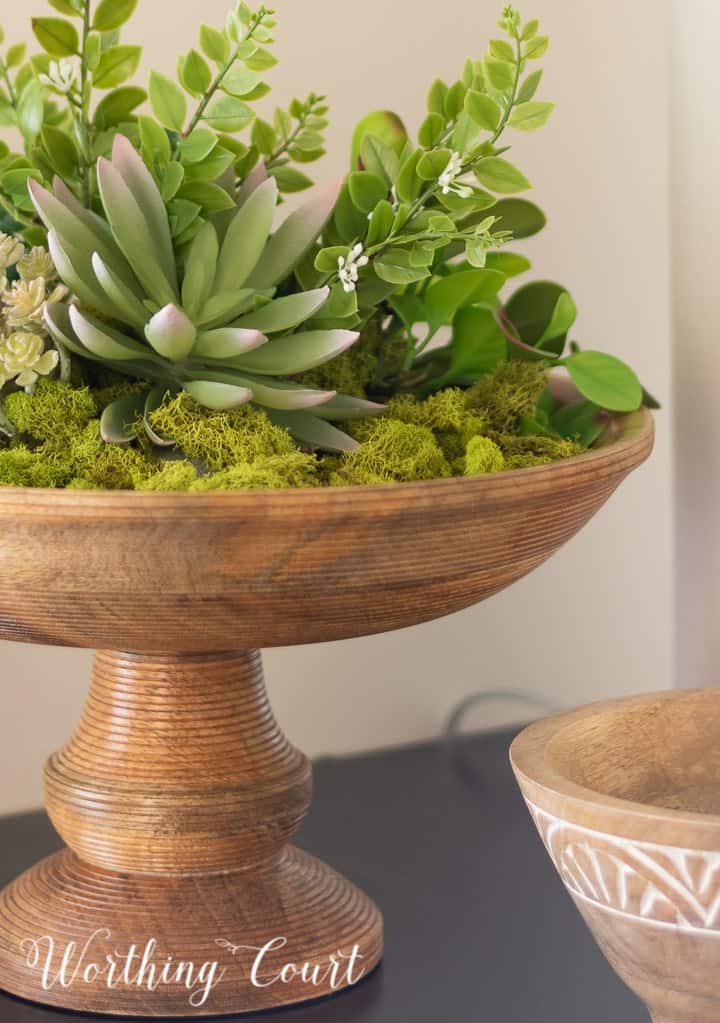
I did add a block of Styrofoam to the bottom of the below example. It gave me a base to push my faux succulent stems into.
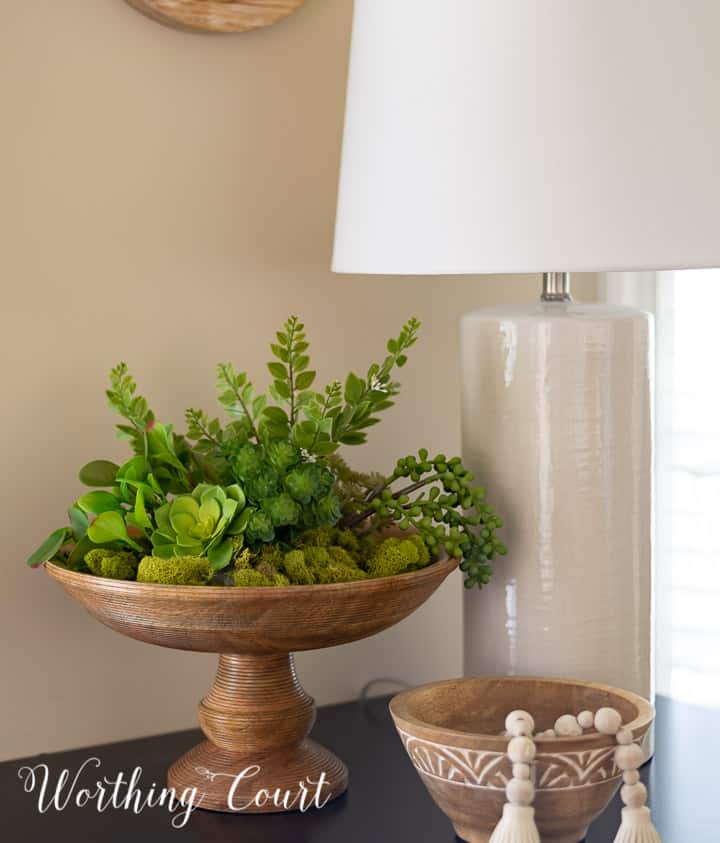
Once all of the moss pieces were where I wanted them, I simply filled in around the Styrofoam with reindeer moss.
Types of Moss to Use
The type of moss that you use depends upon the end result that you’re after.
There are a number of different types available:
- Cushion moss – Known for its soft, dense, and compact growth, forming mounds or cushions and is characterized by its light green to whitish-green color.
- Moss mound or pillow moss – A type that grows in thick, cushiony clumps, resembling small, soft pillows or mounds on the surfaces where they are placed. These mosses typically have a dense, lush texture and a deep, vibrant green color.
- Forest moss – Forest mosses are less structured in appearance and can vary widely. Their colors can range from bright, vibrant greens to deeper, earthy tones, depending on the species and the environmental conditions.
- Reindeer moss – This type of moss is actually a type of lichen. It is often dyed different colors and typically has a spongy feel.
- Adhesive sheet moss – Typically made by attaching a variety of moss known as Hypnum moss to adhesive sheets of paper.
- Moss balls – These are made from either Styrofoam or plastic balls that are covered with preserved or real moss.
What does moss need to survive indoors?
Well, in our case we don’t have to worry about the moss surviving because it has been preserved and will last for years if taken care of.
Follow these guidelines to keep it looking good:
- Avoid Direct Sunlight: While preserved moss doesn’t need sunlight to thrive, direct exposure can cause the color to fade over time. Place it in a spot where it gets indirect light or in a well-lit room without direct sun.
- Maintain Humidity: Preserved moss doesn’t require watering, but it benefits from a stable humidity level. If your indoor environment is very dry, occasional misting can help the moss maintain its texture and color. However, avoid over-misting, as excessive moisture can lead to deterioration.
- Dust Regularly: Like any other indoor decor, preserved moss can accumulate dust. Gently dust it using a soft brush or a hairdryer set to the cool and low setting to keep it looking fresh.
- Avoid Chemicals: Keep the moss away from harsh chemicals or cleaners. If you need to clean the area around it, remove the moss first or shield it from any sprays or substances.
Following these care tips will maintain its vibrancy and keep it looking good for years.
No matter what type of moss bowl you create and no matter where you place it, the beauty of a moss bowl lies in its simplicity.
So go ahead, experiment with different containers and moss types to craft a piece that speaks to your style, knowing that this low-maintenance botanical accent will thrive with just a tad of care, adding a long-lasting lushness to your home.

Love the .oss bowls and was looking for a new spring centerpiece. Question? Can real mess be used? I have beautiful moss including reindeer moss growing in my yard.
Yes – you can absolutely use real moss! It requires a bit of care though. Both regular live moss and live reindeer moss will need to be misted regularly and given a good watering a couple of times per week to keep them from drying out as long as possible. Glad you like these moss bowl ideas!
Oh Suzy, I just love all of them!! And Thanks for all the detailed pictures. I’m definitely going to make some of these!!
Thank you. I bet the ones you make will be beautiful!
I already put materials for making a moss bowl in my Amazon cart! Thanks for the detailed pictures with multiple centerpieces. Can’t wait to make them! Thanks for sharing!
I’m sure you’ll have as much fun making them as I do!
Thanks also for the free Spring printables. They are gorgeous and unique.
Thank YOU! I’m so glad that you like them! 😀
Terrific ideas!! I will definitely be making at least one! I also have one of those small farmhouse red trucks with the open backs. I plan to put the moss in the back of the truck! 😉
That sounds SO cute! I love that creative idea. 😀
These are beautiful. Where did you purchase the faux stems in the one with stems and bendable wire? Thank you!
I purchased them at Hobby Lobby. 🙂
I love all your decorations! When are we going to get to see your new house!
Where did you get the blue and orange bowl for moss display?
Hi April. I’m sorry, but I don’t have a link for it.
Ordered some moss balls and ended up with what look like oversized green tennis balls. Don’t know what to do with those, but with your fantastic, beautifully photographed mossy ideas, I can go in a better direction with other sorts of moss. Thank you!
That orange and blue bowl is stunning, by the way!