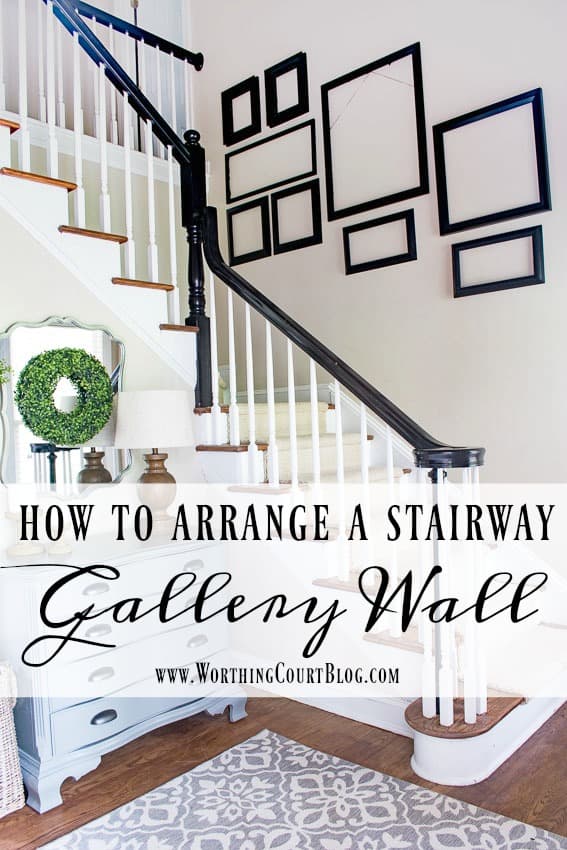
How To Arrange A Stairway Gallery Wall
I will show you the best way to arrange a gallery wall for your staircase.
I’m happy to report that I’m nearing the end of my foyer makeover! If you’ve been keeping up with my to-do list (it’s at the bottom of the post), then you know that I’ve been referring to the wall going up my stairs as a big honkin’ wall. And that’s exactly what it is.
This wall…it mocked me, intimidated me and terrified me! But, I finally followed my own advice and came up with a plan. This is the wall I’m trying to work with. BTW – here’s your first look at the new chandelier. LOVE! You can see the old one sitting on the floor.
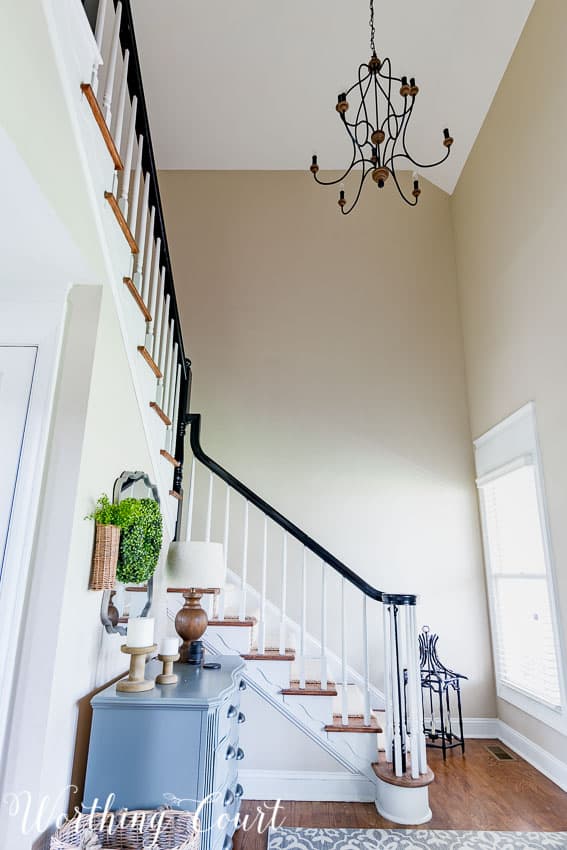
I was torn between adding another board and batten wall to this side of the foyer, creating a gallery wall or simply adding two or three oversize pieces of artwork. I was trying my best to avoid doing a gallery wall because they’re really hard for me. In the end, I decided that’s what would look the best though, so I tried out several picture arrangements and lived with each one for a few days to see which one I would like the best.
Gallery Wall
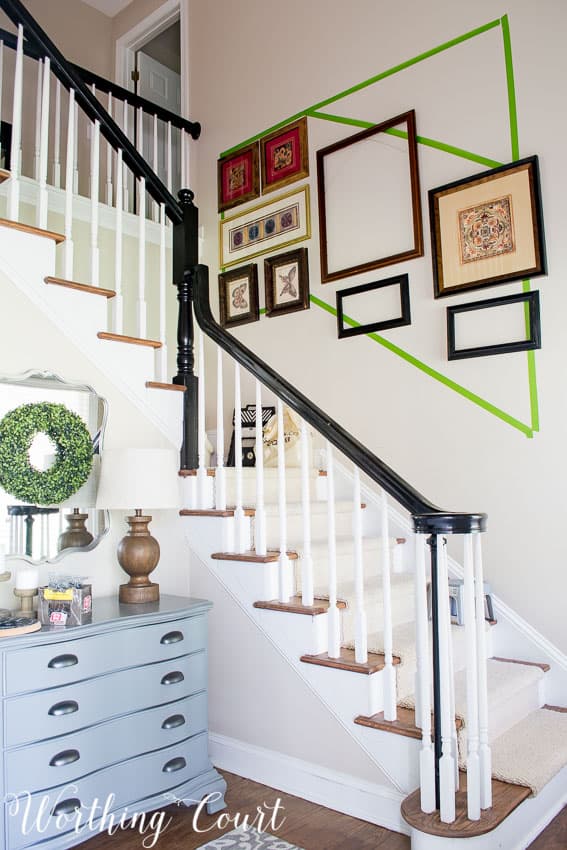
The first thing that I did was to determine where I would want the bottom, sides and top of the gallery wall to be and then framed it out with painter’s tape. This went a long way in helping me to visualize what I was hoping to accomplish. For reference, I started out in the bottom left corner at the landing, with the straight, horizontal, line being 36″ from the floor. I then marked that same distance at the lower right hand side and ran my painter’s tape in an angled line down. I then placed the tape up the sides, to the height that I wanted. The last bit was to add the top pieces of tape.
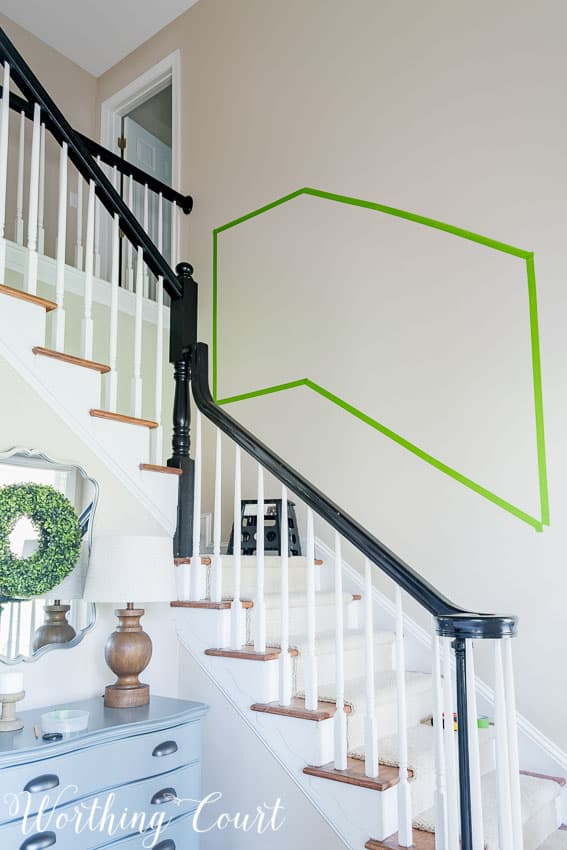
The first layout for my gallery wall wasn’t quite right, so I squared up the right side a bit. Much better.
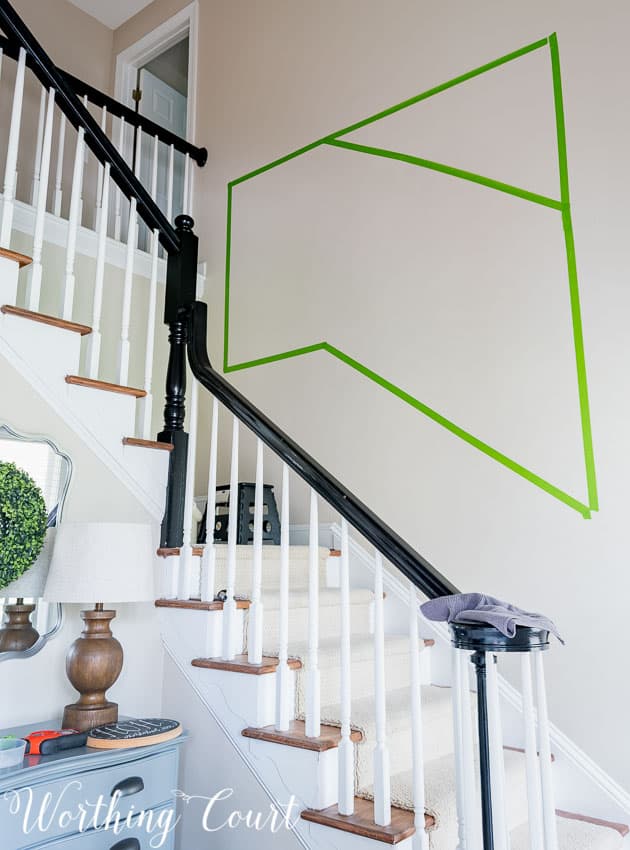
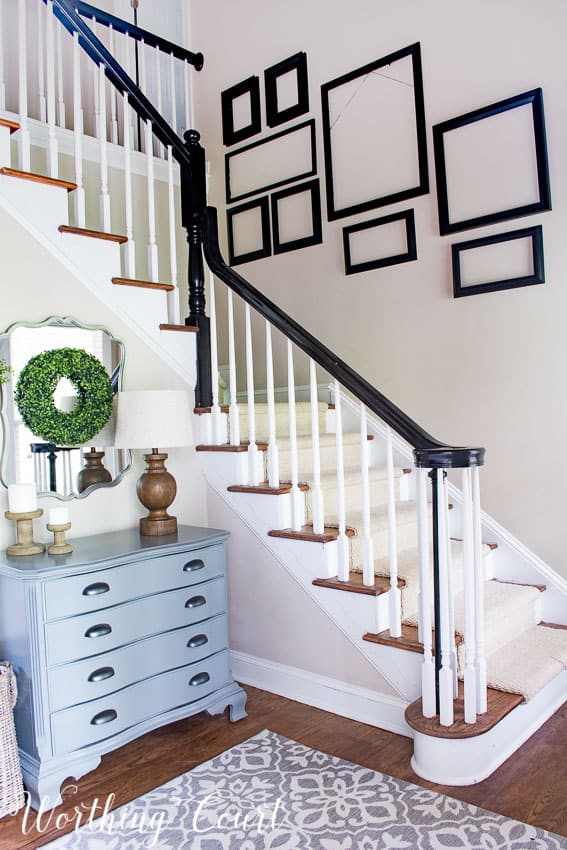
Next, I raided my attic for frames that I thought would work. They needed to be relatively flat because we are constantly hauling things up and down the steps and I’m hoping to avoid knocking anything down. This is the arrangement that I actually wound up with. Sort of a combination of the first and second taped out areas.
The next step was to remove the existing artwork from all of the frames and to paint them all the same color – black. That will help to give the wall a cohesive look. If you compare this photo to the one above it, you can see that I switched a couple of the frames on the left side. Boy, did I have a lot of nail holes to fill and touch up!
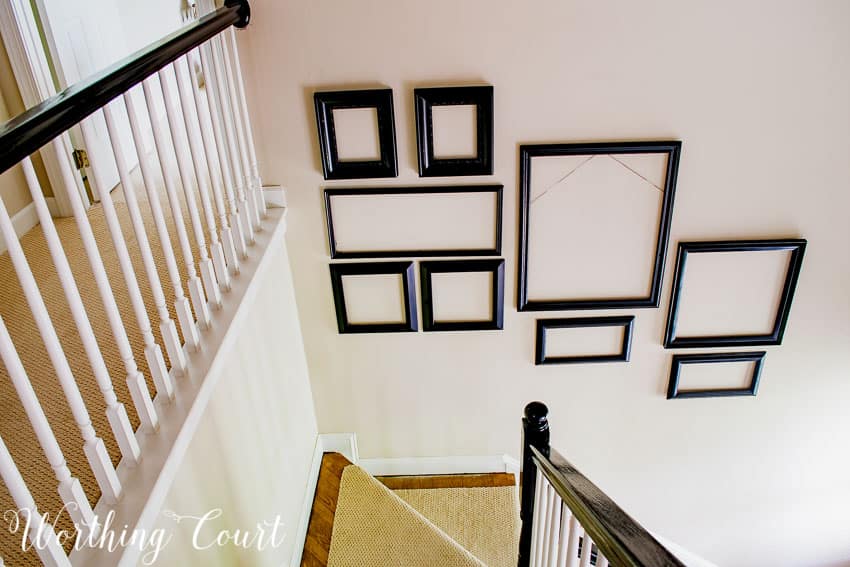
Here’s a look at what the gallery looks like from the top of the steps. It took a bit of trial and error, but I think that I’m going to love the result!
Now, I just have to fill all those frames up! I have some ideas in mind, but it’s going to take me a while to complete. Stay tuned!
Here’s where my to-do list stands as of today:
Caulk and paint the board and batten wall white, to match the trim.Replace the chandelier, add sconces to either side of the doorway into the office and add a matching flush mount in the hallway at the top of the stairs.- Replace the area rug. The current one just isn’t working well with two dogs.
Add hooks to the board and batten wall to the left of the office opening.What am I going to do on the board and batten wall to the right of the office opening???Build (maybe) two benches – one for each side of the office opening.Do something on the big honkin’ wall going up the steps. Gallery wall???- Add artwork to the gallery wall frames.
Made a decision about whether or not to add sconces to either side of the mirror above the gray chest.Add an outlet inside of the coat closet. That’s where our modem and router are located. See that extension cord running around the wall beside the gray chest?- Add some sort of drapery or shade to the window at the bottom of the steps.
Replace the smoke detector in the upstairs hallway.- Add accessories!
Sharing at THESE great parties.
Looking good! You are making progress on your list! 😉
I would love to do a gallery wall on a large wall in my living room. Your advice on how to start the planning is a great help. Thanks much.
I love your staircase wall order.
It looks great from either direction.
I love that you repurposed frames for the gallery wall; It looks amazing!
When I did a HUGE gallery wall (27 different frames/prints) I put painters tape on the floor of the studio (read junk room) at the exact angle of the staircase. Then i had a blast putting the pictures in the order I thought would look best. I could move them around until there was balance. Since i was also using a few frames in a different color I could also “balance
“‘ them through out the display.
I enjoy this collection daily and have received numerous compliments on them.
I know when it is all said and done you are going to love your wall as much as i love mine!
Great tips!!!!! I didn’t know where to start with mine. Now I do!!! Thanks!
I love how you used painters tape to figure out your space, what a smart idea. I can’t wait to see the finished wall!
My daughter is making a gallery wall and I love your layout. Thanks for sharing with us at #overthemoon link party. Have a great week!
Loving how t looks so far, it’s gonna be great! The new chandelier is perfect too. You’re doing a wonderful job.
Very cool gallery wall! Looking forward to seeing it totally finished.
Wow! Your list is almost done! You go, girl!
(I love your area rug in the pics, but, I understand having to take dogs into consideration. 🙂 )
Looks fabulous!
This is going to be beautiful. Great job.
I’m so glad that you shared this! I have an empty wall in my living room that I want to make a gallery wall but it’s so hard to know even where to start with it. I’m definitely going to try your tape idea and see what I can come up with! Thanks for sharing.
This is an informative post to see what your process was with regards to measuring and taping the shape of the gallery before hanging the frames. The end result looks very nice. I also appreciate seeing your to-do list, as it helps to give me ideas about carrying out a project. Thanks for revealing your behind-the-scenes processes.
It looks beautiful! I have been meaning to put up frames on our stairway but haven’t yet done it. This post is really inspiring. Thanks a lot for joining us at the Family joy blog link up party. Pinned.
I’m ready to give this a try. Nice detailed instructions.
Love all your posts; always inspiring. I especially LOVE your board and batten wall and the gallery on your stairway wall. It turned out great! Thanks for sharing your ideas!
Taping off the area is such a great idea! Creating a gallery wall has been on my to-do list for awhile and this gives me a great starting point! Thank you! Pinned and sharing. Thank you for joining us at Family Joy Blog Link-Up Party. I hope you will join our next party starting Sunday at noon EST.
Thank you for the wall gallery tutorial. I wanted to try one myself but didn’t know how to get the right look. Your tutorial has given me the confidence to go ahead with this project!