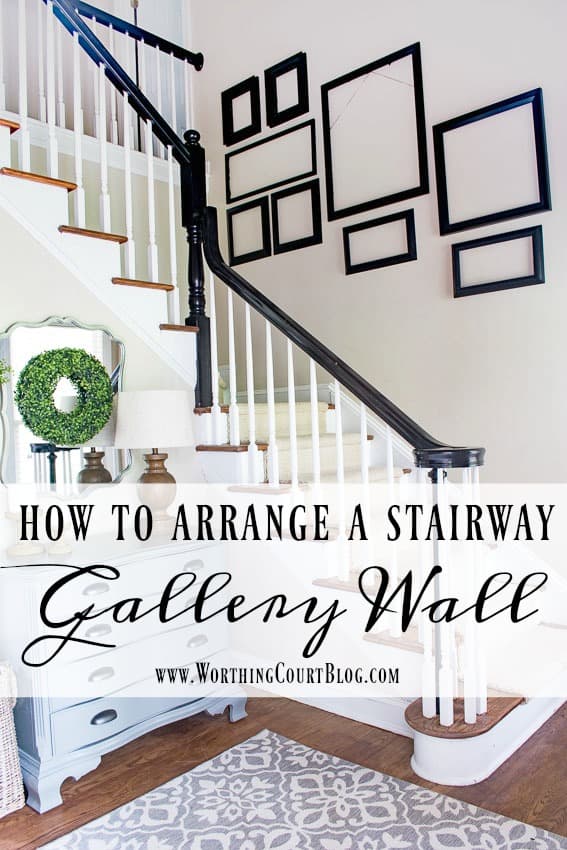
How To Arrange A Stairway Gallery Wall
I will show you the best way to arrange a gallery wall for your staircase.
I’m happy to report that I’m nearing the end of my foyer makeover! If you’ve been keeping up with my to-do list (it’s at the bottom of the post), then you know that I’ve been referring to the wall going up my stairs as a big honkin’ wall. And that’s exactly what it is.
This wall…it mocked me, intimidated me and terrified me! But, I finally followed my own advice and came up with a plan. This is the wall I’m trying to work with. BTW – here’s your first look at the new chandelier. LOVE! You can see the old one sitting on the floor.
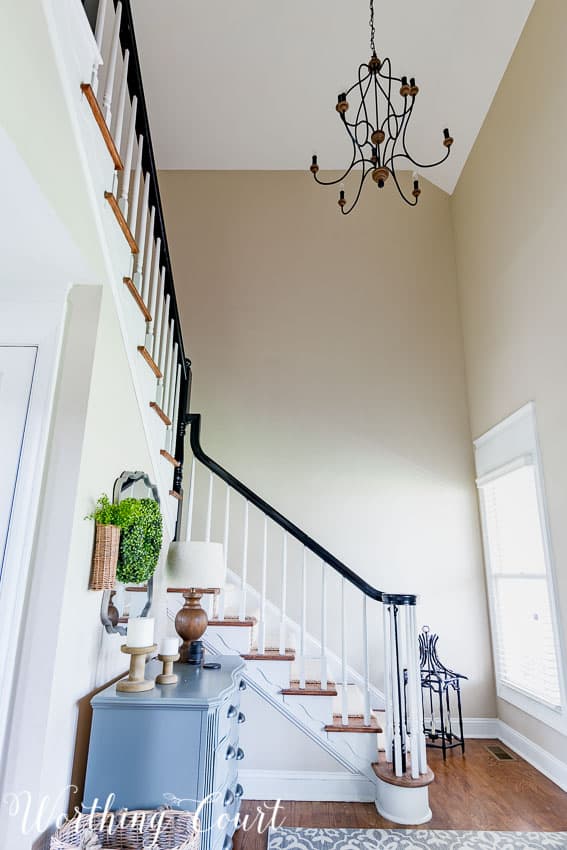
I was torn between adding another board and batten wall to this side of the foyer, creating a gallery wall or simply adding two or three oversize pieces of artwork. I was trying my best to avoid doing a gallery wall because they’re really hard for me. In the end, I decided that’s what would look the best though, so I tried out several picture arrangements and lived with each one for a few days to see which one I would like the best.
Gallery Wall
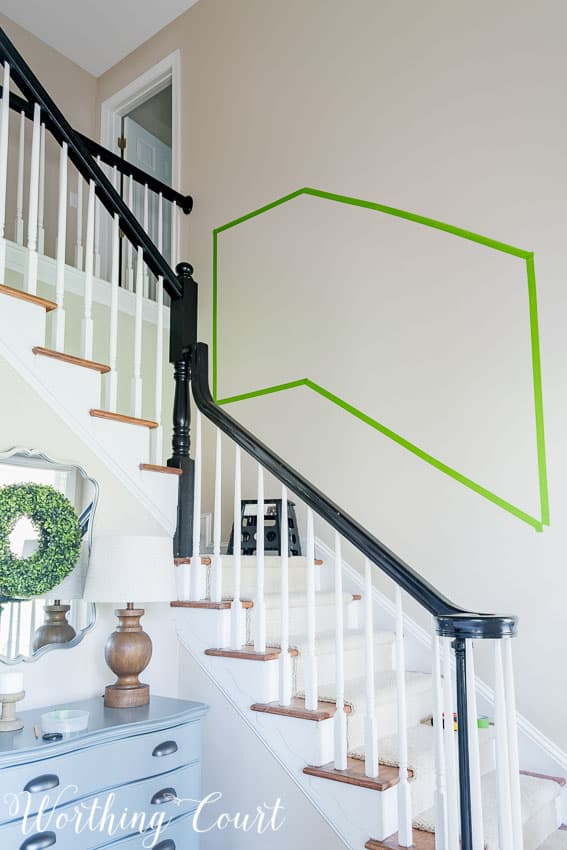
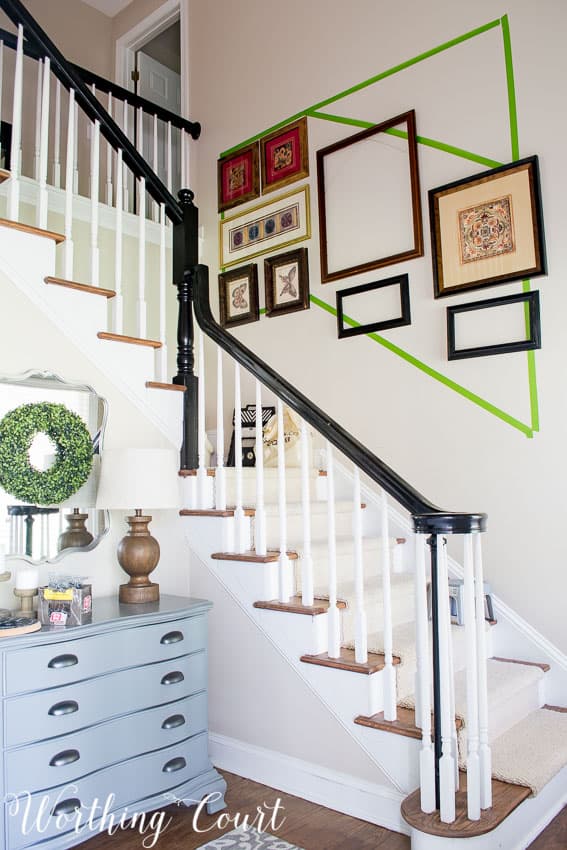
The first thing that I did was to determine where I would want the bottom, sides and top of the gallery wall to be and then framed it out with painter’s tape. This went a long way in helping me to visualize what I was hoping to accomplish. For reference, I started out in the bottom left corner at the landing, with the straight, horizontal, line being 36″ from the floor. I then marked that same distance at the lower right hand side and ran my painter’s tape in an angled line down. I then placed the tape up the sides, to the height that I wanted. The last bit was to add the top pieces of tape.
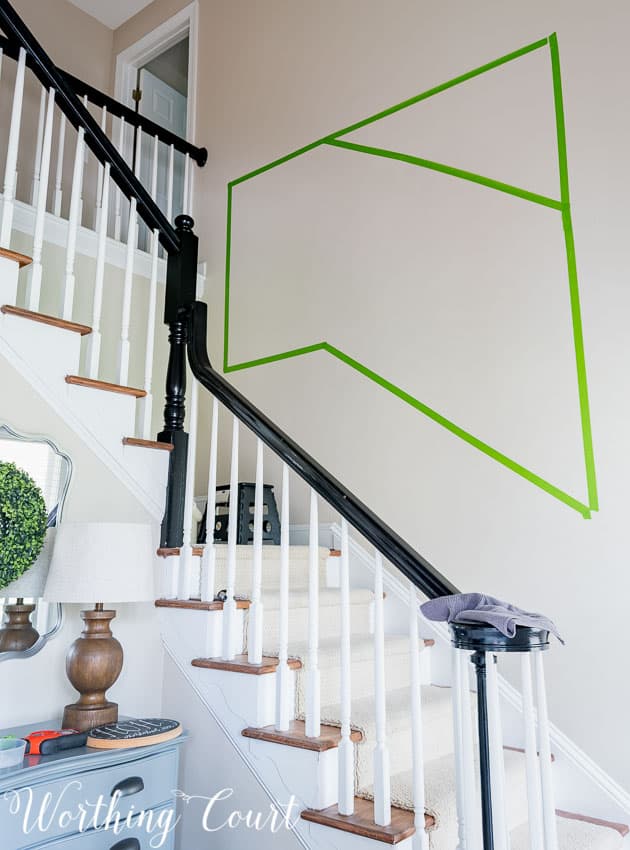
The first layout for my gallery wall wasn’t quite right, so I squared up the right side a bit. Much better.
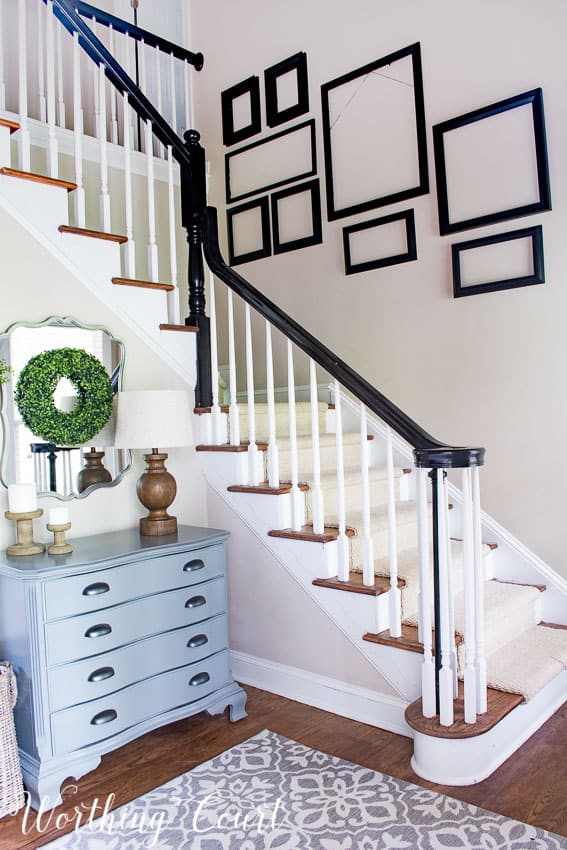
Next, I raided my attic for frames that I thought would work. They needed to be relatively flat because we are constantly hauling things up and down the steps and I’m hoping to avoid knocking anything down. This is the arrangement that I actually wound up with. Sort of a combination of the first and second taped out areas.
The next step was to remove the existing artwork from all of the frames and to paint them all the same color – black. That will help to give the wall a cohesive look. If you compare this photo to the one above it, you can see that I switched a couple of the frames on the left side. Boy, did I have a lot of nail holes to fill and touch up!
Here’s a look at what the gallery looks like from the top of the steps. It took a bit of trial and error, but I think that I’m going to love the result!
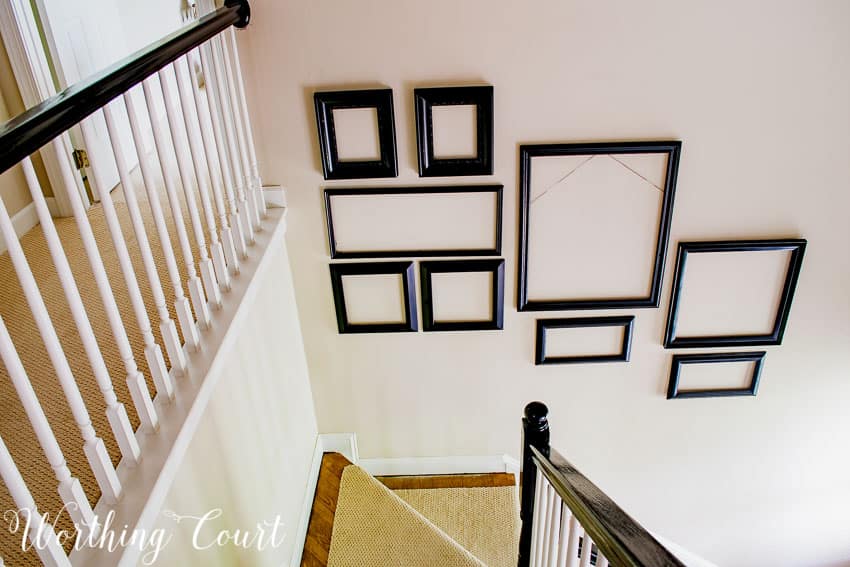
Now, I just have to fill all those frames up! I have some ideas in mind, but it’s going to take me a while to complete. Stay tuned!
Here’s where my to-do list stands as of today:
Caulk and paint the board and batten wall white, to match the trim.Replace the chandelier, add sconces to either side of the doorway into the office and add a matching flush mount in the hallway at the top of the stairs.- Replace the area rug. The current one just isn’t working well with two dogs.
Add hooks to the board and batten wall to the left of the office opening.What am I going to do on the board and batten wall to the right of the office opening???Build (maybe) two benches – one for each side of the office opening.Do something on the big honkin’ wall going up the steps. Gallery wall???- Add artwork to the gallery wall frames.
Made a decision about whether or not to add sconces to either side of the mirror above the gray chest.Add an outlet inside of the coat closet. That’s where our modem and router are located. See that extension cord running around the wall beside the gray chest?- Add some sort of drapery or shade to the window at the bottom of the steps.
Replace the smoke detector in the upstairs hallway.- Add accessories!
Sharing at THESE great parties.
This is such a great tutorial for making a gallery wall. Thanks for sharing it. I linked it up on our create link inspire party. Thanks for joining us!
Want to try this. Time to collect frames.
What a great idea using tape first. I’d like to do something similar with my stairs, but the area is a lot smaller than yours, and I’m worried about it making the stairs look smaller!
I’ll definitely get the tape out first and try that to see how it looks. Thanks for the advice!
Great post on arranging a gallery wall. My situation is thus and I need advice: I have about 12 8×10 studio photographs of me from 1 year to 38 years of age. There is one oval 11×14 and 1 5×7 oval. As it turned out, all the backgrounds are done in a subtle light aqua tone-not planned, just happened that way-guess that shows off the red hair. The question is: Should I place the frames on the wall by chronological age, from 1-38 or should that be random selection, discounting the age? Really stumped on this-don’t want it to look too mixey/matchy in the process. Your advice would help so much. Thanks!
Hi Margaret. My apologies for not responding sooner! Based on your description, I think it would look less matchy-matchy if you mixed them up, especially since you have some different shaped frames.
I would love to create a wall gallery on my stairway. I always thought it would have been far too complicated of a project. Thank you for the guidance – your wall is going to look amazing! It’s such good use of the space xxx
So, so happy that you found some inspiration, Ashley!
Thanks for the tip it really helps let me attack my wall
Love this! I have the same foyer layout. Wondering what size frames you used? Looks amazing and I would love to recreate. Thanks!
Thank you so much! I’ve since replaced the frames with board and batten and no longer have the frames that I used. I’m sorry that I can’t tell you the exact sizes! 🙁
Love the look of the gallery wall. I have a closed stairway and I’m trying to figure what to do with it myself. I’m thinking of using black and white photos of my grandchildren. I would like some pictures of them, but don’t want tiny frames all over the house. Would you incorporate both sides of the stairs or just one? Any thoughts?
Hi Bonnie. Because of the narrowness of a closed stairwell, I think I’d only hang pictures on one side.