How to Make a Picture Frame for a Canvas Painting
You can save a lot of money by making a custom picture frame for a canvas painting yourself! It’s easy and you only need the help of some basic tools, and a few other supplies. This step-by-step tutorial will show you how to easily and affordably make a diy canvas art frame.
This post contains affiliate links from Amazon and other retailers. See my full disclosure policy HERE.
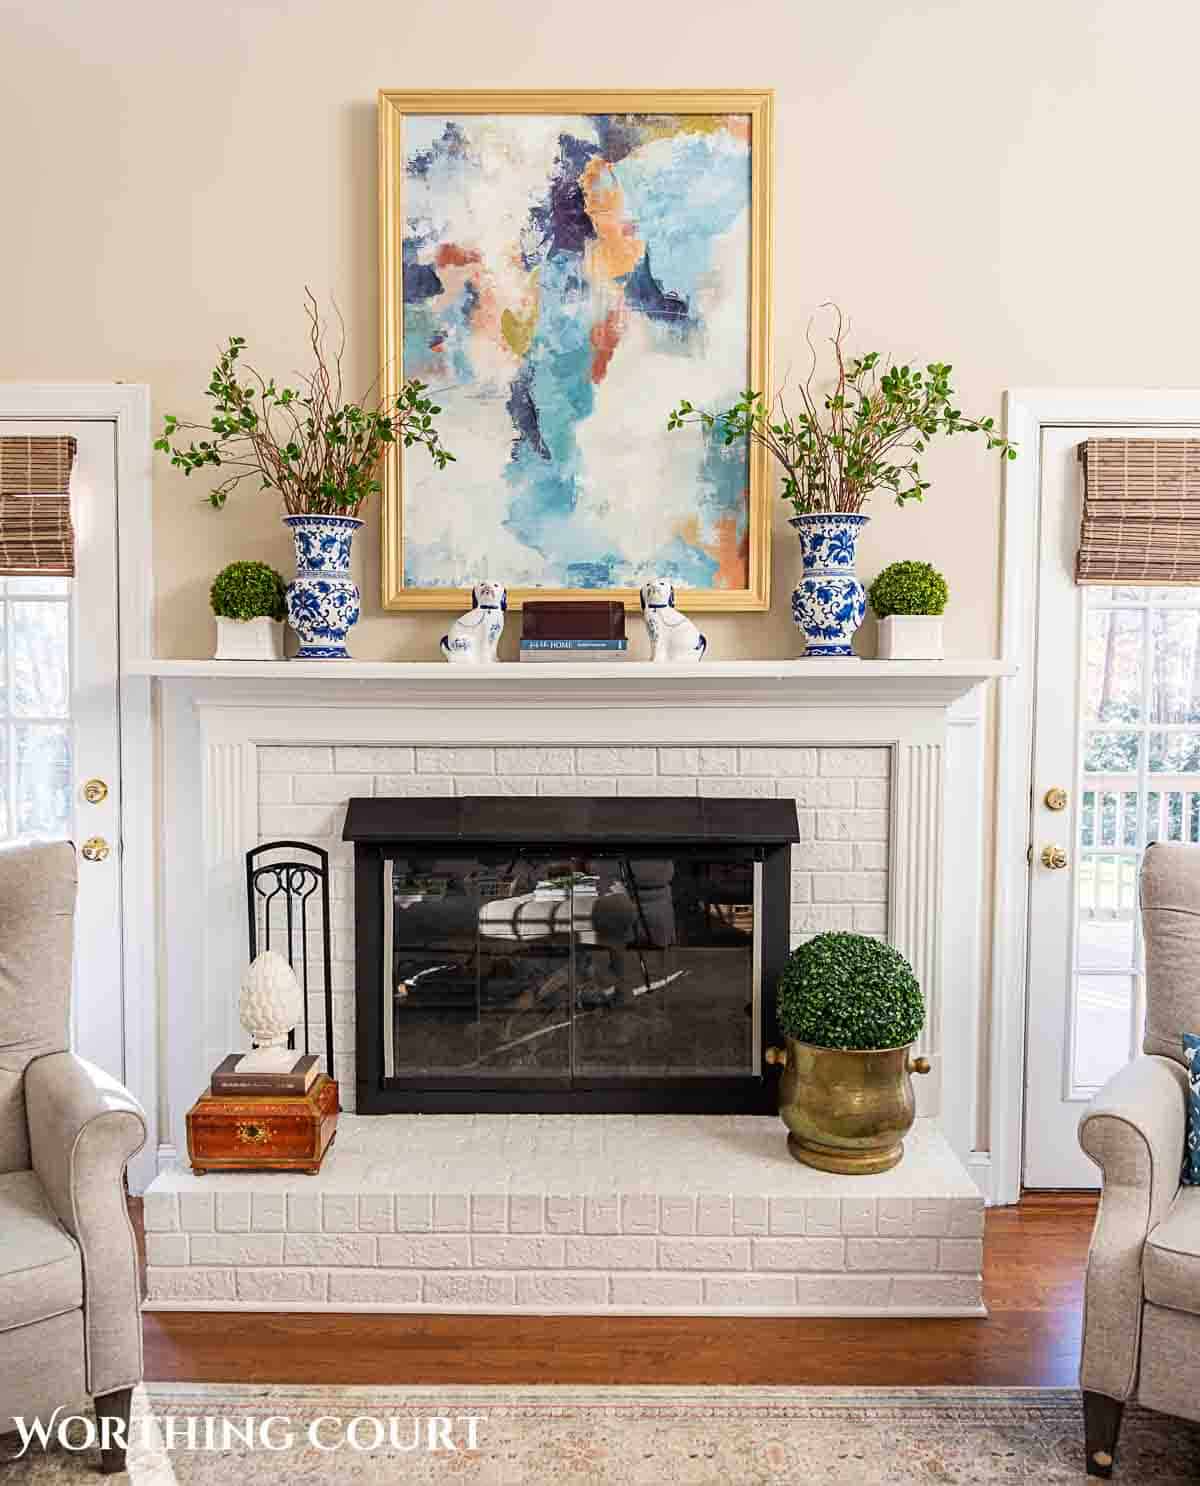
I finally found and purchased a large piece of canvas artwork, to go above my fireplace, after a lengthy search!
After a long search, I finally found a large piece of canvas artwork, to go above my fireplace, after a lengthy search!
But, boy did I have my eyes opened! Let me explain.
An unframed canvas looks unfinished.
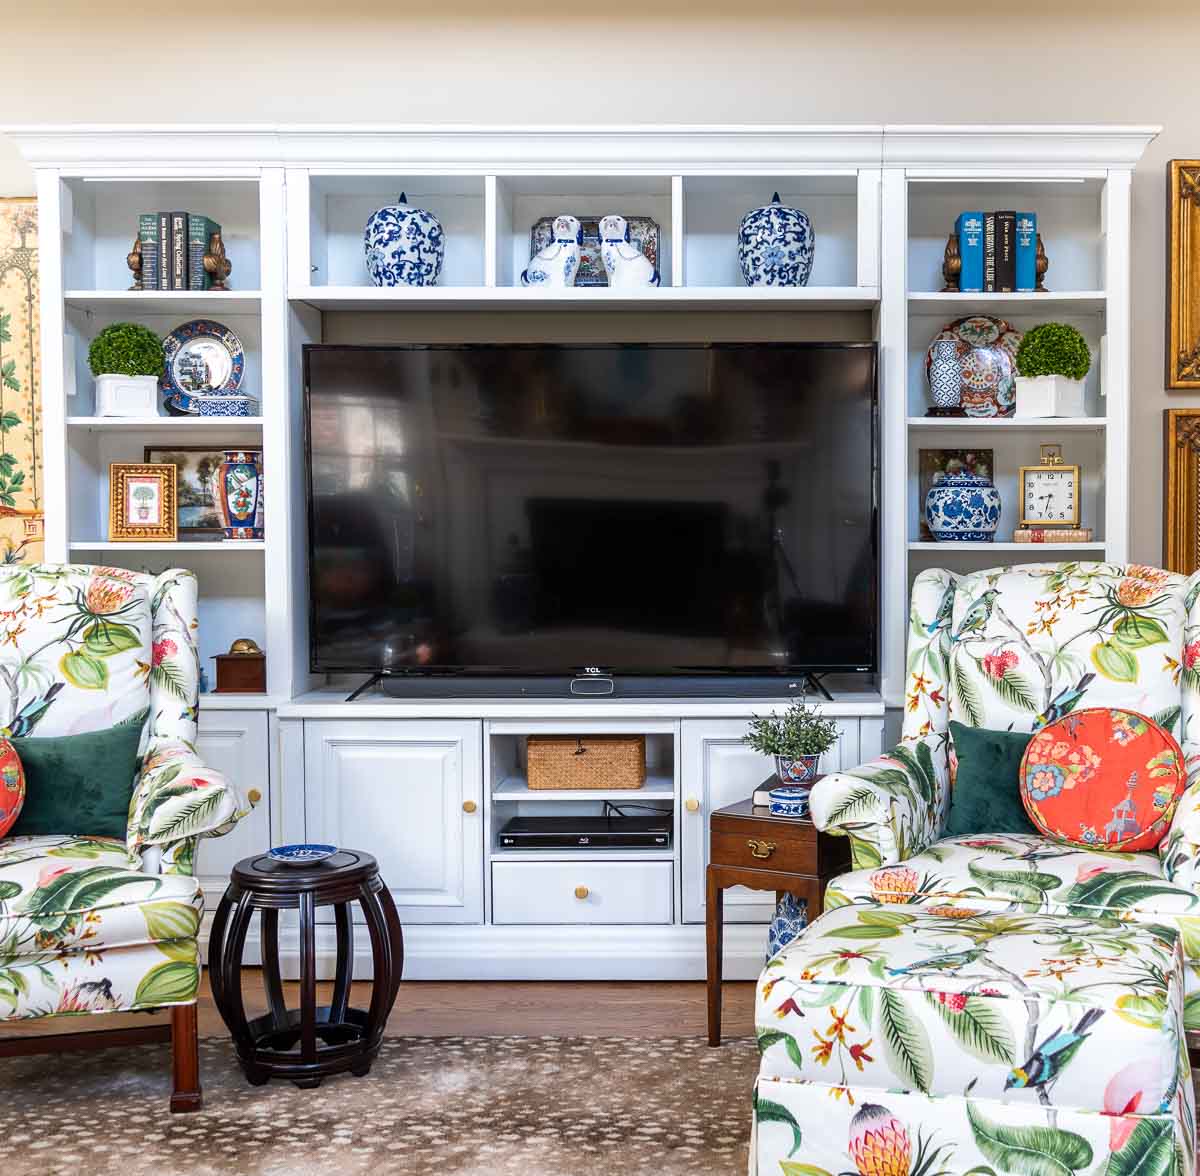
I’m in love with the painting, but when I propped it up on my mantle, it looked unfinished and kind of lost on the wall.
It was obvious that it needed a frame to look its best. Something to give it structure and to keep it from looking blah and blending in.

Here’s the eye-opening part – whether using a premade frame or having one custom made, art frames are expensive! For example, one that I found from Overstock, that’s large enough to fit my canvas, is $349.

That made it pretty obvious that I needed to figure out how to make an inexpensive frame myself!
Let me show you how we made our own large (36 x 48) frame for around $50 (not including the cost of tools). I’ll also include lessons learned and what I would do differently next time.

You’ve probably seen many people use trim from the home improvement store to create a frame. That works well for regular art prints, that are framed with glass, because they don’t have much depth to them.
But wrapped canvas art is a different matter. It’s deeper, which means that the frame needs to be deep enough to allow the canvas to fit inside of it so that the back of the canvas will be flush with the back of the frame. Most canvases are 1½” thick, but measure yours to be sure.
We came up with a way to create a picture frame that is deep enough to accommodate the thickness of a wrapped canvas, using inexpensive wood trim
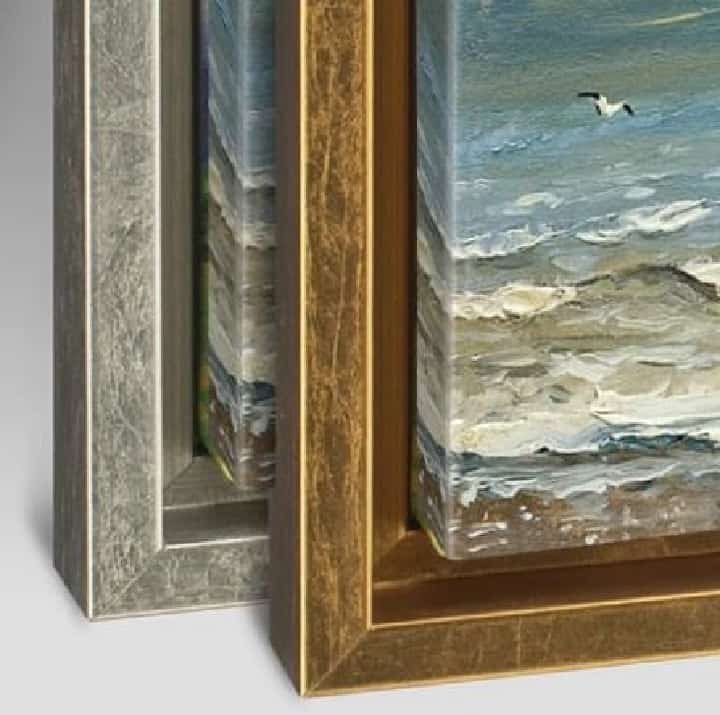
There are two types of picture frames for canvas paintings – flush mount and float mount.
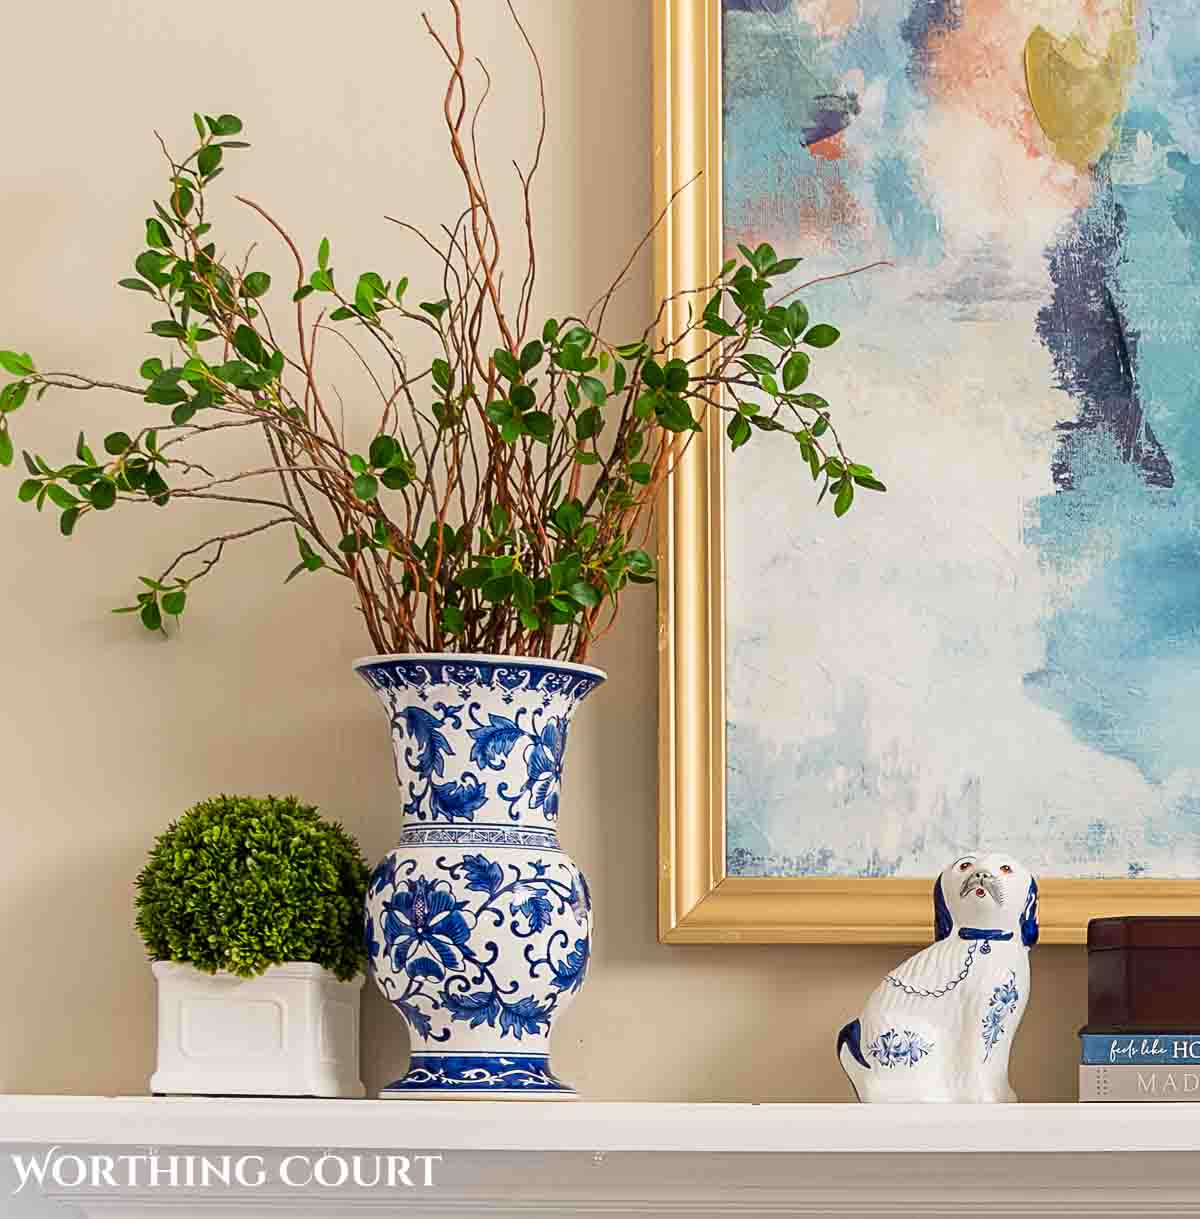
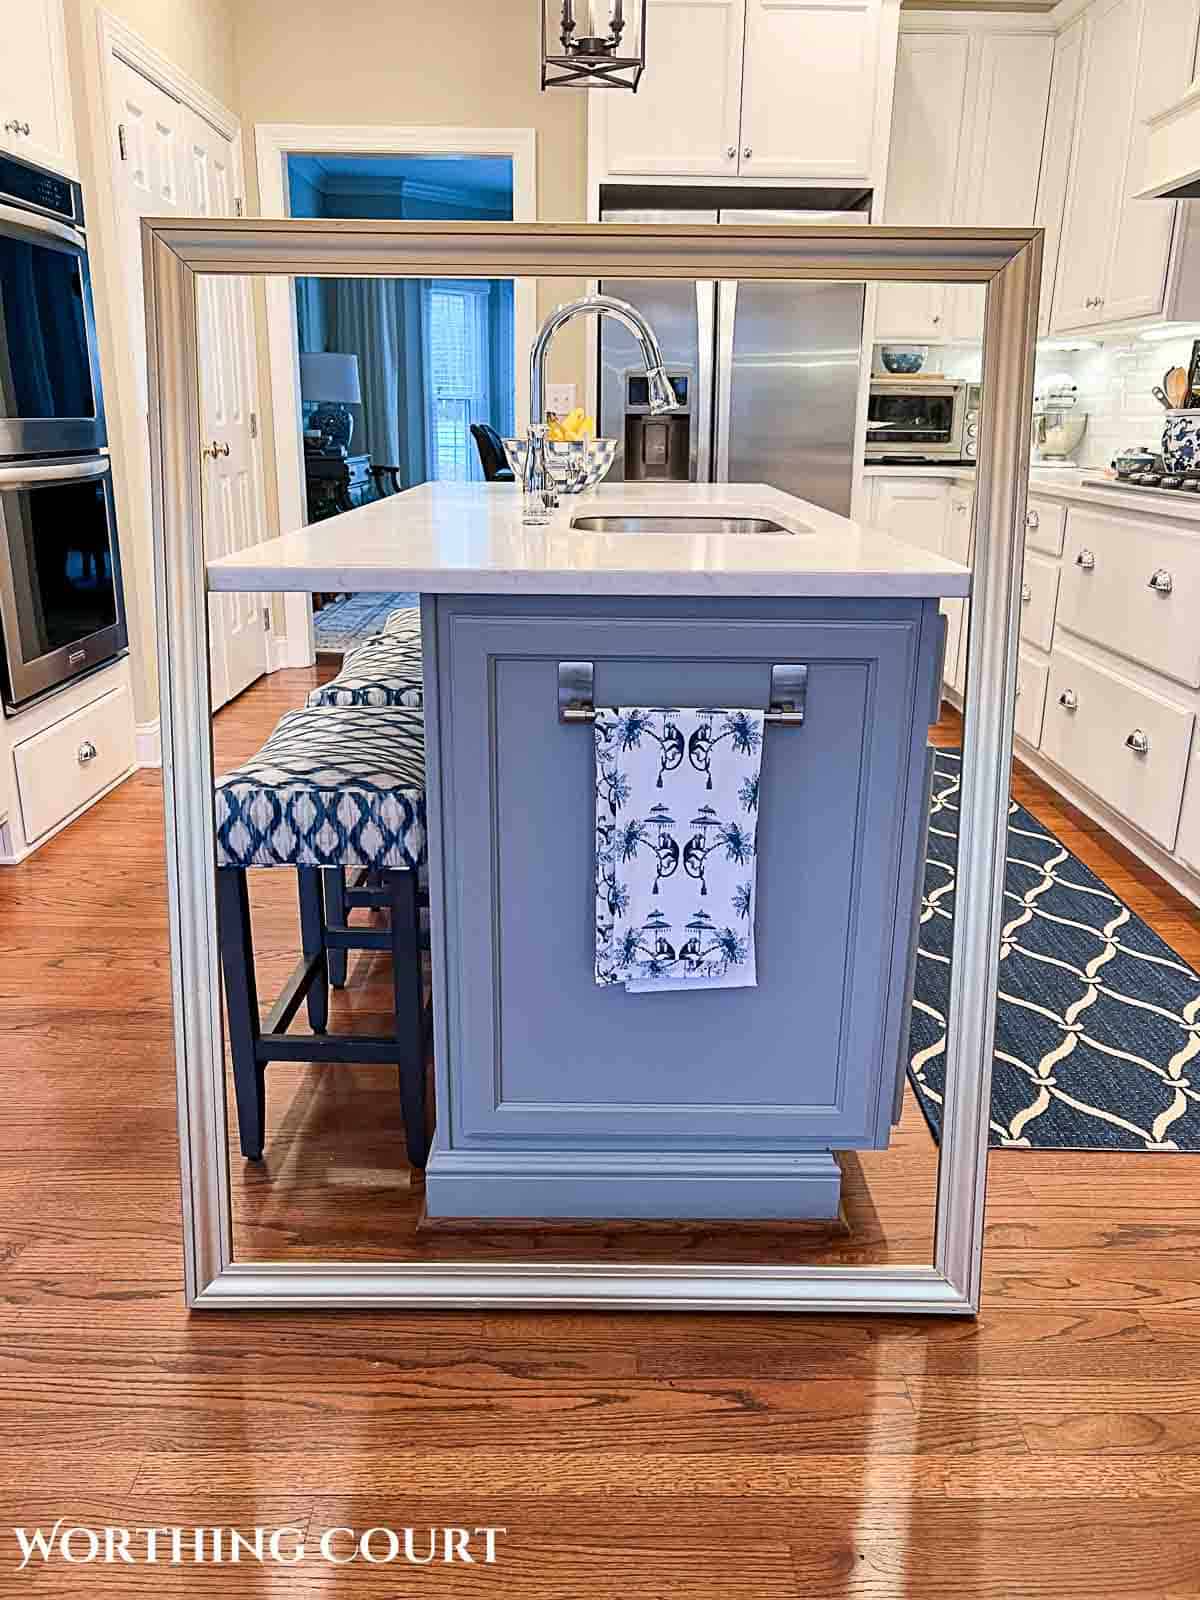
This tutorial is for a flush mount, which means that the sides of the frame “hug” the canvas – there isn’t a gap between the canvas and the frame. Like the one below.
Float mount means there is a gap between the canvas and the frame that is intentionally created to give the appearance of the canvas “floating” in the frame. This look is usually achieved using a spacer or inlay of some kind. Like the one below.
To create a flush mount frame, that’s deep enough to accomodate a canvas, we’re actually going to be making two layers of frames that are joined together. Don’t let that deter you though – it isn’t hard at all!
One frame will act as the back part of the frame, and will give the depth needed to accommodate the thickness of the canvas. The other will be the front, decorative part of the frame.
Materials needed to frame a canvas
Here is a list of what you need to make a frame for your canvas.
TOOLS: Power tools always make woodworking projects easier, but this project can totally be done without them!

• Power miter saw or miter box and saw set (I recommend THIS ONE)
• Brad nail gun and brad nails or hammer and finishing nails
• Nail set – if you use a hammer and nails instead of a brad nailer
• Drill or screwdriver
• Tape measure
• Clamps – I own and love THESE
WOOD: Note that the lengths and number of pieces of wood and trim that you need will depend upon the size of your canvas.
TIP: When shopping for wood, it is important to make sure that each piece of wood is straight and is not warped or twisted!
• 2″ x 2″ pine lumber – 2″ x 2″ lumber actually measures 1½” x 1½”
• Wood trim/millwork that is at least 2″ wide (you want trim that is wider than a 2×2) – we used THIS exact trim.
TIP: Look for 2×2’s with as few knots as possible, preferably none, even if you have to pay a little more for premium lumber.
GENERAL SUPPLIES:
• 4 – 2″ or longer wood screws
• Wood filler
• Sand paper or sanding block
• Wood glue
• Spray primer (optional) – THIS one is my favorite.
• Spray paint – I recommend using paint, instead of stain, for this project because the two different types of wood (the 2×2’s and the wood trim) will not stain the same color. I used THIS one.
Make a basic 2×2 frame.
The 2×2 frame will act as the back part of the frame and will “hug” the canvas. It will serve to provide the depth needed to accommodate the thickness of the canvas.
- Measure the exact width and height of the artwork to determine the frame measurements.
- Cut the 2×2 pieces of wood to fit around the outside of the frame of the canvas. The ends can be butted up against one another and don’t need to have mitered corners.
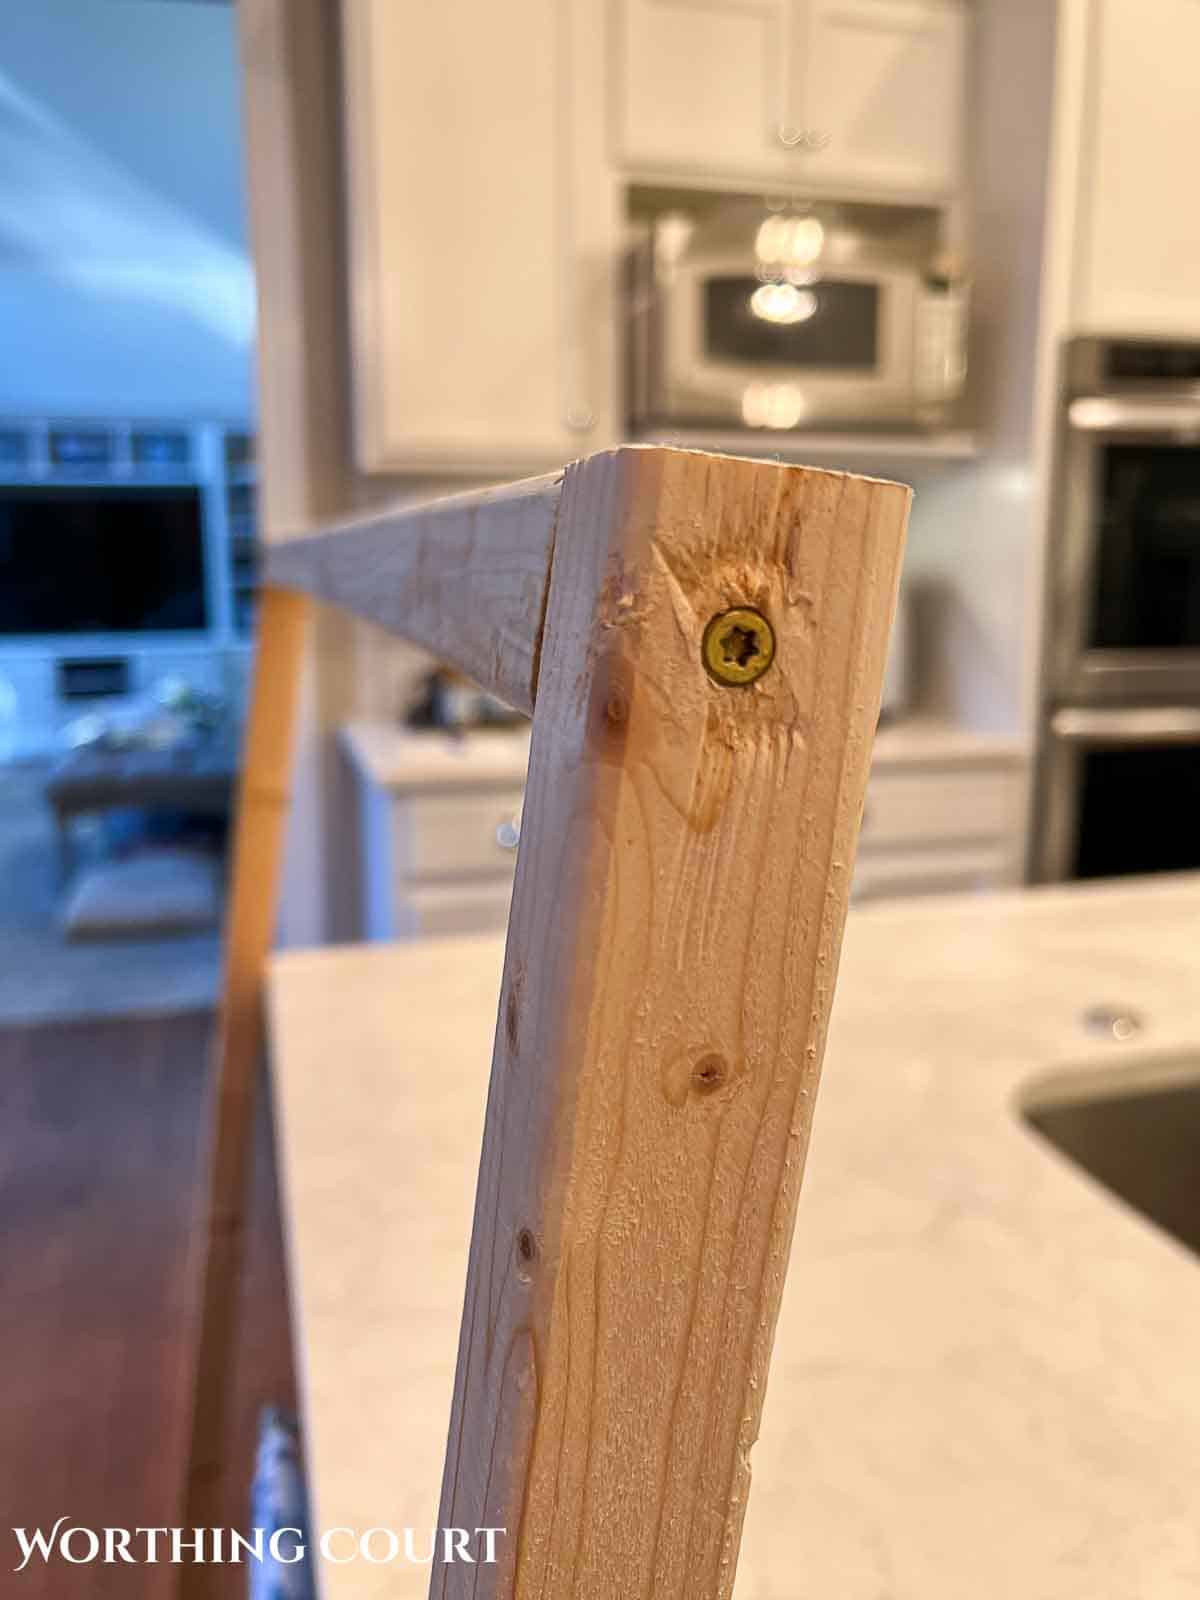
- You’ll want this frame to be sturdy, so attach the frame together at each corner using wood glue and a wood screw.
TIP: Pre-drill the hole for each screw to prevent the wood from splitting.
TIP: Be sure to wipe away any excess glue while it’s wet.
- You’ll want what will become the visible, outside edge of the frame to be as smooth as possible, so seal any knots with a primer like THIS ONE, fill them with wood filler, allow to dry and sand smooth.
LESSON LEARNED: Sand the entire side of the wood that will be the outside of the frame, even if there are no knots. We made the mistake of not taking this step and you can see the roughness of the wood if you examine the frame closely. Fortunately, our framed canvas sits high on the wall, above the fireplace, so it’s very unlikely that anyone will ever notice.
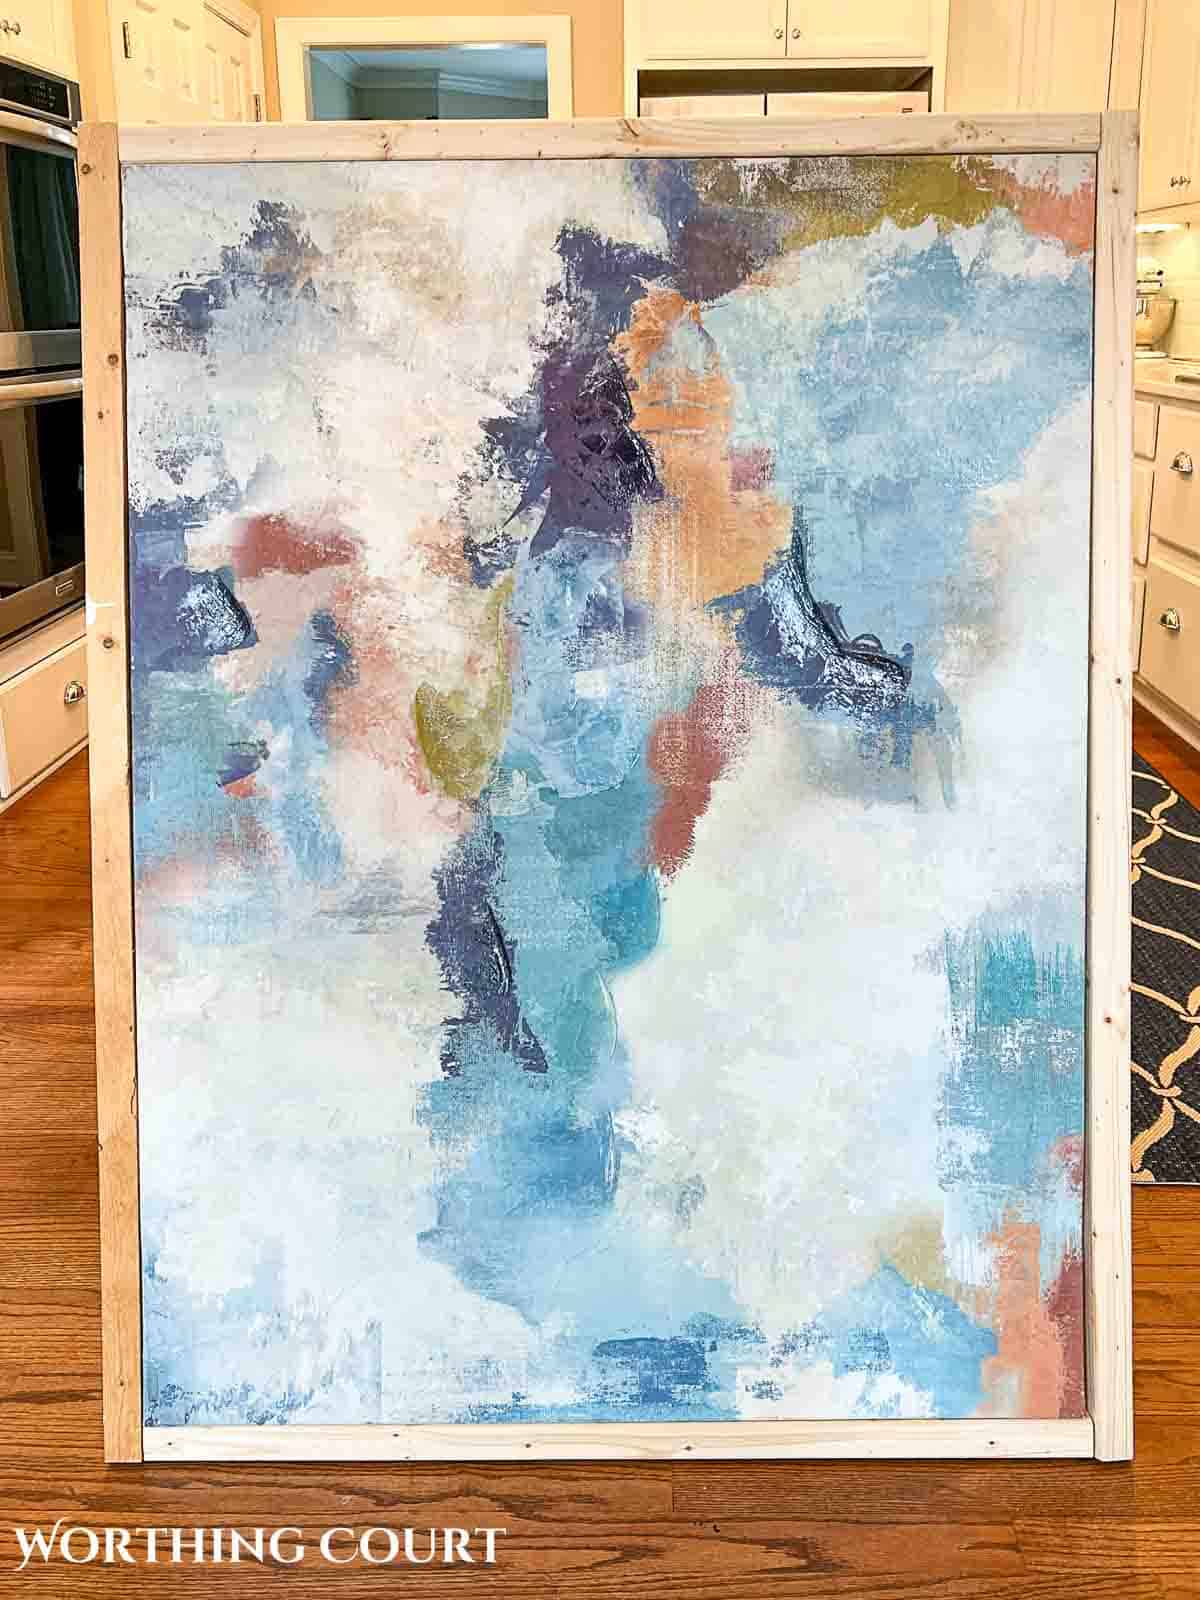
- When the frame pieces are completely assembled, do a dry fit by inserting the canvas into the frame to make sure it has a snug fit.
- Remove the canvas from the frame.
- Optional – spray the completed frame with spray primer to prevent the finish coat of paint from seeping into the wood.
Cut the trim wood for the front part of the frame.
The most complicated part of this whole process is calculating how long to cut each length of trim because of the mitered corners.
Here’s what one looks like. There’s a formula for you below.
A perfectly mitered corner requires a 45° angle to be cut on each end of the wood. When the two pieces are joined, you’ll have lovely, professional looking corners.
TIP: If you aren’t familiar with how to make 45° angle cuts, experiment with scrap wood first. When cutting the pieces that will actually become the frame, cut them slightly longer to start with, dry fit them together as you go and trim down any pieces that are too long.
CLICK HERE for a tutorial for cutting miters with a power saw.
CLICK HERE for how to cut miters with a manual miter box.
The wood trim frame is going to mount to the front of the 2×2 frame that you just built. When the frame is finished, the wood trim will slightly overlap the front of the canvas.
The canvas will ultimately sit inside of the 2×2 frame so that it sits flush with the back of the frame. You will see the sides, but what you will see from the front is the decorative wood trim frame that you’re going to make.
You are going to be using four boards to make the frame, but when calculating the amount of wood you need, keep in mind that you’ll be making a mitered cut on the end of each board, for a total of eight cuts.
To calculate the length of each board, when allowing for mitered corners, follow the below formula.
Measure the exact width and height of the frame that you just made with the 2×2’s, not the measurement of the canvas.
Formula for the length of the top and bottom boards – you will need two of these, the exact same length:
Width of the art + width of both 2×2’s (there is one on each end) + width of the trim board (times 2) = total length to cut each board.
Formula for the two side boards – will also need two of these, the exact same length:
Height of the art + width of the 2×2’s (there is one on each side) + width of the trim board (time 2) = total length to cut each board.
Assemble the frame.
When all four of the trim wood pieces are cut, it’s time to attach them to the front of the frame that you constructed with the 2×2’s.
I guess it helps to make faces when you work. haha
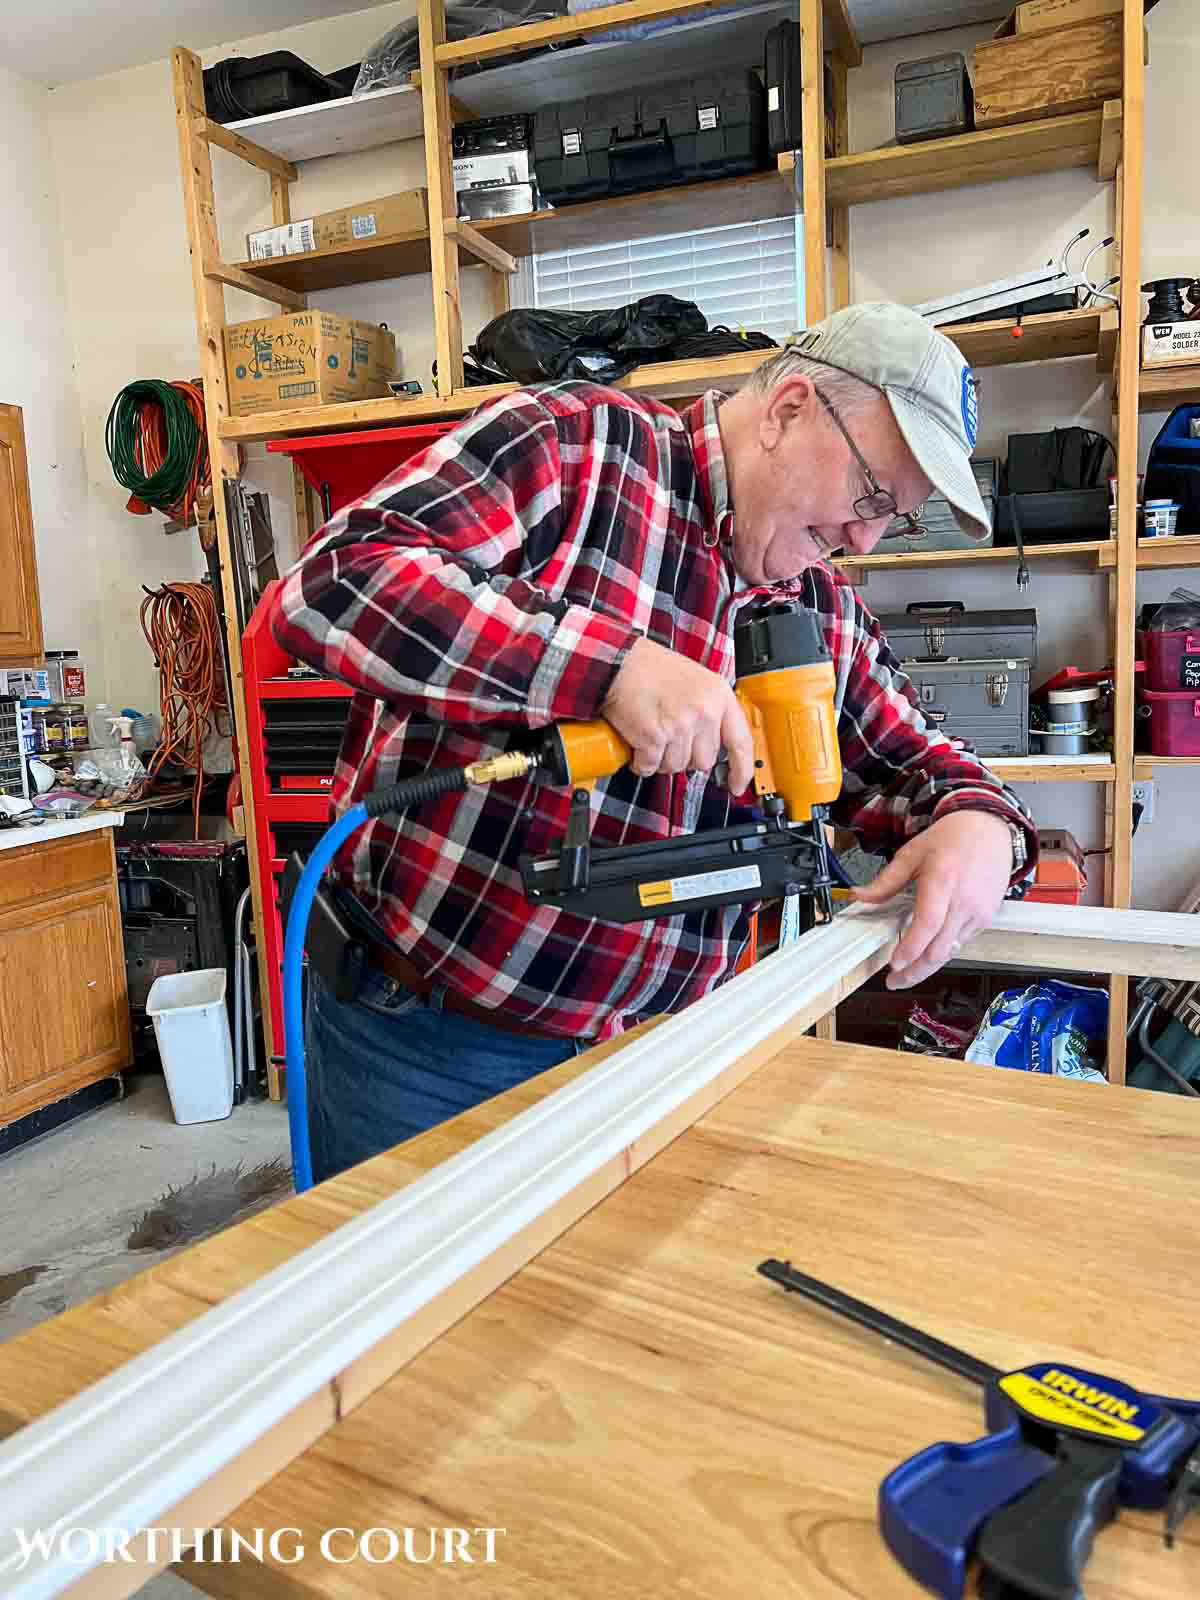
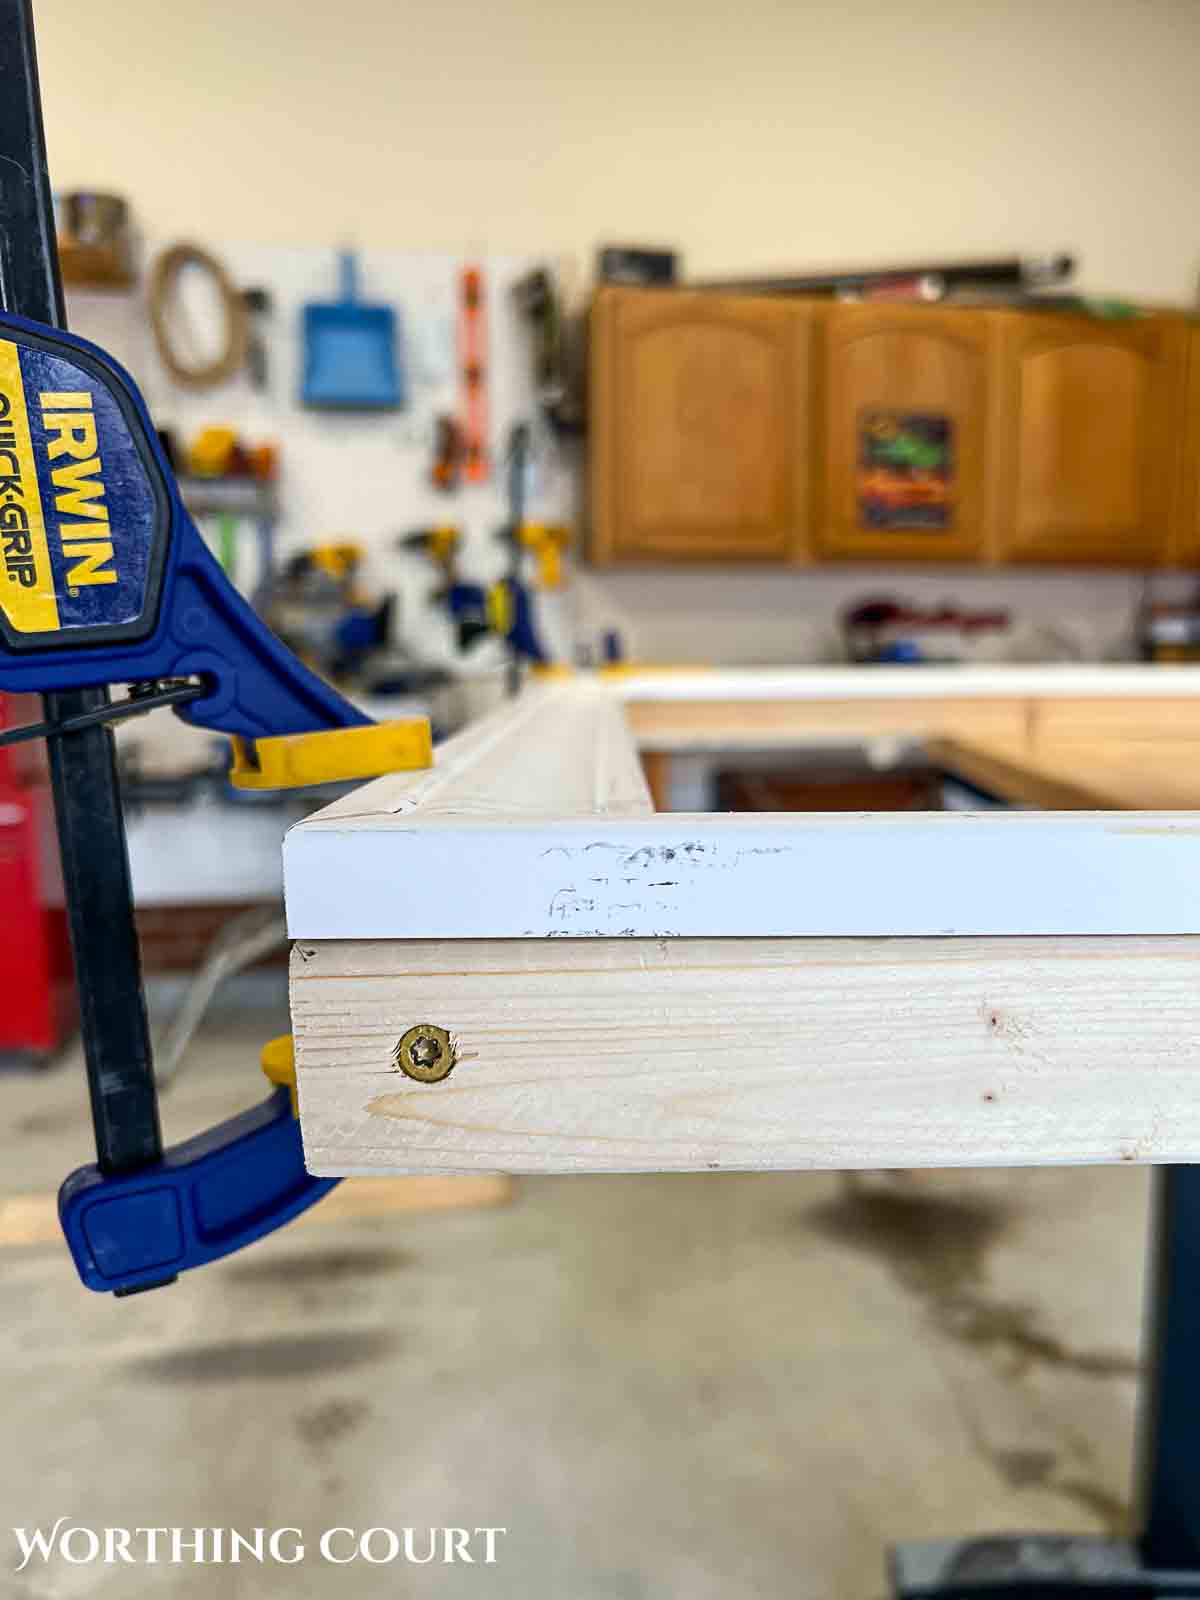
Lay the trim wood so that the outside edge of the trim lines up evenly with the outside edge of the 2×2’s. Attach each board individually, with a brad nailer or hammer and finishing nails. Place the brads (or nails) about 1/4″ in from the outside edge of the trim board, through the thickest part of the trim.
In the image below, we’re using the clamps to hold everything in place before nailing.
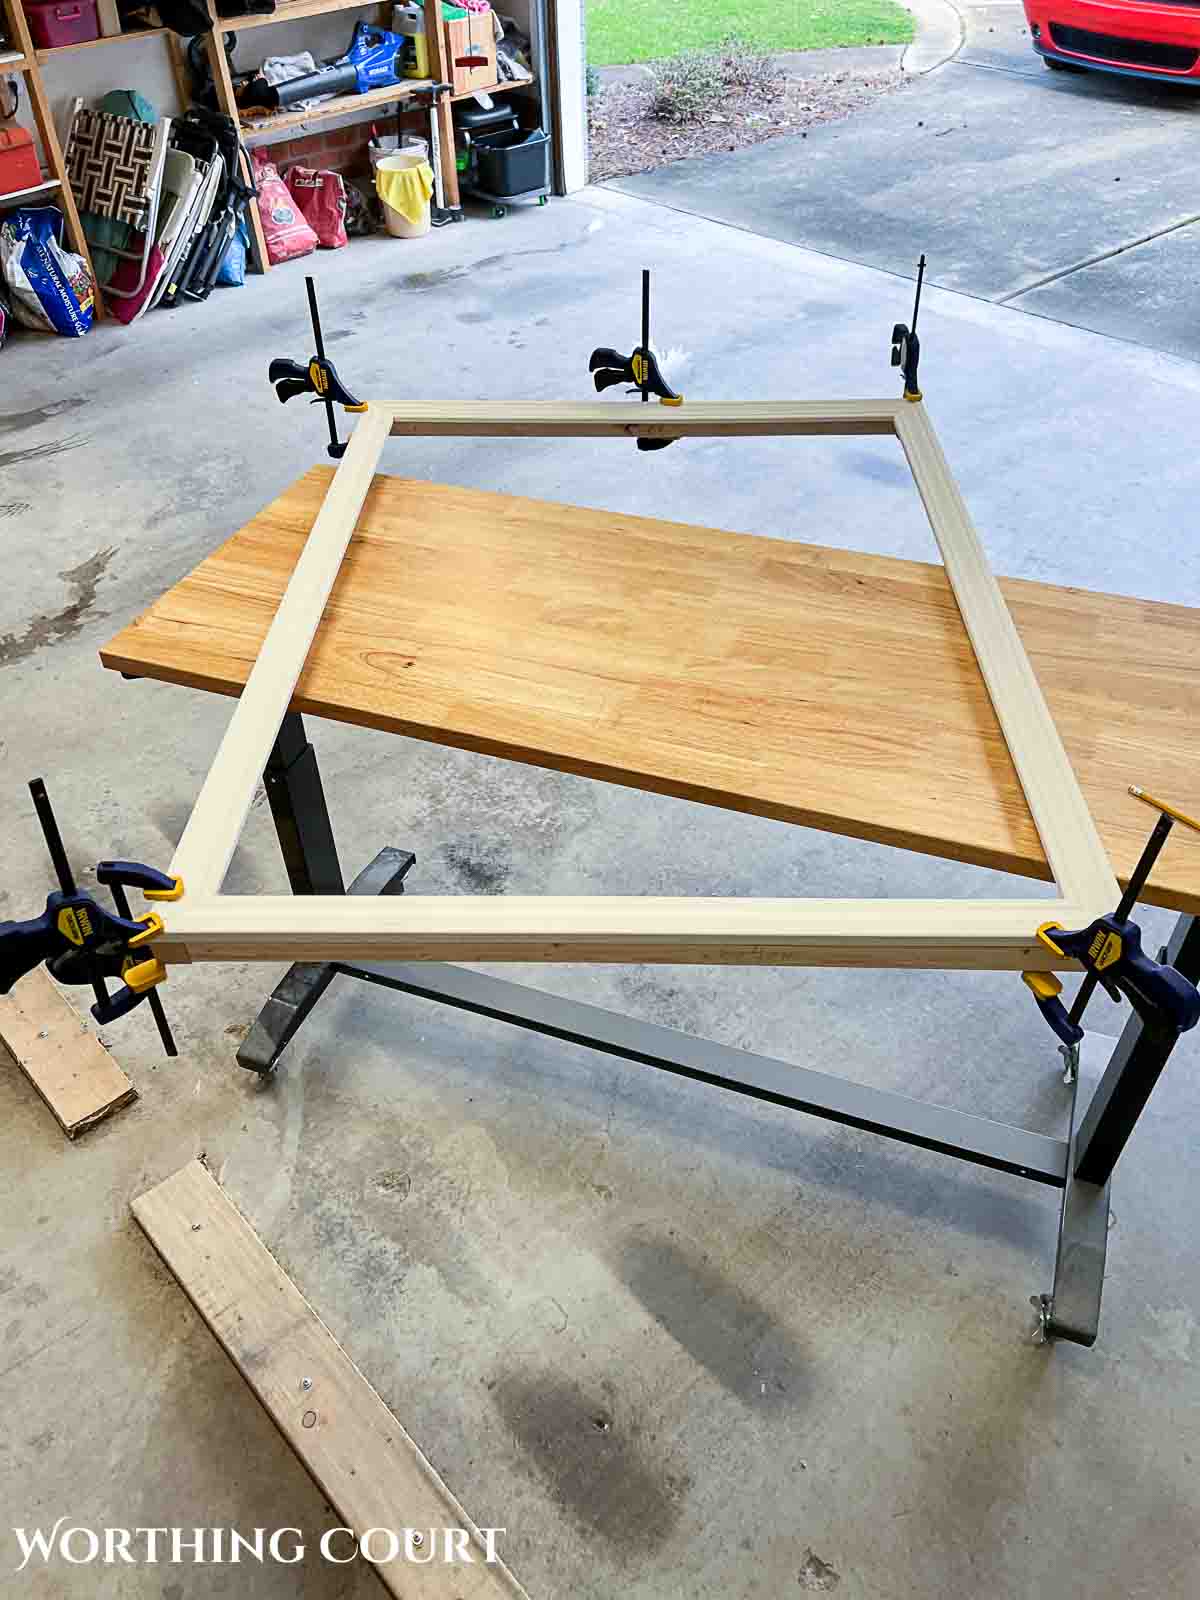
Butt the mitered corners against one another and continue, until you have all four trim boards attached to the 2×2 frame.
The finished frame will look like this:
Because the trim wood is wider that the 2×2’s, lining them up with the outside edge is what will create the slight overlap on the artwork.
Fill holes and gaps and paint.
Fill the mitered corner seams and any nail or screw holes with wood filler before painting.
You will have nail holes to fill along the front, where the trim boards were attached to the 2×2 frame, and screw holes at the joints where the 2×2’s were attached together.
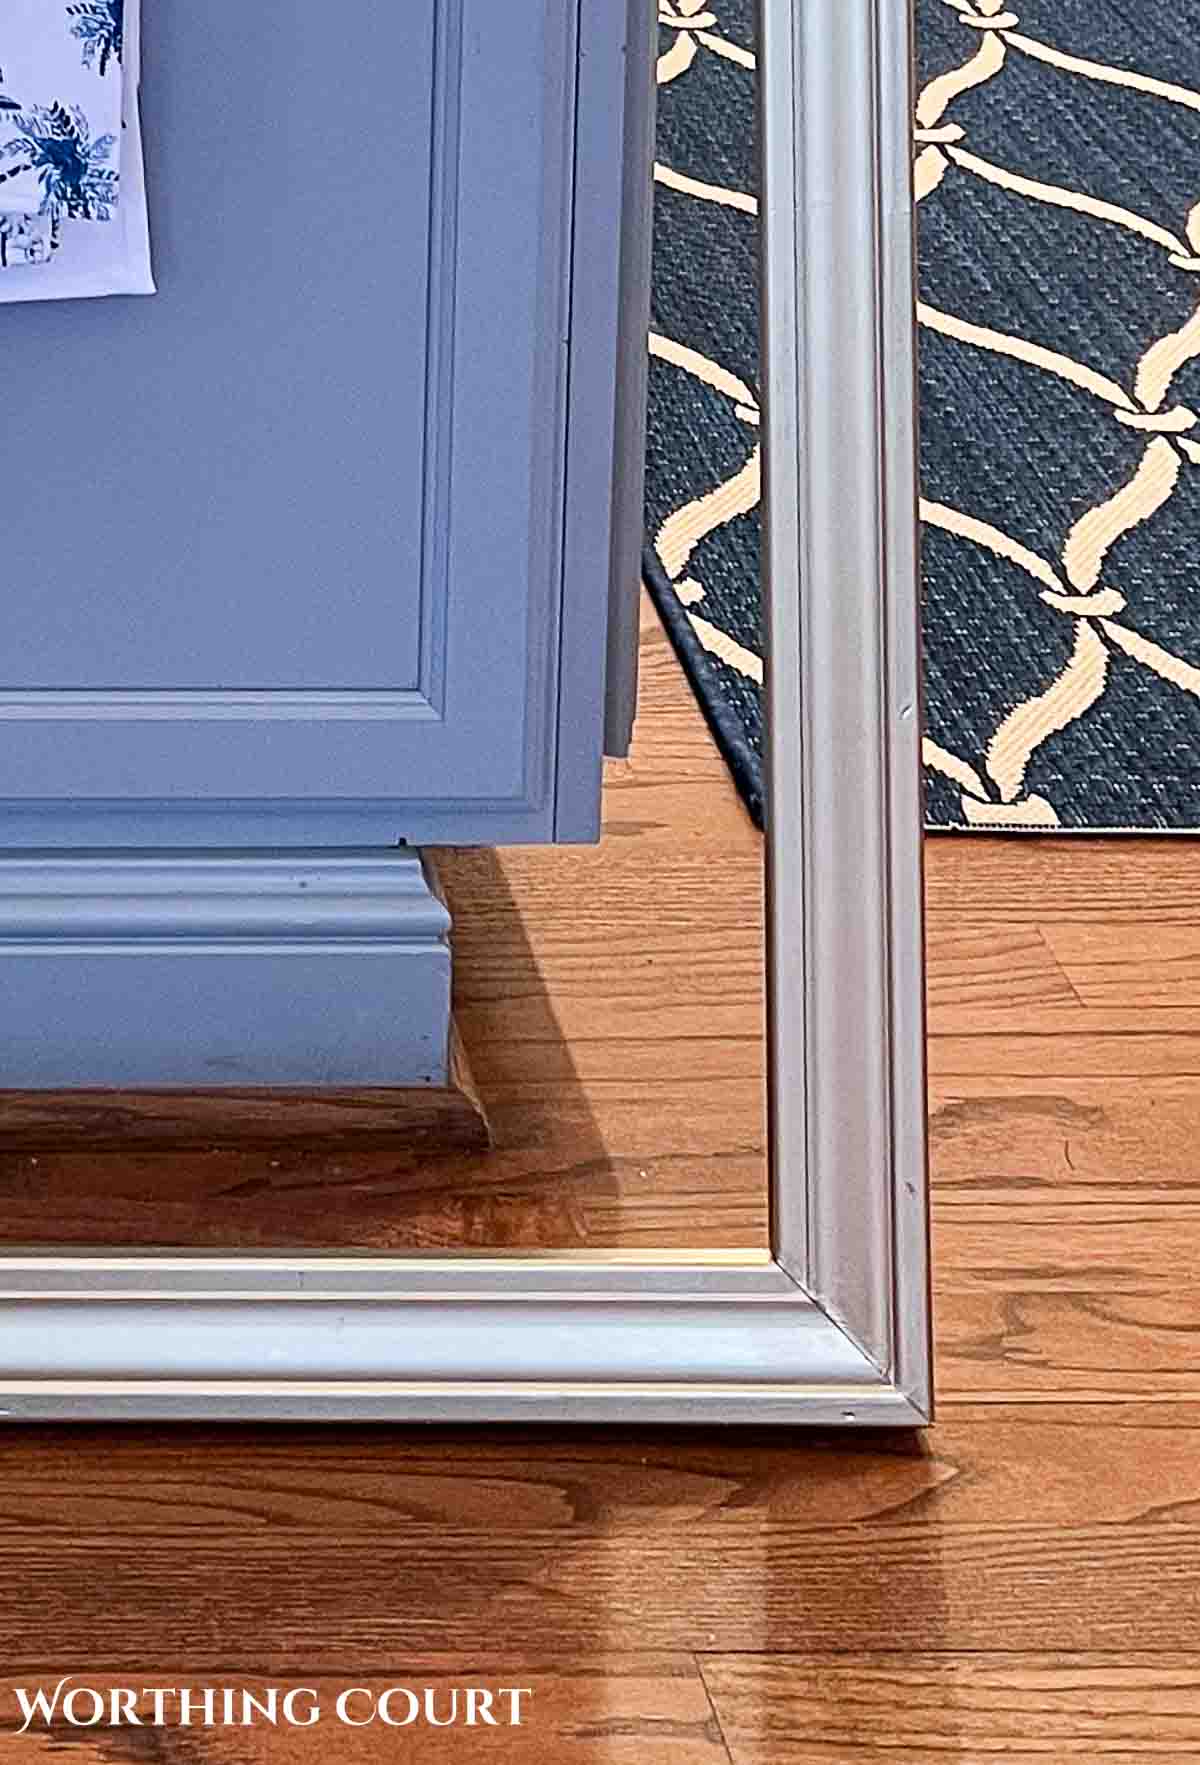
You’ll also have a bit of a gap on the sides of the frame where the wood trim frame and 2×2 frame meets.
LESSON LEARNED: We tried filling the gap on the trim frame and 2×2 frame with paintable latex caulk, but it didn’t completely fill it. We should have used wood filler instead.
Once again though, our frame is up high where I don’t think anyone will notice, but if you look closely in the above picture, you can see the line down the side of the frame.
Be sure to sand all of the wood filler smooth before painting your frame.
Paint the frame.
As mentioned before, I don’t recommend using wood stain for this project because of the uneven result you’ll get from two different wood types/species.
I’m a lazy painter, so I love using spray paint as opposed to brushing paint on any chance that I get.
I laid the frame face down and sprayed the back side and sides. Once completely dry, I flipped it over to paint the front.
TIP: When using spray paint, don’t try to get 100% coverage with the first pass. To avoid drips or wrinkled areas in the paint, spray several light coats.
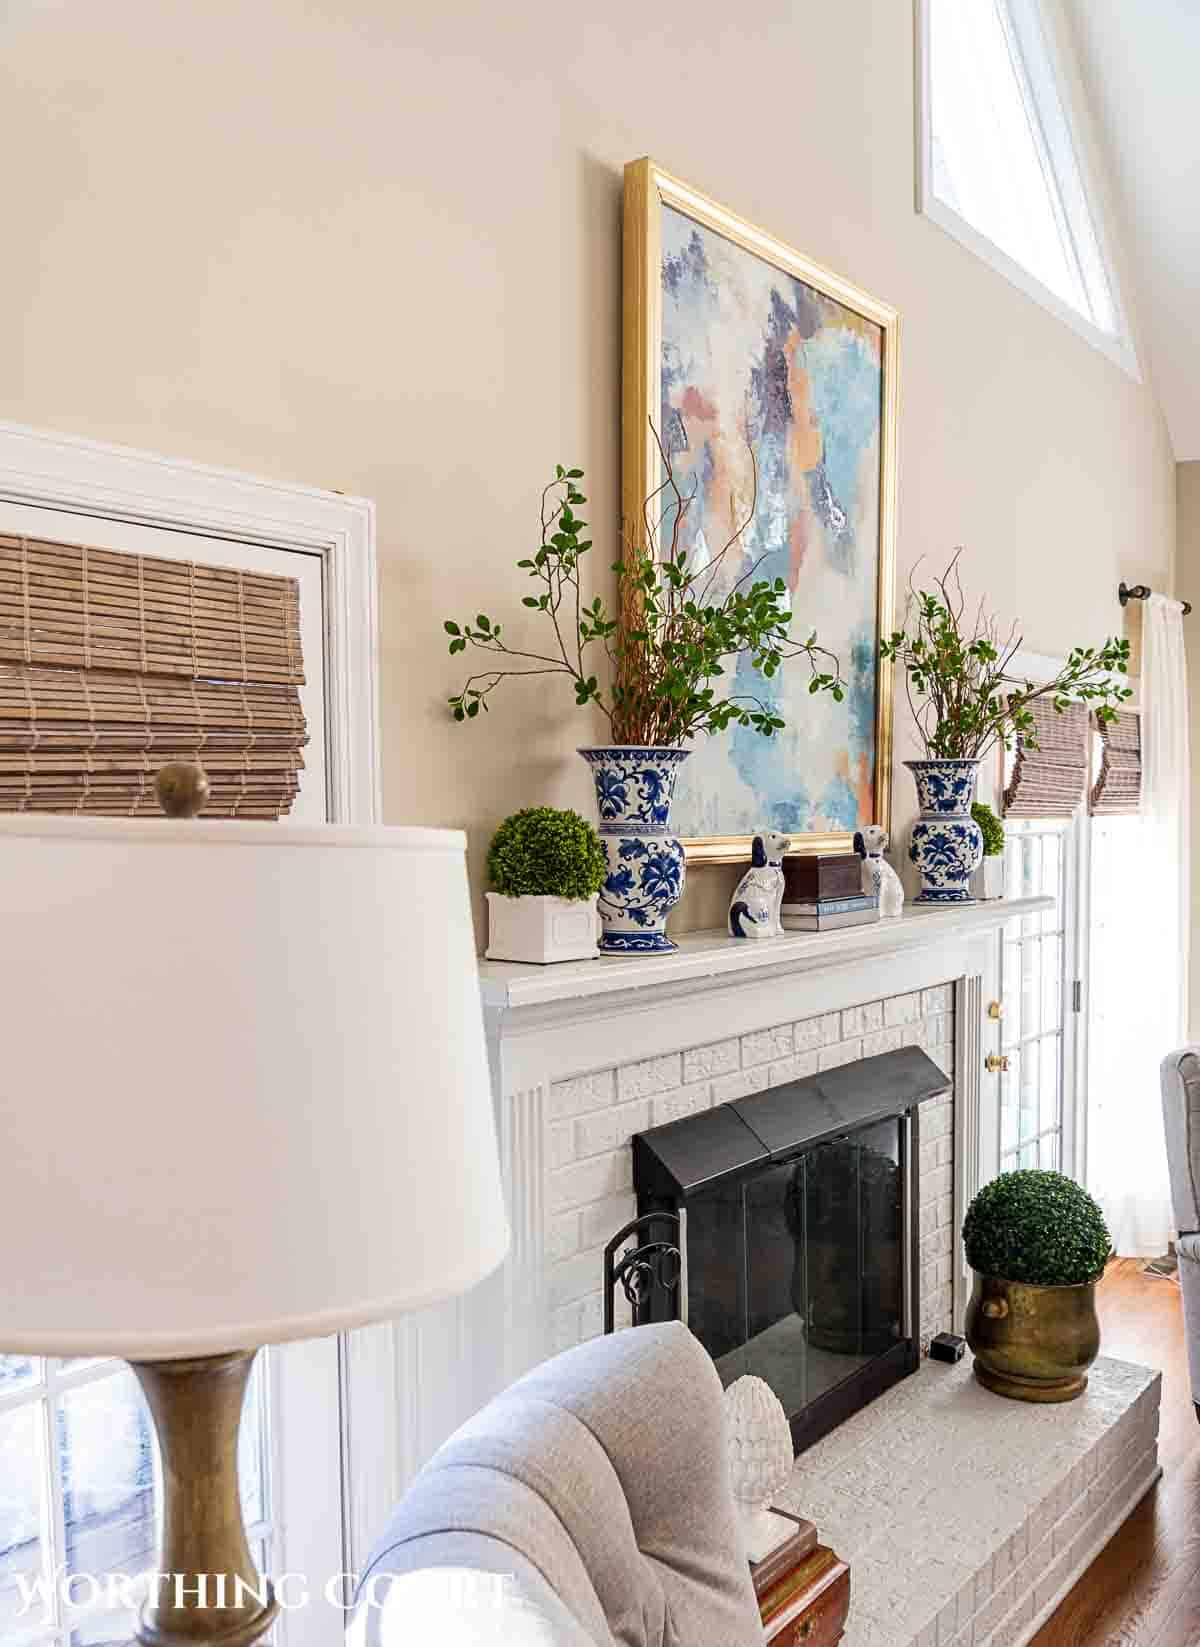
Of course, any color that you would like can be used, but I felt gold would look the best with the rest of my decor.
If you’d like an aged finish, you can add antiquing wax to the frame after painting. I wasn’t after that type of look, so I simply painted mine.
The right shade of gold spray paint can be hard to find, but I’m very happy with the one that I used!
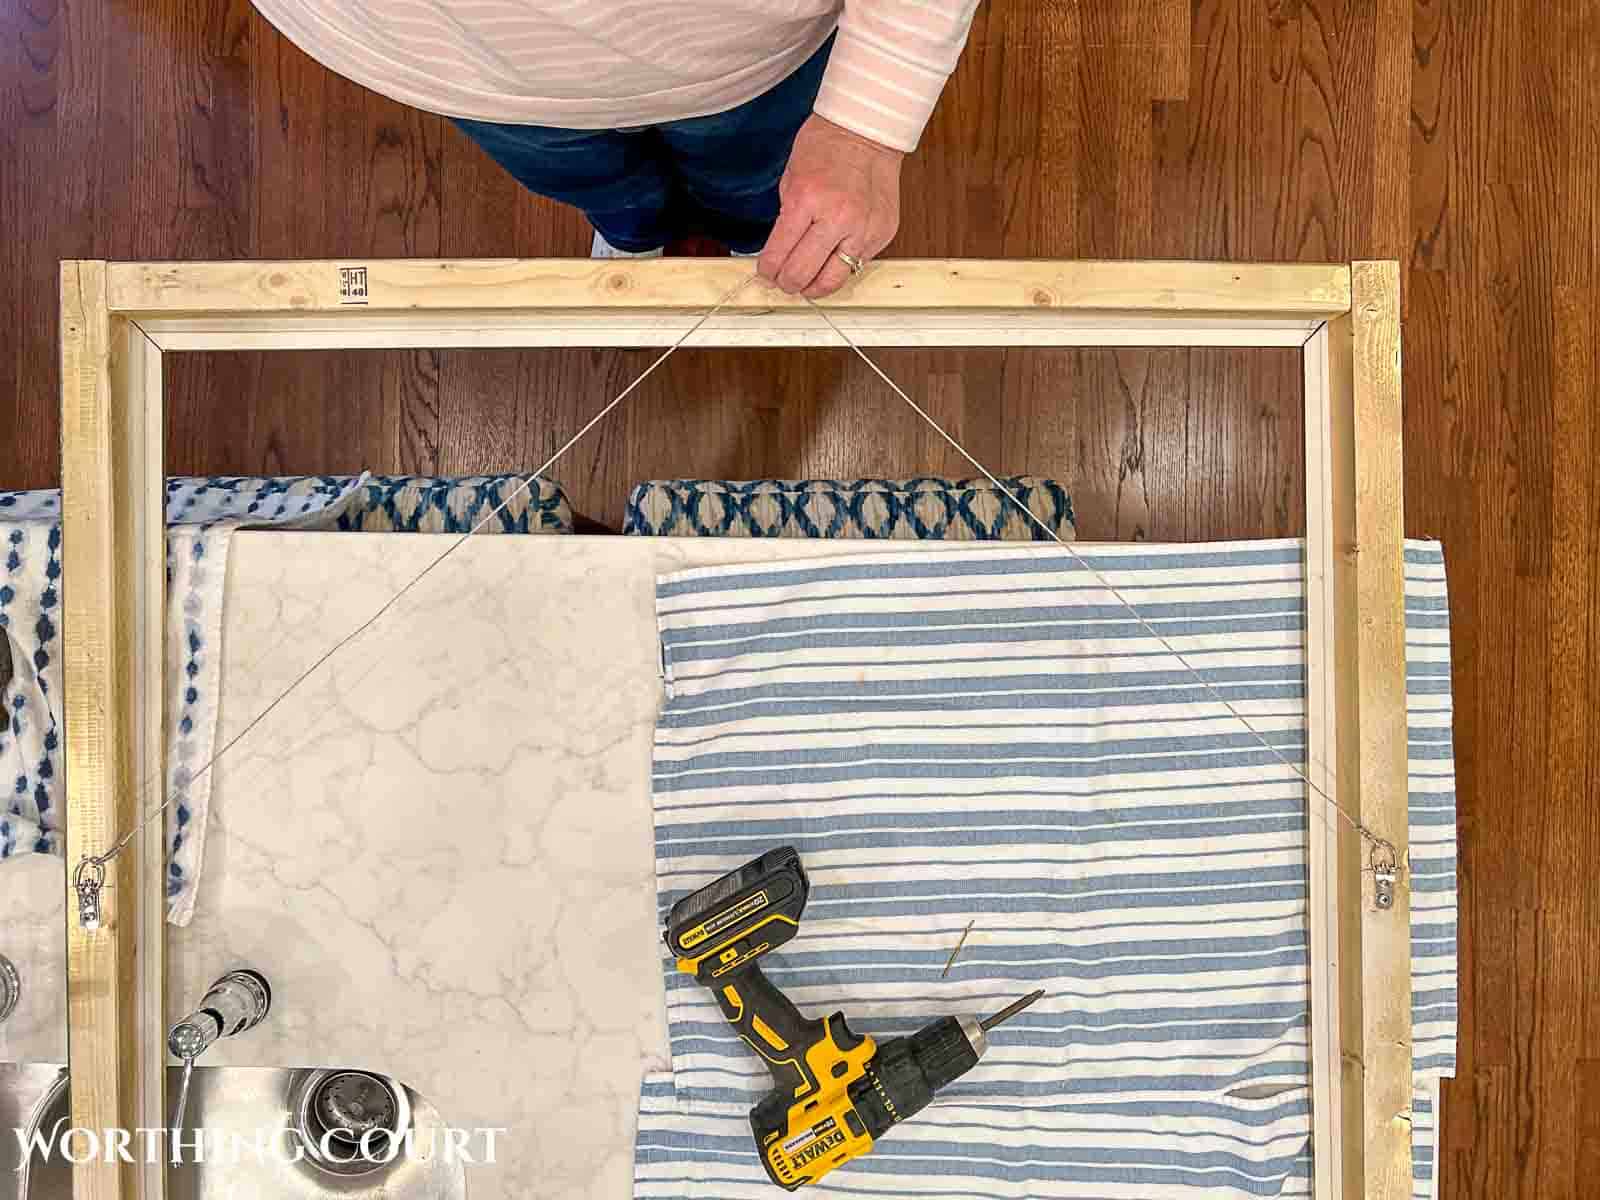
Add hanging hardware.
There are all types of picture hangers for art available. I love using D rings and picture hanging wire whenever I can. It’s so easy!
Simply add a D ring to each side of your frame, making sure that each one is the same distance from the top.
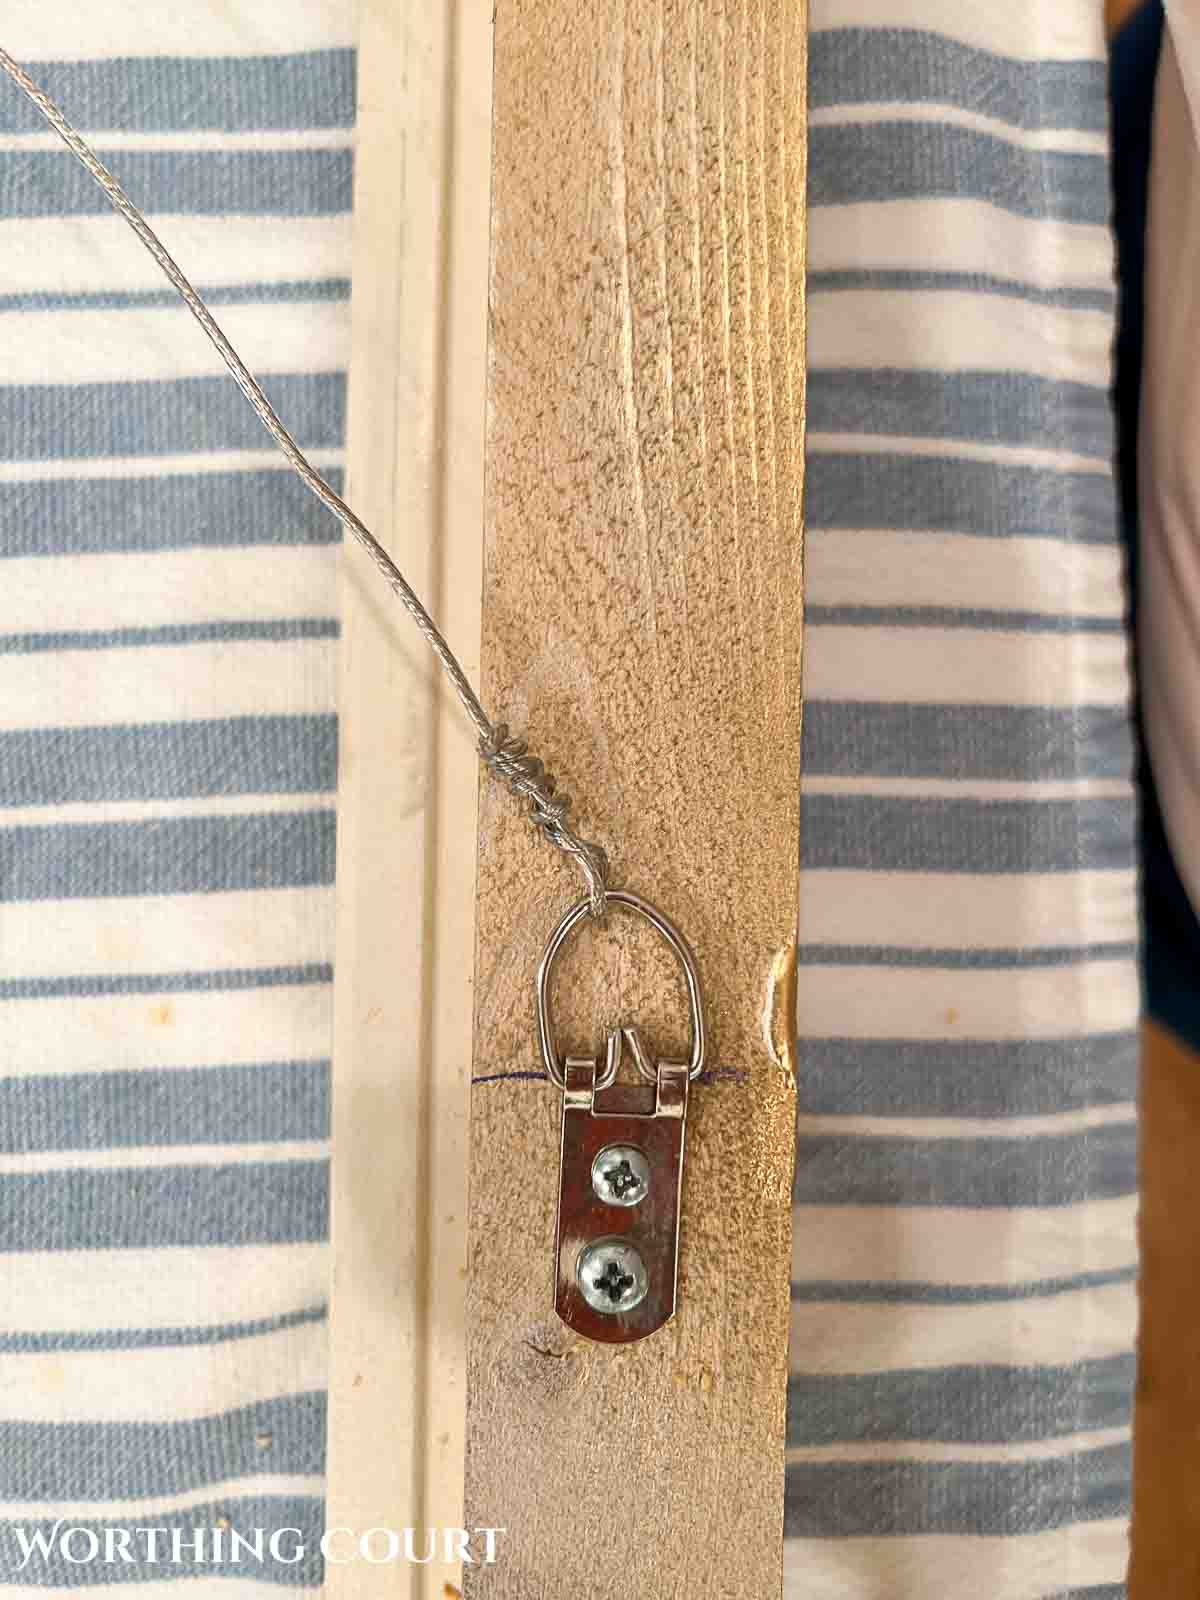
Then add picture frame wire between the two D rings.
TIP: Check the length of the wire. You don’t want to wire to show above the top of the piece of art when it’s hung.
Insert the art into the frame and hang.
When we planned this project, I assumed that we were going to need to add corner braces to hold the canvas in the frame. However, the wood frame is just the right size for a nice snug fit on the pieces of artwork, so no braces were necessary.
If you find that you do not have a snug fit, you may want to either attach a small triangle of wood in the corners or nail the canvas to the frame from the inside on the back.
I love saving money by diy’ing whenever I can! CLICK HERE to see all of my diy projects – from window treatments to furniture building and more.


Love your frame. It looks so good and the art in it to.
WOW WOW WOW, Suzy! This frame is stunning! And I think the picture is perfect above the mantel. Thanks for such detailed and easy-to-understand instructions.
Just beautiful!
Brilliant, thanks for an excelllent how to. A keeper for sure. The artwork is lovely in your room
Excellent instructions! Thank you
I loved seeing how you built your own frame. Where did you find the canvas – this would be so perfect in my guest bedroom.
Thanks for all your posts!
Hi Nancy. I purchased the canvas at At Home. 😀
Great tutorial, Suzy. We have an unframed canvas from Etsy above our mantel and it definitely needs a frame.
Glad you found it helpful, Carol! It made such a difference. 🙂
Your frame is beautiful. Thanks for the detailed instructions.