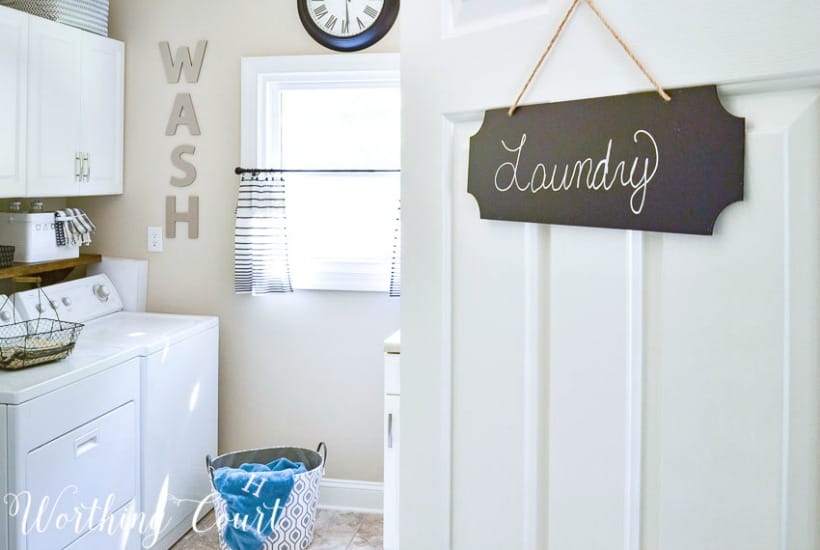
How To Hide Your Ugly Washer Hookup – An Easy DIY
A simple and creative way way to that ugly box cut out in the wall where your washing machine hook-ups are located. This easy diy will still give you easy access to your hoses when you need it.
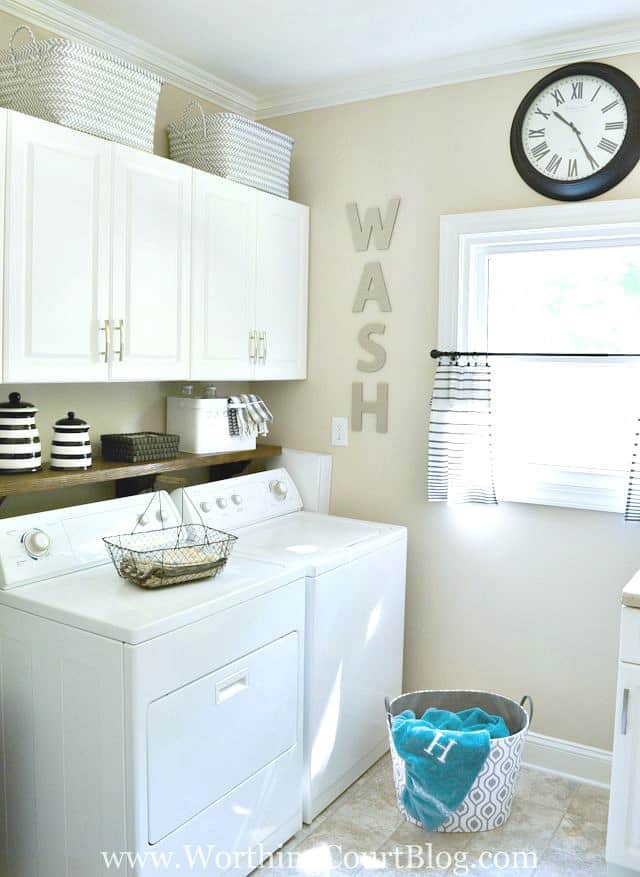
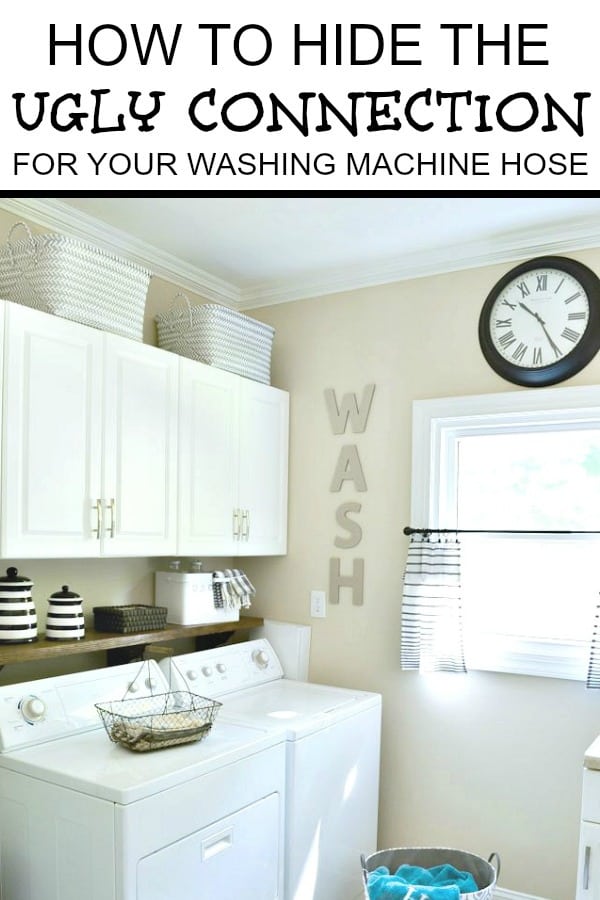
This is my laundry room mid-renovation. Notice anything glaringly ugly? Well, aside from the fact that the whole space is looking pretty blah at this point.
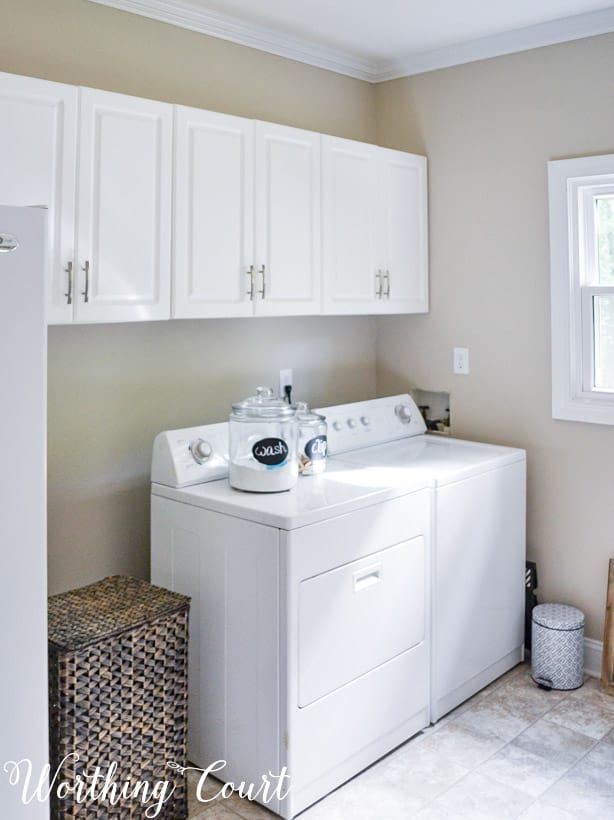
When we were remodeling our laundry room and trying our best to make it a pretty space, there was one glaring thing that literally drove me crazy – and that was the ugly box cut into the wall where the washing machine’s hoses and drain are connected.
If my machines were located in a laundry closet, I probably wouldn’t have done anything to hide the ugliness. But, my machines happen to be located in a very open room and no matter how great the rest of the room looked – that hole is where my eye went every single time I stepped into the space.
Laundry room plumbing is kind of like an electrical cord. It’s a very necessary thing, but it isn’t pretty to look at.
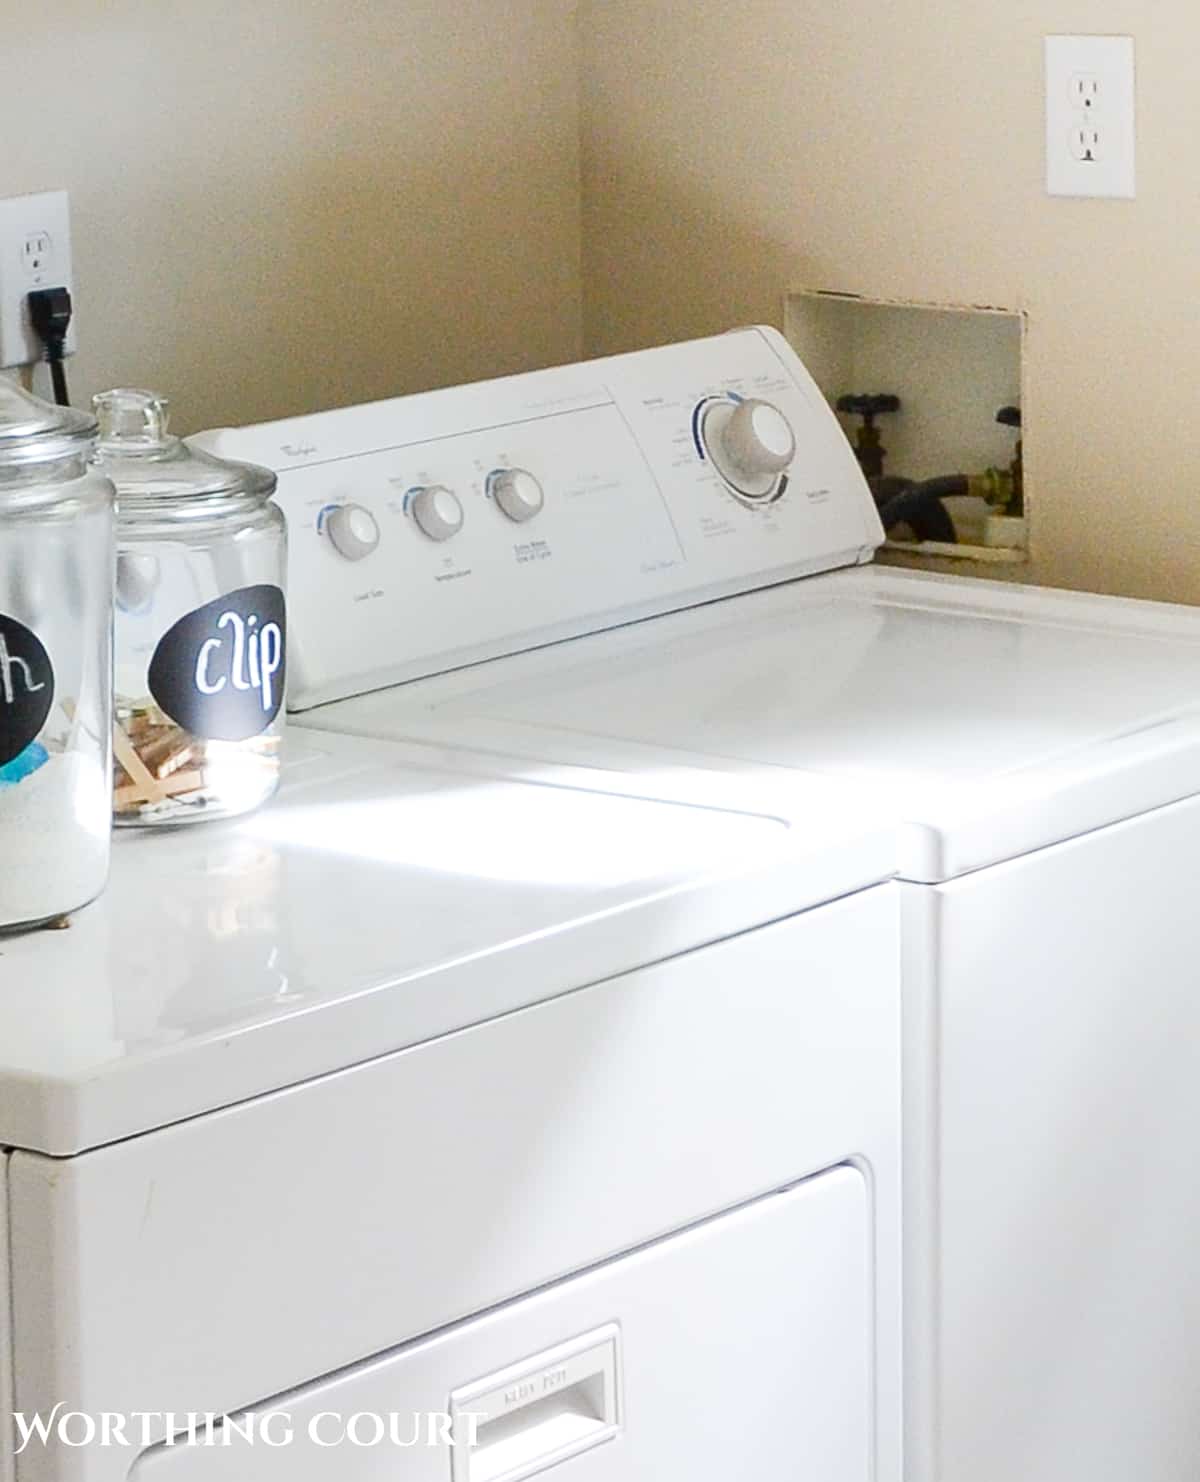
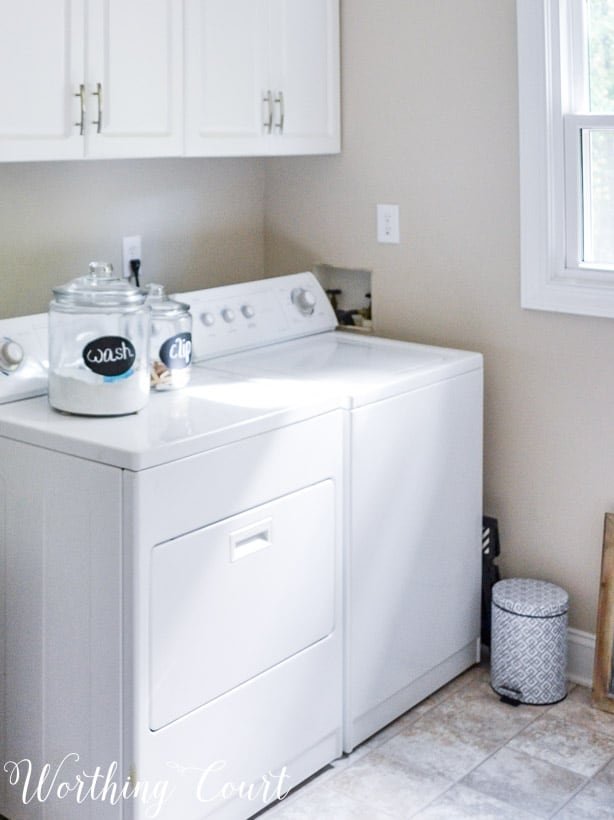
If you have a washing machine in your home, you probably have a hole in your wall like this one too. Not only is it where the water lines to the washing machine are connected – it is often times also where the drain pipe runs to.
This simple diy project will hide the washer hookups as well as still giving your drain pipe access to the washing maching hookup box.
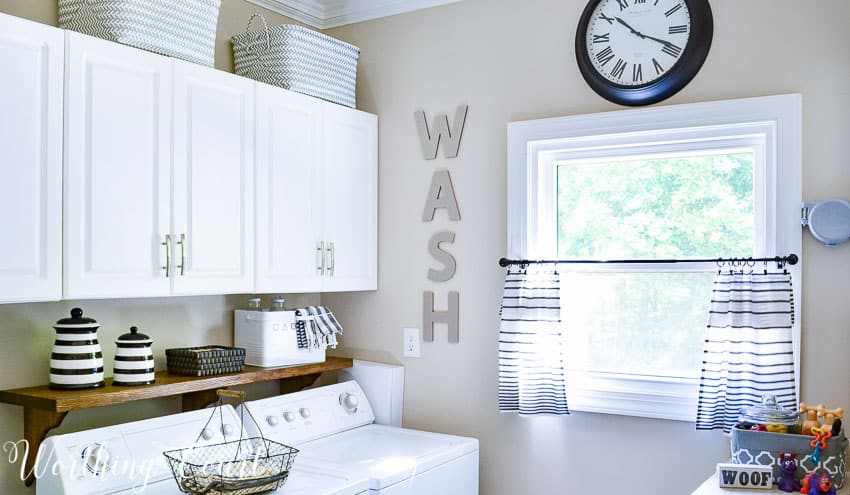
There was no way I was going to go to all the trouble of prettying-up my whole laundry area without figuring out a way to hide that ugly hole in the wall. Here’s what it looks like today.
This project isn’t rocket science. It’s just an easy solution to solve an very ugly eyesore. Let me tell you what I did:
STEP 1:
Measure the size of your opening – height and width.
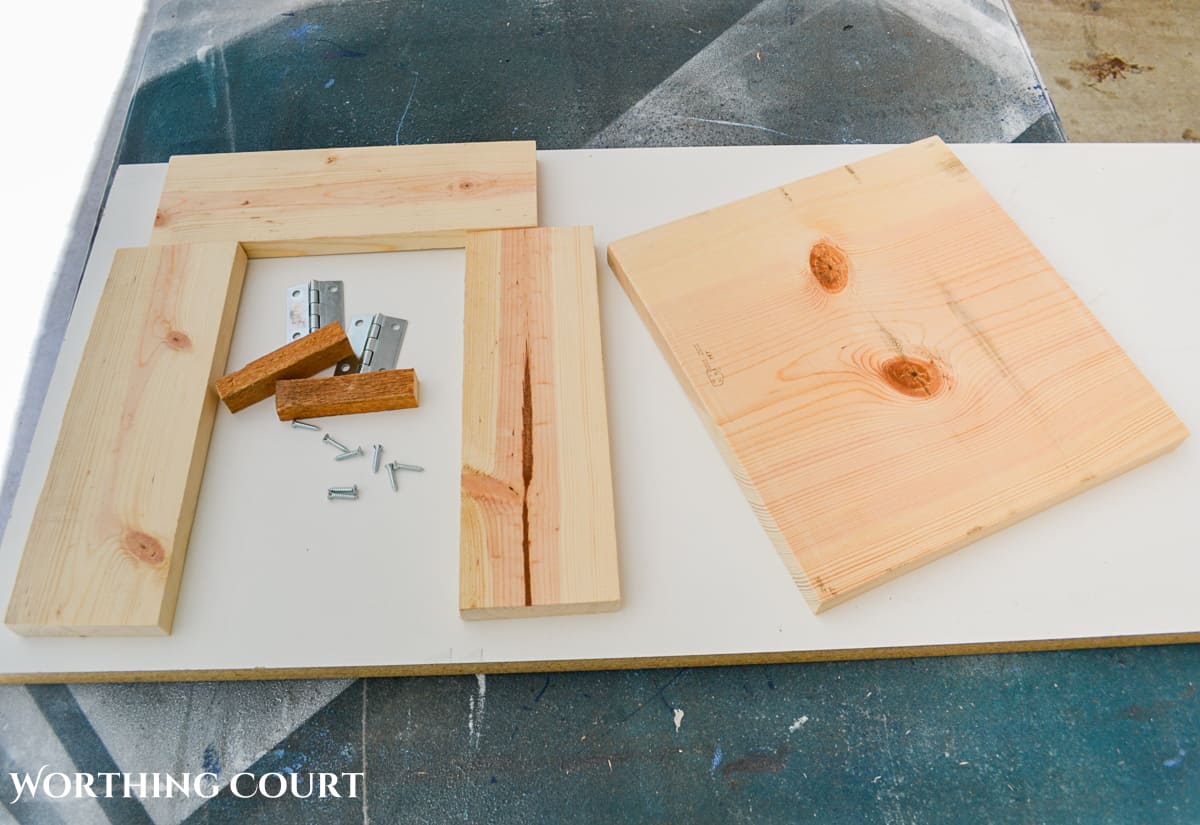
Then gather these supplies:
- 1 – 1″ x 4″ Board – The board should be at least as long as the total of the height of both sides of the box plus the width of the box.
- 1 – Single board that is wide enough and tall enough to act as the cover for the front of the box.
- 2 – Small blocks of wood to brace the corners
- 2 – L brackets and screws
- 2 – Hinges with screws
- Wood glue
- Wood screws
- 4 Clamps
- Spray paint color of your choice (not shown)
STEP 2:
Considering the measurements of your opening, make the following cuts:
Cut 2 – 1×4 boards that will be the finished height (sides) of the frame
Cut 1 – 1×4 board that will be the width of the frame plus the thickness of the two sideboards. This board will be the top of the frame and needs to be long enough to go all the way across the opening plus the top edge of both of the side boards.
Cut 2 – Small square blocks of wood for stabilizing the corners.
Cut 1 – Board that will serve as the cover of the box so that it will completely cover the assembled frame.
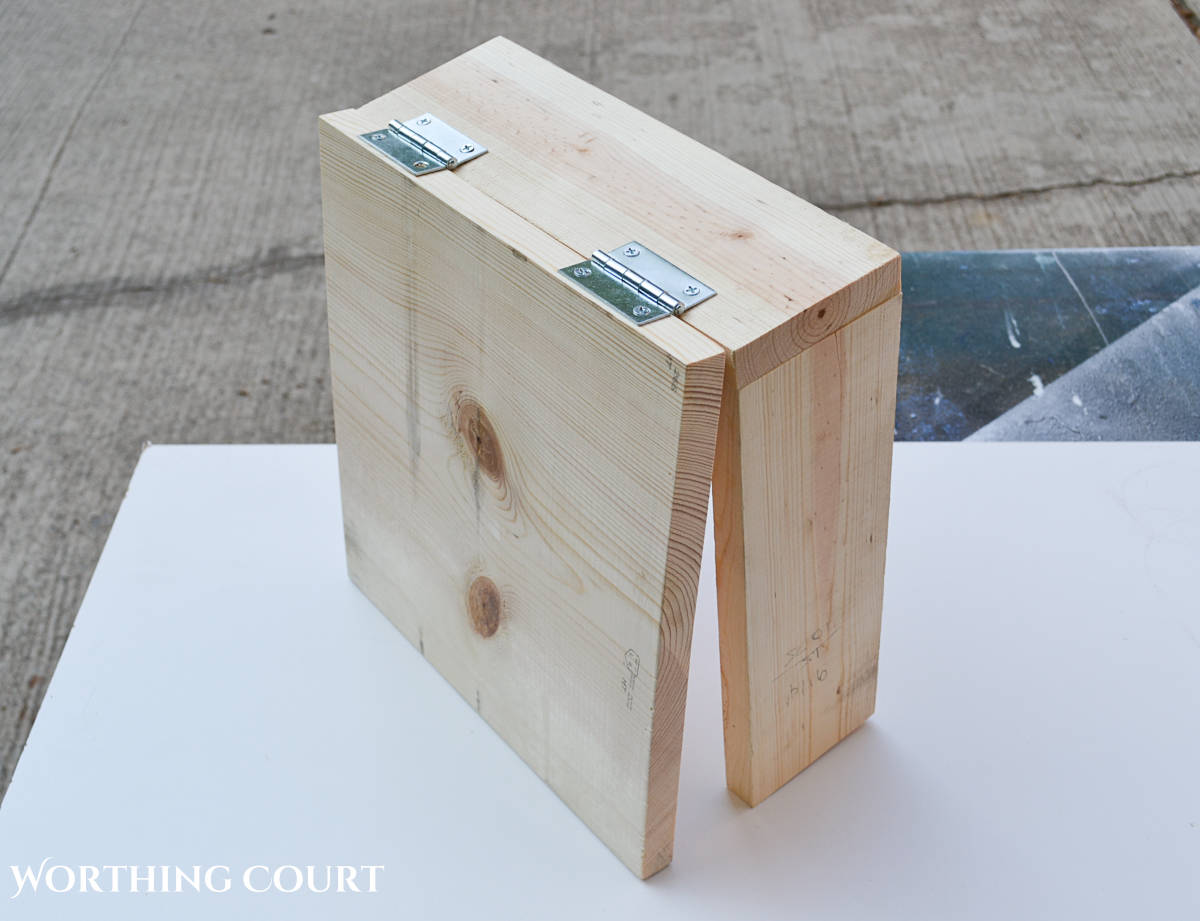
STEP 3:
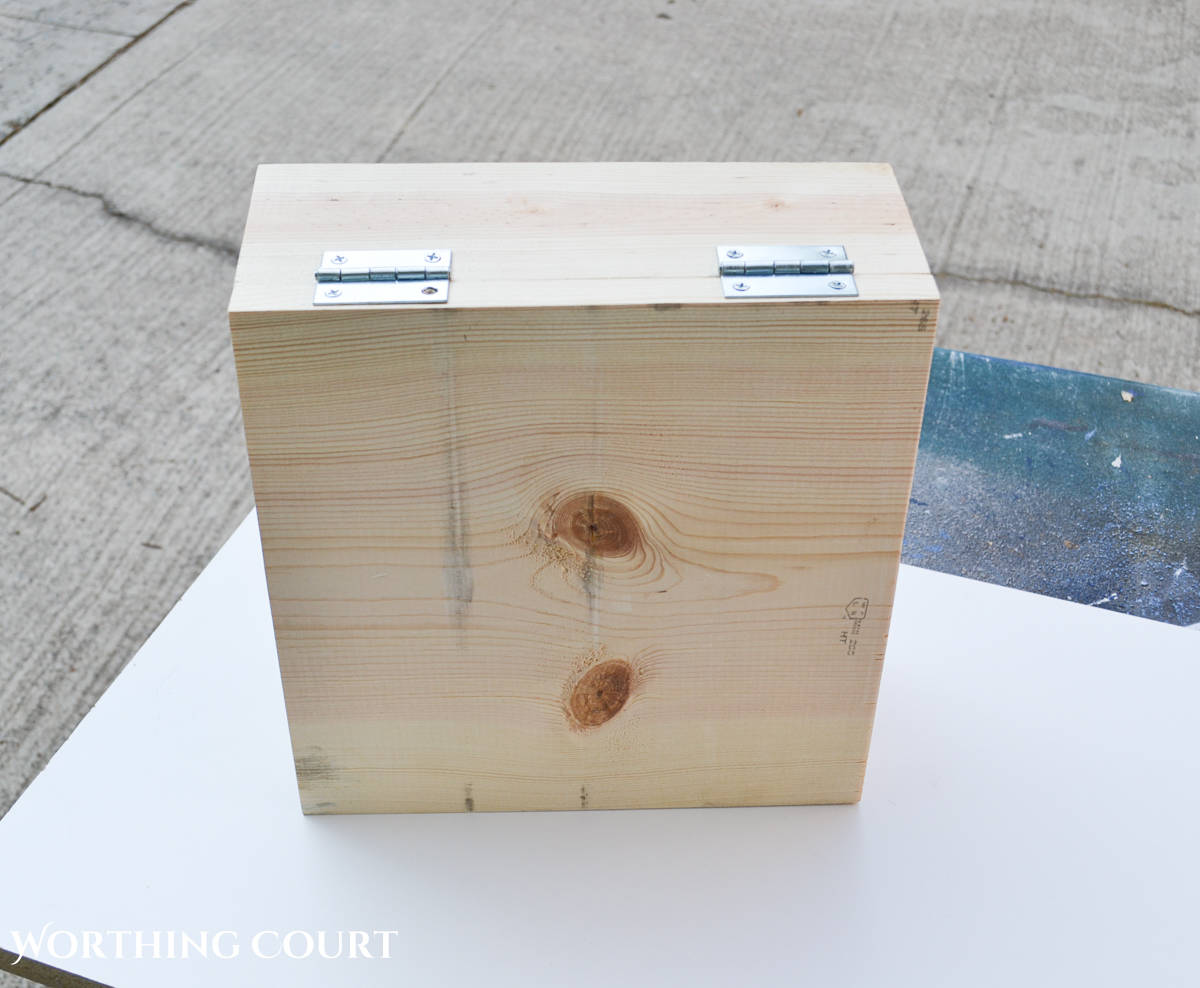
Assemble the frame. If you examine the picture below, you can see how all of the parts of the frame are put together. I glued all of the places where the wood is joined and then added some wood screws for reinforcement.
The two small stabilizer blocks of wood are a little difficult to see in this photo, but if you look closely, you can see them under the clamps.
The board at the bottom of the frame (in between the side pieces), farthest away from the clamps, isn’t attached – it’s just there to temporarily hold the legs apart until the glue dries.

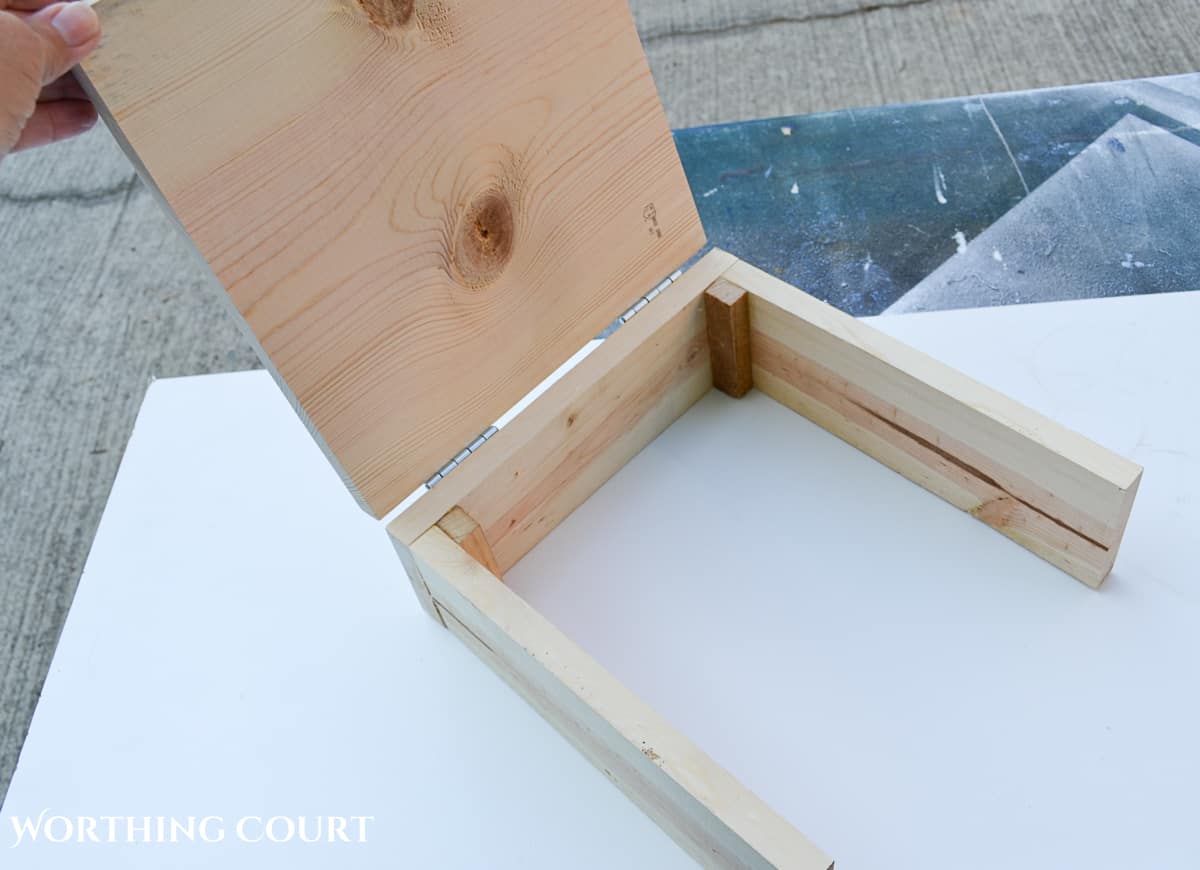
STEP 4:
Once all of the glue has dried, remove the clamps. Attach the board that is the cover to the top side of the frame using the hinges.
STEP 5:
Spray paint the inside and outside of the completed box and allow it to completely dry.
STEP 6:
Once the paint is dry, it’s time to mount the box. I forgot to take a photo of this step, but you should be able to easily understand what to do.
Attach the L brackets to the wall, above the open box for the washing machine hookups. If the location of the of the hook-ups doesn’t allow you to mount them in studs, you’ll want to use wall anchors.
The box hangs by sitting it on top of the brackets and lifting the front cover to attach the it to the L brackets. You might need someone to help you hold the box in place while you attach it.
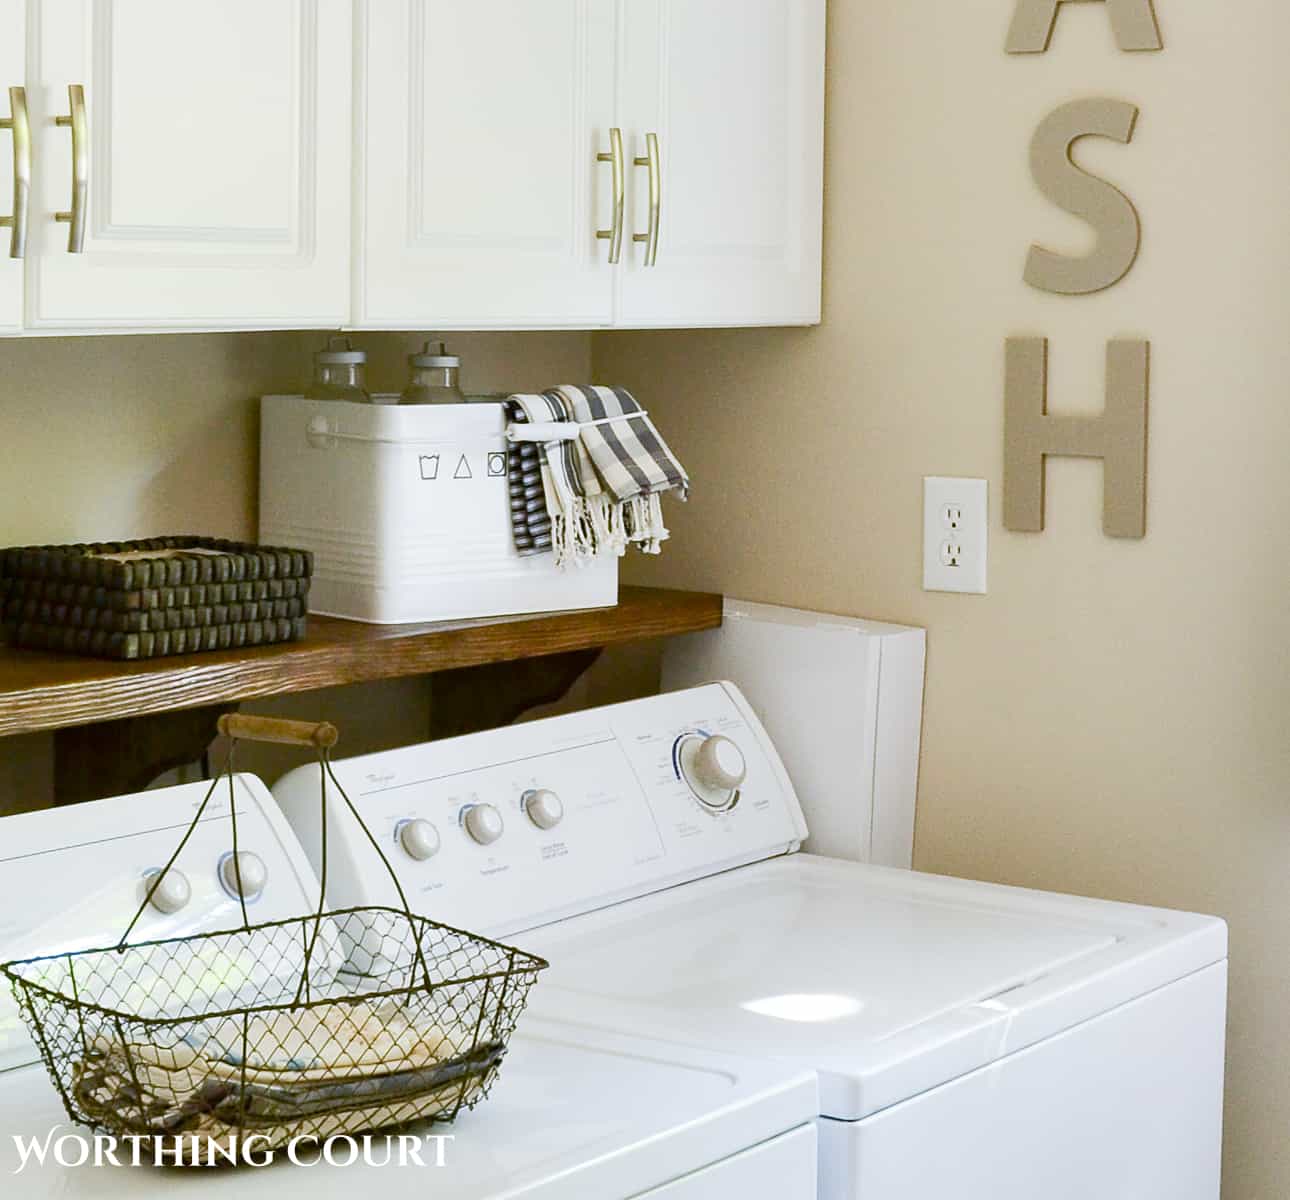
Voila! No more ugly washing machine hose connection hole in the wall, but the faucets are still easily accessible.
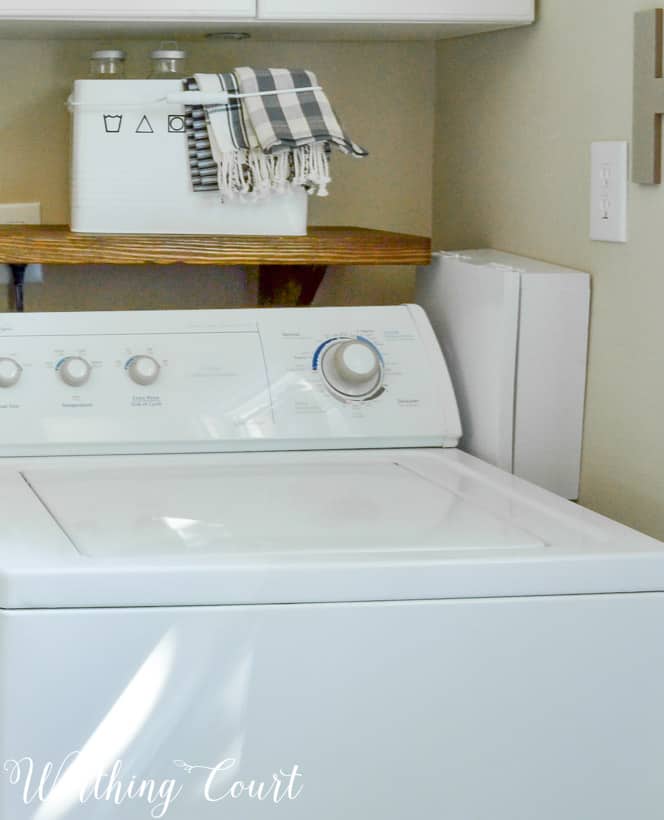
SIDE NOTE: As you can see, the box for my washer hoses is located to the side of my machine, instead of behind it. So, in my case, I have to actually pull my washing machine forward to be able to open the box from the front.
FAQs

Great idea – my stupid cat is forever chewing on pipes and anything plastic. I am so going to box in my laundry pipes!!!
I love your black and white curtains!!!! Do you remember where you got them???
They’re actually tea towels instead of curtains! I folded the tops over and hung them with clip-on curtain rings.
LOL Mine are partial to fake Christmas trees and wreaths. Cruella de Ville favors white ones. Peanut likes silk flowers. Hard to sell arrangements with chewed off petals. So far the washing machine hoses are safe.
How about buying a blank picture canvas from a craft store and painting it the same color as the wall?
Suzy, your laundry room looks wonderful! I’ve been wanting a shelf over our washer and dryer and now I’m gonna get my honey to make one for them!
JP
Can’t clever idea
Cindy
Brilliant, and it doesn’t distract from your lovely new laundry room. Hugs P.S. I hope you will link up at my hop ( you can share until midnight tonight)
Indeed, brilliant! Would you have any suggestions on how to hide power cords? Mine are all bunched up in a built-in bookshelf (next to my fireplace) and they look horrible! Would you please post on how? Thanks! -Bev
Hi Bev. Look for a Design Dilemma post about hiding cords soon! In the meantime, can you email me a photo or two of your problem area? My email is: handgrs(at)gmail(dot)com.
Am doing it right now 🙂 Thanks! -Bev
What a good idea. Thanks for posting. Hello from Share the Wealth Sunday.
I like this idea. For ours, I think we can do a door-ed shelf, as I love the shelf idea you have behind your washer/dryer and that’s where our connections are! I can’t wait to fix our washing area up a bit once we work on the garage! 🙂
My connections would have been sooo much easier to hide if they had been located behind the washer instead of beside it. As it was, that big ole hole in the wall is the first thing that my eye went to when I walked into the room. Good luck with your garage!
Can you have a sulfide hookup of the washer? I thought it was supposed to be in the back of the machine.
Awesome, I love your laundry room! I am currently revamping our laundry room and can’t wait to build a shelf to go over the washer and dryer.
This looks so amazing. Pinned and tweeted. Thank you for bringing such amazing creations to our party. We hope to see you tonight at 7 pm because we LOVE to party with you! Lou Lou Girls
What a great idea to hide the ugly – love it. I’ll have to share this one with hubby. Thank you so much for sharing at Share It One More Time. Cathy
Lovely and very helpful tid bit! I love the idea of hiding the hook ups with something simple, yet practical. Thank you for sharing this, Suzy! I’ll be sharing your link on twitter as well. (and pinning your laundry room because it’s gorgeous! I’m looking to spruce up my laundry room as well, and your space will be my inspiration 🙂 )
I agree…the hookups are an eye sore. What a great idea!! Will have to pin!!
I like the idea of covering the faucet hole in the wall. Such an eyesore. I’m trying to imagine how it works in the end. Do you hook the box over the L hooks and let it hang there or did it have to be screwed on to the L hooks?
Also, when you need to access the faucets, how does it open? Are the hinges on top or on the side?
Hi Portia. The box was screwed onto the L hooks so that it wouldn’t fall off. To access the faucets, you open the box from the front. The hinges are on top of the box.
Love the new laundry room. And love that metal box on the shelf above the washer. The white one with the laundry symbols, may I ask were you got it from??
Thank you, Amy! I found the white laundry box at HomeGoods.
love the shelf over washer /dryer. Did you make the shelf or is it premade?
Hi Michelle. I made it myself using a 2″ thick board and inexpensive wood brackets.
Love your laundry room!What a great solution!
Do you need to move the washer in order to access the box cover? It looks like the cover box is inaccessible without moving the washing machine. Looks nice and clean and blends well in the tidy laundry room. Great look!
Hi Laura. In my case, yes I would need to pull the washer out to be able to access the cover, but that shouldn’t be any problem. Hopefully, I’ll only need to access it every few years to change the hoses. 😀
Oh my! You’re supposed to change the hoses?
Yes, it’s recommended that you change your washer hoses every 3 to 5 years as they can become brittle and burst.
the box i have is behind washer so i may need to use 1×2 board instead to allow washer to be pushed back
Suggestion: paint it your wall color and it will practically disappear