Bookcase Makeover – Traditional Cherry To Farmhouse Fab!
I am sharing my step-by-step directions for giving an old cherry bookcase a farmhouse fab makeover.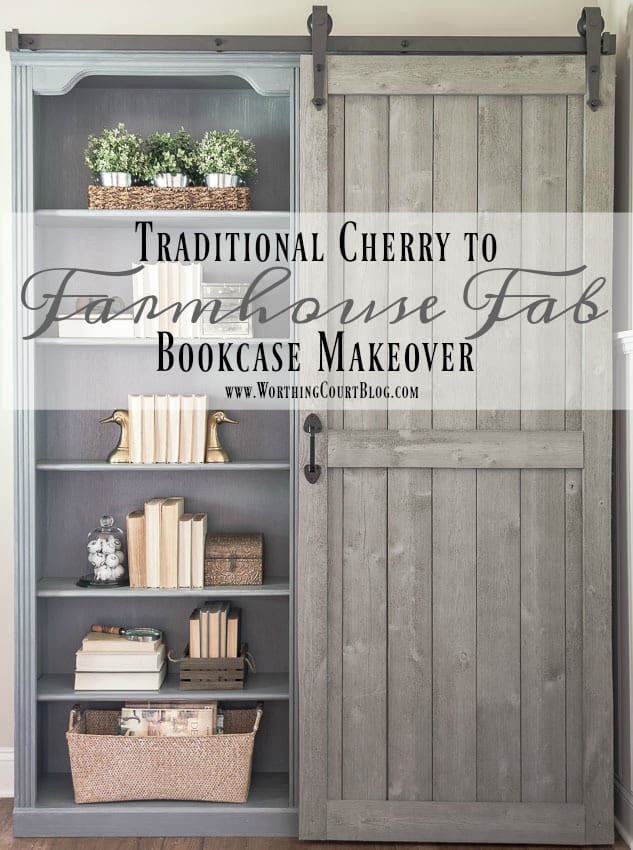 Affiliate links have been used in the post. See my full disclosure HERE.
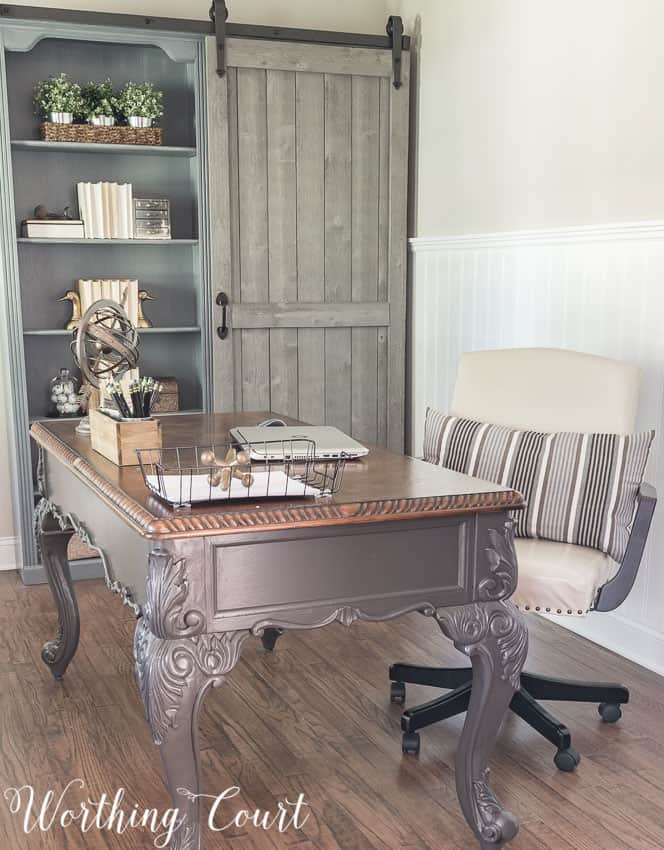
I usually don’t put an exclamation mark in my blog post title, but y’all – I am so stinkin’ thrilled with the bookcase makeover for our home office! A few weeks ago, I mentioned that I was working on the bookcases and was concerned with how they were going to turn out. Thankfully, I’m in love with the end result and find myself stopping often just to stare at them!
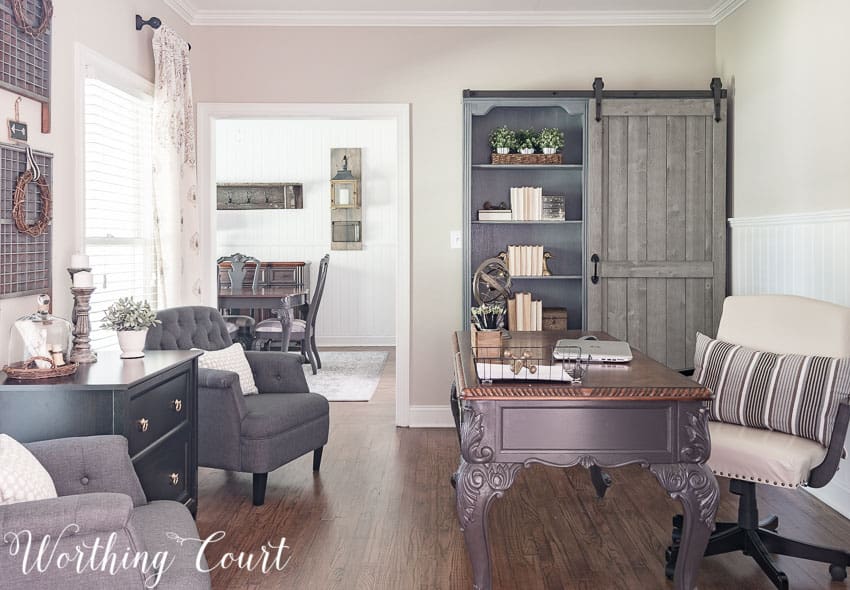
Did you notice that the dining room is striped bare of all its fall finery? That’s because Christmas is in the house! LOL I’ll be sharing my Christmas dining room soon!
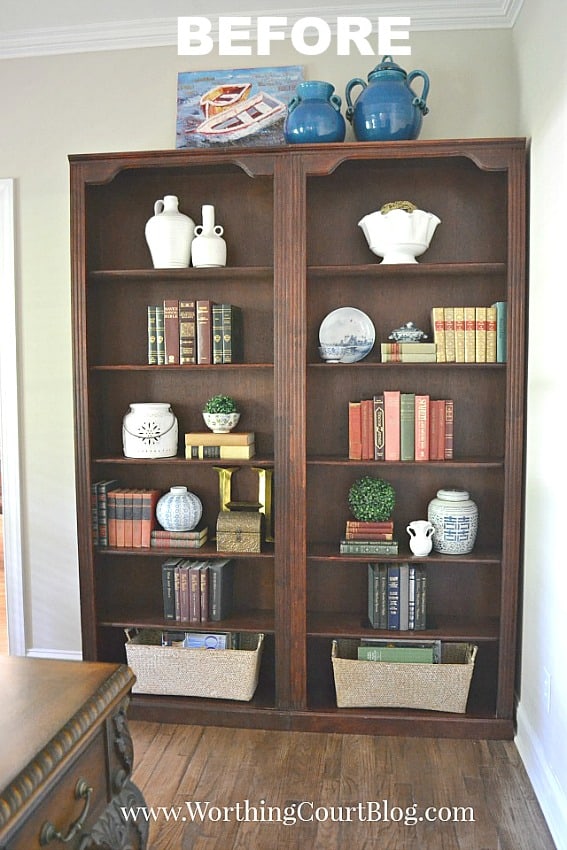
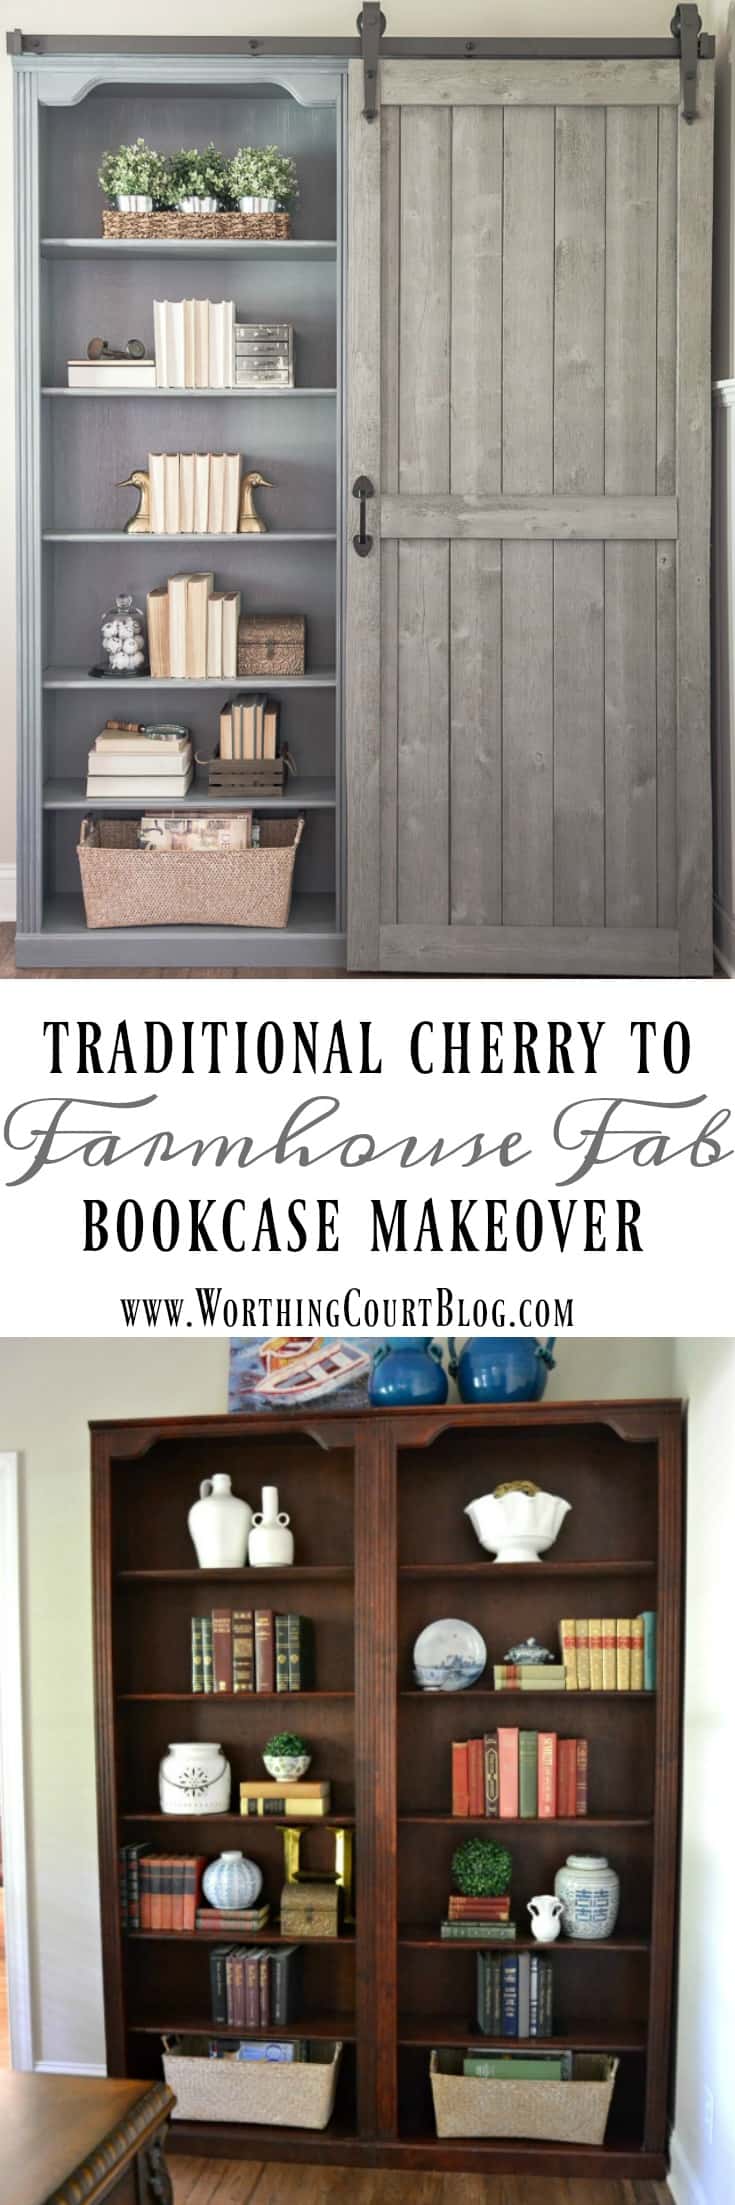
To fully appreciate the change in the bookcase, take a look at the before picture. These are cheap-o bookcases that had a waxy, fake looking cherry stain on them. Their most redeeming quality is that the open shelves are solid wood, so they don’t sag under the weight of a lot of books.
Here they are today, after giving them a couple of coats of primer paint (to completely cover the red’ish stain) and brushing on gray stain. I used one of those cheap chip brushes to apply the stain and allowed it to dry without wiping any of the stain off. Primer paint used: Kilz 2 Latex Primer in Gray. Stain used: Rustoleum Ultimate Wood Stain in Weathered Gray.
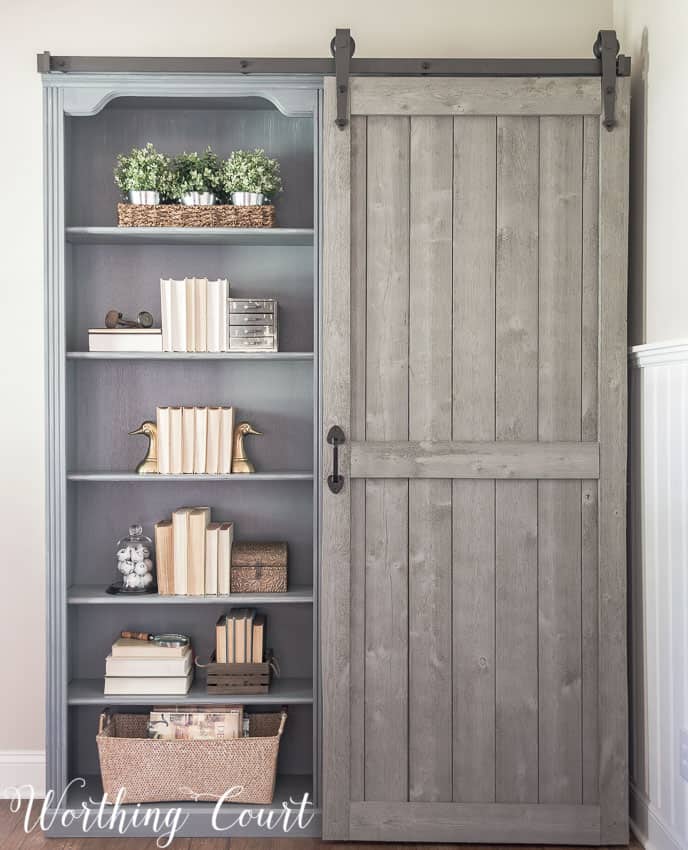
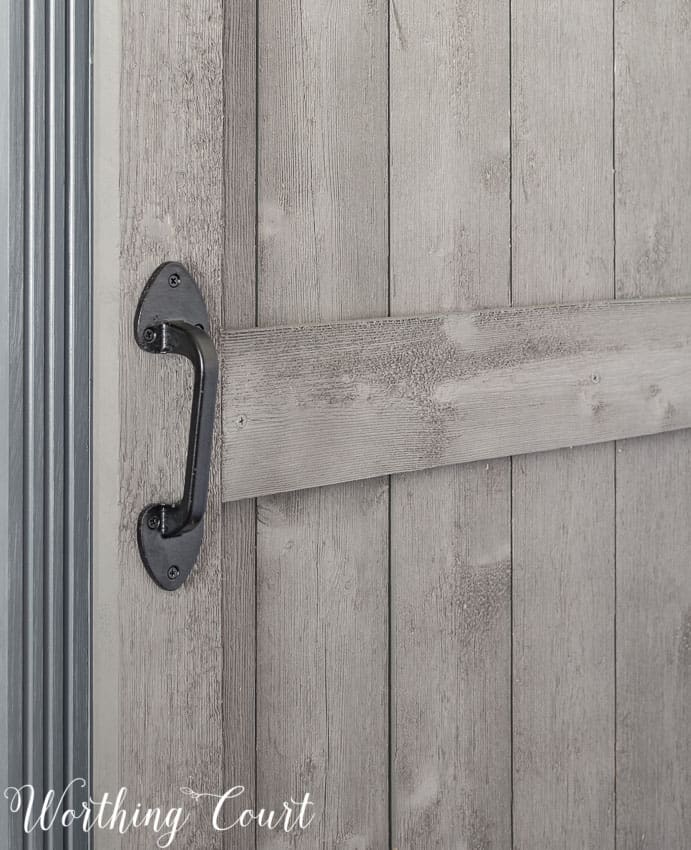
This closeup shows the weathered looking finish that was created by brushing the stain on top of the wood and allowing it to dry without wiping it off.
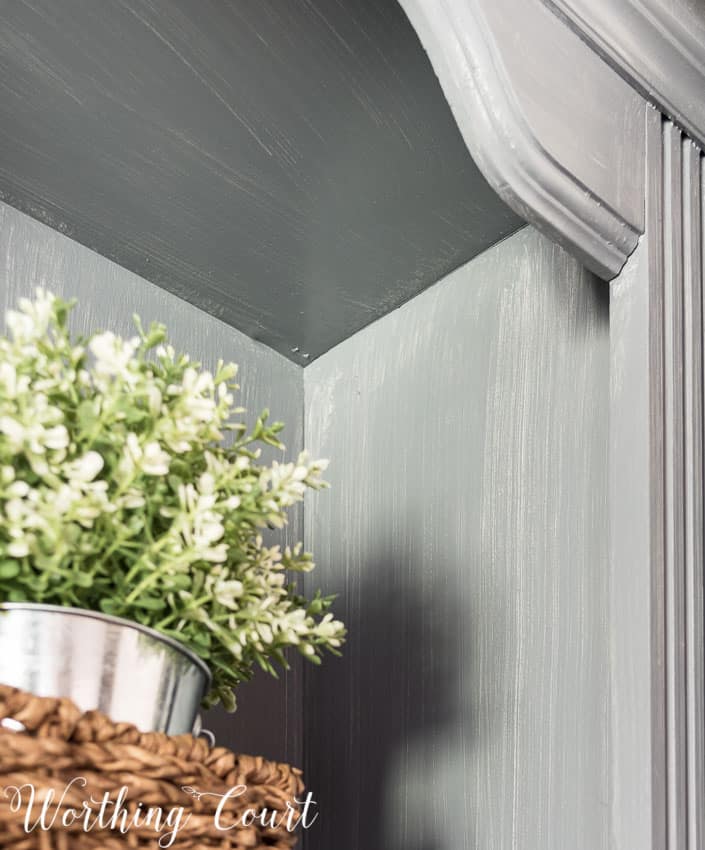
I know that the gray of the barn door and gray of the bookcase doesn’t match, but I think that it makes the door look more authentic.
You might wonder why I chose to cover half of the bookcases with a sliding barn door. Well, it’s because I needed more storage space, not more space to display tchotchkes. The shelves behind the sliding door are filled with boxes that hold all sorts of home office paraphernalia. This side of the bookcase is only open when we need access to something in one of those storage boxes.
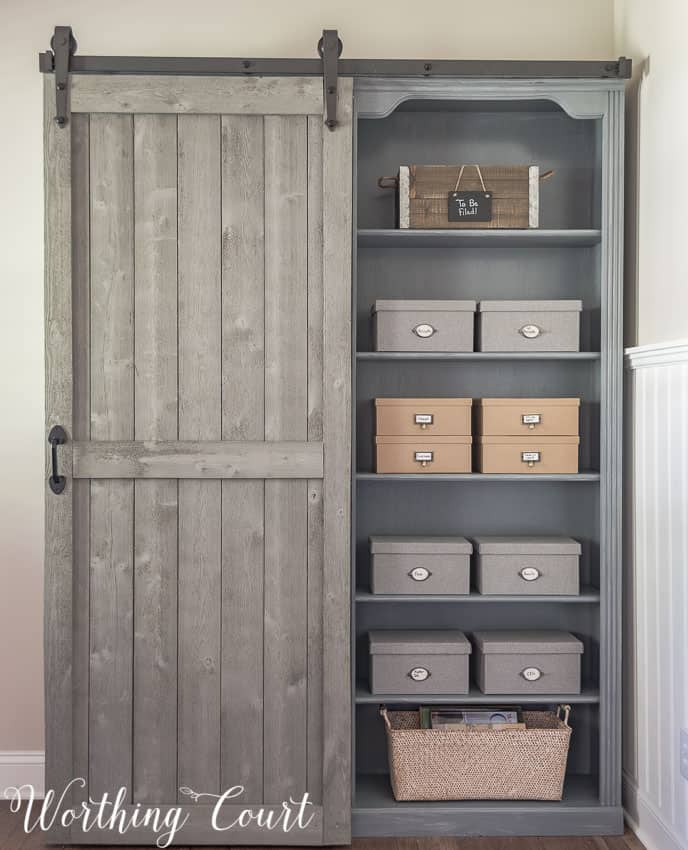
I was a little scared of the door, because I was convinced that installing the sliding door hardware was going to be complicated. Nothing could have been further from the truth! After much research and shopping around, we ordered the hardware from Home Depot. CLICK HERE TO ORDER THE SAME HARDWARE.
The smallest size available was a few inches longer than what we needed, so the hubs used our Dremel to cut the slider bar down to the correct length. I touched the end up with a black magic marker and now you’d never know that it had been cut.
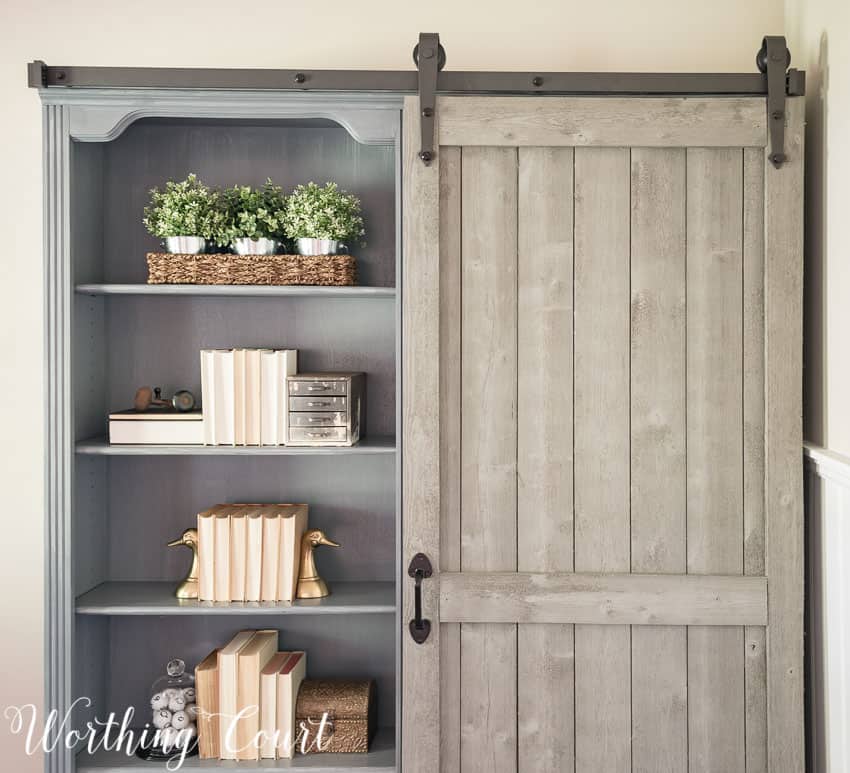
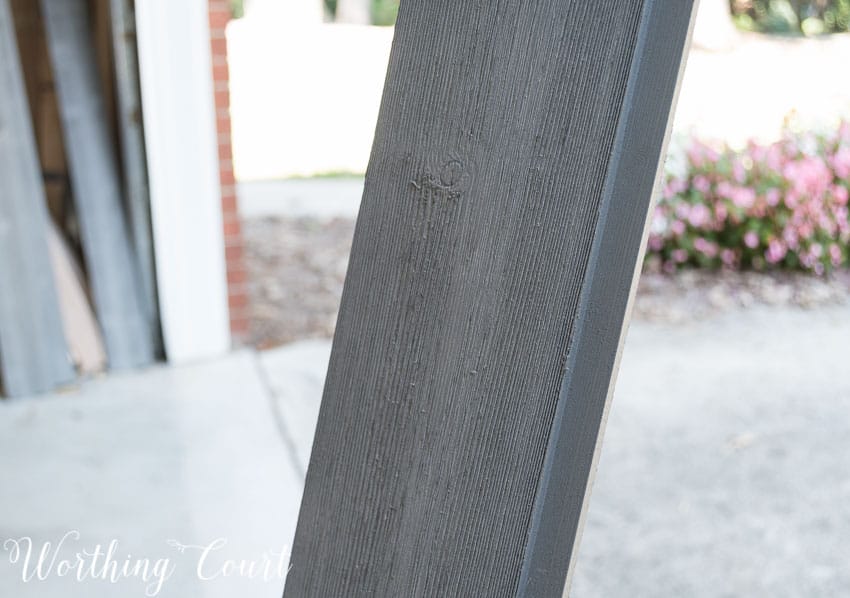
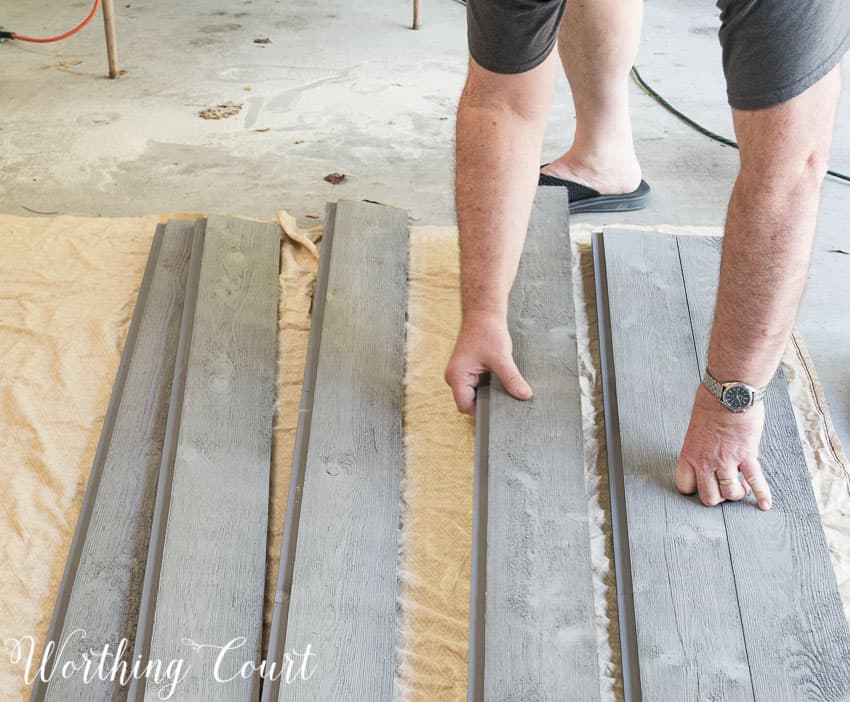
We built the barn door out of pre-painted rustic lumber which is sold at Home Depot. Each piece of lumber was 8′ long and had a rabbited edge on each side. One rabbited edge faces the front and other faces in the back.
I was unable to find the lumber online, but our store had it in stock the last time that we were there.
Having those rabbited edges made building the door a dream! First, we determined how wide we wanted our door to be. Then the hubs laid the lumber out on the floor of our garage, using wood glue along each rabbited edge, and allowed it to thoroughly dry. No nails or screws were used in this part of building the door.
After the glue had dried, the door was cut to the length that we wanted and other boards were cut down to be used to frame out the top, sides and for a middle brace. Those boards were attached with wood glue and wood screws.
Thankfully, Home Depot had a label on the backside of each of the pieces of lumber with the paint formula that was used to paint the wood. I had a small container of that mixed at the store and used it to touch up the few places that needed it after the construction was completed. A wrought iron gate handle, also from Home Depot, finished the door off.
Unless I come up with something else, this office makeover only has one project left to do and that’s getting some artwork up on that wall behind the desk chair! You can catch up on all of the projects that have gone into this makeover, from start to finish, HERE. UPDATE! CHECK OUT THE FULL BEFORE AND AFTER OFFICE REVEAL HERE!
We just bought another home and I have the perfect spot for this ! Thx
Beautiful! What a project to take on and with great results. Barn doors are so popular and it is a challenge to know where to use them. Thank you for sharing.
Such a neat idea and it turned out amazing!
Just beautiful and the right touch for your office
Suzy, it’s amazing! I adore barn doors, and this is such a unique way to incorporate one.
That is absolutely beautiful!!!
Absolutely love this!!! I have an entertainment center bookcase that was my mom’s and this would be awesome to do!!!
May have my hubby make a barn door for my pantry as well!!!
WOW – great job, Suzy!! I love it and you’d never know that is the same bookcase! The room looks so good…I’m looking forward to the final touches.
This is amazing!!! I love it!!! Great job!!!
This is one of the best DIY projects I have ever seen! Your office space looks like Joanna Gaines herself did it!
I really love this idea. You have inspired me to try this! Thank you!
We have a hand-me-down set of cheap bookcase that are in desperate need of a makeover. I love how your’s turned out. Thanks for the inspiration!
Love how it turned out. I love the barn door. What a transformation from outdated to farmhouse .
I Love your bookshelf, it is absolutely gorgeous. The colors perfect, and the sliding door I Love. You probably have the only bookshelf with a sliding barn door. Fantastic job!
Oh WOW! Your bookshelves look so nice with that sliding barn door and the gray finish.
That is so beautiful and looks perfect in your office.
Linda
What a cool idea! Love the bookcase! 😉
Brilliant idea for redoing ordinary bookcases and making them unique, beautiful and add storage at the same time. Thanks for all the wonderful ideas you pass on to us.
Oh girl, this turned out fabulous!!! ??? Reminds me of the expensive one we drooled over at Arhaus. I was excited when I saw this wood at Home Depot when we were researching building the barn door headboard for the Destin condo. It is fantastic and the perfect weathered look! Thank goodness we finally found someone on Etsy to build ours because as you know I don’t have a talented Pookie LOL. Great job, both of you! You’re so clever! Oh, curious….did you attach the headboards with a strip of wood at the top, then attach the hardware to it??? Also sent you a text yesterday regarding a local upholsterer.
Hey GF. Yes, we added a strip of wood to the top of the bookcases to attach the rail to. It spans the length of both bookcases, ties them together and gives them more stability. So glad you like them! I didn’t get a text from you????
Truly amazing. You are so creative! I knew you redid the dining table, but somehow I missed the desk redo. The whole room is truly transformed. I liked the before, but the after is so much warmer and more welcoming. Really great job, Suzy.