How to Make a Pillow Sham
Learn how to make a pillow sham with this detailed, step-by-step tutorial, perfect for any size pillow. Taking you from how to measure, cut fabric, assemble layers, all the way to the finished product.

They are not difficult to make at all. If you can take a few measurements and sew a straight line, you can make a sham by following these easy steps.
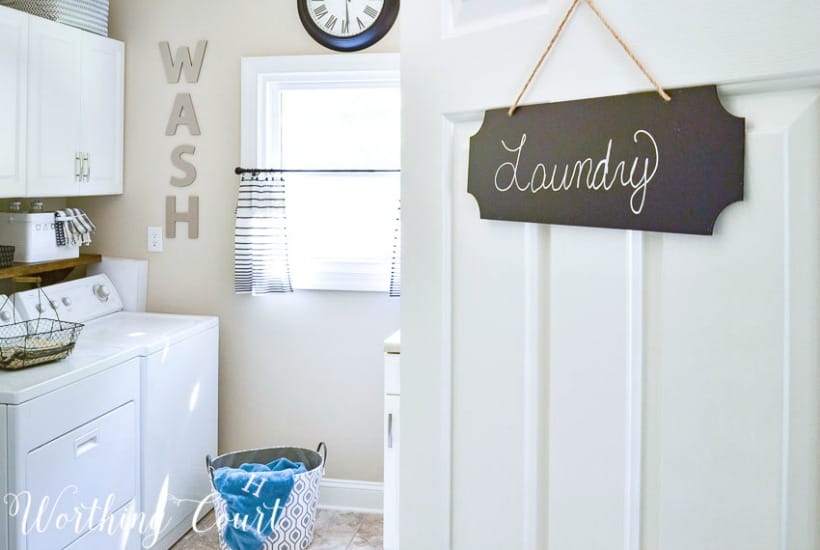
The sham that we’re going to make has an envelope backing (where two back panels overlap one another) and is part of the group of throw pillows and pillow shams that I made for the bed in my master bedroom in our last house.
The colors and fabric patterns may not be the most popular ones today, but the steps to constructing a pillow sham remain the same!

There are lots of tutorials for making different types of throw pillows, but I’ve seen very few for making a pillow sham.
But – I’ll go ahead and warn you – the rest of the pictures were taken in my workroom, so the background isn’t all that pretty – that is unless you consider a well used work table, sewing machines, fabric racks, and other workroom stuff pretty. 😃
Measure and Cut the Fabric for the Front of the Sham
The front and back of the sham are two different sizes. In this section, I’ll go over cutting the front.
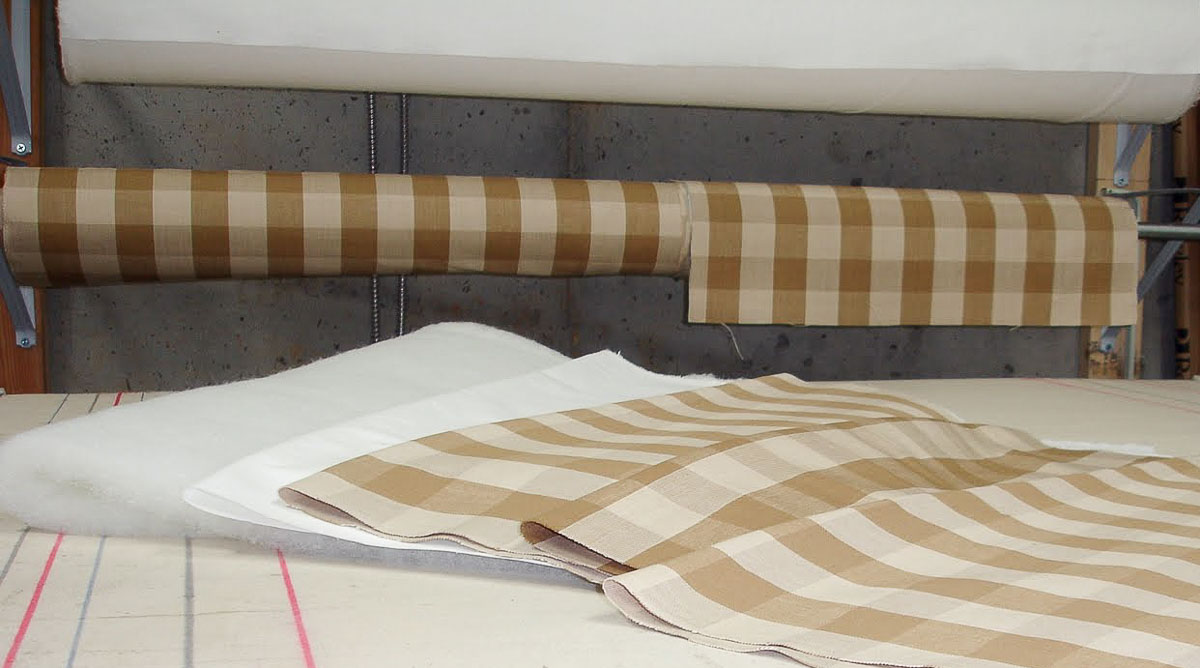
I used four fabrics to make my shams:
- the main fabric for the sham
- white drapery lining fabric
- batting
- an accent fabric to cover the cording (not shown in the below image)
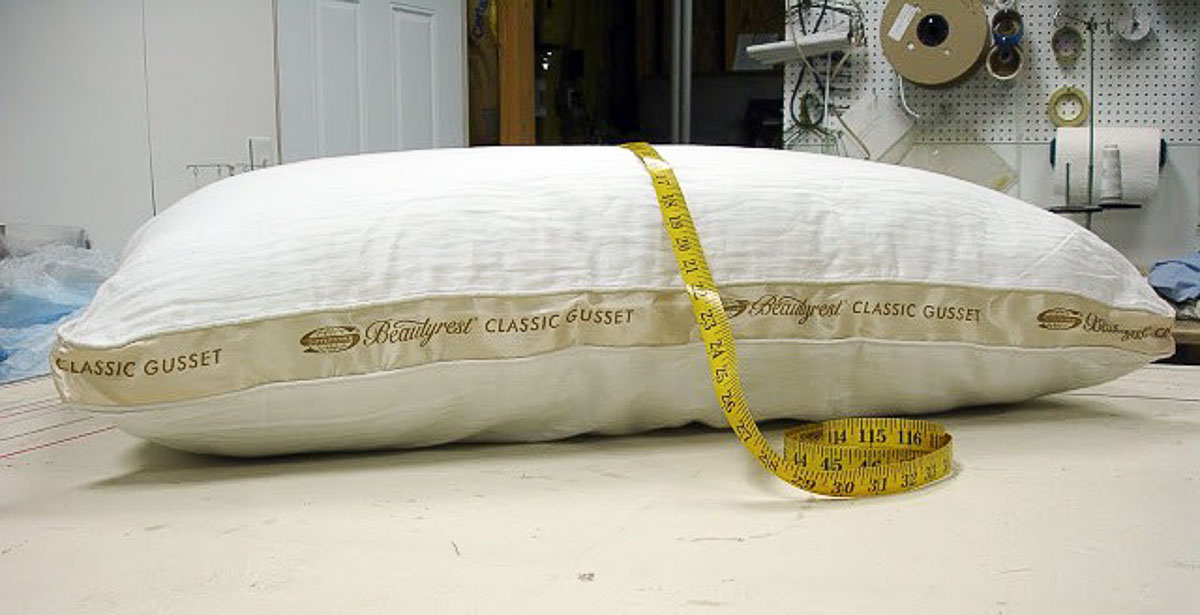
Naturally, the first step is to measure the pillow.
- Measure the longest side of the pillow, from side to side. This is the width.
- Measure the shortest side of the pillow, from side to side. This is the height.
Using your measurements, calculate the size of the pieces that you need to cut. You can adjust these measurements for any size pillow – a standard size pillow, a queen size or a king.
Mine is a king size pillow that measures 36″ wide x 27″ high.
Here is my calculation for the size of the fabrics that I need to cut for the front of the sham:
Formula to Calculate the Cut Width
36″= width of the actual pillow
+ 6″ – for a 3″ flange size on each side
+ 1″ – for a ½” seam allowance on each side
43″ = Total width of fabric piece to cut for the front of the sham
Formula to Calculate the Cut Height
27″ = height of the actual pillow
+ 6″ – for a 3″ flange on the top and bottom
+ 1″ – ½” of seam allowance for the top and the bottom
34″ = Total height of fabric piece to cut for the front of the sham
In other words – I need to cut the fabrics for the front of the sham at 43″ wide x 34″ high.
I need to cut three pieces of fabric this size – the main fabric, the white lining, and the batting. I’ll explain why I’m using batting and white lining farther down.
Assemble and Prep for Sewing
On your work surface, layer all three of the cut pieces in this order:
- The main fabric goes on the bottom with the face (or right side) of the fabric down.
- The batting is the second layer.
- The white lining goes on the top.
Line up the edges evenly and pin the layers together, around all four edges.
Now let me pause right here to explain a couple of things.
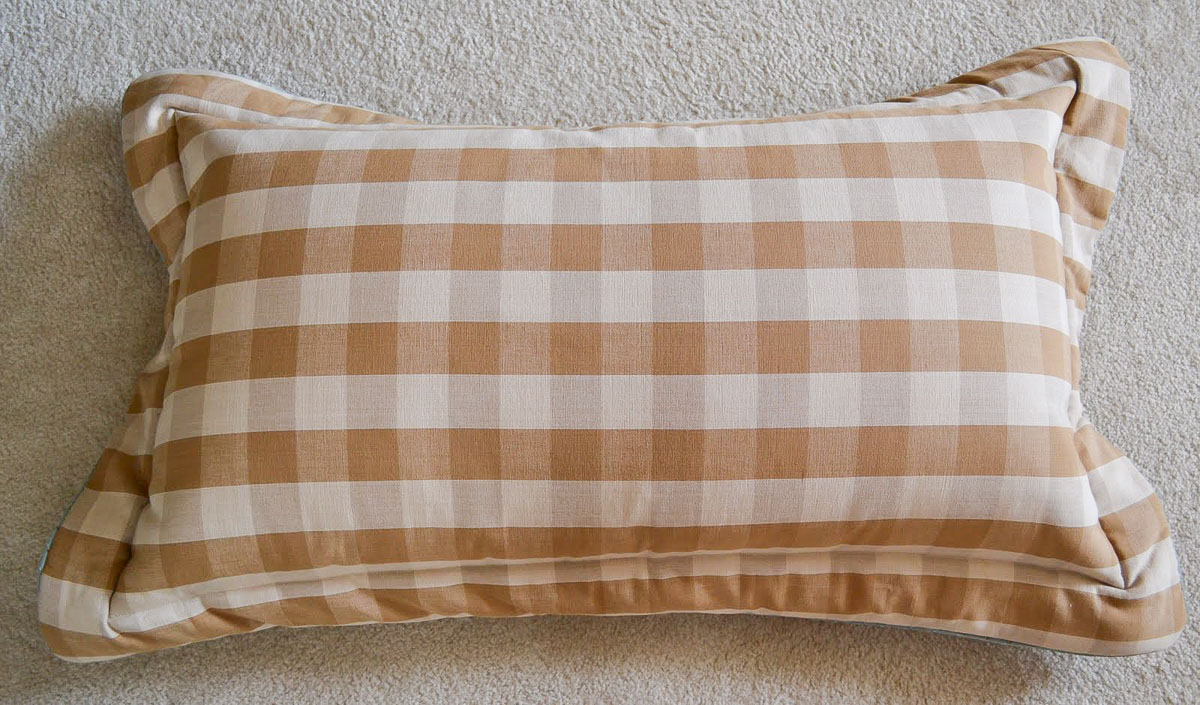
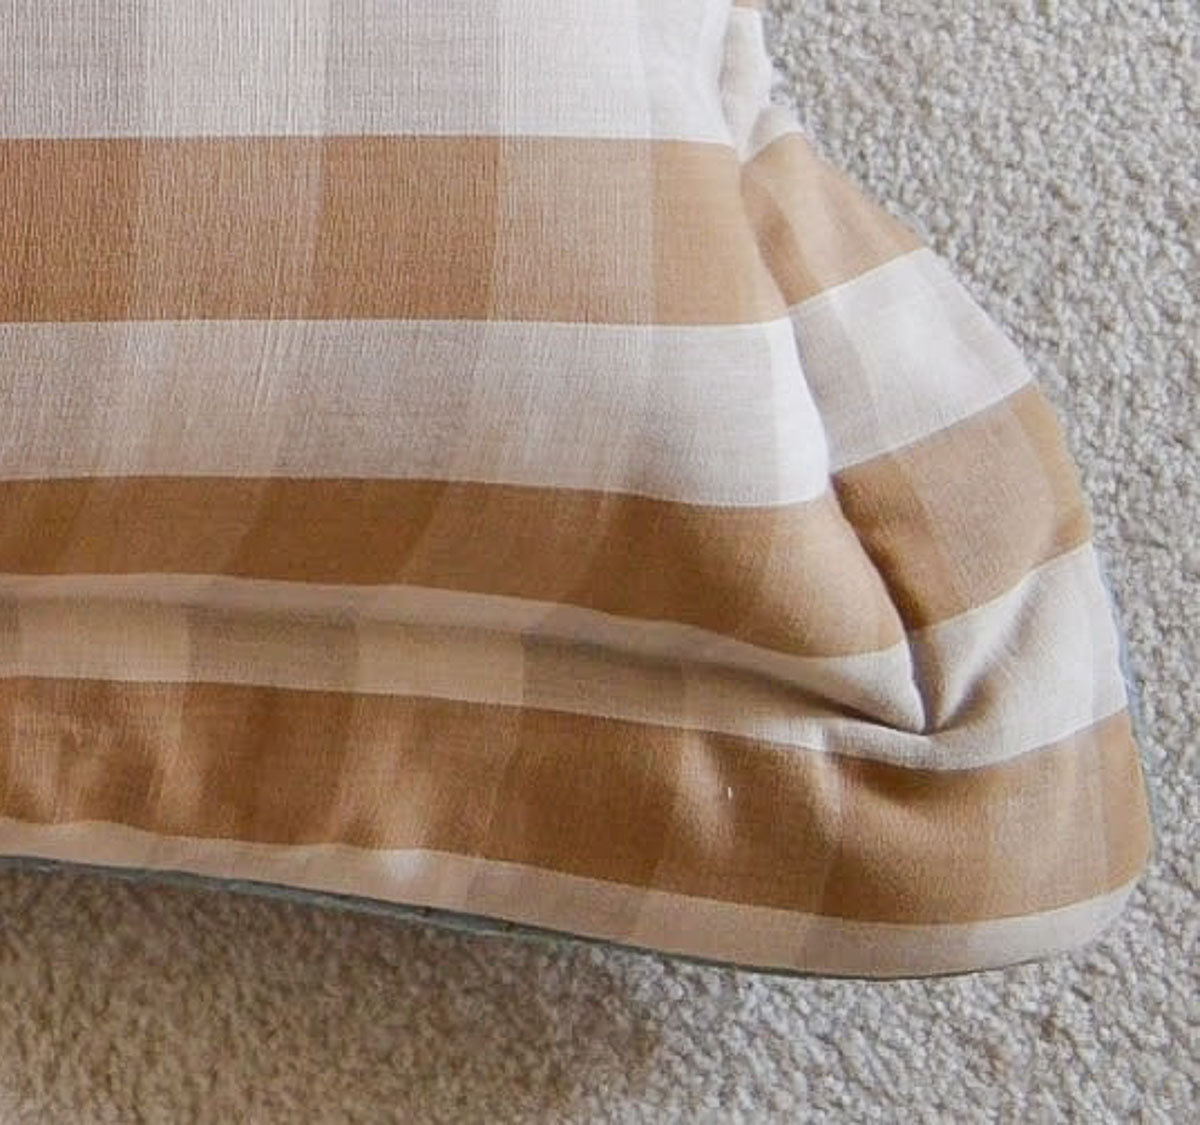
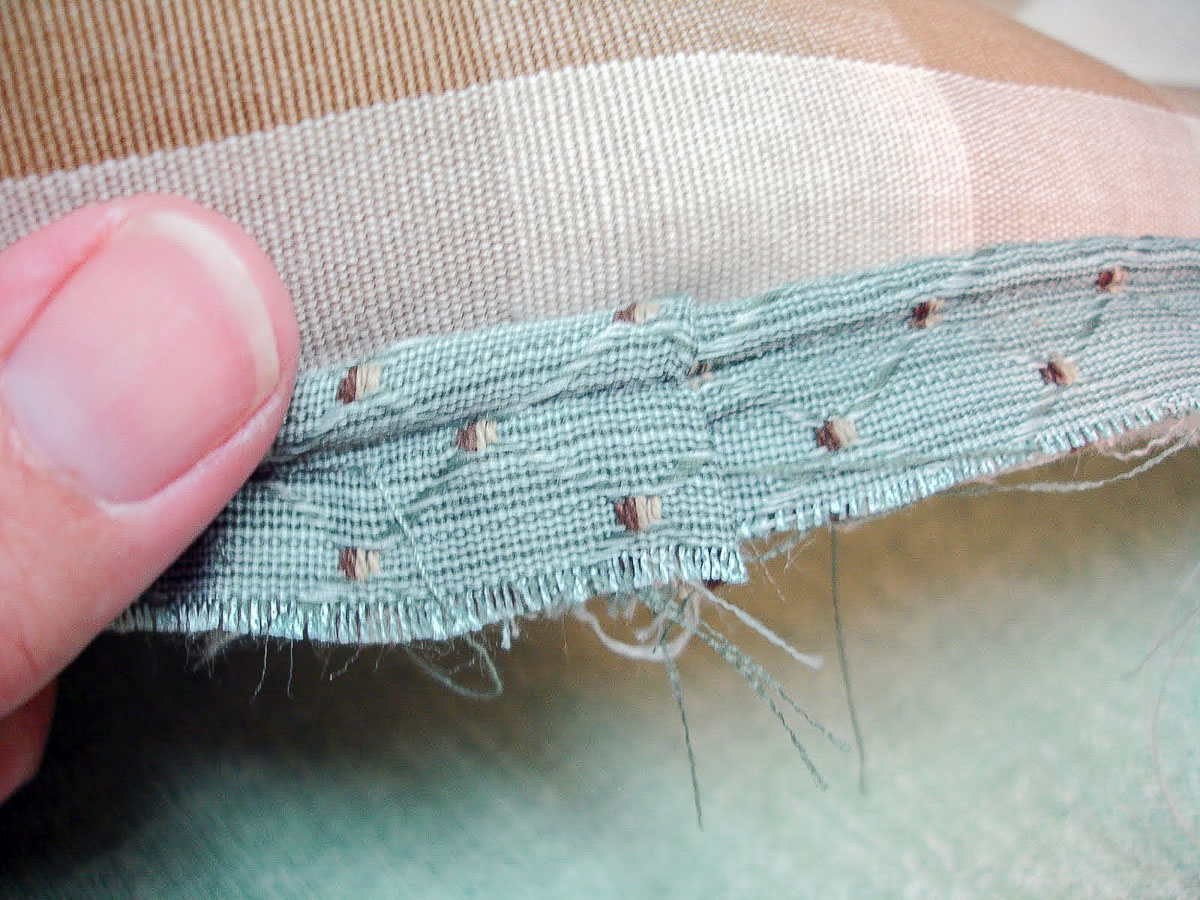
Do you know what the flange is on a pillow sham? I can show you a picture better than I can explain it.
See the flat part that surrounds the puffiness where the pillow is? That’s the flange.
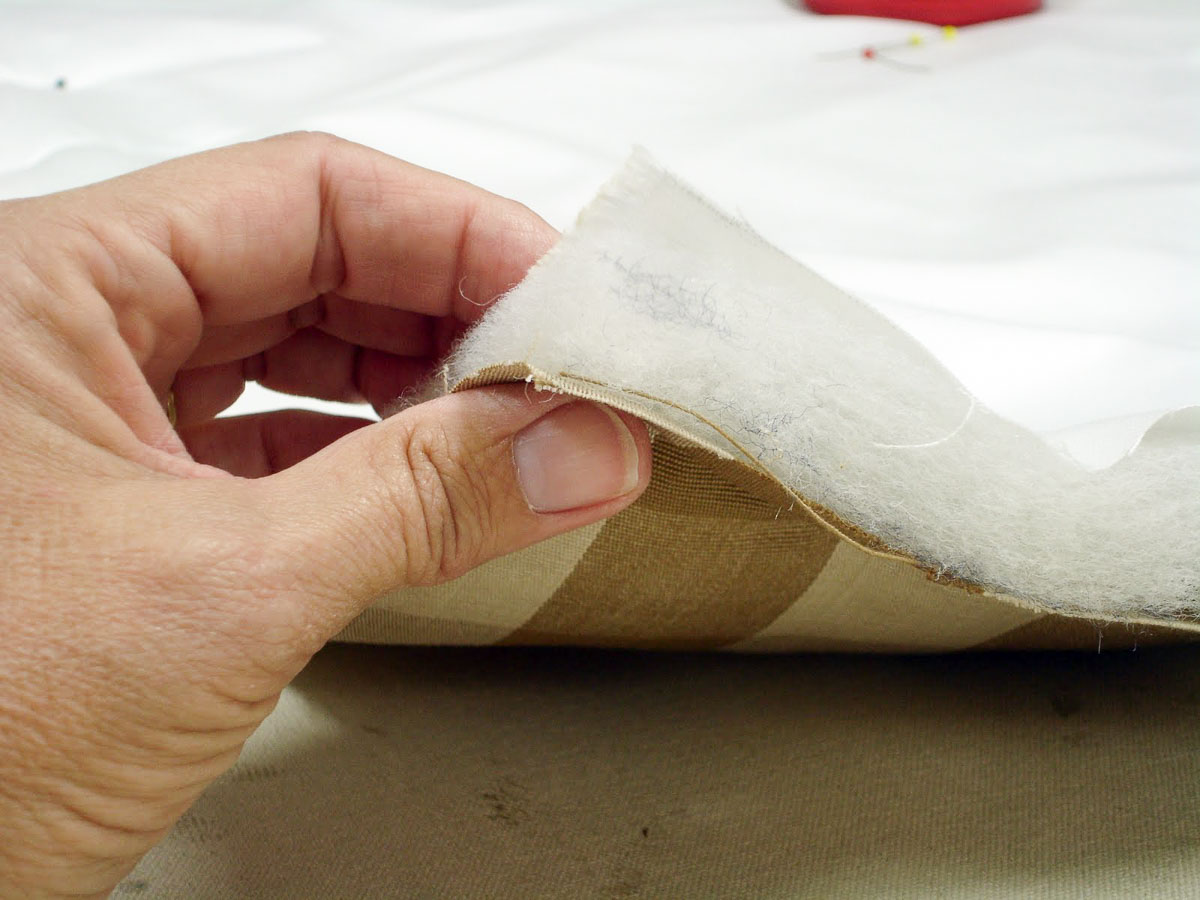
This leads me in to why I’m using batting to make a pillow sham and I can sum it up in one sentence.
I don’t like a floppy flange! I’ve found that adding a piece of batting to the front of the sham is the only thing that has enough stiffness to keep the flange from flopping over when the pillow is standing up.
You can skip the batting if a floppy flange doesn’t bother you though.
The white lining is optional, but I add it as it acts as a barrier so that the batting won’t get snagged when removing and inserting the pillow into the sham.
Let’s Sew!
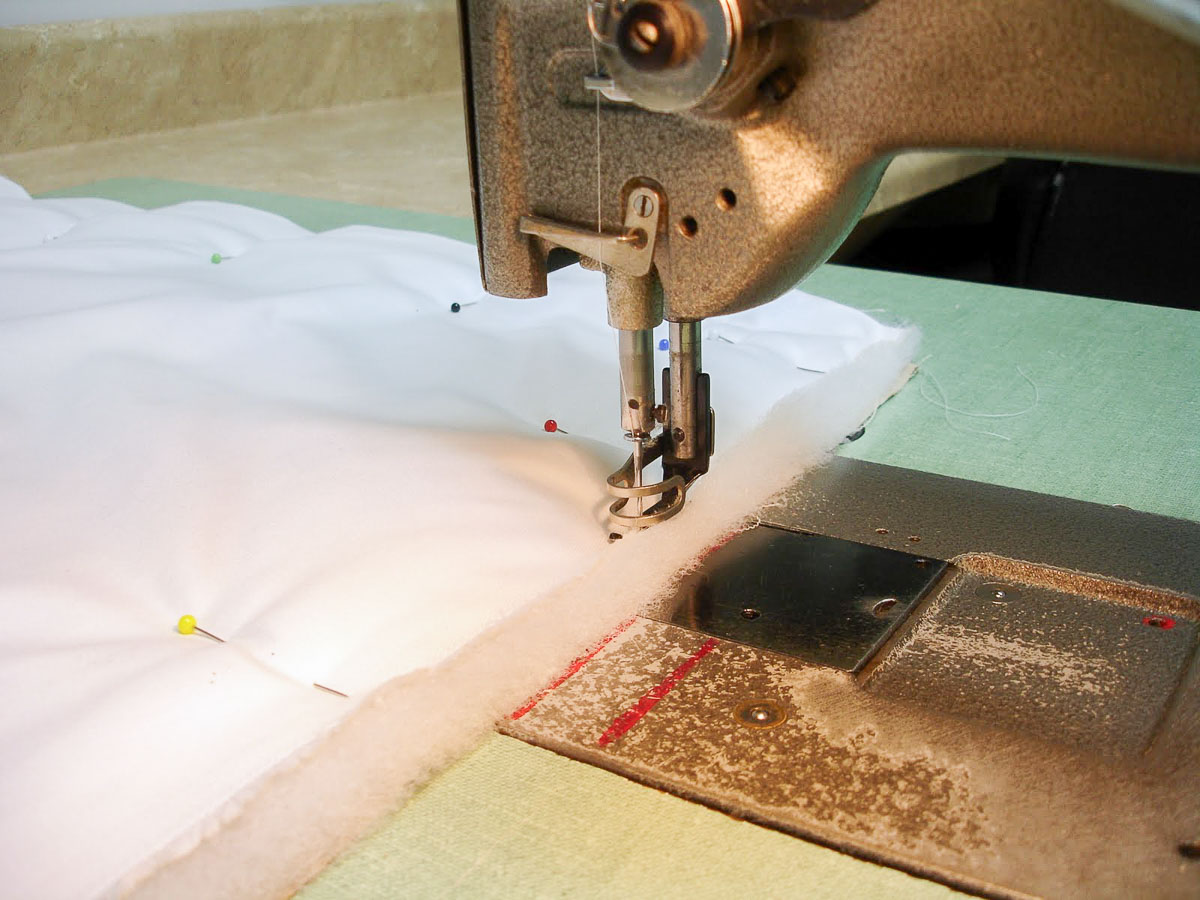
Using a needle that is approriate for the type of fabric you have, sew the layers together on all four sides with a basting stitch. How do you like my old workhorse industrial machine?
The next step is to apply the already covered cording.
(Adding covered cording is optional. If you choose to leave it off, you can skip ahead to Part 2 of the tutorial.)
There are many places on the web to find directions on how to cover cording, so I won’t go into the details about how to do that here (but don’t hesitate to ask if you have any questions).
As you can see in the picture, the cording is applied to what will become the front piece of the sham.
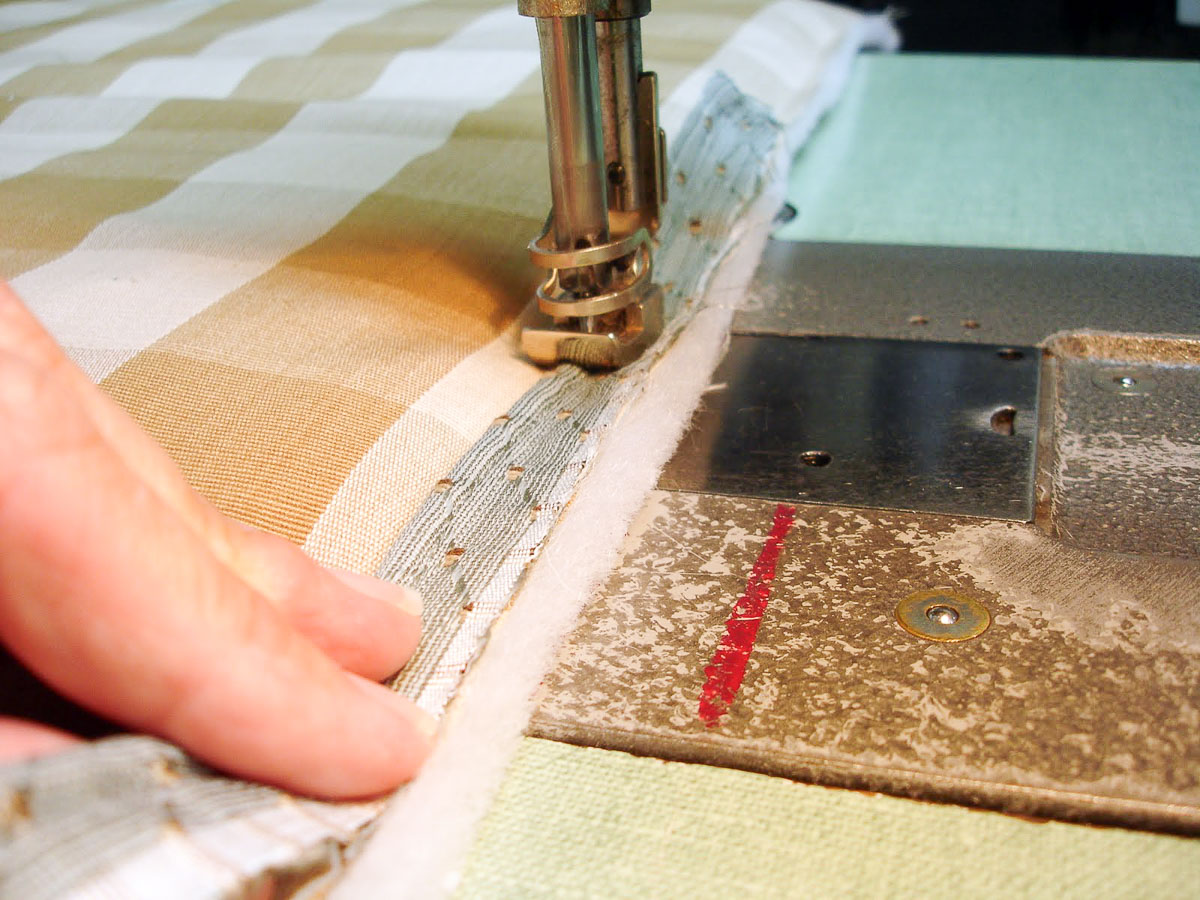
It is turned so that the raw edge of the cording fabric is lined up with the raw edges of the other fabrics. Sew the corning to all four sides, using a basting stitch.
You’ll want to leave a few inches unattached at each end for joining the cord. We’re just basting everything together right now, so at this point, it isn’t necessary to get your stitches as close to the cording as possible.
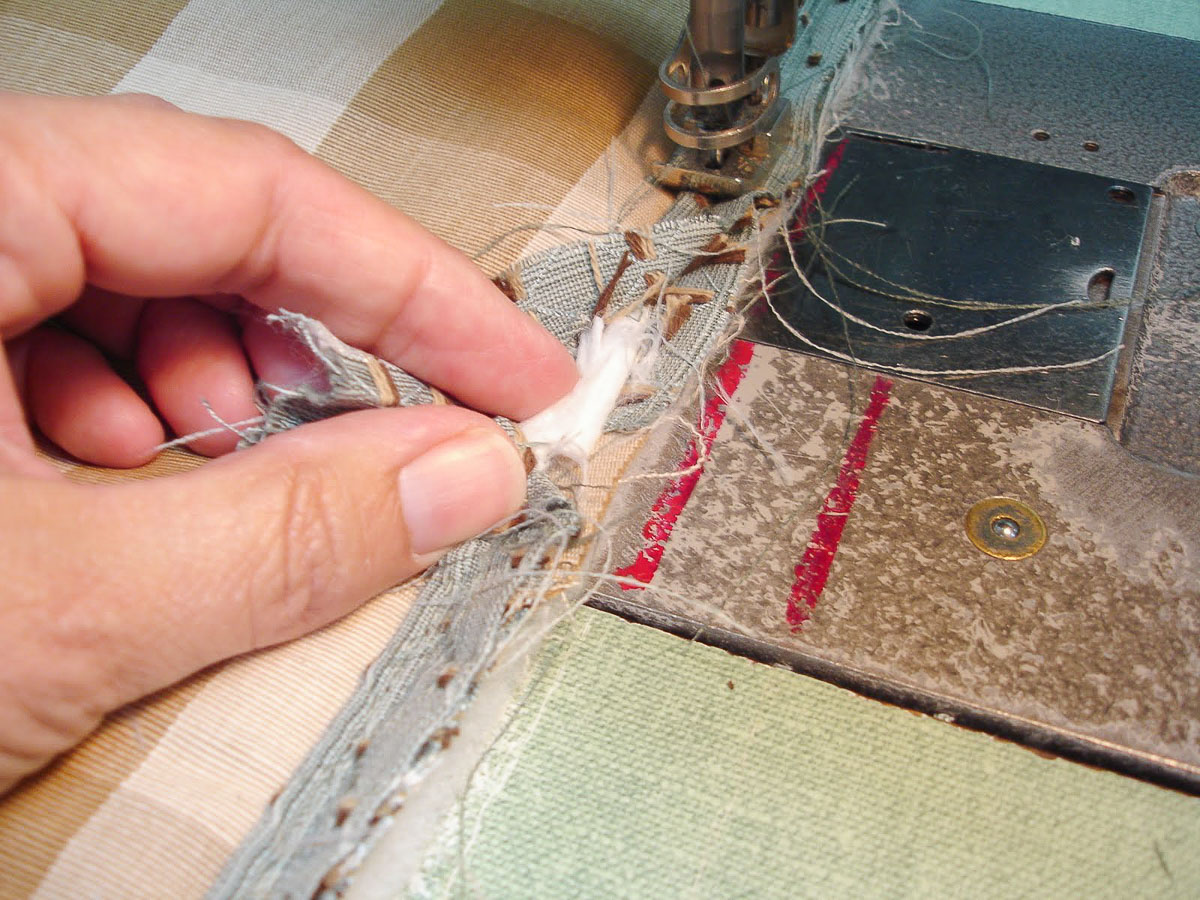
Once you’ve basted the cording to the front of the sham, return to the where the beginning and end of the cord meet. Clip open the stitches, at each end and pull back the fabric to expose the cord itself.
It should look like this.
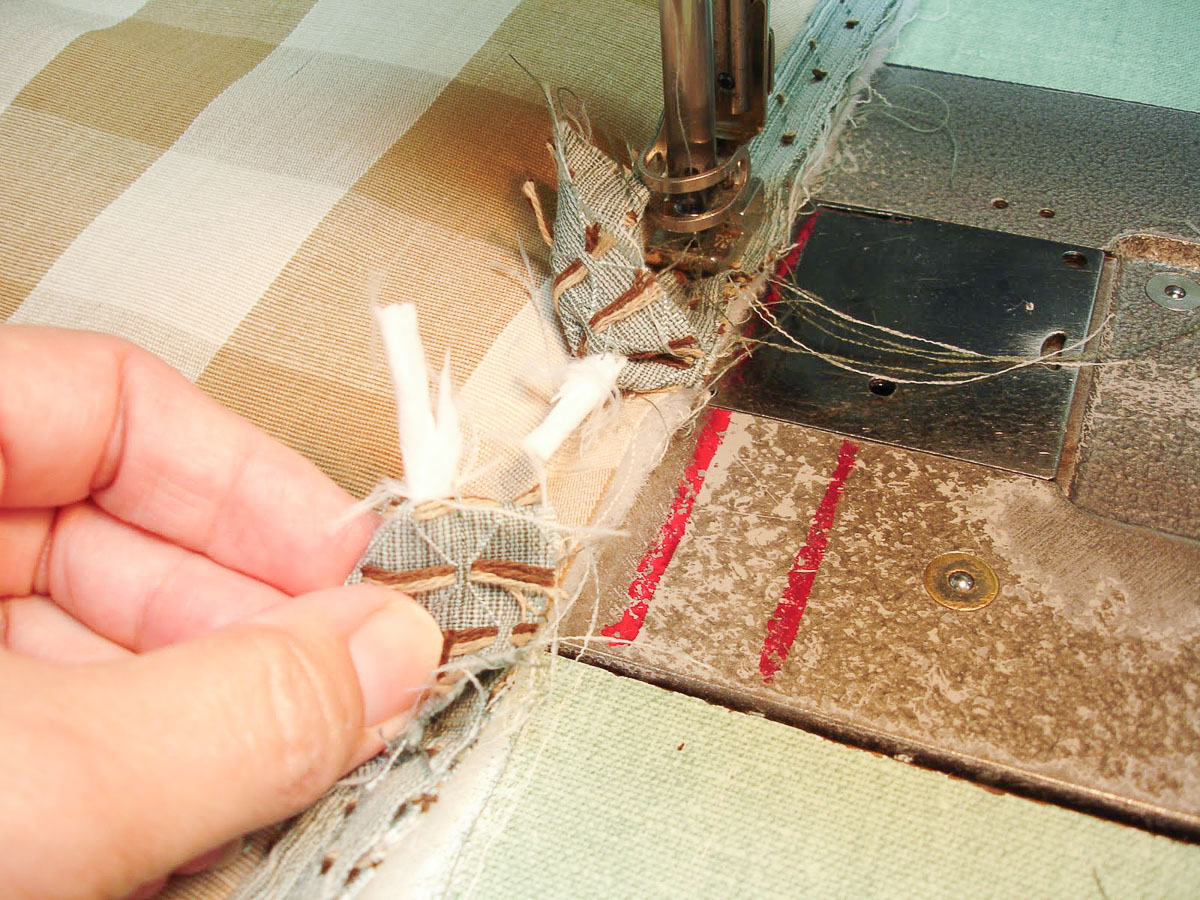
Cut about an inch off of each end of the cord so that it is roughly half of it’s original thickness.
Lay the two cut ends side by side, overlapping each other.
Now wrap the layers of fabric back around the cord. Turn under the raw edge of the top layer of fabric so that you won’t be left with a raw edge. Sew the loose ends of the cord to the sham fabric.
And done!
Let me tell you that it took me a few tries to really get the hang of this. I might have gotten itchy and sweaty and huffed a lot from being frustrated trying to get the layers of fabric to lay correctly.
I couldn’t do it at the sewing machine either. I had to take everything to my work table. The trick is to just go slowly and most importantly, be patient with yourself.
This is a good place to stop part 1 of the tutorial. You’ve cut all of the pieces for the front, basted them together, and applied your covered cord. Great job!
In part two, we’ll cover the cutting and assembly of the back and do the final assembly of the sham.
Click here to view Part II of the tutorial


Great tutorial, Suzy! I’m so far behind in “blog-snooping,” so I just took a look-see of your beach house. Wow, what transformations you made! I love all your softer colors.
I was one of those who was anxiously waiting to see how you “dressed” your bed. Amazing! I had to laugh, though, because my hubby would have had the same responses about the pillows!
🙂 CAS
Great tutorial. Love you sewing machine. Is that a special foot for sewing the cording? I am anxiously awaiting part two. Hugs
Great job! You are very tenacious I have to say. Not sure if I will attempt this or not but I’m thinking about it…and looking forward to Part 2.
xo
Pat
Hi everybody. I’m glad you like the tutorial. Part 2 will be up Monday morning early. And yes it is a special foot for cording that you see on my machine. Pat – I hope you go for it!
Thanks for using the time and effort to write something so interesting.
My site:
simulation credit Rachat De Credit
Now, I know what to do about my floppy flange. You are a geneus! I’ll be ripping my pillow apart and doing it with batting. Thanks.
~ ~Ahrisha~ ~
I love all of your pillows!
You are way too talented Suz! I would botch this up. Great tutorial though for those who have a brain LOL. Thanks for sharing with my newbie party.
Wonderful instructions! I am so lost about sewing but I really want to learn!
Yes, I am so in need of these instructions! Thank you for sharing! Can’t wait to try it out for myself! I would love to have you share this @ Show & Share–
http://southernlovely.blogspot.com/2011/09/show-share-4.html
I found this tutorial just when I needed it! Thanks SO much Suzy! Can anyone contribute on when I could quilt this fabric? I want a HEAVY sham, so am planning on putting batting on front and back. I’m thinking the quilting should be done on front and back after the 3 layers are sewn together (main fabric, batting, lining) Then front and back of the sham would be put together and completed as usual. I also wouldn’t need the cording. Any ideas would be most appreciated. I subscribed today and am looking forward to many, many wonderful ideas.
Hi Kathy. Nice to meet you! I think you’re right – I would quilt the front and back (all three layers) before joining them together. Let me know how it turns out!
Can I just use binding, like on a quilt?
Use binding to do what? Sorry, but I’m not sure what you’re asking about.