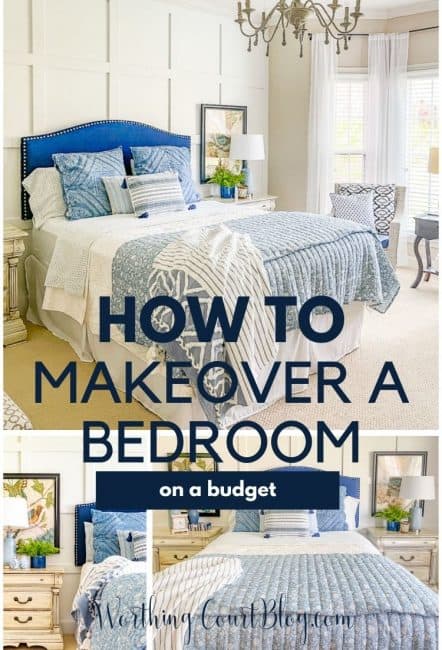
Budget Bedroom Makeover Reveal and Tips
If you’re looking for budget bedroom makeover tips, you’ve come to the right place! I’m going to share my guest bedroom makeover reveal with you and give you all the tips for making your space feel new and inviting without spending a lot of money.
By the end of this post, you’ll have all the tools you need to start your own budget bedroom transformation.

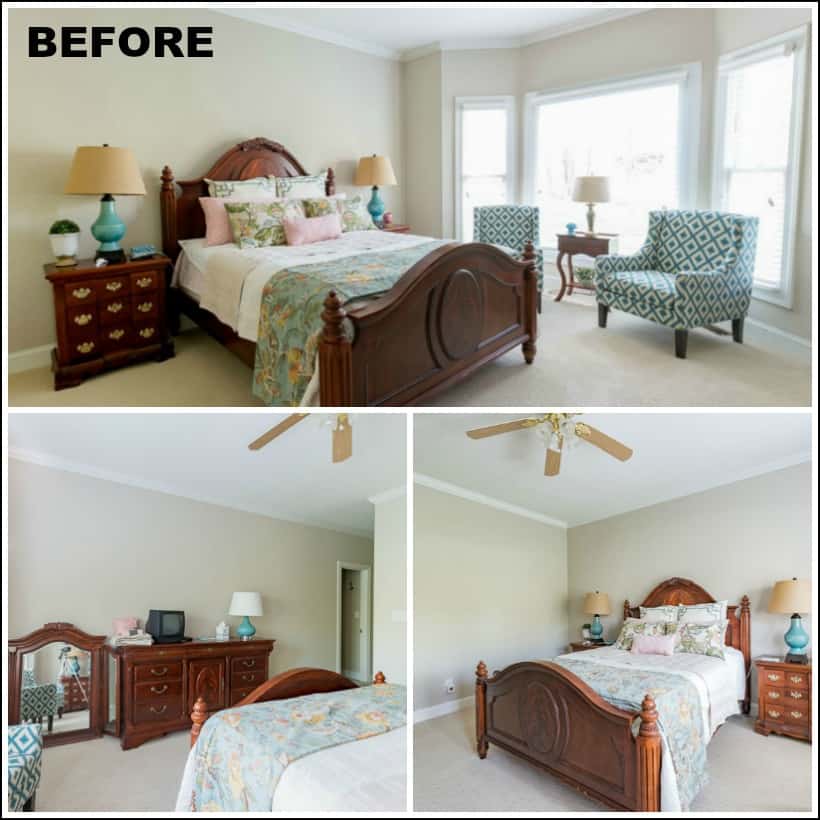
Let me show you a few pictures of what this bedroom looked like right after we moved into the house. There wasn’t really anything wrong with it other than it was boring and dated.
Plus, I was extremely over the cheap faux cherry finish on the furniture. It sat like this for quite a while.
CREATE A MOOD BOARD
Before you even start the decorating process, do yourself a favor and create a mood board.
It’s free, fun, and easy and is an excellent way to put all of your thoughts and ideas into one place. By using a mood board, you’ll be able to get an idea of what your end design will look like.
Not only does it help with the design process, it helps to keep costs down by helping you stay on track with your makeover budget.
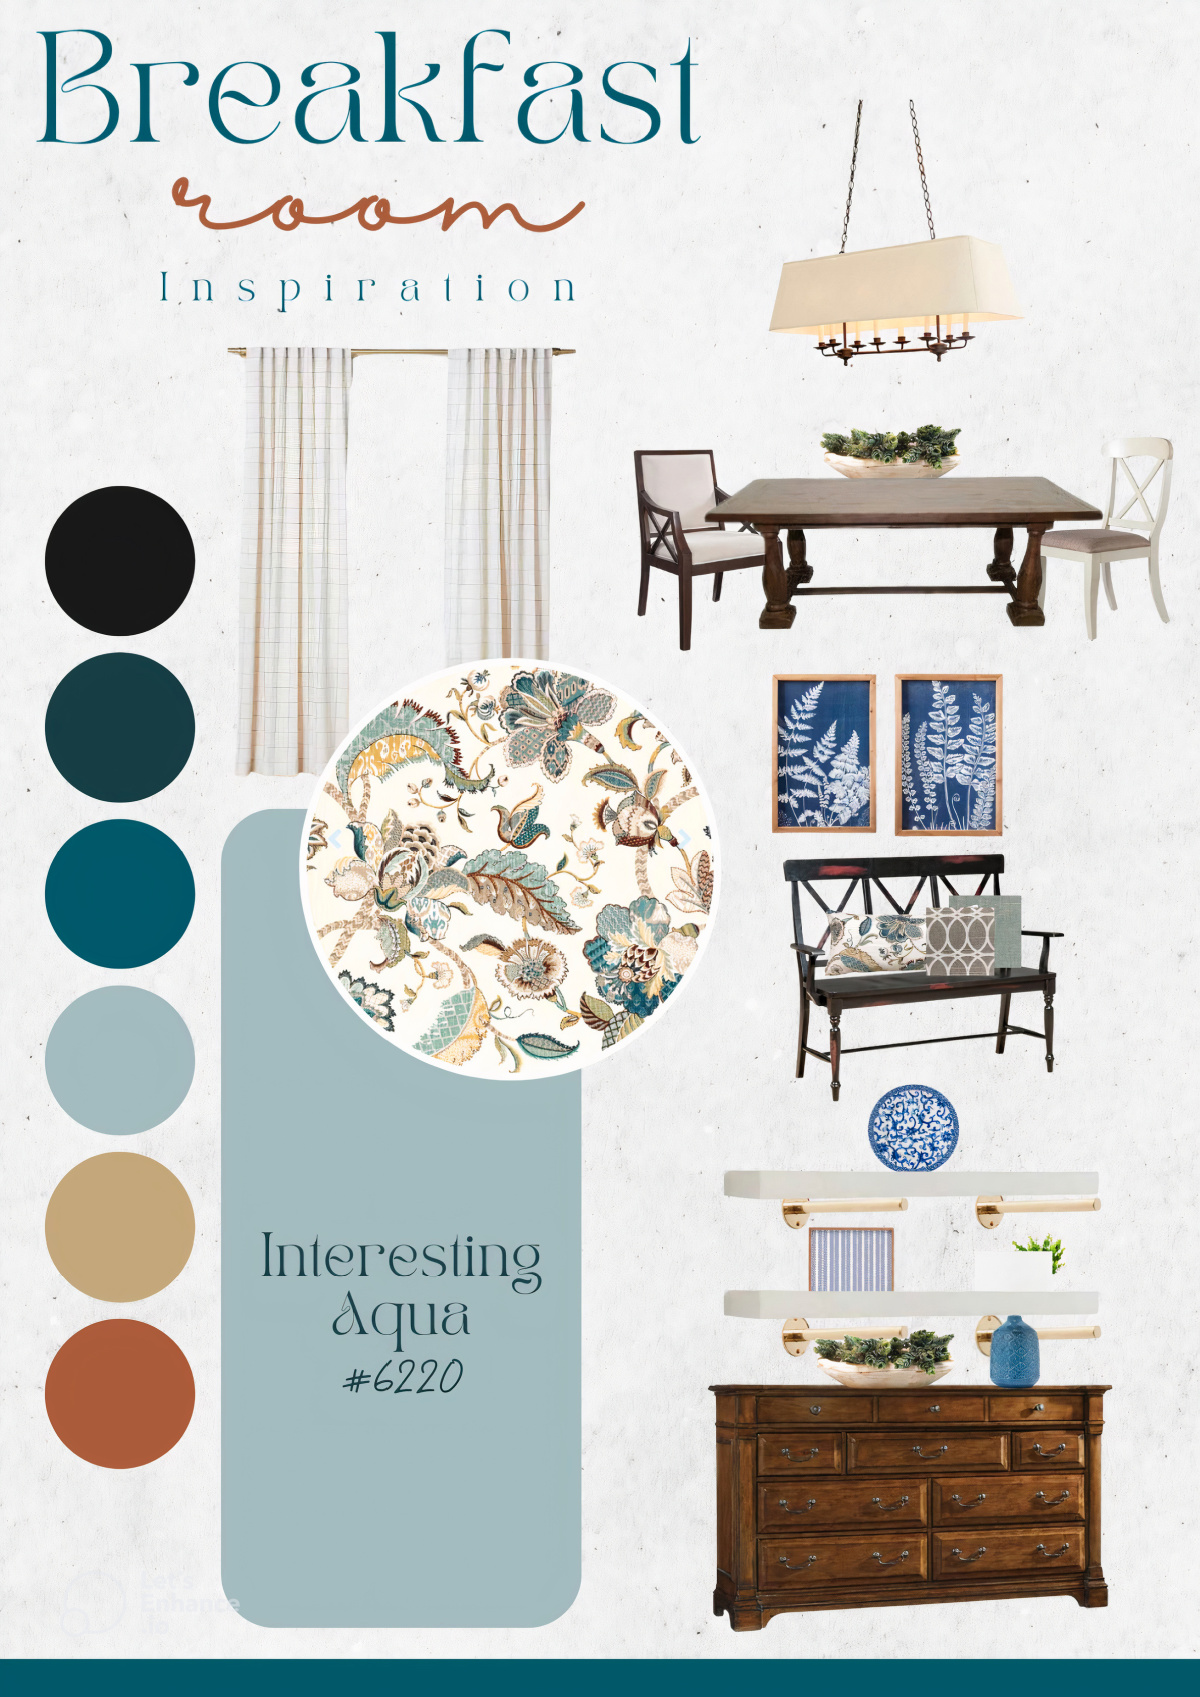
Here’s an example of a mood board for my breakfast room makeover plan that I created for my mood board tutorial.
This example might look a little design’ery to you, but the nice thing about mood boards is that you can make them as simple or as detailed as you would like.
ADD CHARACTER ON A BUDGET
When a room is lacking character (like this one), the addition of moulding is a simple, budget friendly way to give your space a fresh and polished look.
Whether you choose crown moulding, picture frame moulding or another type, moulding makes a room look expensive without really trying.
The big blank wall, where the bed is located, was just that – a big blank wall. It seemed to overwhelm the room with its lack of interest.
So – the first budget-friendly project of the makeover was to enhance and add interest to the architecture of the room.
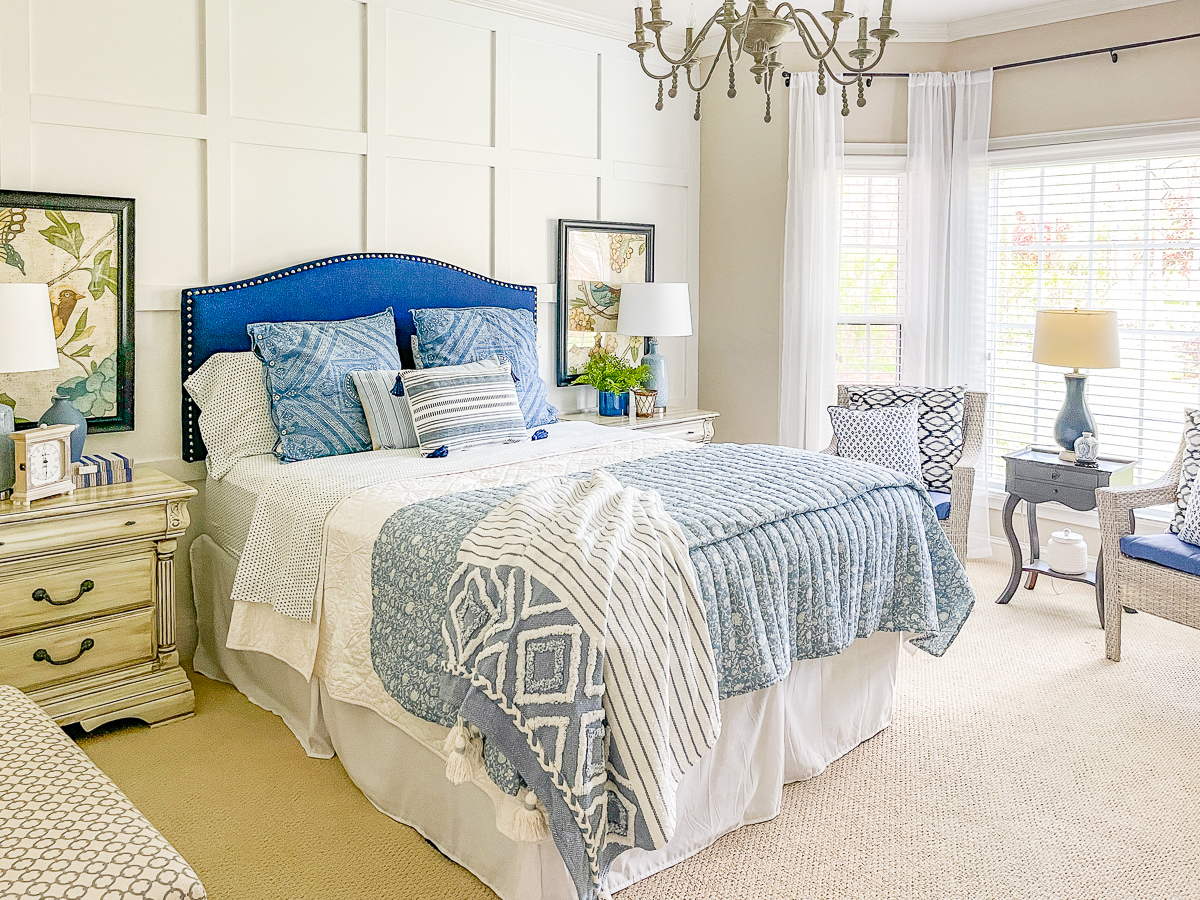
I wanted the room to have a cozy, yet uncluttered look, so adding board and batten to that wall, instead of filling it with a bunch of artwork, was a great, inexpensive solution.
Not only does the new wall treatment add interest it also adds lots of texture and is a nice feature that really draws your eye to this spot.
To prevent warping and knot holes, we used 1″x4″ pvc boards instead of pine boards to create the wall. For reference, this wall measures 13’3″ wide x 8′ 3″ tall and each one of the openings between the boards is 22½’ wide x 21″ high.
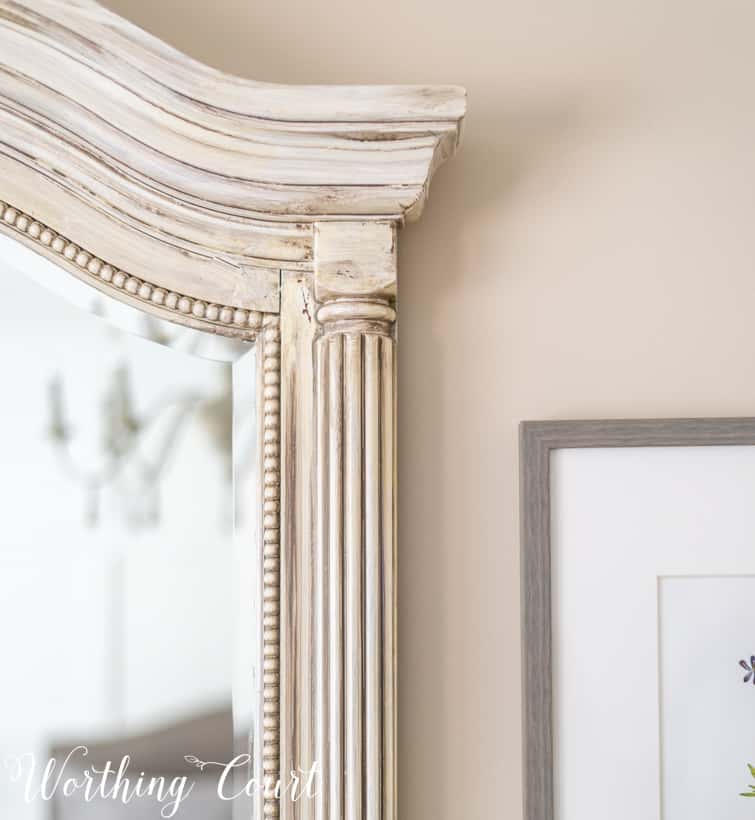
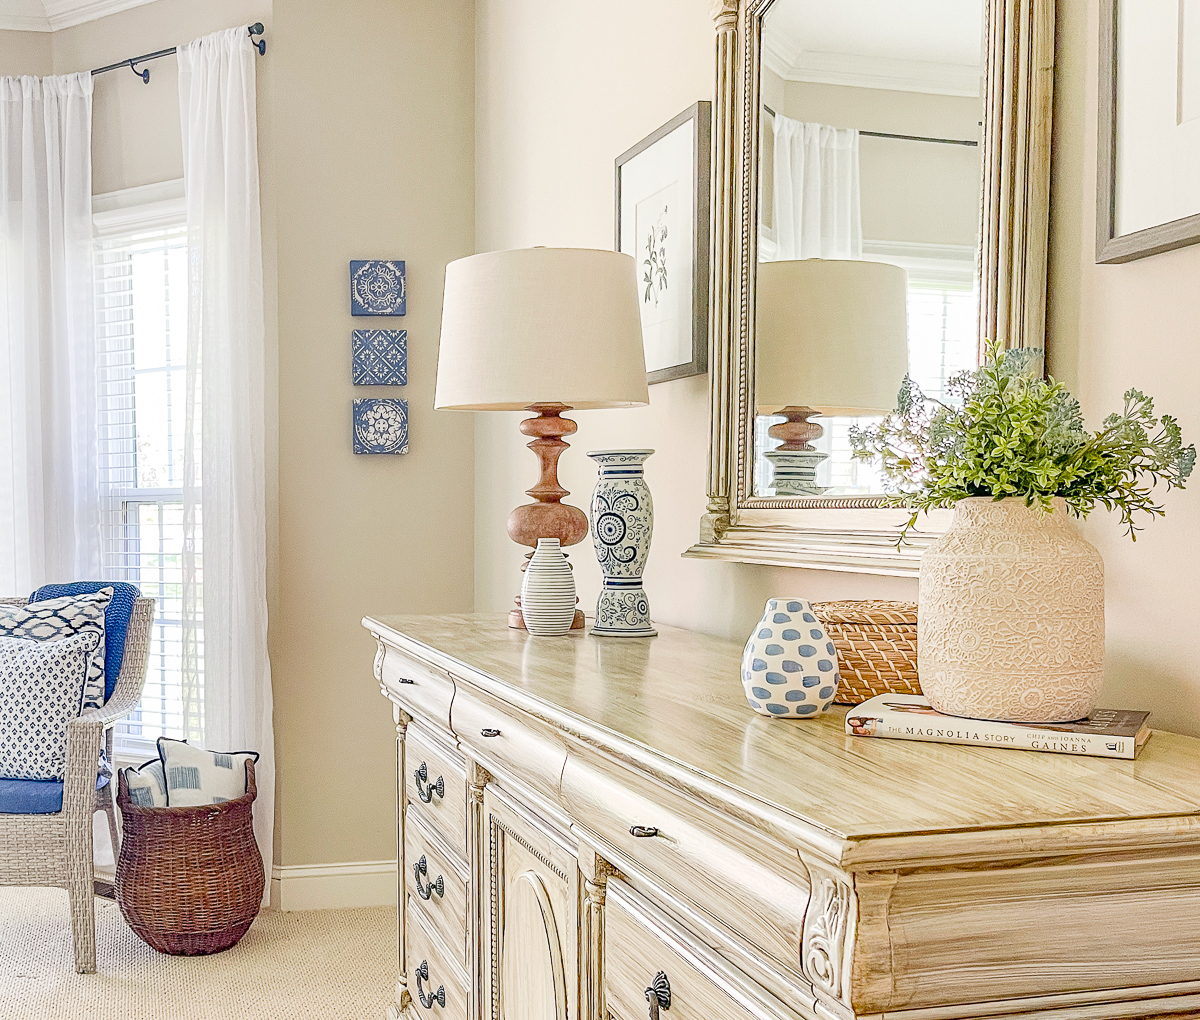
SAVE MONEY BY PAINTING FURNITURE
Painting, instead of replacing, your existing furniture is probably the #1 money-saving tip I can give you for any budget bedroom makeover.
I gave my old, ugly, fake cherry finish furniture a paint makeover using an easy technique that fits right in with the cozy vibe I wanted for this room.
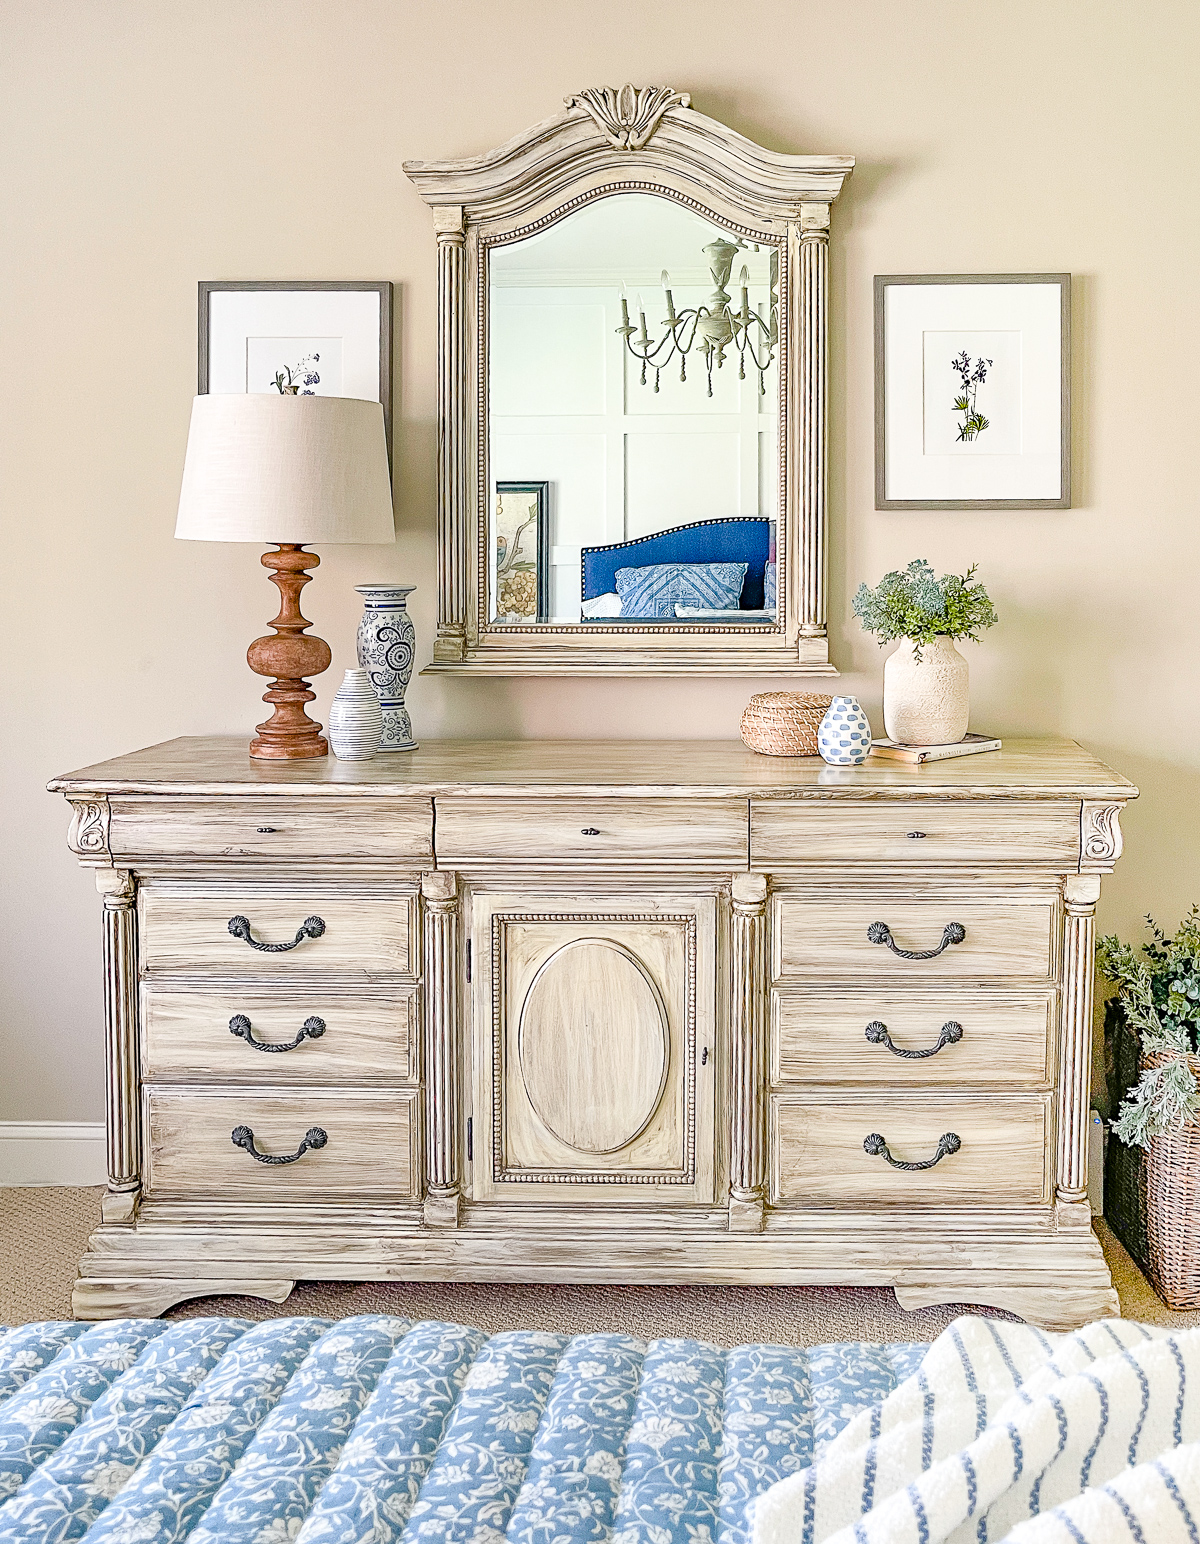
It was the largest undertaking of the whole makeover, but the furniture that we already had was in perfectly good condition, it just wasn’t to my taste any longer.
So – the dresser, mirror, and nightstands got a brand new look for very little money!
THINK OUTSIDE OF THE BOX
If you simply must add or replace furniture, save money by thinking outside of the box.
I wanted to update the seating in the room but didn’t want to go to the expense of new arm chairs.
Outdoor furniture to the rescue! By purchasing outdoor armchairs and cushions, at a discount store, I was able to save hundreds!
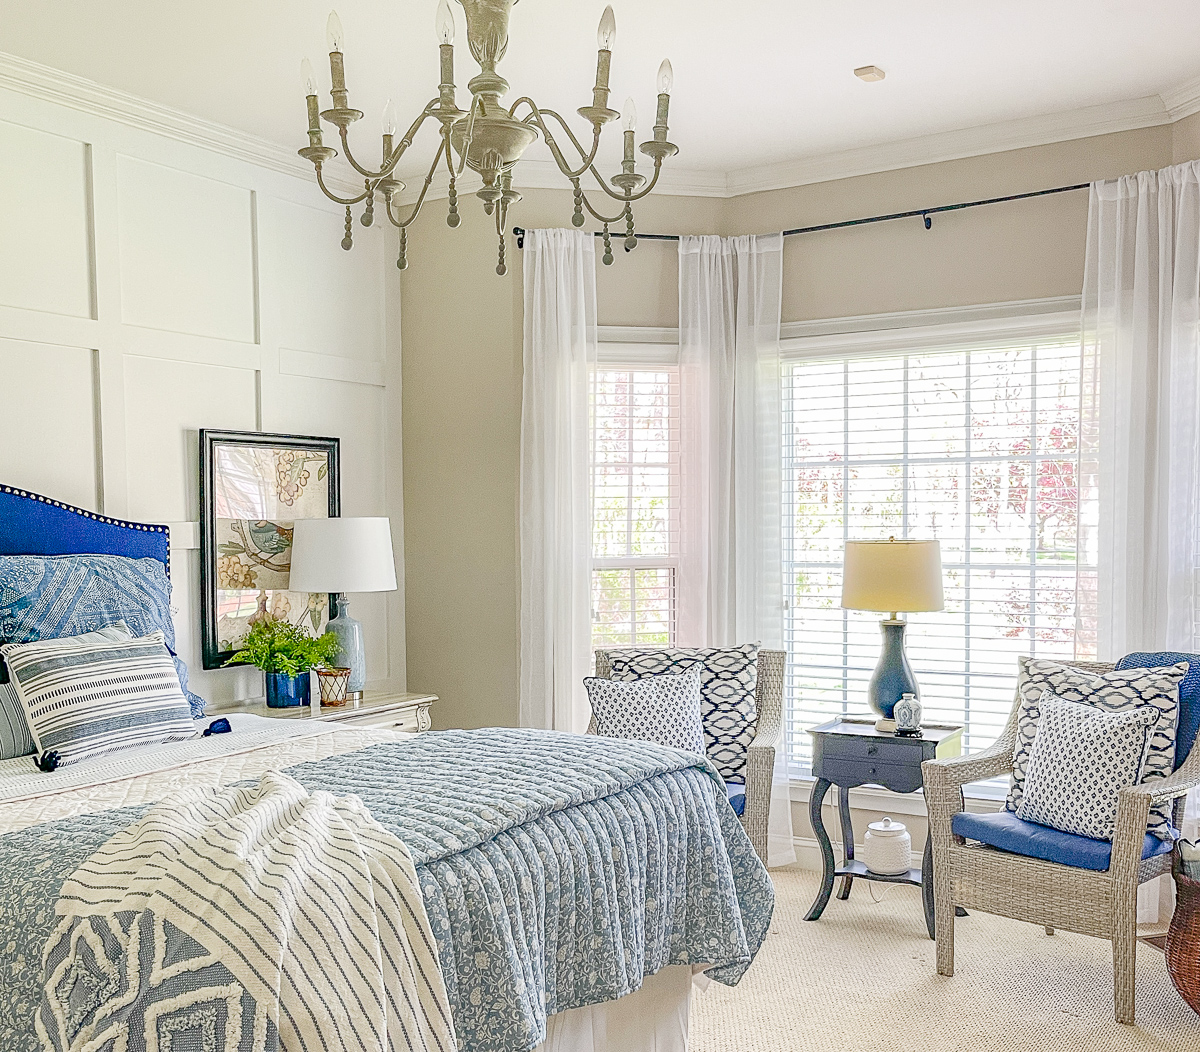
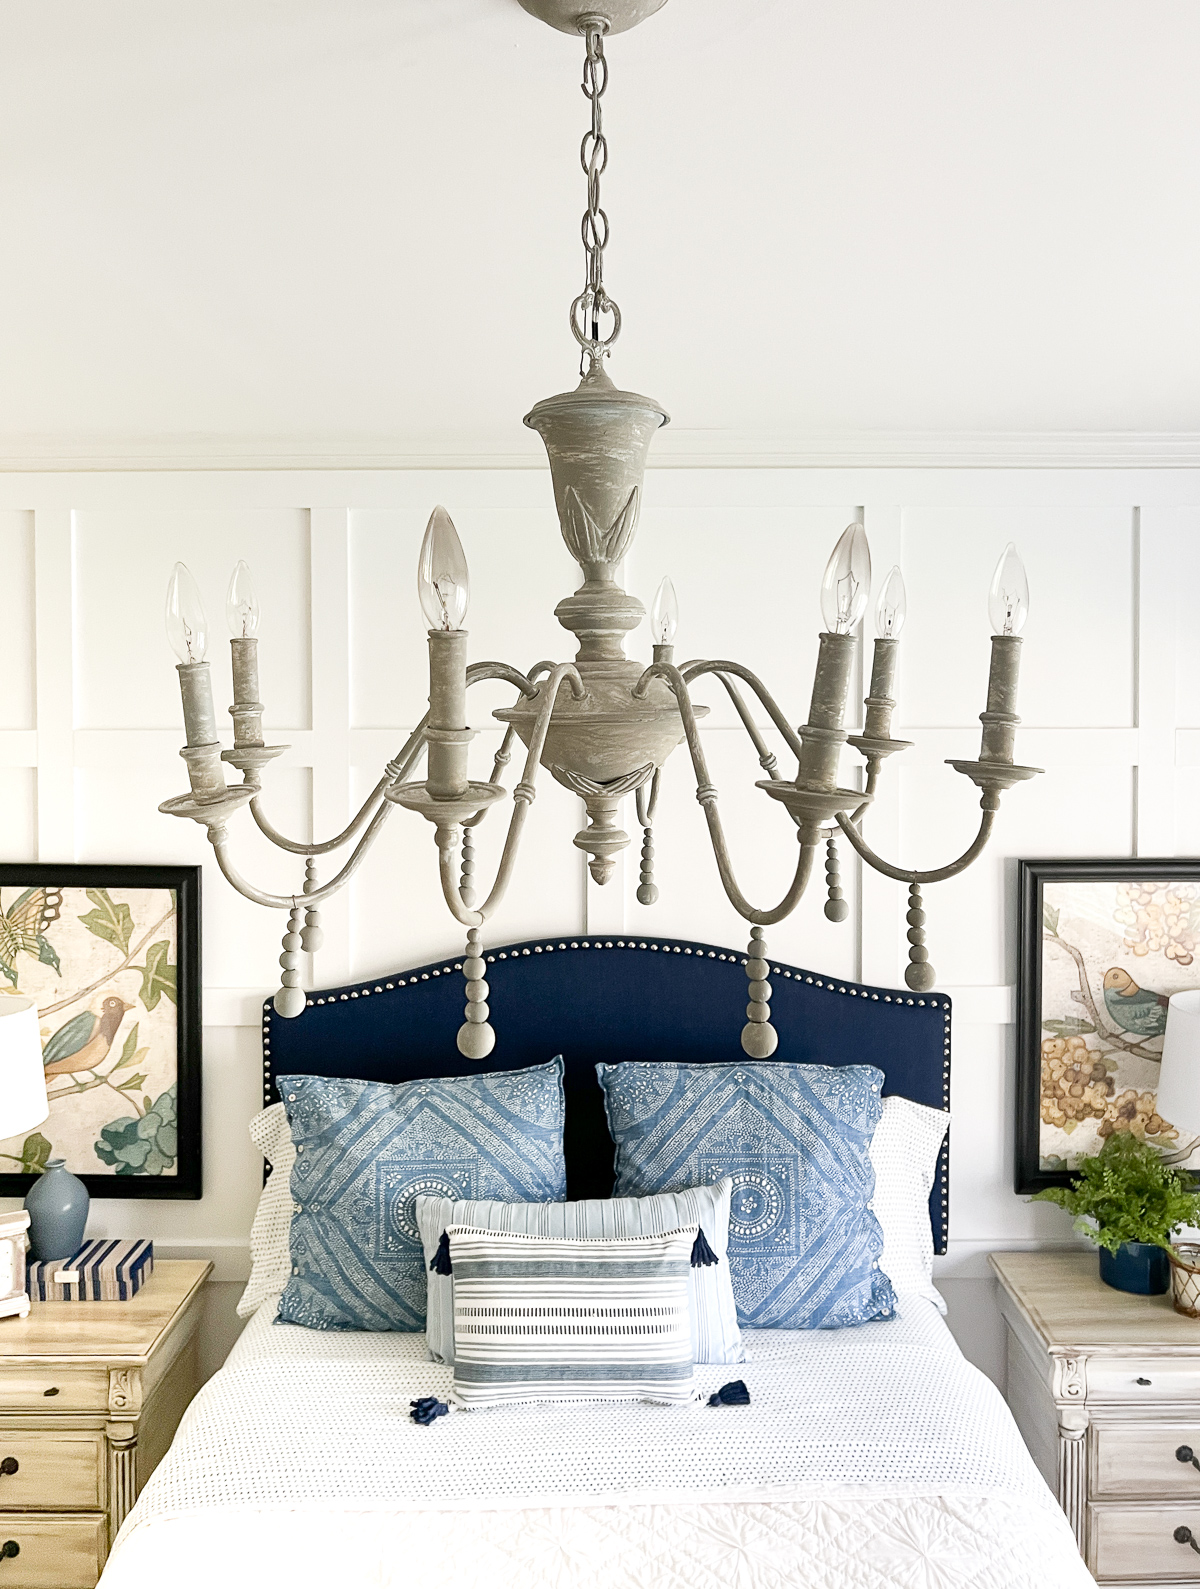
UPDATE EXISTING LIGHTING
Have you taken a look at light fixture prices lately? Good grief – they are so not budget friendly!
Take a look back at the before photos and you’ll get a glimpse of the ceiling fan that was original to the room.
The frosted glass and ugly shiny brass embossed with grape clusters had to go! In its place, I put the chandelier that was originally located in the dining room of our home, prior to its makeover.
The chandelier started out as verdigris green with shiny brass accents, so it took a bit of scheming to come up with a new design for it that would complement the rest of the decor in the room.
The re-do of this chandelier is another easy-peasy project that anyone can do.
SHOP DISCOUNT AND THRIFT STORES
When it comes to a budget makeover of any kind, discount and thrift stores are your best friend!
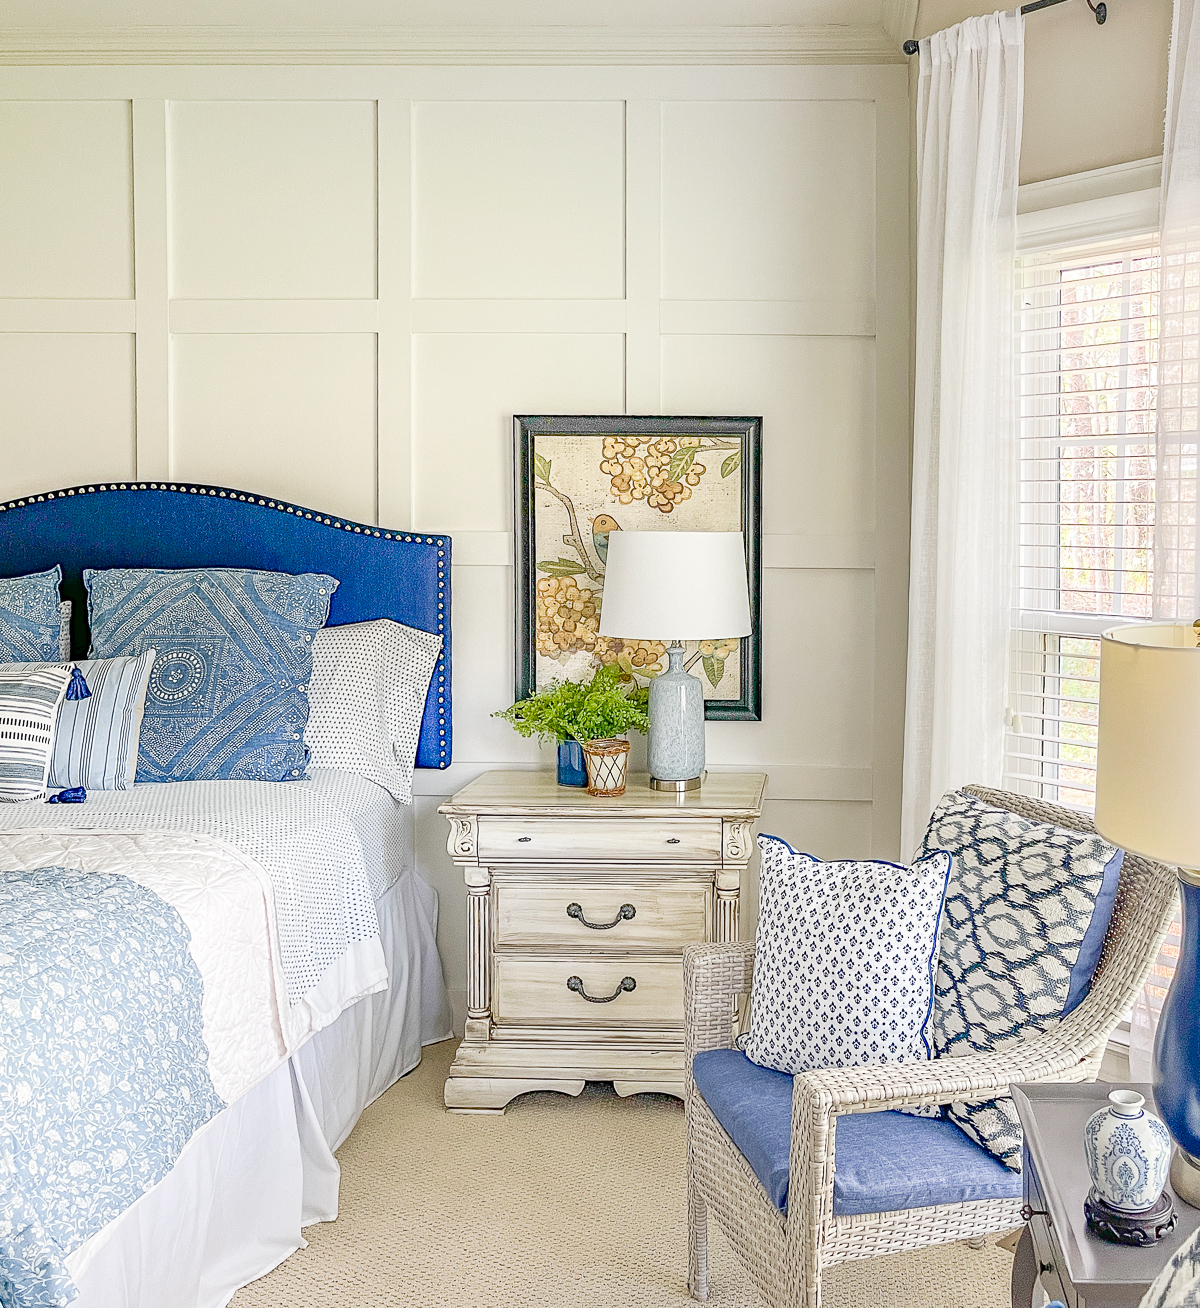
The original heavy, ornate bed was much too heavy for this room. A simple, non-fussy, upholstered headboard was just what the room needed.
By shopping at a discount store, I was able to replace it with a pretty upholstered headboard for a fraction of the cost of what I would have paid in a furniture store or to have one custom-made.
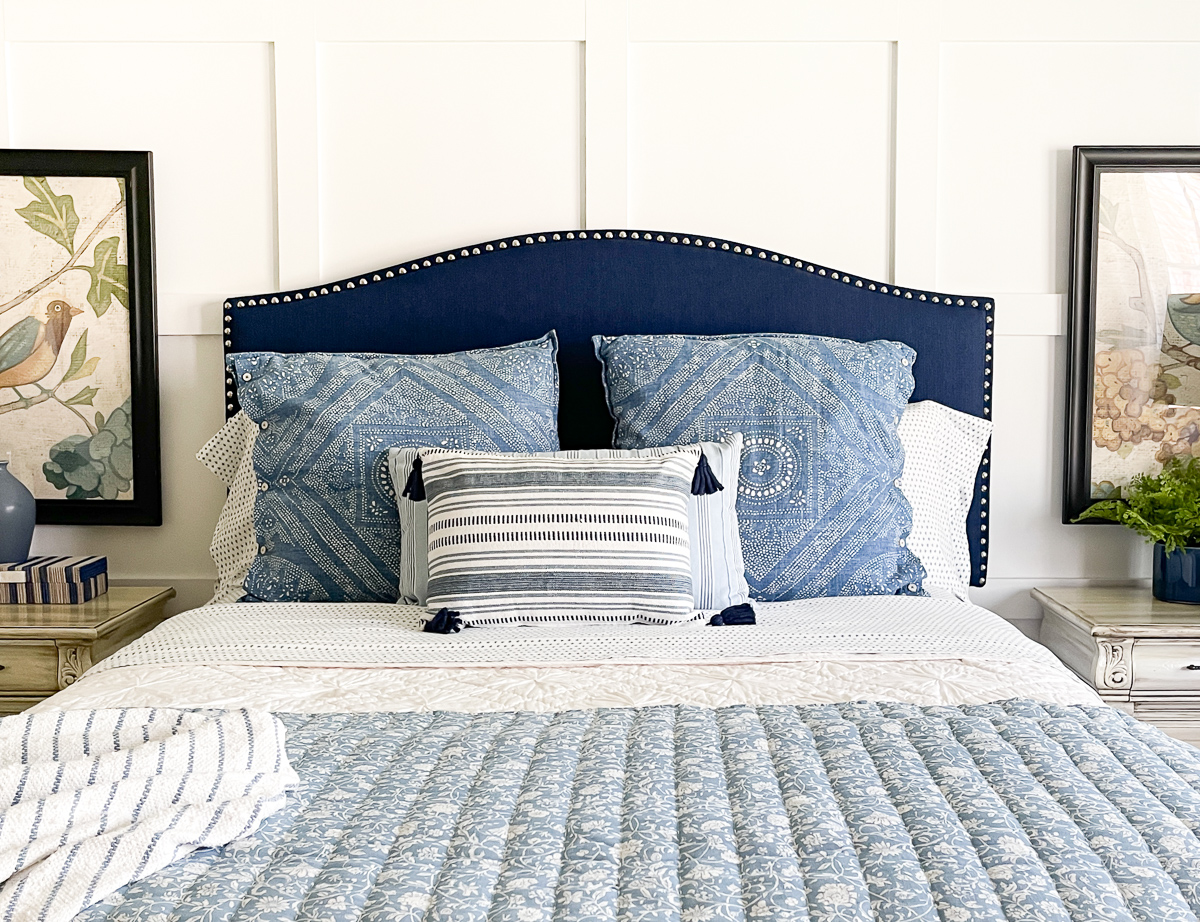
The headboard that I used comes with legs that can be attached, but the depth of our baseboards kept it from lying flush against the wall. To overcome that little issue, we just chose not to attach the legs.
Instead, we added a D ring to each corner of the headboard on the back and hung it directly to the wall. Worked like a charm and I actually prefer this to being able to see the legs since they are covered with black fabric.
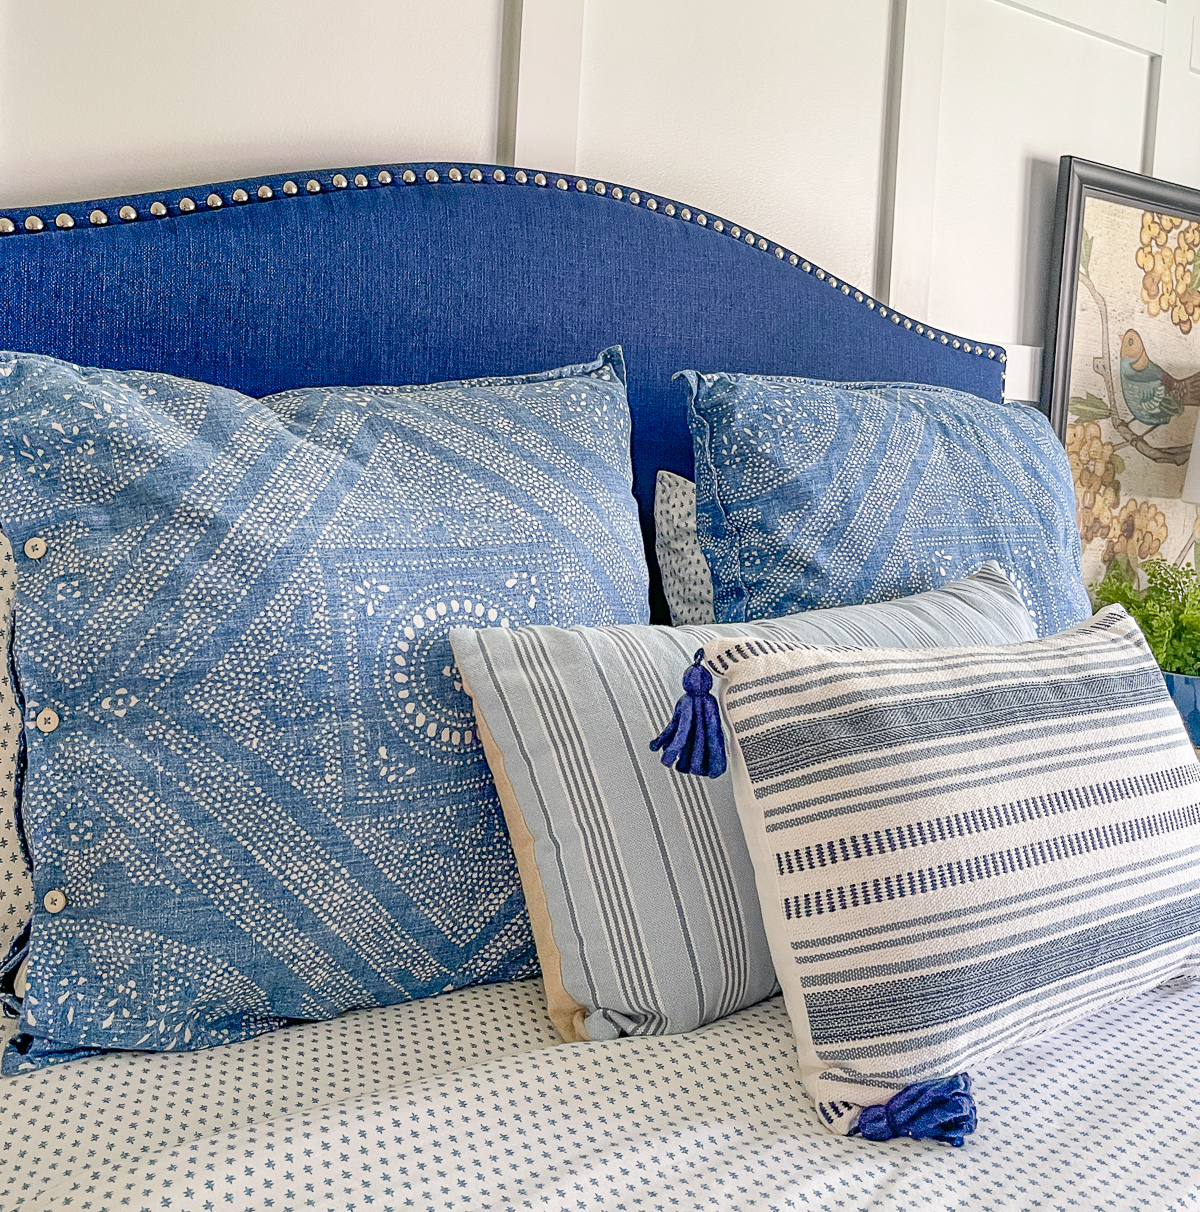
All of the bedding and pillows came from discount stores as well.
When I put a bed together, I don’t hide away the actual sleeping pillows or even put them into a decorative sham. It’s too much trouble to take them out each night and replace them the next morning, so I simply “hide” them behind the other decorative pillows on the bed.
Lamps and accessories are perfect items to purchase at a thrift shop! If a lamp base isn’t the right color, grab a can of spray paint.
SAVE MONEY ON ARTWORK
There’s no need to spend a fortune on framed artwork! Shop thrift stores for frames that you can fill with inexpensive posters or printables.
I needed two large pieces of art to go above each of the nightstands, but I quickly found that pre-framed art was going to be very costly.
I spent just a few dollars on pictures that I didn’t like, just to get the frames. With a fresh coat of paint and two inexpensive posters, they look brand new.
I purchased two downloadable prints from Etsy to fill frames to flank either side of the dresser mirror.
I hope this post has inspired you to see that giving a bedroom a makeover doesn’t require a hefty budget.
With some creativity, a bit of DIY, and thoughtful purchases, you can significantly transform your space.
Start small, be patient, and watch your bedroom evolve into a space that truly feels like your own. Thank you for joining me on this decorating journey—here’s to making your home more beautiful, one room at a time!
Gorgeous – that pretty much sums it up. Am doing the same thing with dining room. Passed on the china cabinet to someone who would love it and am in the process of painting the dining room table legs. First coat of chalk paint is done and am already loving it.
I know that painting furniture can be scary, so I’m so glad to hear that you’re loving it!
You definitely updated your room! I love the board and batten – may be my favorite aspect of the room. I also like the paint job you did on the dresser/mirror. It lightens the whole room. I like the headboard and bedding as well, and the “arches” behind the bedside lamps. You’ve done a terrific job, Suzy! A+.
Thank you so, so much, Barbara!
Apologize – sounded like I was bragging – but you have been such an inspiration to me.
No – you didn’t sound like that AT ALL!!! Providing inspiration is exactly what I’m here for, so it totally makes me happy when I hear that I’ve been able to do that. 😀
I absolutely love your designs!! I would love to send you a photo of my sitting room that has board and batten walls and get your perspective on what I should do! Please let me know if you’d be willing to take a look!
Thank you, Katie. Sure, I’d be happy to take a look. Just shoot the photo to me in an email along with what type of advice you’re looking for.
I just sent you the email and photos. Thanks so much, Suzy!
The room is beautiful! I love the way the board and batten adds interest to the wall. Can you tell me the colour of paint you used on the wall with the large piece of art? Thank you!
Thank you, Connie. All of the walls, except for the board and batten wall are painted with Sherwin Williams Accessible Beige.
Wow, I’m impressed by what you’ve done with this room! It’s so elegant and breathtaking! Love the accent wall’s texture. It’s not overwhelming, but it’s still very eye-catching. My most favorite thing is the color of the furniture because the nuance you’ve painted it in is incredibly beautiful and one-of-a-kind. The pillows are also lovely and seem very cozy. Every corner and detail in the room is so inviting!
Thank you so much, Katarina!
Wow, I’m impressed by what you’ve done with this room! It’s so elegant and breathtaking! Love the accent wall’s texture. It’s not overwhelming, but it’s still very eye-catching. My most favorite thing is the color of the furniture because the nuance you’ve painted it in is incredibly beautiful and one-of-a-kind. The pillows are also lovely and seem very cozy. Every corner and detail in the room is so inviting!
Such a beautiful transformation. Would you be able to tell me the name, color, and manufacture of the carpet in this lovely room?
Thank you, Cher. We purchased the carpeting from Lowes. I don’t remember the brand or manufacturer’s name, but honestly, I wouldn’t use this brand of carpeting again as it’s difficult to spot clean.
I just found your blog today. The redo looks amazing. Did you DIY board and batten? It really puts the room over the top. Would love to know how much that part of the project was if not.
Thank you so much, Andrea! Due to time constraints, I hired someone else to install the board and batten for us. What would have taken us weeks to do was completed in only a few hours by the person we hired. 🙂 I’m sorry, but I can’t remember exactly what the cost was – somewhere $300 – $600, I think. That didn’t include caulking and painting everything after it was completed.
Love this room and now it’s my inspiration for a room in my home. Thanks for sharing where to find things too! What is your wall paint color? Thank you!
Hi Rebecca. The board and batten wall is painted with Sherwin Williams Extra White, semi gloss. The rest of the walls are painted with Sherwin Williams Accessible Beige in flat.
Loved your bedroom makeover so much we had board and button installed!!! I read another comment you painted the 3 walls accessible beige, what color did you paint the board and baton wall?
Hi Dana. I’m so happy you were inspired by the board and batten wall in my bedroom! We painted that wall with Sherwin Williams Extra White in the semi gloss finish so that it matches the rest of the trim in the room.
Thanks, Suzy!
Sorry if I missed it, but did you say where you got your bed? Love the wall!
Jayme
I’m so sorry for the delay in replying! Here’s the link to it. To hang it from the wall, we added D rings to each corner on the back and didn’t add the legs that came with it. https://rstyle.me/+3AmXnTJPBIPfSoCasieSHg
Lens,Zeefuik
I just love it! You had a great vision and it looks fresh and airy. Thank you for sharing. you are truly gifted!
Thank you so much!