How To Makeover Any Room On A Budget
Budget friendly room makeover ideas and designer tricks that will show you the changes to make in any room to give it a fresh new look without spending a lot of money.
As I go through time, I might add a new pillow or a new accessory or something small like that to a room, but the time eventually comes that a room simply needs a whole new look. Besides – who doesn’t like to have a stylish, up to date home?
There can be lots and lots of reasons for making over a room. It may be that decorating styles and trends have changed, my tastes have changed, my needs have changed and so on. But – the problem is often M-O-N-E-Y.
I’m sure you’re well aware of how costly all types of home improvements, including decorating, have become. In this post, let’s talk about the best budget friendly makeover ideas, tips and designer tricks that you can use.
ADD AN ACCENT WALL
Adding an accent wall to a room is an easy DIY project that will provide a lot of bang for the buck!
Accent walls are used to create drama in a room’s design or to draw attention to an area that might otherwise be overlooked. They can be used to add interesting texture to a room or simply for adding a decorative flair.
Types of accent walls include:
- painting one wall a different color than the rest of the room
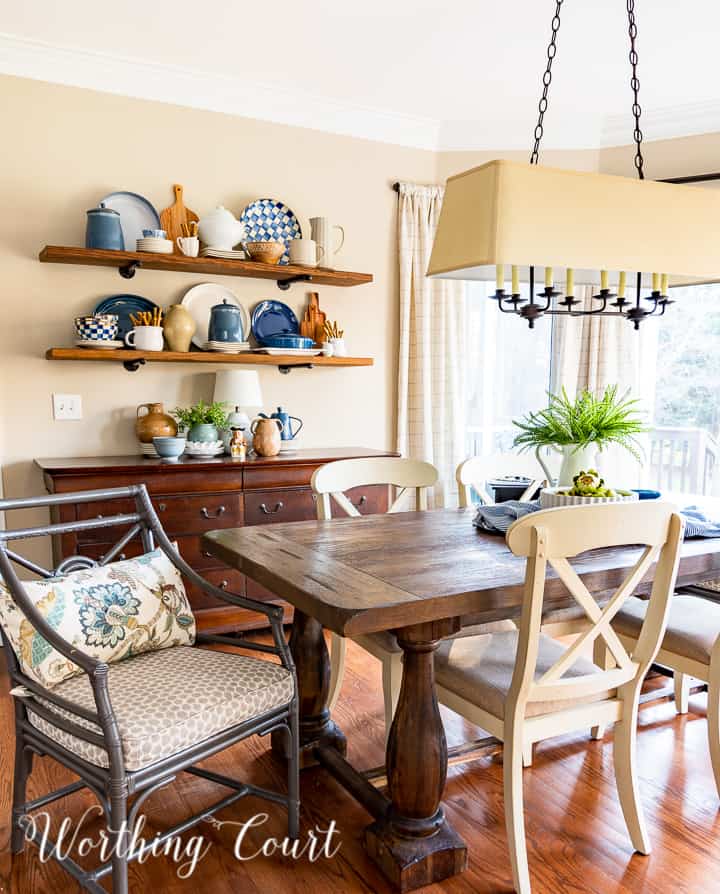
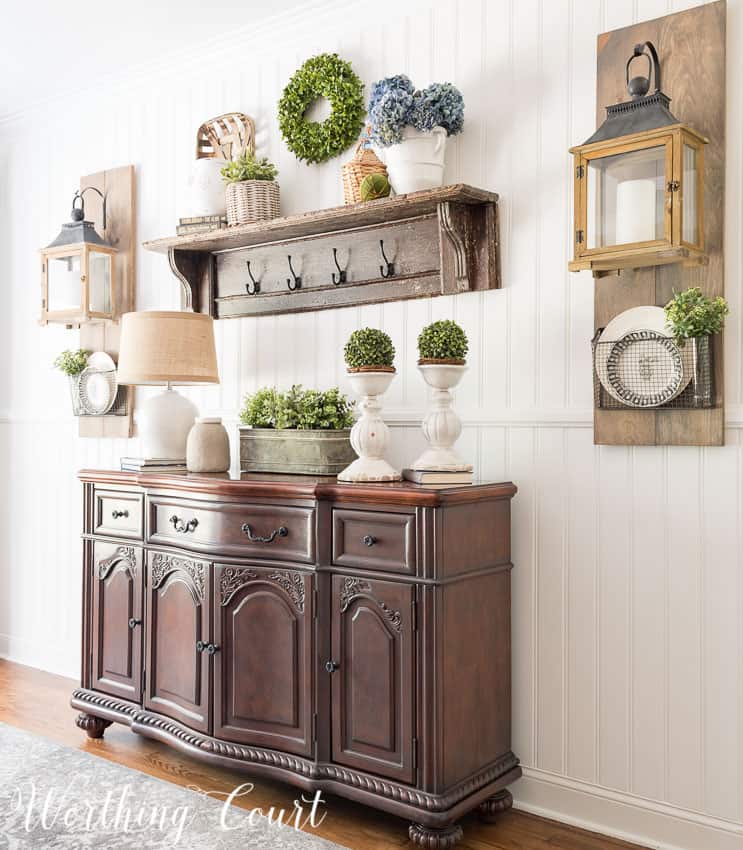
- adding paneling to a wall (take a look at my paneled dining room wall below)
- adding a board and batten treatment to a wall
- adding wallpaper to a wall
- adding picture frame moulding
- adding a chair rail
- painting stripes or a design using a stencil on one wall
- a gallery wall filled with favorite pieces of framed artwork or portraits
- a wall filled with a hanging plate collection
- large wall decals
- hang a large, oversized piece of art or mirror
- wallpaper murals
CHANGE OR MAKEOVER A LIGHT FIXTURE
I’m currently working on a budget room makeover for my breakfast room. My project is mid-makeover, but one of the first things that I changed is the light fixture above the dining table. Boy what a difference that one change made to the room! The new fixture added wonderful visual interest to the space and gave it an instant facelift!
I find Amazon to be a good resource for finding low budget lookalike options for many of the higher priced light fixtures that are seen on the market today.
Changing a light fixture is a good beginner DIY project too. Just make sure to turn off the electricity to the electrical box that the fixture will be wired to and follow ALL of the safety precautions listed in the directions.
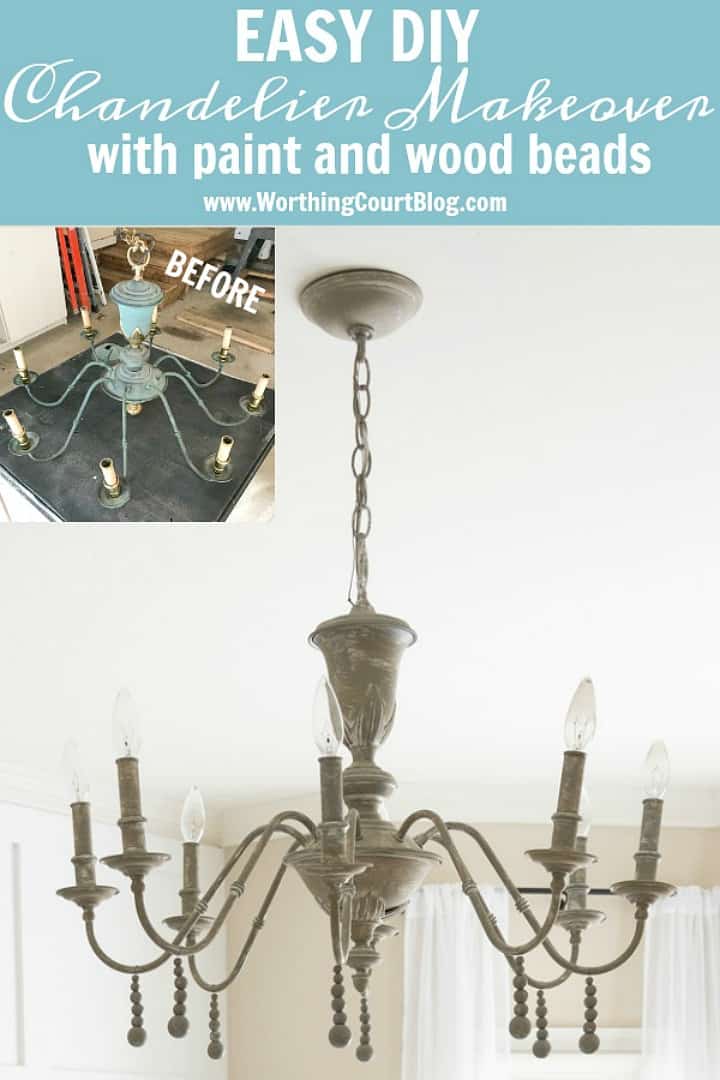
To save even more on your makeover, try giving the existing light fixture in the room a makeover.
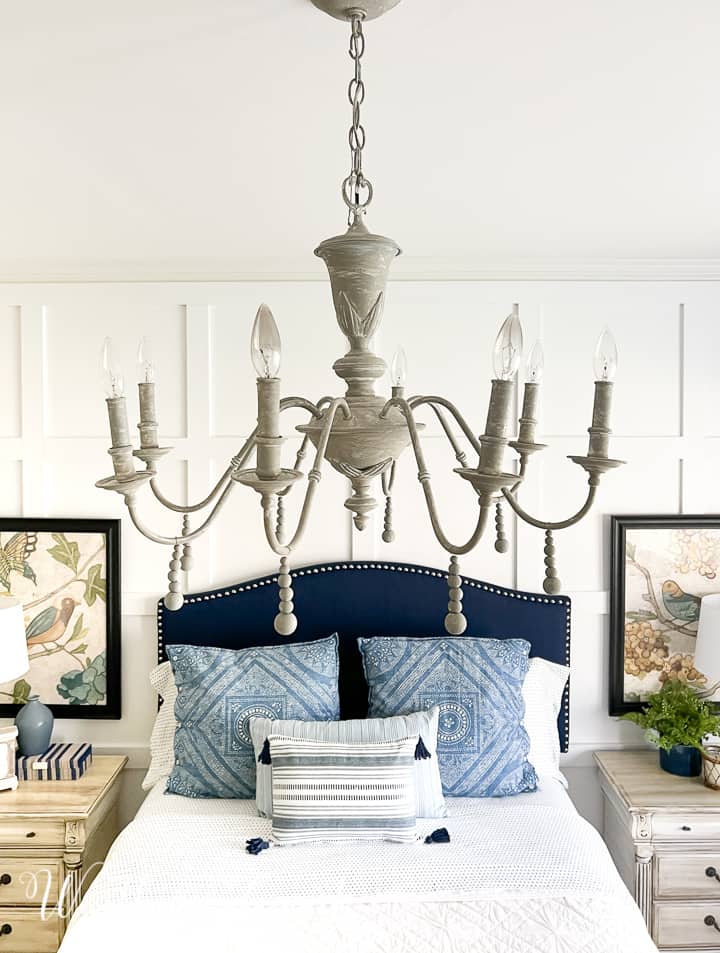
For example, take a look at the before and after of the chandelier that is currently in a bedroom at my house. The original chandelier was the verdi green finish that was so popular in the 90’s. My easy tutorial will show you how sponging on a couple of layers of craft paint and wiring a few wood beads to the arms, makes an old light look brand new.
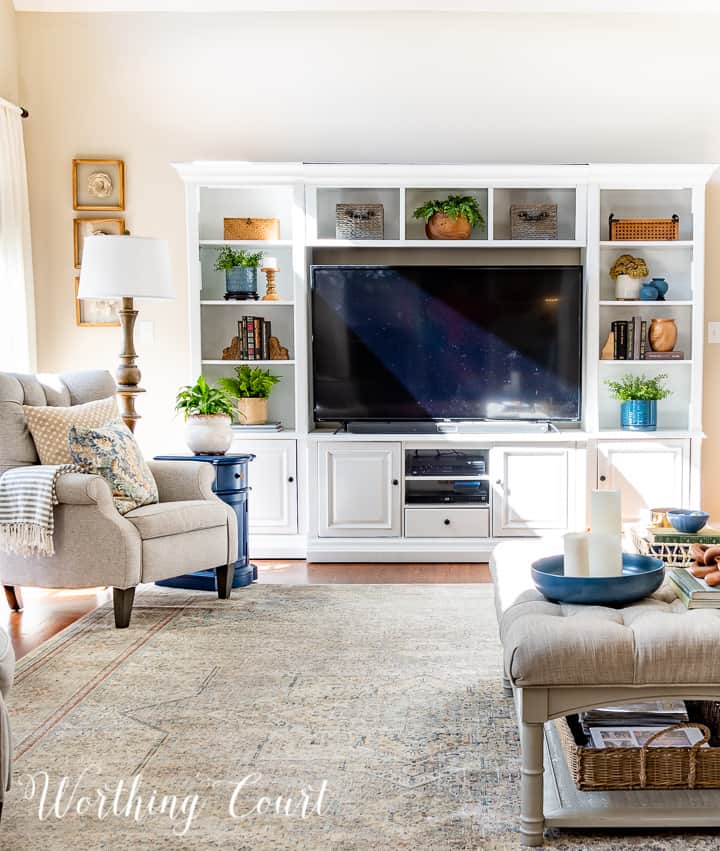
ADD LAYERS OF LIGHTING
What do I mean by layering lighting? Basically it means to add lighting at different levels and locations throughout the room.
Working together, the three types of lighting that you should include in a room, ambient, task and accent lighting, create a visually and functionally balanced room.
A ceiling light provides general light to a room, a lamp becomes task lighting and smaller accent lights become, well, accents and can brighten dark corners.
Think about the difference in the ambience of a room that has a single overhead light versus a room that has multiple sources of light at different levels and in different locations.
UPCYCLE OLD FURNITURE
Upcycling an old piece of furniture is great money saving tactic, but I also find it to be very gratifying when it prevents me from having to purchase a new piece of furniture.
Painting or reupholstering a piece of furniture is an obvious example of upcycling, but think beyond that gallon of paint to see if there’s a way you can completely reimagine a piece of furniture.
A good example is the buffet cabinet that I inherited from my mother-in-law. It was a cute piece of furniture, but it was totally not my style and I had no place for it in my home.

I don’t have a mudroom, but I desperately needed a dropzone place for us to hang our coats, umbrellas, purses and other paraphernalia so that they weren’t always hanging on the back of our kitchen chairs.
My solution was to split the buffet cabinet into two pieces by removing the top and beefing it up a bit to hang on the wall.
I removed the doors, painted it white, added some hooks and mounted it to the wall (making sure to mount it into the studs). Now it’s a workhorse that helps us take advantage of this very awkwardly shaped hallway off of our garage entrance.

CHANGE THE DRAPERIES
Draperies are the jewelry in a room and can be a good low budget way to make a room pretty!
You don’t need to spend a fortune on them either. Just about every major retailer now offers good deals on readymade draperies in multiple colors, patterns and lengths.
One of my favorite places to find them is at HomeGoods. I’m also a big fan of Half Price Drapes, which can be found on Amazon or on their own site.
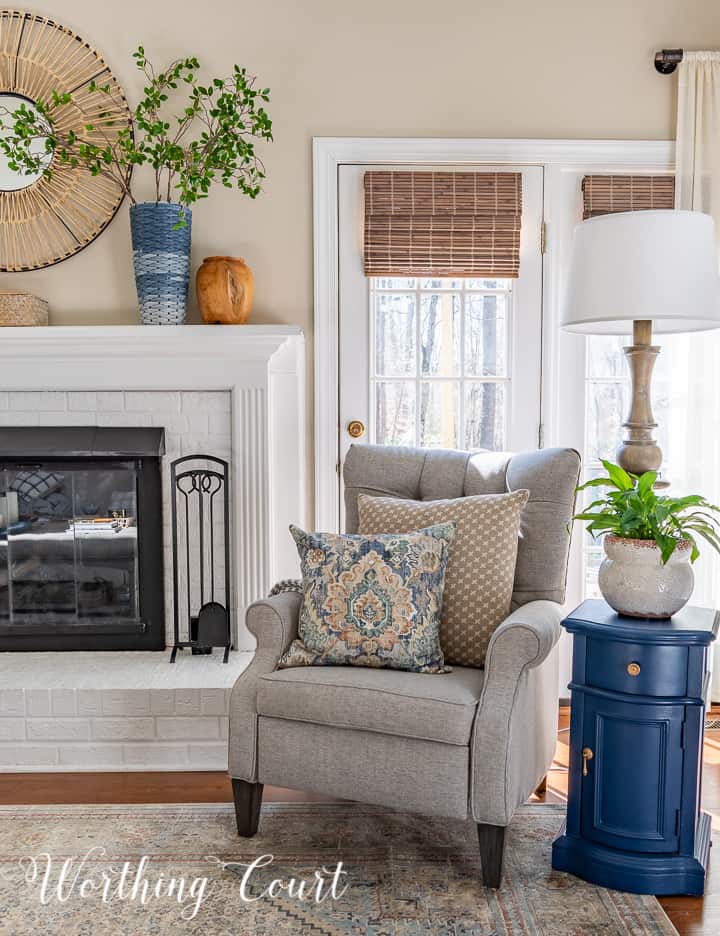
CAREFULLY CURATE THE DECOR IN THE ROOM
When referring to a room’s decor, we’re talking about the components that make a room more attractive and visually appealing.
Home decor is inclusive of a an entire room’s physical items, but we’ll just focus on accessories for today’s conversation.
Don’t make the mistake of thinking that accessories are just tchotchkes to be set around and admired. They come in the form of throw pillows, throw blankets, area rugs and other items that you add to a room to add visual interest.
The great thing about accessories is that you can have a large impact in a room without spending a lot of money.
When we accessorize a room we:
- add our own personality to the space
- add visual interest
- keep a room on trend
- can add a pop of color

To really save money on accessories, be ready to embrace shopping at thrift stores, consignment stores, auctions and yardsales. It’s the thrill of the hunt for me!
My biggest thrifted bargain of all time was probably a vintage fireplace surround sitting off in the corner of a junky store. Normally, the price for those runs in the hundreds of dollars. My find was only $10!
By the time that I cut off the sides/legs of the surround and touched up a couple of places I had myself a gorgeous one of a kind piece that I used as a wall shelf.
I’ve since given my dining room a makeover so it no longer looks like this, but this shelf was a real statement piece in the room when I had it.
BE PATIENT AND TAKE YOUR TIME
I can’t stress this one enough, but it took me a long, long time to learn this lesson! I wish I had a list of how much money I’ve wasted over the years by allowing myself to be impatient and settle for something just because I thought it was a good deal.
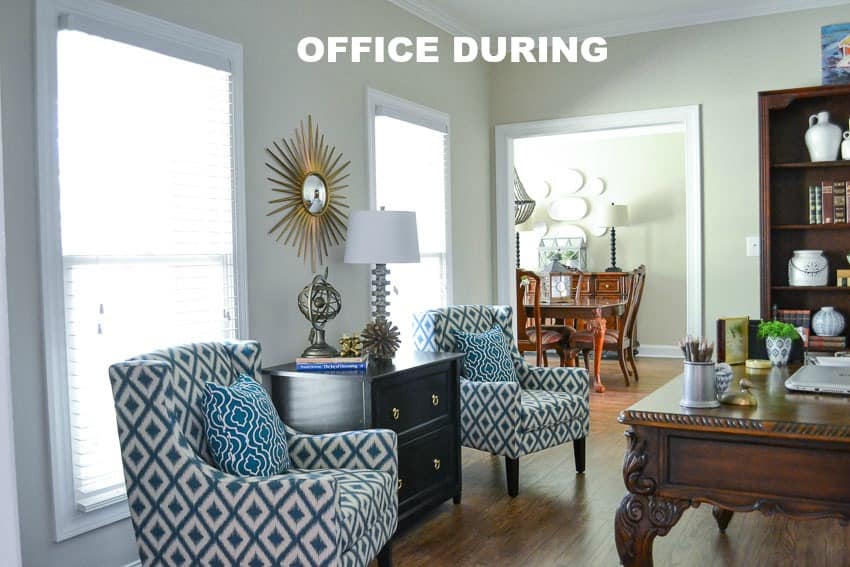
A prime example is our home office. I needed two side chairs for our office and was shopping for a bargain. The chairs were more for looks than actual use, so I didn’t want to put a lot of money into them. When I ran across chairs on clearance for roughly $150/ chair, I snapped them up, telling myself that I could make them work.
But, what really happened is that I wasted $300 because I didn’t take the time to think things through and come up with an overall plan for the space first. Those chairs, that were such a great deal, are now sitting in another room, waiting for me to decide what to do with them.
OFFICE BEFORE THE MAKEOVER WITH THOSE “GREAT DEAL” CHAIRS
SET A BUDGET FOR YOUR ROOM MAKEOVER BUT BE WILLING TO COMPROMISE
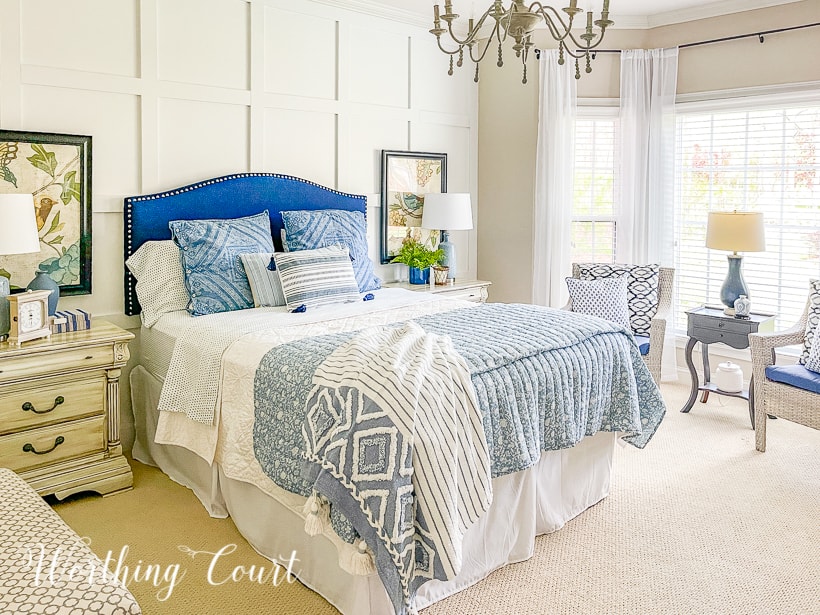
For example, I recently gave one of my bedrooms a makeover. I’m working toward creating an updated cottage vibe in my home.
Part of the updating called for a changing the color scheme, which meant that I needed to replace the existing accent chairs in the room. That one change – buying new accents chairs would have completely blown my tight budget!
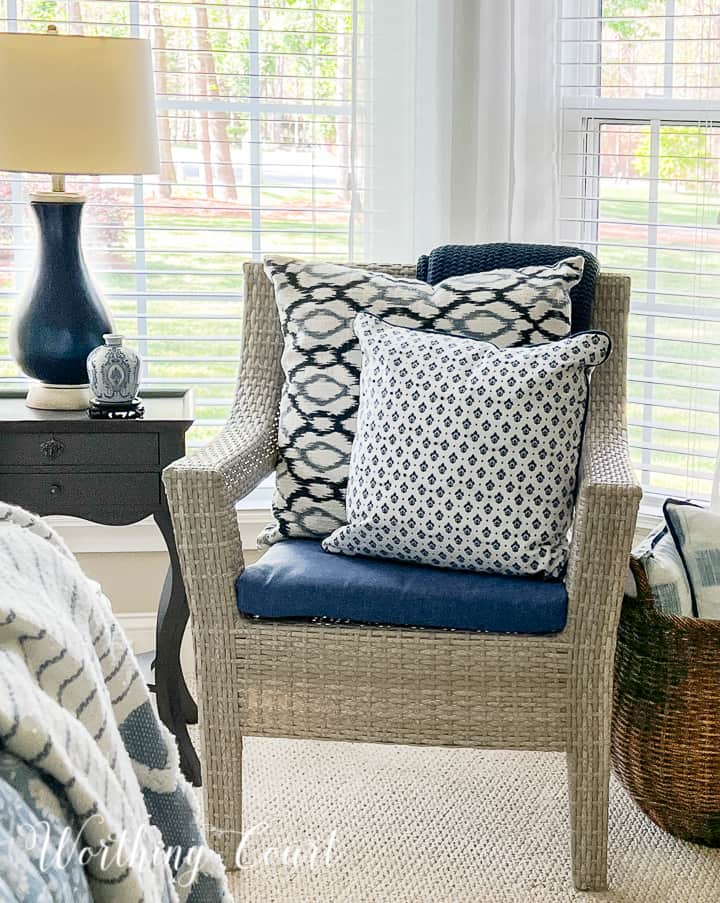
My compromise solution? I used outdoor chairs in place of fully upholstered indoor chairs. I made sure to use chairs that are good quality and have a good functional form to them.
By the time I added seat cushions and throw pillows, they look just like normal indoor chairs. The best part is that I spent $200 total instead of the several hundred dollars it would have cost me for a pair of fully upholstered arm chairs.
TRY A LITTLE DIY
Oh, how I would love to always be able to just run to the store anytime I want something for my home. Who doesn’t love instant gratification? Pardon my grammar, but that ain’t gonna happen at my house!
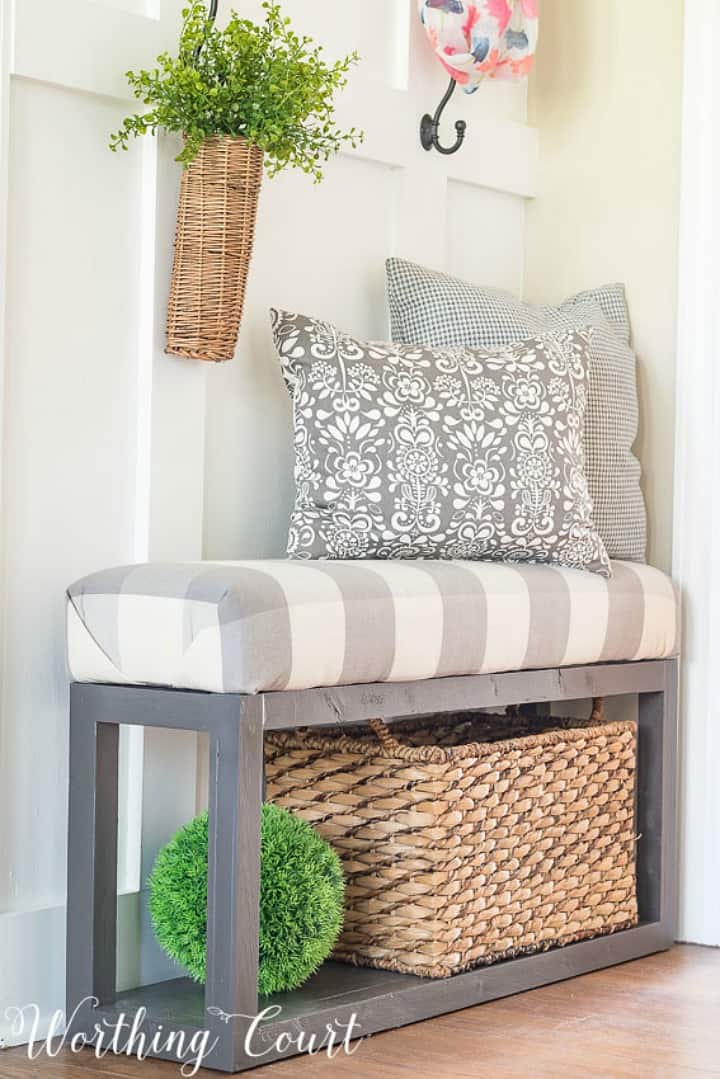
When I gave my foyer a makeover, I found myself wanting two benches to flank the entrance into our home office. I knew that finding benches in the style and size that I wanted would be pretty pricey, especially since I needed two of them.
So…the hubs and I put our heads together and built them. And you know what? That feeling of accomplishment was waaay more gratifying than if I had run to a furniture store or if I had ordered something online – not to mention, we saved a ton!
HOW TO BUILD AN EASY BENCH – STEP BY STEP TUTORIAL
BE WILLING TO THROW IN SOME ELBOW GREASE
I’m not talking about the kind of elbow grease that it takes to build or make something. I’m talking about the kind of elbow grease that it takes to paint! Or to put some moulding on your wall. These types of projects aren’t hard and aren’t expensive, but boy oh boy, do they make a world of difference!
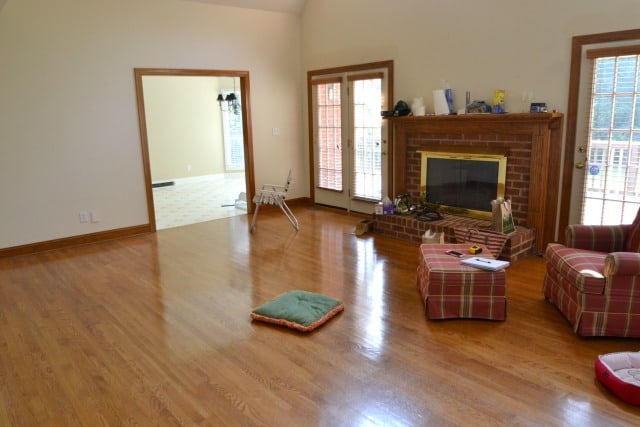
OUR DATED BRICK AND OAK TRIM FIREPLACE BEFORE
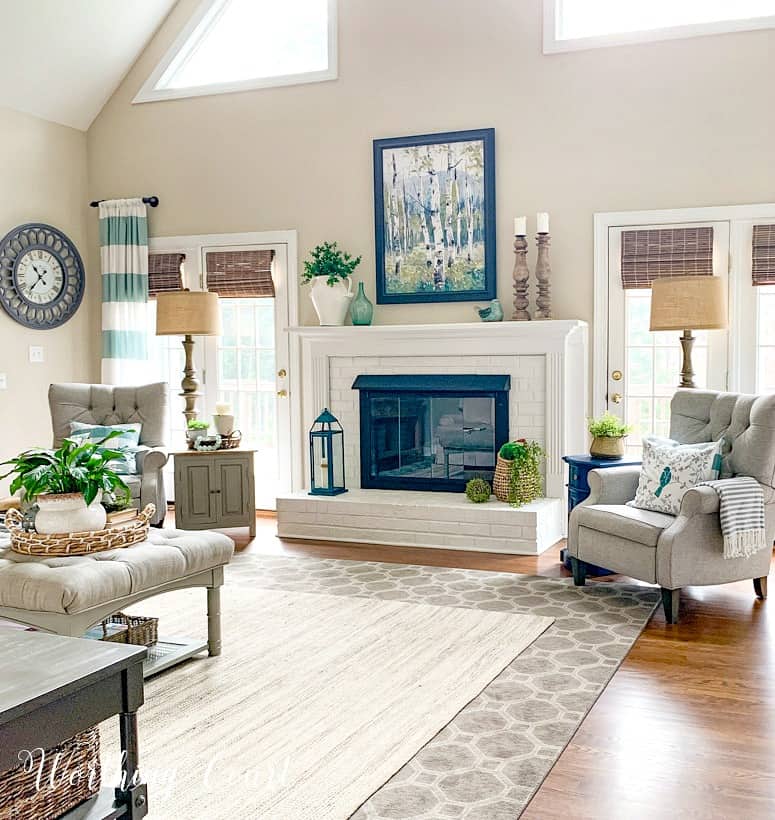
AND AFTER! AHHH – THE AMAZING POWER OF PAINT!
For those of you who are struggling with just how to go about changing and/or updating your home, I hope you’ll find these tips helpful!

Great tips as always!
Very helpful indeed! I am in the same boat- though instead of not having deep pockets, I have empty pockets … but I am determined to use your tips to create the style I love in our home. Much of our furniture is dark and heavy and inherited, so we are blessed to have it, but need to make it work. I’ve been nervous to paint, but after seeing your transformations, I am so ready. Most of our furniture has simple, classic lines and I know it will look great! Thank you so much!
Heather,I just recently took the plunge and tried an inexpensive brand of chalk paint from WalMart by Waverly. It was highly recommended by a furniture flipper I follow on IG. It worked beautifully! I painted an orangey oak wall mounted jewelry cabinet black, and all the prep I did was just a VERY light sanding and wipe down with a damp cloth. It went on so smoothly, and after two coats of paint, I gave it two coats of Minwax polycrylic in Matte finish. It was so easy and looks so good, now I’m ready to find more things to paint and try out some new colors! Also, I barely used any of the 8 ounce jar of paint, so a little goes a long way!
That’s one of the main reasons that I love chalk paint, very little if any up front prep. Congrats on completing your project!
Great tips! Cannot wait to see your finished foyer and the light fixtures you decided on.
I am looking for a magnolia wreath at a reasonable price. Do you know where yours came from?
Hi Peggie. I can’t say that it was a reasonable price, but mine came from Magnolia Market. I splurged on the theirs because I just didn’t care for the look of the less expensive ones.
I read on another one of your blogs that you got the wreath at Painted Fox Home or is that wreath similar to the inever posted above ?
What a wealth of great tips.
Your tips are great and are inspiring me to get busy. You are so creative and it looks so perfect.
Linda Owens
Thank you so much for sharing your money-saving ideas (even though I HATE to paint, I know it can make a big difference!). You are proof-positive that you can have a stunning home without breaking the bank!
Wow, excellent post with lots of great ideas! I’m hesitant to put much effort into my current home because we’ll be moving in the next few years (although maybe I should so it sells!) but now I want a style makeover for my next home!
I agree with you about paint. I would love to paint more of my furniture, but my husband is not a big fan of paint! I keep working on it.
I just need Wickie to be more like Pookie LOL!!
Great inspiration as always!
Excellent advice!
I love all your creativity and thanks for sharing.
Great post!
Thank you for the great tips and inspiring pictures. Love what you’ve accomplished!
Thank you for the encouragement to be patient and to use or modify what I already have in some instances. Your home is beautiful!
Great post. Can you please tell me what kind of black paint you used on the gold metal on your fireplace. And, what kind of paint you used on your dining room table. Thank you so much.
Hi Linda. I used Rustoleum High Temp Spray Paint on the fireplace screen. You can read all about the paint for my dining room furniture at this link: http://www.worthingcourtblog.com/dining-room-finishing-touches/
Your painted dining room furniture looks amazing. Such a huge difference!
wonderful and affordable tips as always, thank you. I am in the beginning stages of “farmhousing” my home and you are such an inspiration to me. I am in love with your breakfast nook curtains and have been unable to find something similar that works for me….until now. I found the “taupe loretta” style on kirklands.com and ordered them right away. i hope they work – wish me luck!
Love your posts!