Expert Tips For Making Stunning Fall Wreaths
Decorate your front door for fall with an easy DIY fall wreath! Here are several ideas to inspire you, along with expert tips and my must-have wreath making tools.
This post and photos may contain Amazon or other affiliate links. As an Amazon Associate I earn from qualifying purchases. If you purchase something through any link, I may receive a small commission, at no extra charge to you. All opinions are my own. See my full disclosure HERE.
Creating a beautiful fall wreath is a great way to add seasonal charm that welcomes guests to your home. With the right guidance and tools, you can easily craft a stunning fall wreath for your front door.
To me, fall is the most beautiful season of the whole year. The humidity and temps are more comfortable, the air is fresher, and nature puts on the most amazing show, filled with foliage in glorious colors – for free!

I feel like the arrival of the fall season is a time to celebrate and what better way to do it than by welcoming it into our homes by crafting our very own diy fall wreath?
I love to make myself a new fall wreath every year. Each one of these wreath ideas that I’m sharing with you is unique and sets the tone for the fall decorations on the rest of the front porch and gives a nod toward my fall decor on the inside.
Nothing gives a more heartfelt and cheery welcome to my guests than greeting them with a beautiful wreath on my front door!
Down below, I’ve also included my favorite must-have wreath making supplies that make the job so much easier! Not that it’s a hard job, but who doesn’t love any type of tool to simplify things?
Basic DIY Wreath Steps
You’ll see that all of the wreaths use a grapevine wreath for the base, instead of a wreath form. They are my favorite when it comes to making a wreath!
The textures they provide are great, they are inexpensive, and the vines are perfect for wedging picks into. Often they don’t even need to be wired or have things glued in place.
The beauty is that I can simply deconstruct things after the end of the season so that I can use the grapevine wreath over and over again!
No matter how complicated any of these diy wreaths may look, every single one of them is easy to make.
The steps will vary by wreath, but let’s break making a fall wreath down into very basic steps:
- Choose the right size wreath. As a general rule, the diameter of a wreath should be ½ to ⅔ the height of the door. The larger the wreath – the greater the statement.
- Supplies to have on hand include: floral wire, wire cutters, hot glue gun, and glue sticks. See below for my must-haves.
- Decide on the look you want – flowy and full, clean and simple, or somewhere in between? Determine the orientation you want – picks only on the bottom or top, only on one side, or all the way around. The ideas here can serve as great inspiration!
- Decide on a color scheme and shop for a variety of faux greenery and leafy stems, stems with berries, acorns or pinecones, and/or floral stems. You’ll want a variety of lengths and bushiness.
- Begin wedging the picks between the vines in layers. Start with the longest stems and work your way forward with short stems. Heavier stems may need a little help with floral wire and/or hot glue to hold them in place.
- Use small bushy stems or pieces of moss to help fill gaps and to add accents.
- Top your wreath off with a bow made with a gorgeous ribbon that pulls the design together.
TIP: Hang your wreath with a piece of ribbon that matches or coordinates with the bow instead of using a metal wreath hanger. To secure the ribbon, place a Command Hook, upside down, at the top of the interior of your door. Run the ribbon up from the wreath and over the top of the door. Tie a knot at the end of the ribbon and place it over the hook.
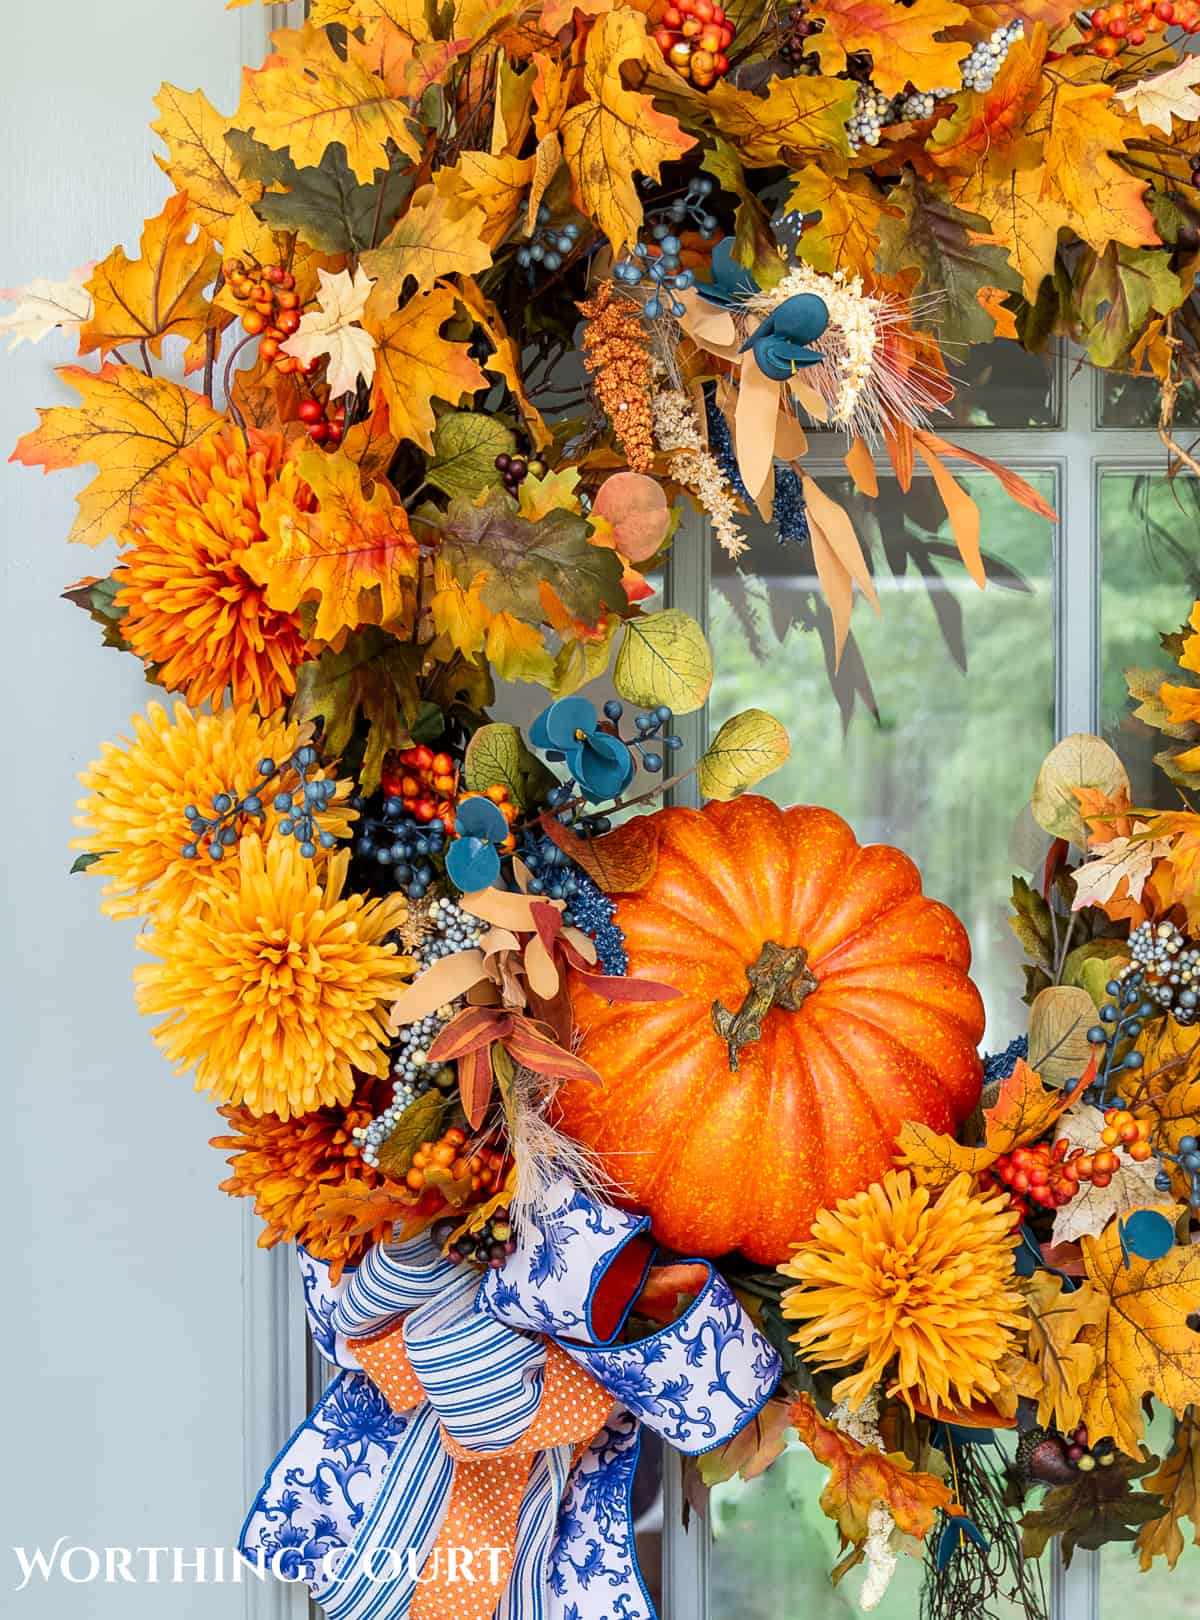
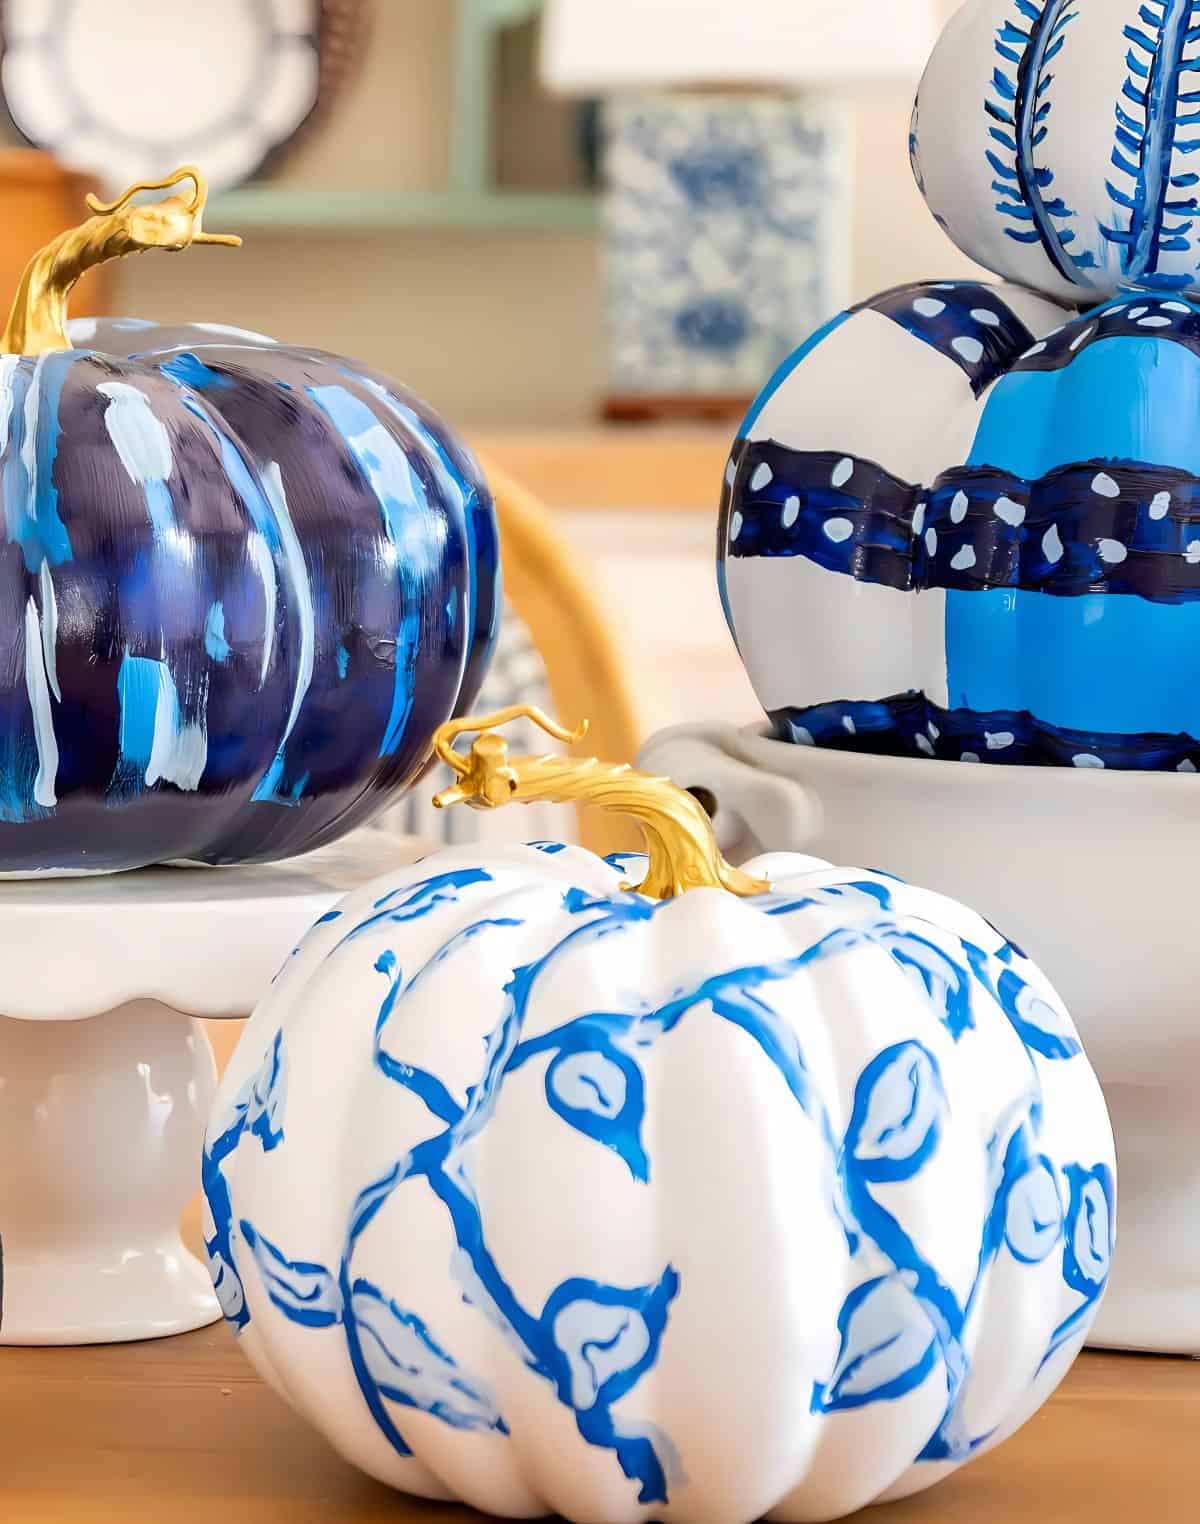
Navy & Burgundy Chinoiserie Wreath
This wreath was inspired by my love of blue and white and all things chinoiserie.
I determined that I wanted the decor at the bottom with the pumpkin and bow slightly off-center for an asymmetrical look.
The first step was to add the long eucalyptus and fall leaf stems, facing opposite directions, while leaving a bit of space where the pumpkin would ultimately sit.
I love to add a bit of drama to my wreaths, so I then added a few long, narrow leaf stems. Some are oriented upward and drape down a bit and others are angled so that they hang below the wreath.
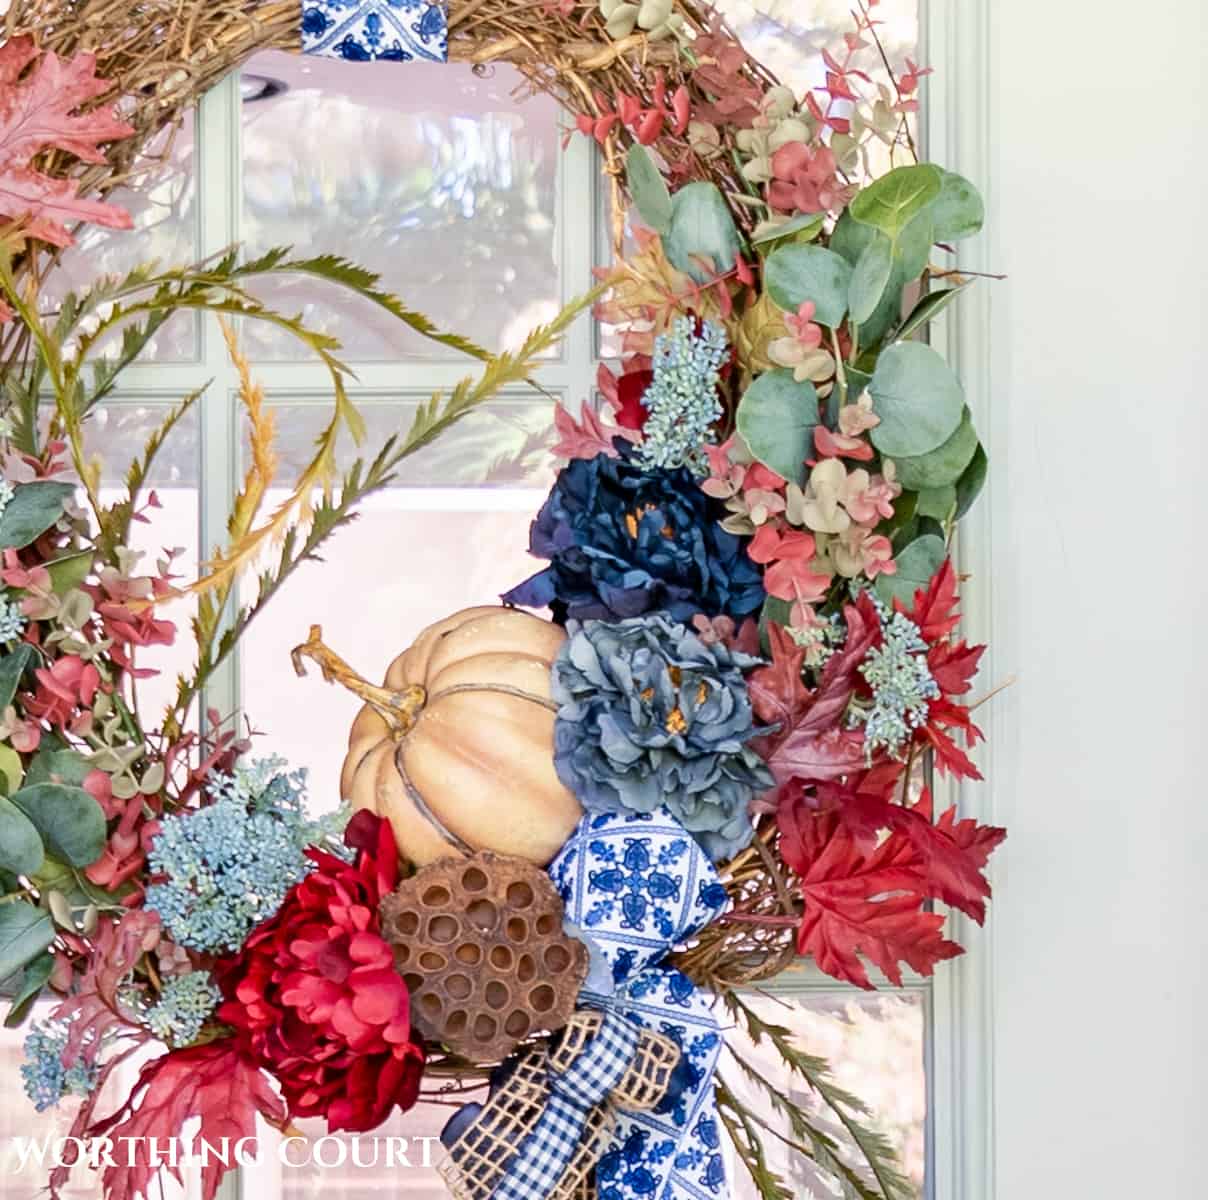
From there, I added the rest of the items, tucking them into spots that needed filling. I made sure to leave room for the large flower blossoms, seed pod, bow, and pumpkin to be added last.
I did have to wire some of the long stems that are upright to the grapevine wreath to hold them in place. The pumpkin was added last with a small amount of hot glue.
TIP: To remove an item secured with hot glue, hold the heated tip of a glue gun to the hardened glue until it softens.
Front Door Hanging Basket
Sometimes a front door wreath isn’t a wreath – it’s a front door basket.
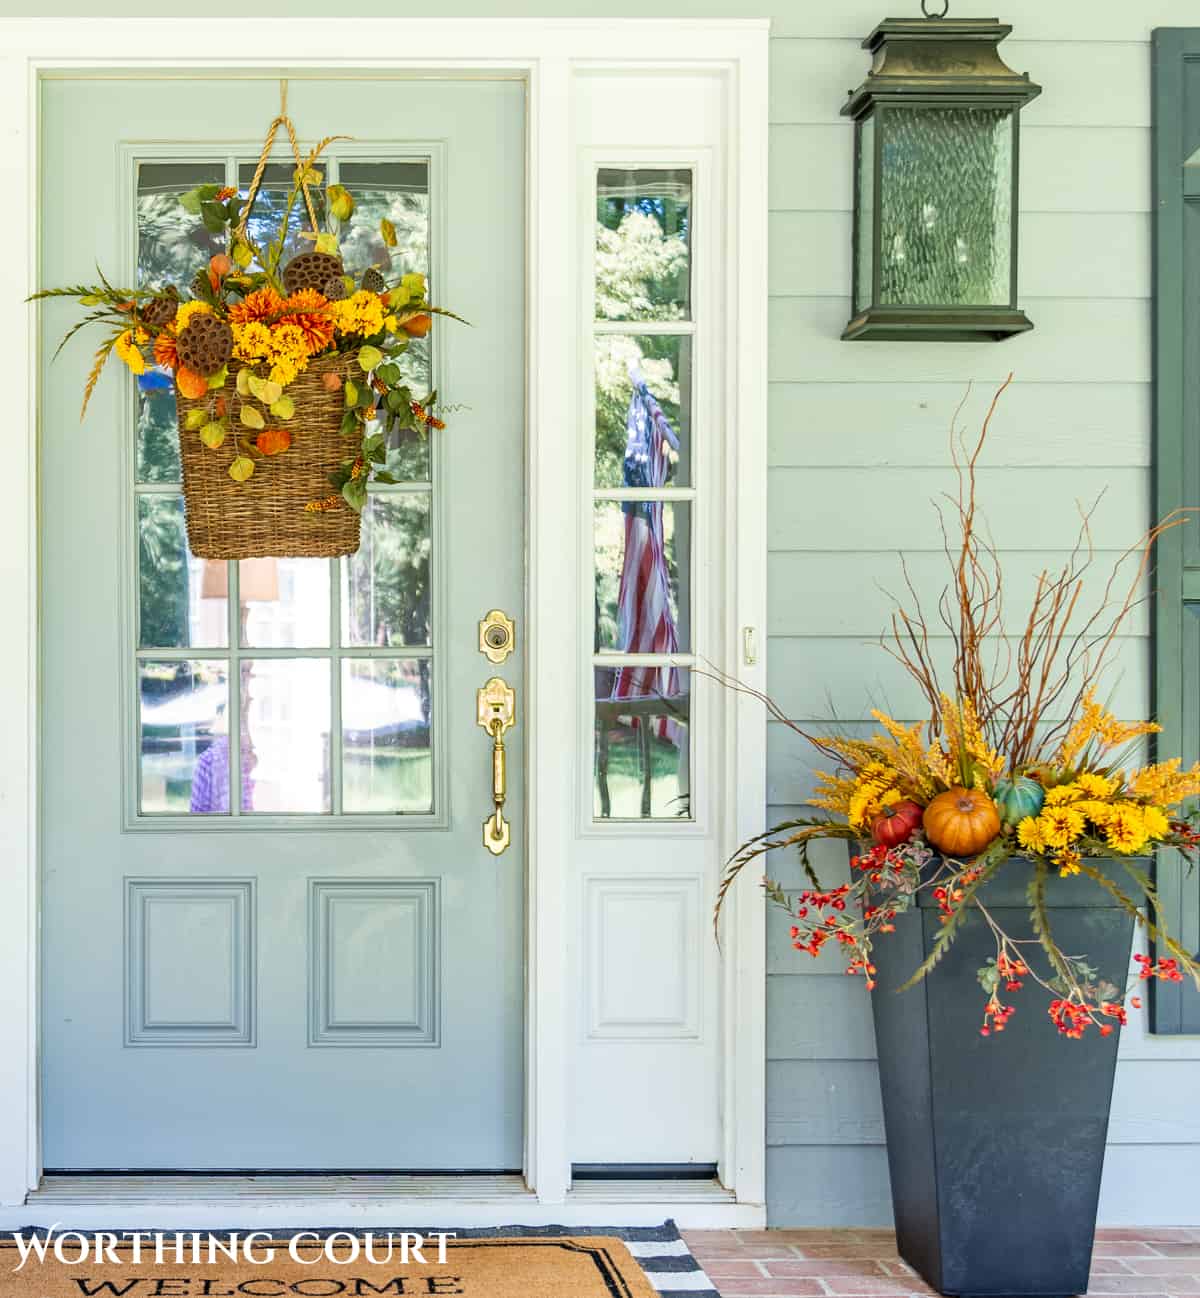
Using a hanging basket is a wonderful way to do a something a little different on your front door for fall. Why not add a little variety to your life!
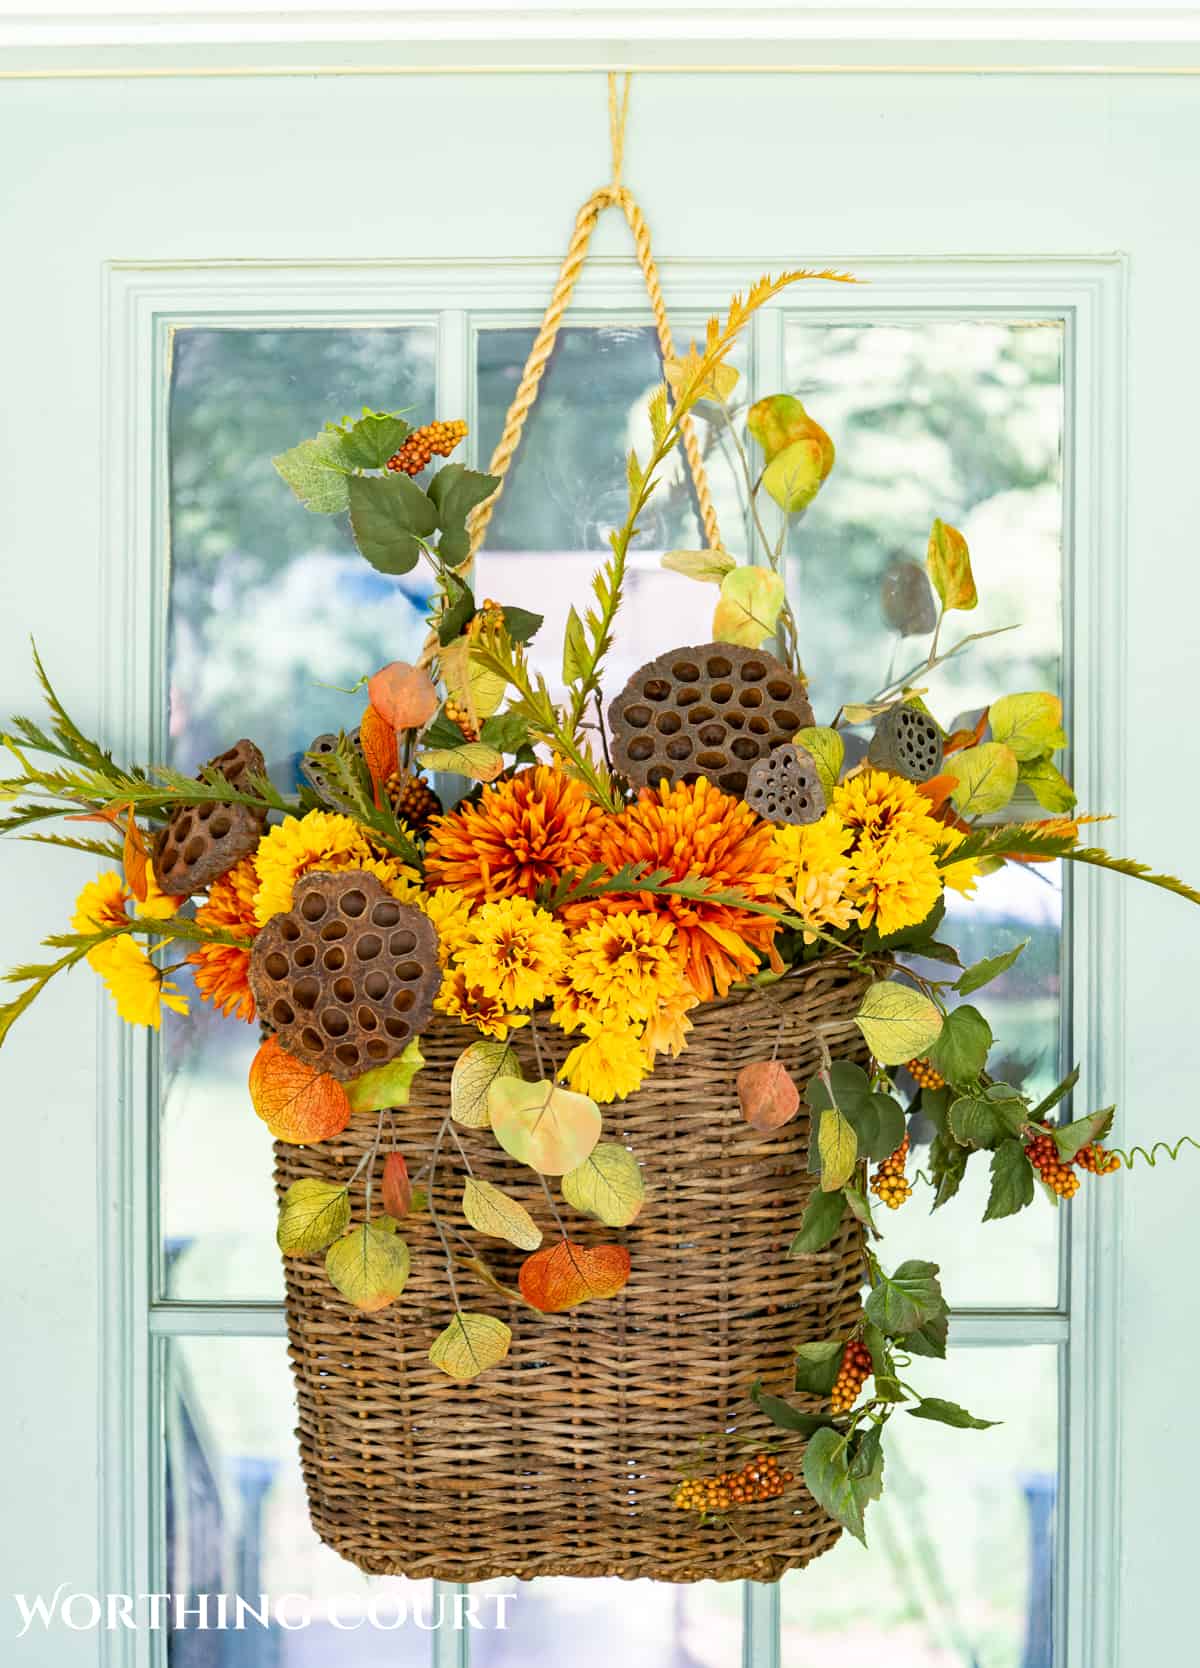
This type of basket is so easy to assemble, but I do have a few tips for you:
- Choose a basket that is sturdy enough to support the weight of the stems and florals you will use.
- Use a variety of stem types and lengths, but place the longest stems toward the back.
- Create a focal point. It could be a statement flower or a combination of blooms that draws attention. It can be in the center or off to one side.
- Add the “base” layer of foliagestems first, spreading them around the basket. This will help to provide a foundation for everything else.
- Add longer stems toward the back of the basket.
- Arrange the rest of the items in a visually pleasing way, placing some toward the front and others toward the middle.
- For drama, incorporate trailing elements that hang over the edges of the basket.
Tip: Fill the bottom of the basket with black trash bags if the stems you are using are too short for the depth of the basket. The black bags will disappear in the openings in the weave of the basket.
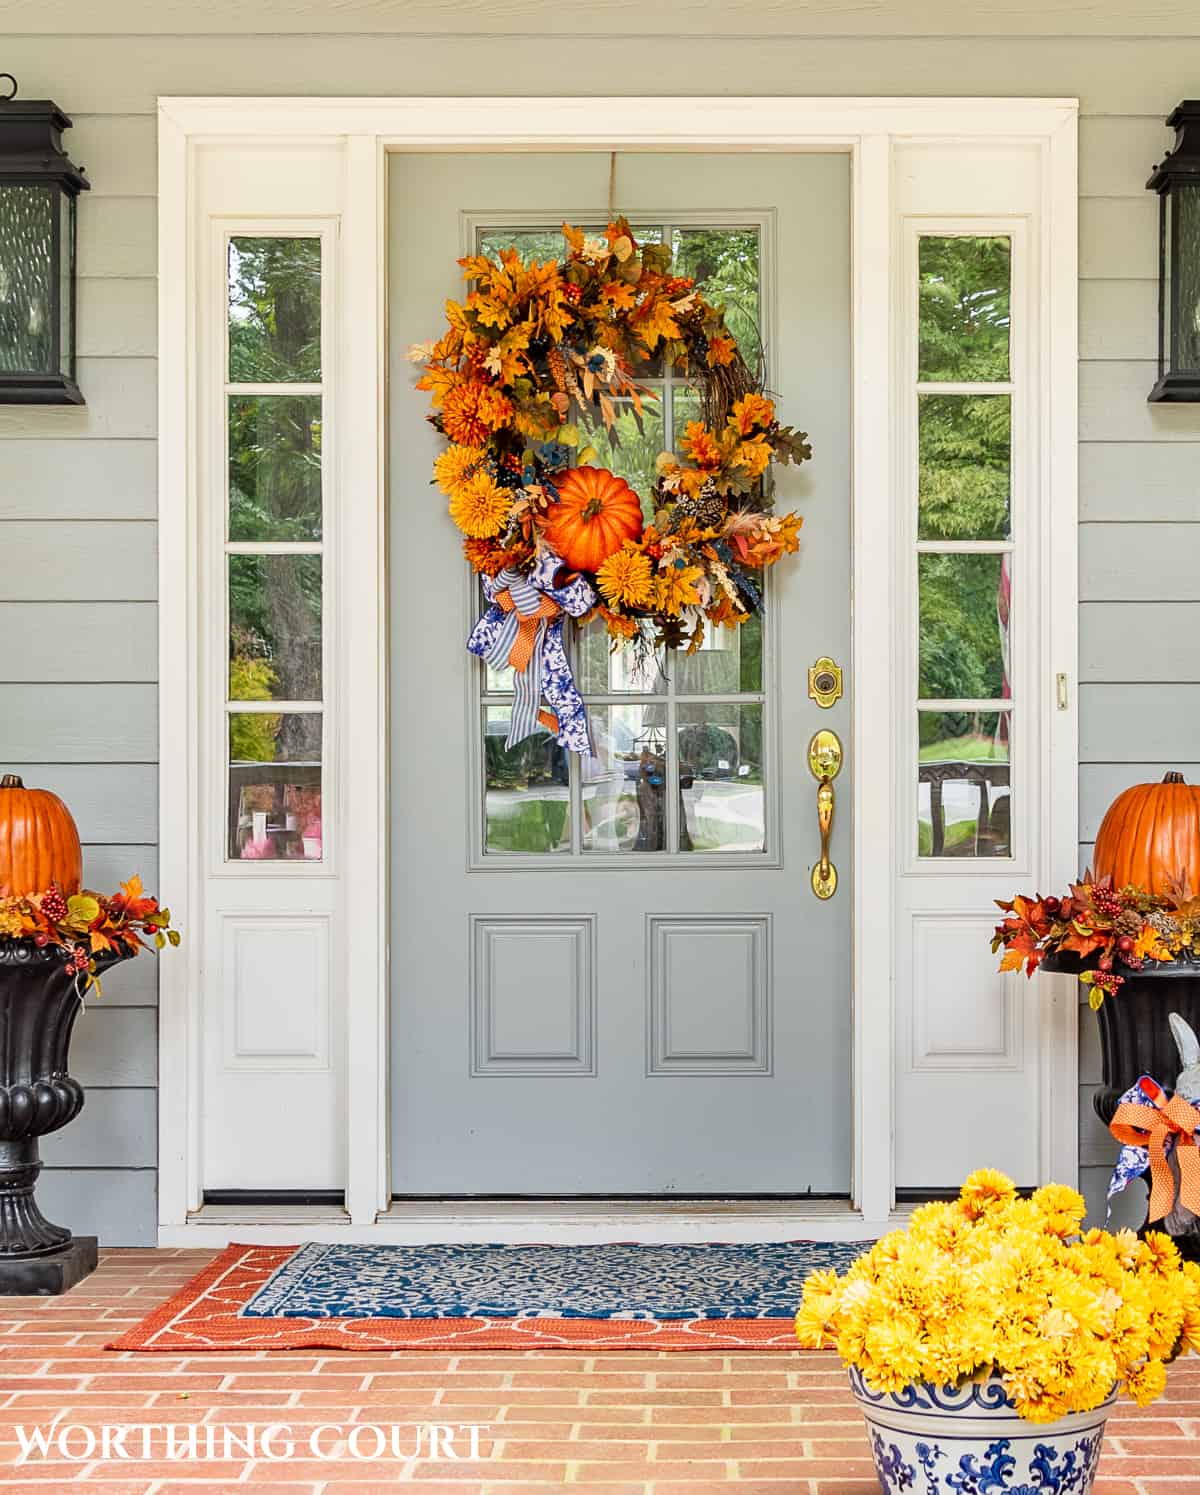
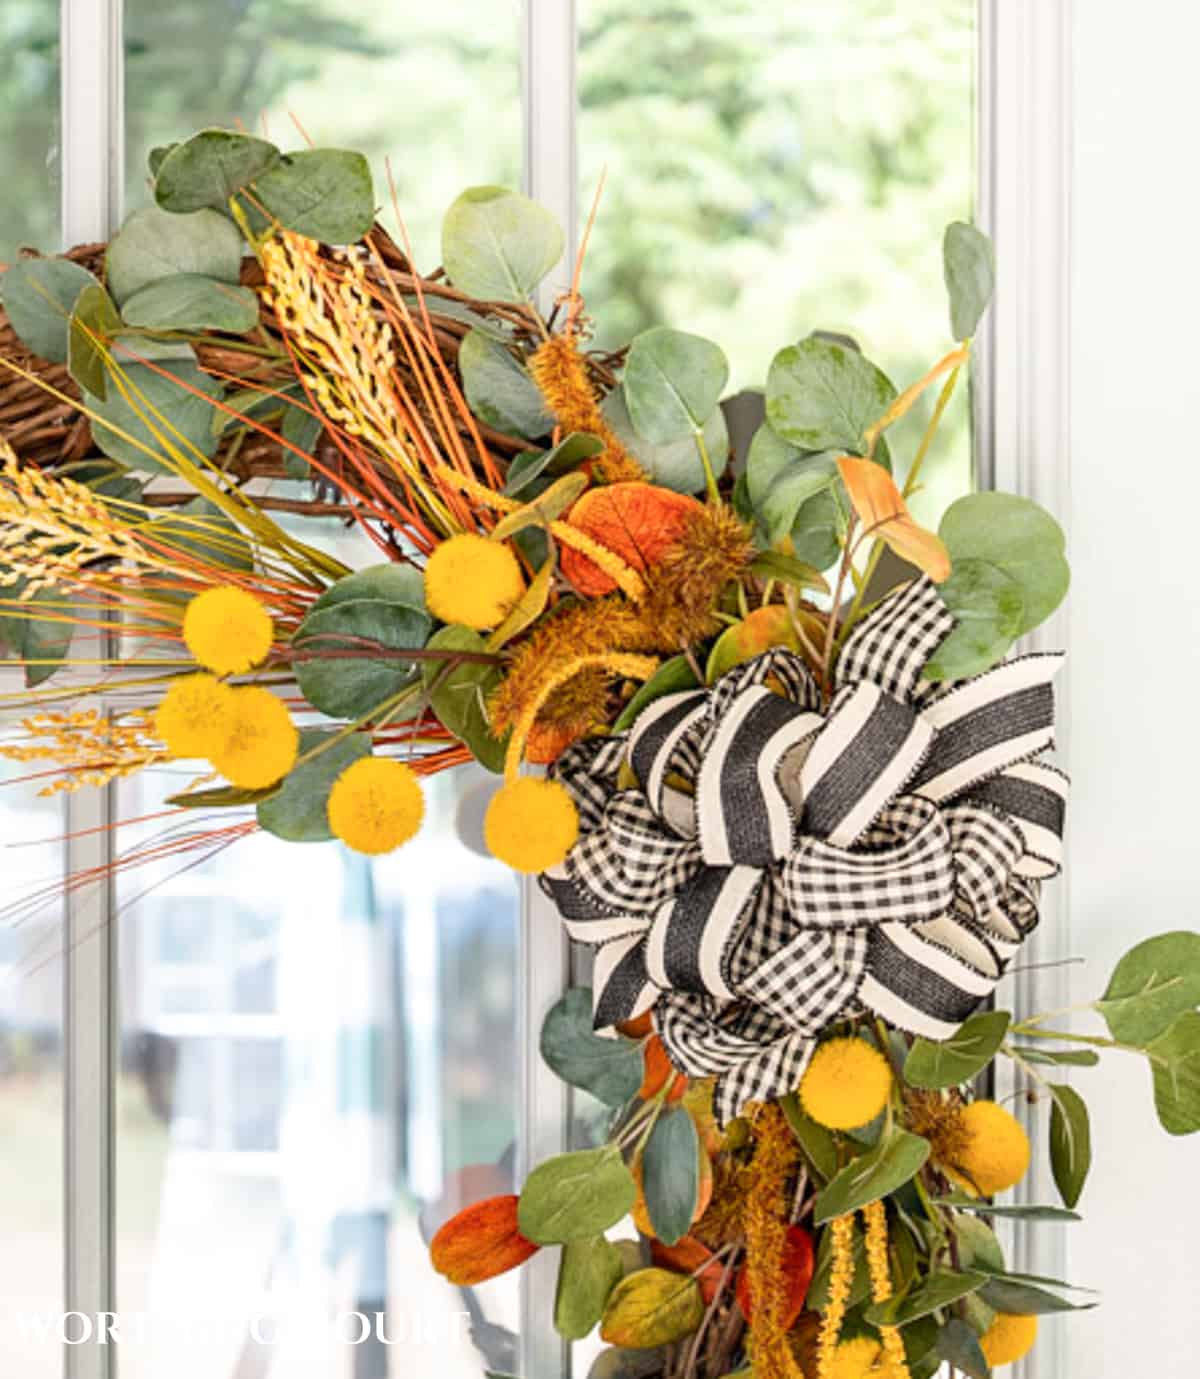
Traditional Fall Colors Wreath
If I had to choose a favorite fall front porch that I’ve decorated, it has to be the one with this wreath.
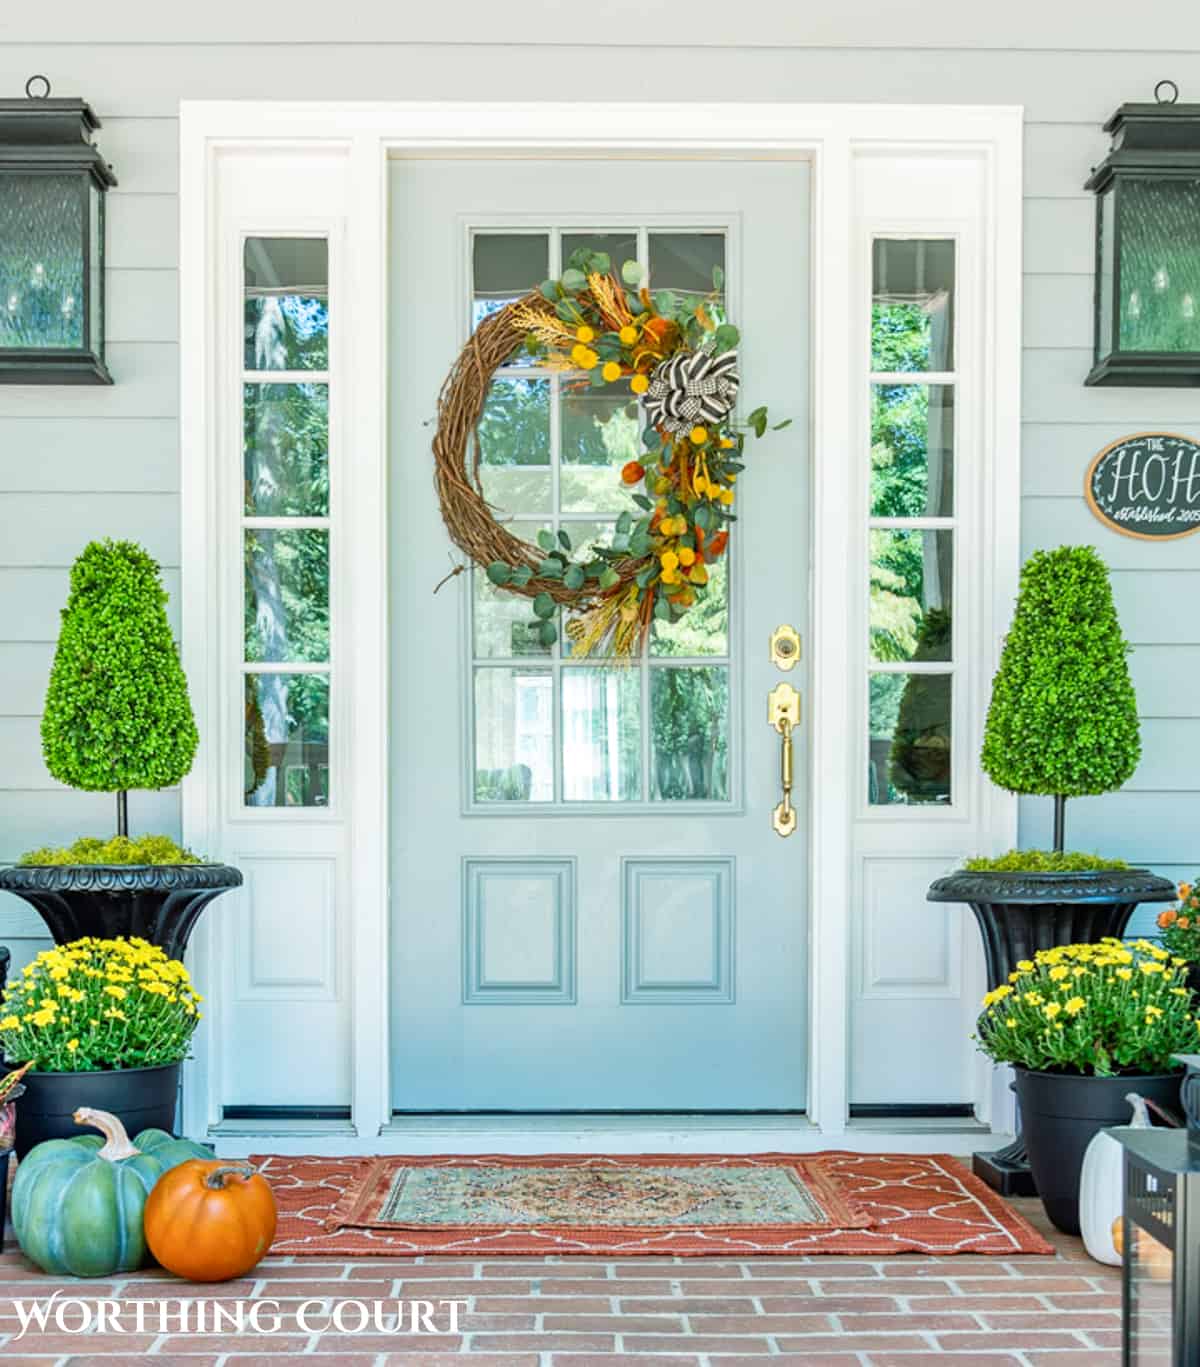
I just love the combination of colors, the fuzzy yellow whimsical balls and the attention grabbing black and white ribbons used to make the bow.
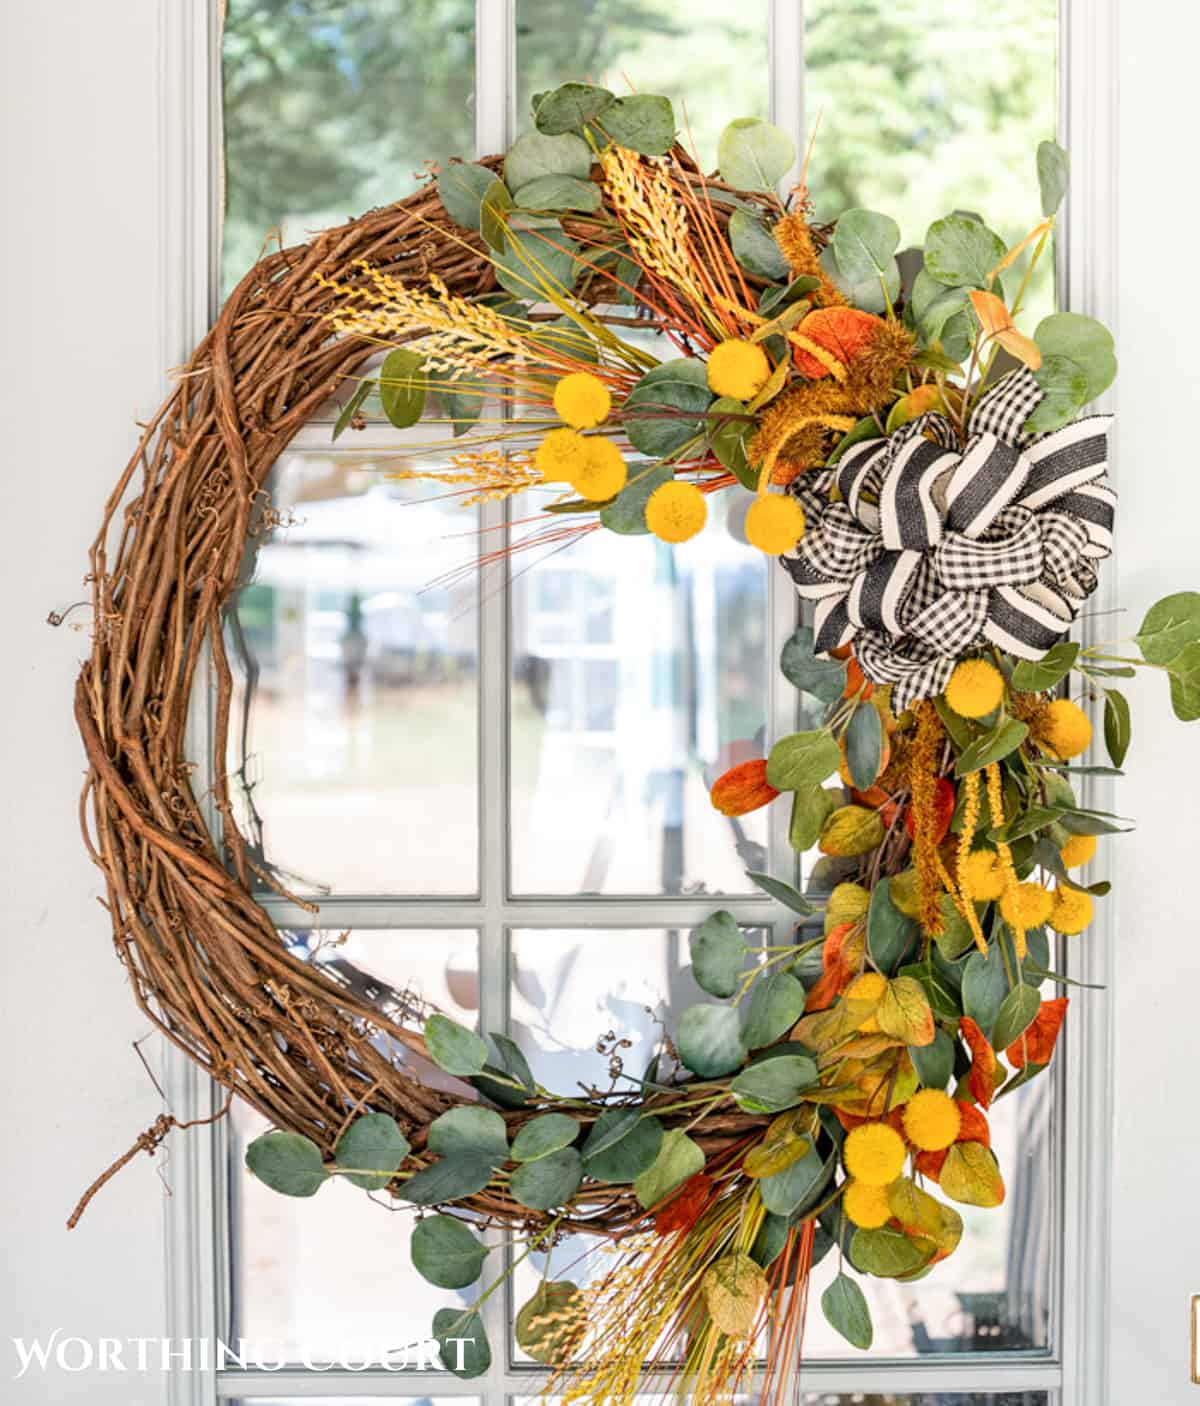
This wreath started out with a base of both green and fall colored, eucalyptus stems. Notice that the stems are going in opposite directions, which is based on where I wanted to locate the bow.
I’ve used and reused the green eucalyptus pieces so many times in wreaths and on Christmas trees, that I’m surprised they aren’t worn out!
Tip: Save money by purchasing picks that will be used as filler from the dollar store. They may not look nice enough to use in an arrangement inside, but they’re just fine for a wreath.
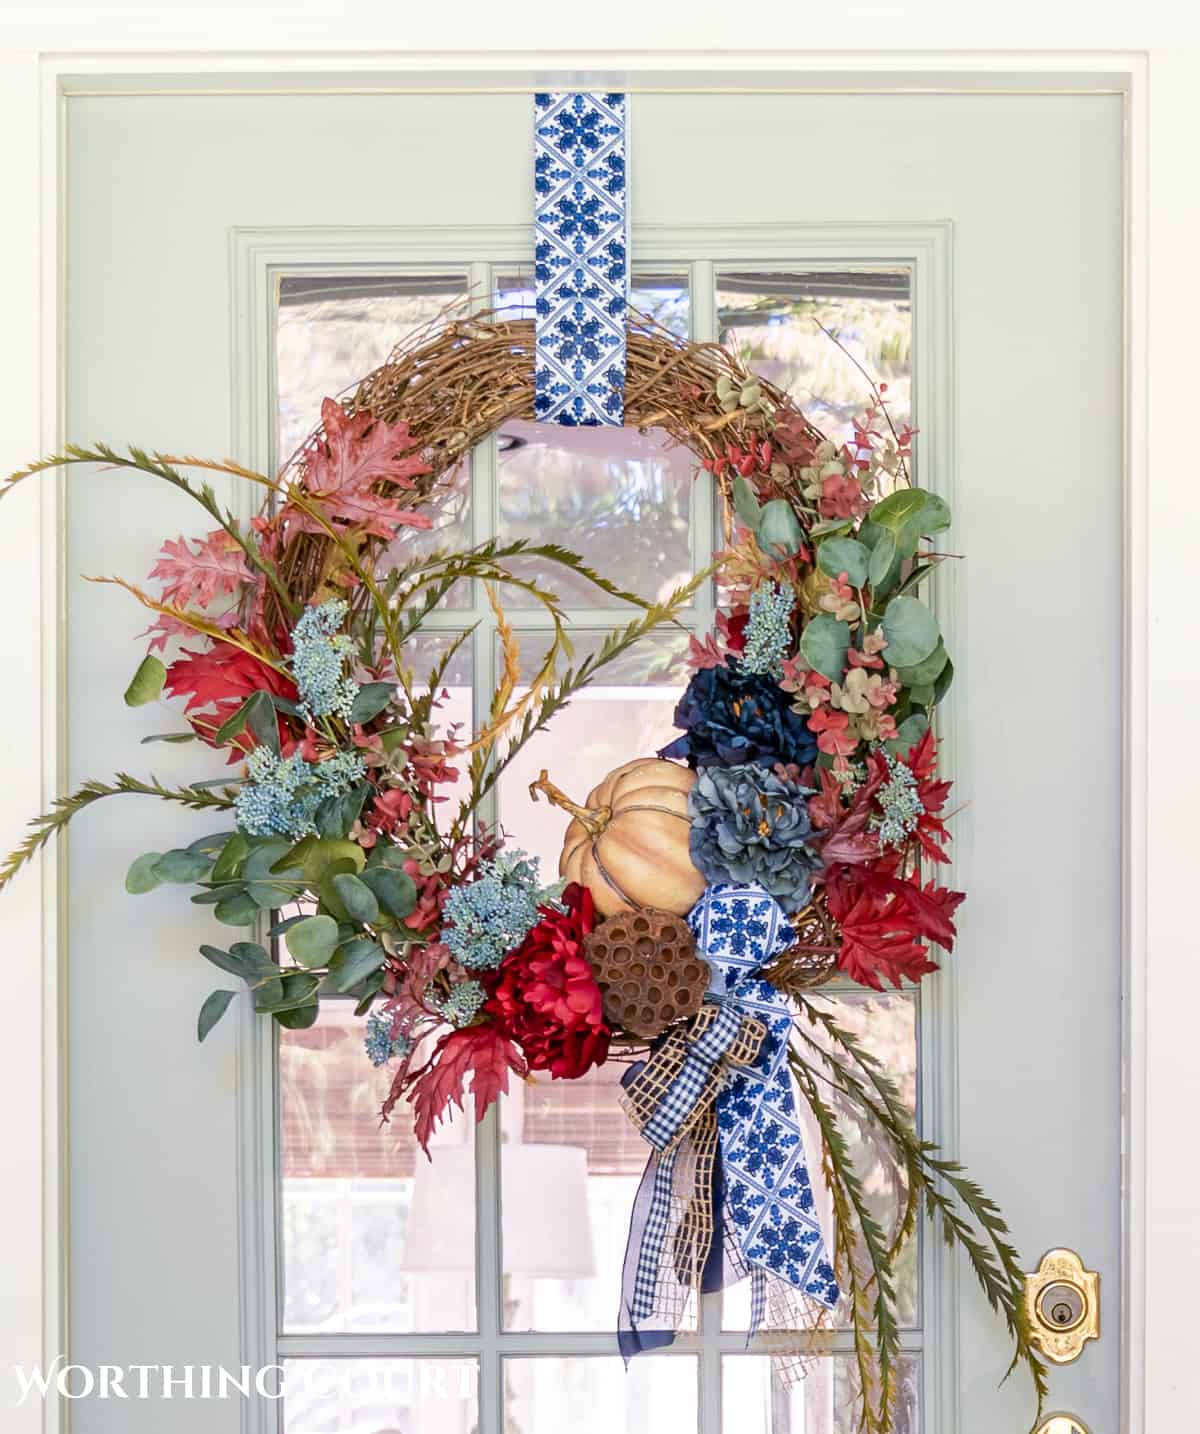
Make A Knockoff Wreath
Truly gorgeous wreaths at many retailers are priced at $150 or more. That was the case with this one.
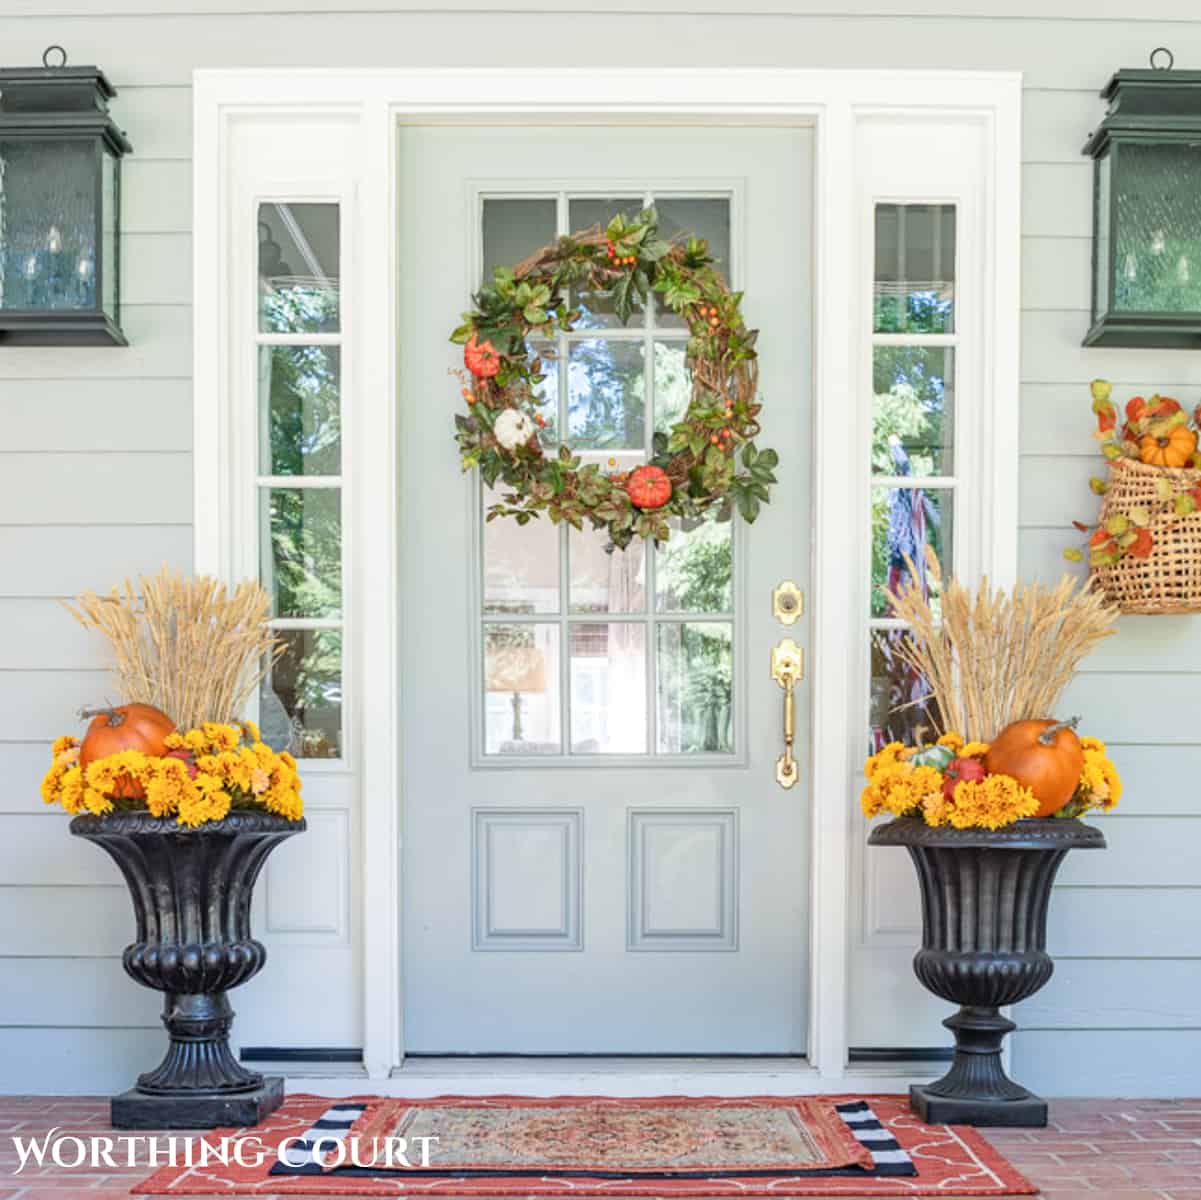
I fell in love with a wreath from Pottery Barn one year, which was priced much higher than I was willing to pay.
But – upon examination, I felt like I could easily get the same look myself for much less. Especially since I already had so many of the needed components on hand that I’ve accumulated over the years.
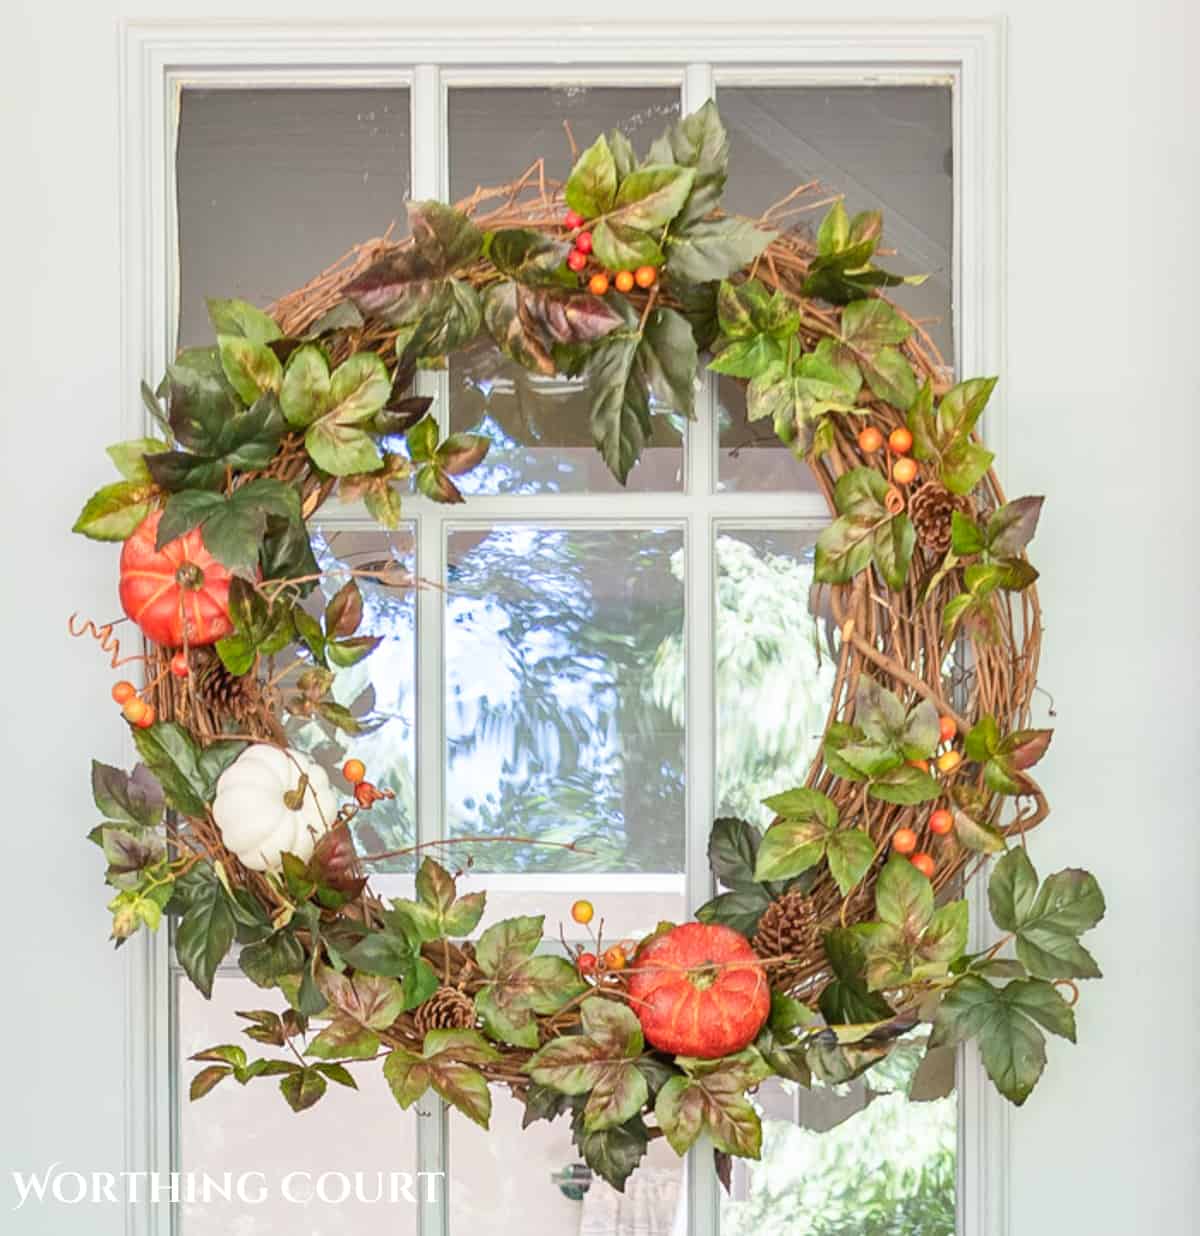
As you can see, it’s just a leaf wreath with mix of green grape-like leaves, instead of fall leaves, with a few pumpkins, fall crabapple colored berry picks, and a few small pinecones added to it.
TIP: Browse catalogs from your favorite retailer, Instagram and Etsy to look for knock-off wreath ideas.
DIY Embroidery Hoop Wreath
If you want something more simple and a little different, this is a great option.
You only need a few supplies to make a knockout diy fall wreath like this one. You’ll need a large embroidery hoop, two types of ribbon, a few fall sprigs, a cute fall sign, and a hot glue gun.
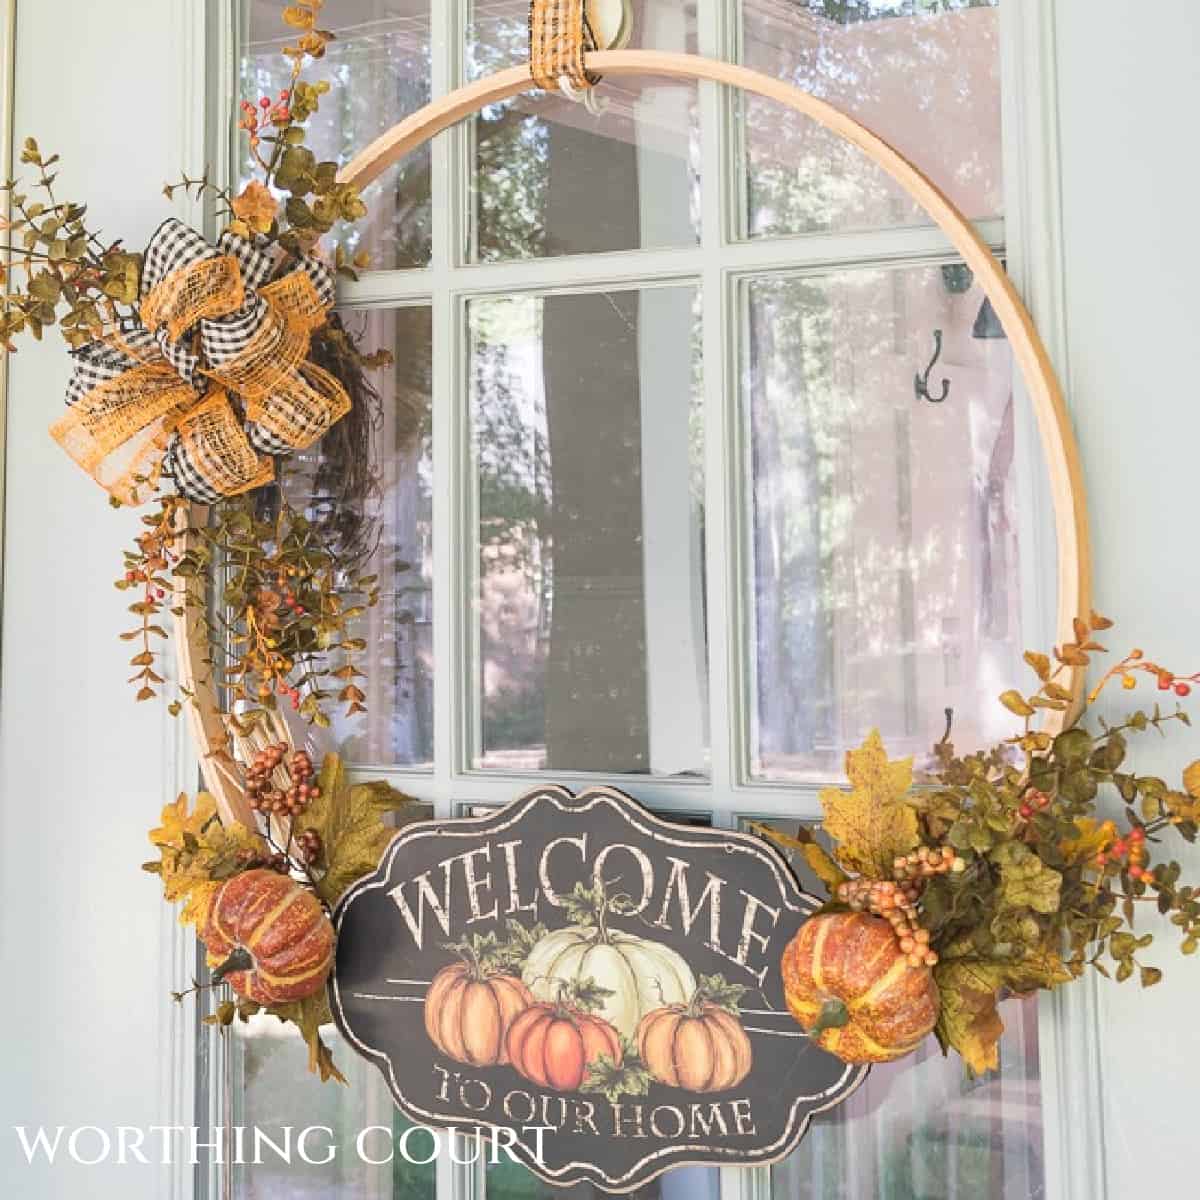
This wreath was perfect for me when I was super strapped for time one year!
TIP: When making an embroidery hoop wreath, use both the inner and outer rings to give you a wider surface to adhere elements to.
Embellished Grapevine Wreath
You don’t even need any hot glue for this cost-effective wreath. All you need is a pre-made grapevine wreath and a few sprigs with a mixture of elements.
I only used a total of four fall picks – and that’s it! They’re simply wedged in between the stems of the grapevine wreath.
The picks are so pretty on their own that no bow is needed.
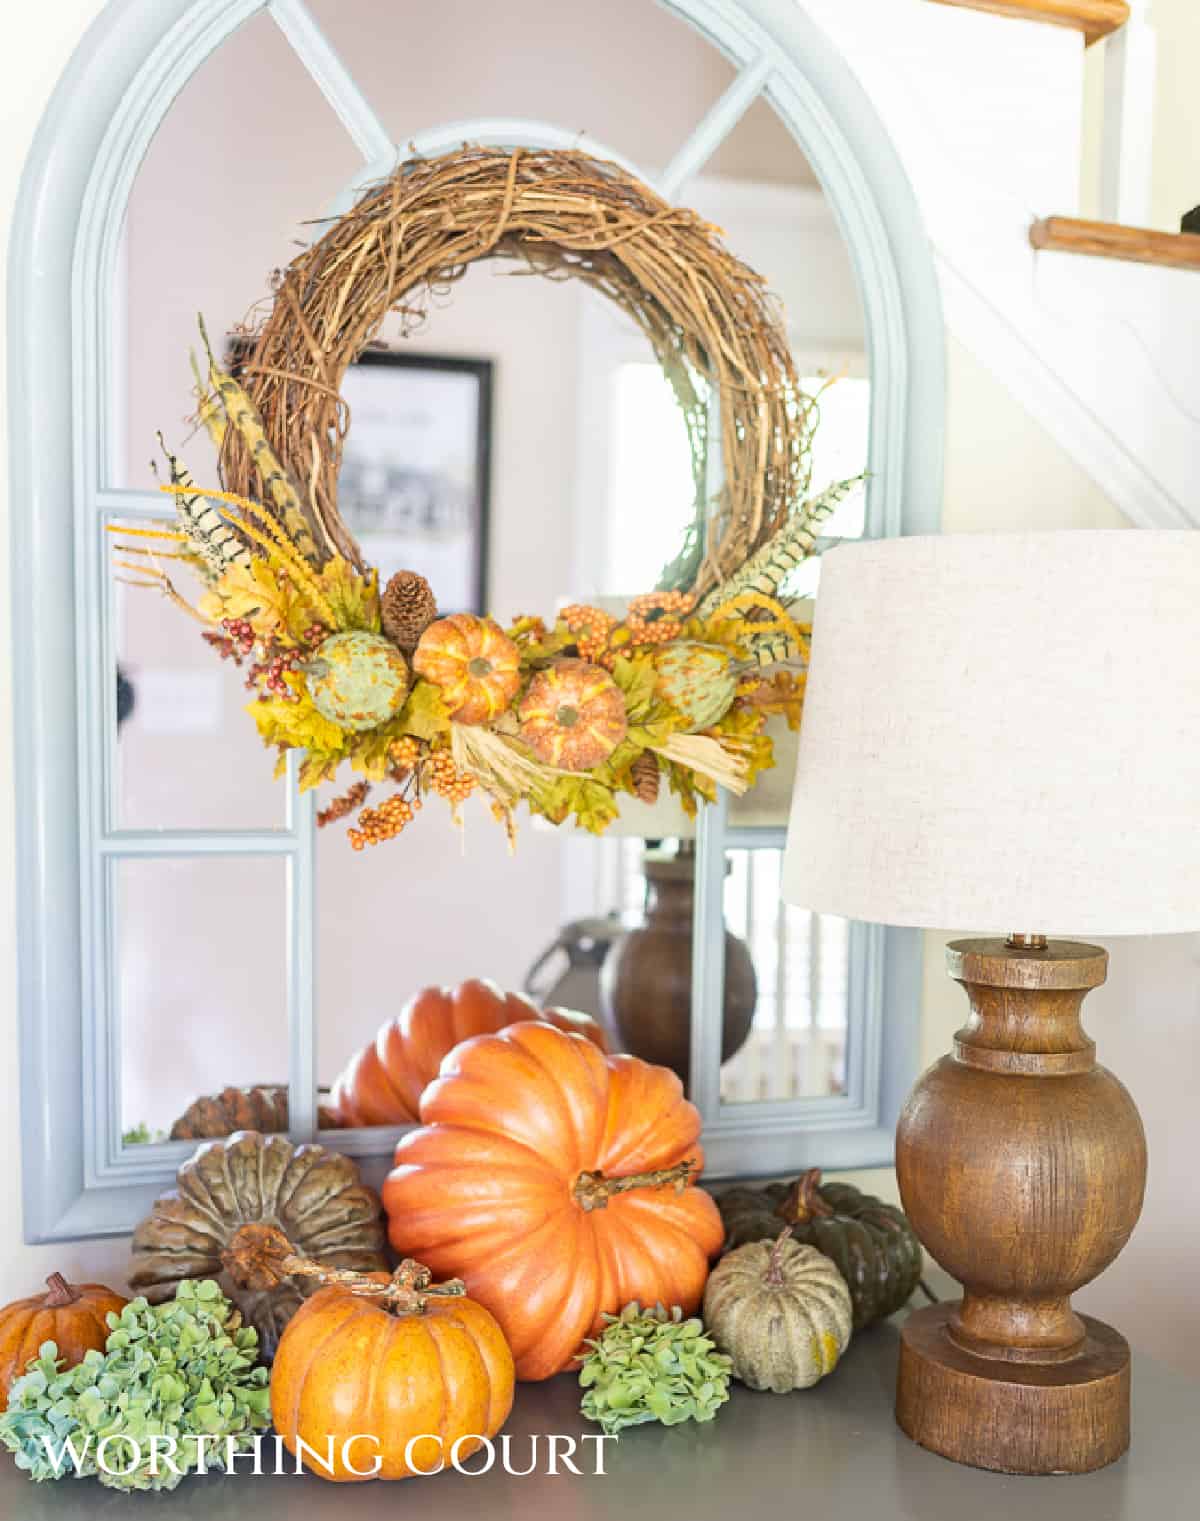
Even though this example is hanging in my foyer, it would be equally pretty on a front door too!
TIP: For more fullness and impact, look for picks with multiple elements incorporated in them.
Must-Have Wreath Making Supplies
I make a different wreath for every season of every year – that’s a lot of wreaths!
I’ve found these “tools” to make the job much, much easier.

See a diy fall wreath idea that inspires you? Let me know in the comments!
More Fall Ideas
SEE ALL FALL DECOR
Nice collection of Fall ideas. Love your vignettes in the different rooms. It’s all so cozy and welcoming for the season. Wonderful to visit your blog today. Susie from The Chelsea Project
All of your wreath ideas are so pretty. I especially love that basket with the foliage inside of it. Thanks for sharing so many ideas. So glad you joined us on the tour!
I definitely can’t pick a favorite of your wreaths. I love them all and I always enjoy your porch and mantel decor.
All of your wreaths are gorgeous!! They are all perfect for welcoming the best season of all! Happy Fall!
WOW!!!! Love all of your wreaths I cannot pick just one!!! I love the way you have done your front porch with the wreaths and lanterns on the planters!! Love each of you ladies that do the podcast and all your ideas and decor!!! God bless and please keep in your prayers all of Texans, Florida and the hurricane Irma and the fires our mountain areas are having
WOW!!!! forgot to mention the mirror and decor in dining room love the idea of using a suction cup to hang the wreath God bless
I love how you’re reused and reinvented your fall foliage Suzy! I remember your wonderful metal topiaries, they’re my favorite addition to your fall front porch!
Hi Suzy, I lost my comment…let me try again. I love how you repurposed and used your fall foliage for your multiple wreaths and baskets. Your metal topiaries on your front porch are wonderful and my favorite addition!
These are all so great! It’s hard to choose a favorite one!
Beautiful! I just happen to have a nice hanging wicker basket that I was wondering what to do with. Now I know how to fix it up. Thanks!
All so very beautiful…I tend to use the same wreath too as a base as it fits my doors well….As always so creative and gorgeous…love your front porch!!
Your ideas and talent amaze me. I love the various ways you have to share your Fall wreaths.
Have a wonderful Fall season.
So many great ideas! I have a wall pocket that I need to add Fall elements to. Now I have your ideas to follow. Thanks so much!
This is just so warm and inviting … I love it!
These are great fall ideas! Now if we could just have some cooler weather (& no hurricanes) in Florida!
I LOVE all the Fall/pumpkins orange with your grey!!! Looks so good!
Your wreaths are all so beautiful!
So many great fall wreath ideas! I especially love the woven basket with the sunflowers. Thanks for sharing your expertise with us. So glad you joined us on the Fall Ideas Tour!
So many beautiful fall wreaths! It’s hard to choose a favorite because they all are truly lovely!
So simple and no glue gun required!! I think I could probably actually make one myself! Thanks for the ideas and inspiration.